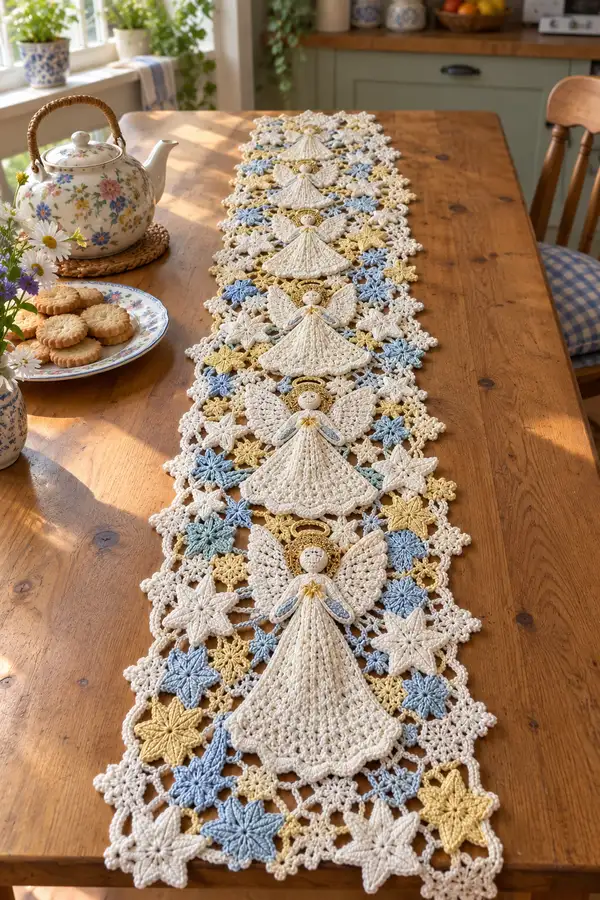
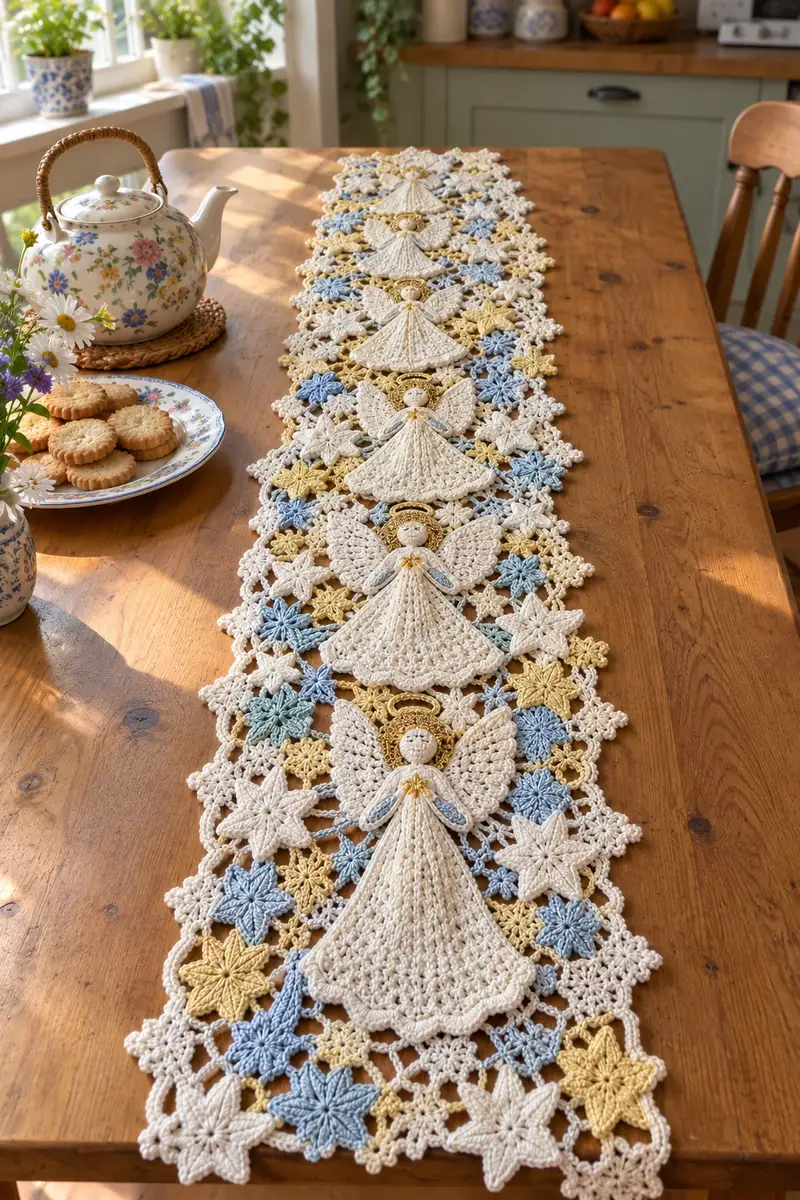
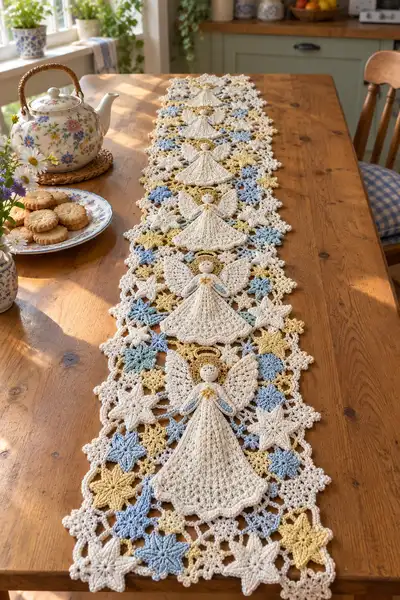
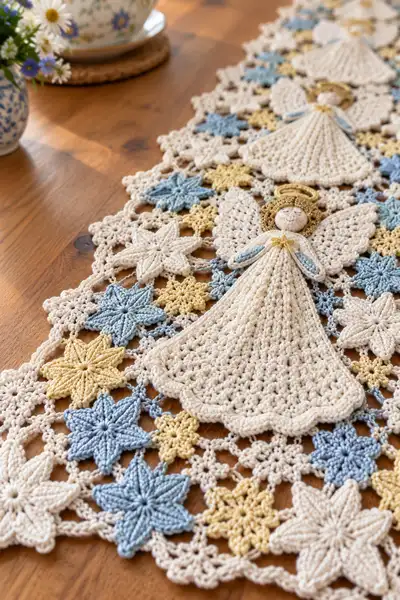
Create a delicate, lacy table runner decorated with little angel motifs and an array of star flowers in soft cream, pale blue and warm gold. The runner is made from many individual motifs — angel dresses, wings, heads, halos and three sizes of star flowers — joined into a continuous, airy lace strip. The finished piece is light, elegant and perfect for a sunny table, dresser or holiday display. Detailed shaping, joining and edging instructions guide you step-by-step.
Progress Tracker
0% Complete
— Angel Head (make 6 for pictured runner) :
Round 1 :
6 sc in magic ring (6)
Round 3 :
(1 sc, inc) x 6 (18)
Round 4 :
(2 sc, inc) x 6 (24)
Round 5 :
(3 sc, inc) x 6 (30)
Info :
If using wooden or polymer beads as a face, stop here and fit bead into center then proceed to rounds creating a collar around bead. If crocheting the head completely, continue stuffing lightly as rounds progress
Round 6 :
(4 sc, inc) x 6 (36)
Round 7 :
(5 sc, inc) x 6 (42)
Round 8 :
(6 sc, inc) x 6 (48)
Round 9 :
1 sc in each st (48)
Round 10 :
1 sc in each st (48)
Info :
Begin light stuffing if crocheting head. The heads in the sample are shallow domes; do not overstuff. Mark the front center where face detail will be added.
Round 11 :
(6 sc, dec) x 6 (42)
Round 12 :
(5 sc, dec) x 6 (36)
Round 13 :
(4 sc, dec) x 6 (30)
Round 14 :
(3 sc, dec) x 6 (24)
Info :
Lightly finish stuffing so the face stays slightly rounded. If using a bead, add a few securing stitches behind the bead to lock it in place before crocheting the collar rounds.
Round 15 :
(2 sc, dec) x 6 (18)
Round 16 :
(1 sc, dec) x 6 (12)
Info :
Fasten off leaving long tail for sewing head to the top of the dress motif. Weave tail into back of head to flatten the closure and secure.
— Angel Halo (make 6) :
Round 1 :
6 sc in magic ring (6)
Round 3 :
(1 sc, inc) x 6 (18)
Round 4 :
1 sc in each st (18)
Round 5 :
Work picot edge: (sc, ch 3, sl st into first ch) around to form a tiny halo scallop; join with sl st (18 picots)
Info :
Make halos in warm gold to match pictured accent. Block flat and sew just behind head, so halo sits above the top of the head by about 2–3 mm.
— Angel Dress / Skirt (make 6) :
Round 1 :
Ch 4, join into ring with sl st, ch3 (counts as dc), 11 dc into ring, join (12 dc)
Round 2 :
Ch3 (counts), inc in same st, (1 dc, inc) x 5, join (18)
Round 3 :
Ch3, (2 dc, inc) x 6, join (24)
Round 4 :
Ch3, (3 dc, inc) x 6, join (30)
Round 5 :
Ch3, (4 dc, inc) x 6, join (36)
Info :
These early rounds form the yoke of the dress. Keep the joins neat and use stitch markers to mark the start of round until you are confident of your counting.
Round 6 :
Ch3, (5 dc, inc) x 6, join (42)
Round 7 :
Ch3, (6 dc, inc) x 6, join (48)
Round 8 :
Ch1, sc in each st around for a firm transition (48)
Round 9 :
Ch3, dc in same st, *ch2, skip 1 st, 2 dc in next st* repeat around to create openwork shell channels; join (48 base spots, 24 shells)
Round 10 :
Working into shell spaces from previous round: (ch3, 3 dc, ch3, sl st to shell top) x 24 to create large shell scallops; join (24 shells)
Info :
From round 9 onward you are shaping the full skirt. Work loosely but evenly so the skirt flares gently. Blocking after finishing will open these shells and create the scalloped hem seen in the photo.
Round 11 :
Ch1, sc in each dc and shell st around to tidy the interior (approx 72 sc)
Round 12 :
Ch3, (2 dc, ch1, 3 dc) into each shell top to form layered fan petals; join (24 fans)
Round 13 :
Ch1, sc in each st to consolidate (approx 96 sc)
Round 14 :
Ch3, (1 dc, ch2, 1 dc, ch2, 1 dc) into each fan top to form a lace panel (24 lace points)
Round 15 :
Ch1, sc around working into ch spaces to firm up (approx 120 sc)
Info :
If you prefer a slightly shorter skirt, stop after round 12. For the pictured runner the dress has significant length and flares, so continue to round 20 for maximum drape and visible scallop.
Round 16 :
Ch3, (2 dc in next 3 sts, ch1) repeat around to create vertical ridges that will be visible as pleats when blocked (approx 120 base spots)
Round 17 :
Ch1, sc in each st to stabilize (approx 120 sc)
Round 18 :
Ch4 (counts as tr), (tr, ch1, tr) across each vertical ridge top to create a deeper lacy scallop; join (approx 40 scallops)
Round 19 :
Ch1, sc in each st and ch space to create tidy base (approx 140 sc)
Round 20 :
Finish hem with scalloped edging: *(sc, skip 1, 5 dc in next, skip 1, sc)* around. Adjust so scallops are evenly spaced (approx 24 scallops)
Info :
Fasten off leaving long tail to sew dress to the central connector ring in the runner. Block the dresses flat and shape the scalloped hem carefully with pins for a neat look.
— Angel Wings (make 12 - 2 per angel) :
Round 1 :
Ch6, sl st to form ring, ch3 (counts as dc), 11 dc into ring, join (12)
Round 2 :
Ch3, (1 dc, inc) x 5, join (18)
Round 3 :
Ch3, (2 dc, inc) x 6, join (24)
Info :
Wings are worked in a teardrop shape. After round 3 you will break the circle and work outwards along one side to form a half-oval wing. Use a stitch marker at the side where the wing tip will be attached to the dress.
Round 4 :
Work along one side: ch1, sc in next 12 sts, ch2, turn, continue working 2 dc clusters into side loops to build a curved wing. (This round is counted as shaping rather than a numeric stitch count.)
Round 5 :
Ch3, (1 dc, ch1, 1 dc) into each ch2 space across to form feather ribbing; add small picot at wing tip (ch3, sl st into same st)
Round 6 :
Ch1, sc around wing edge working picots every 6 stitches for lace texture; fasten off (approx 48 sc)
Info :
Sew two mirrored wings to each side of the dress yoke, positioning them so the top of each wing attaches at the shoulder area near dress rounds 6-8. Wings should slightly overlap the dress to read as an integrated motif.
— Big Star Flower (make 24 cream stars and 6 in blue/gold) :
Round 1 :
6 sc in magic ring (6)
Round 2 :
Ch3, (3 dc, ch3, sl st into ring) x 6 to form 6 petals; fasten off (6 petals)
Round 3 :
Join in petal base, ch1, sc around working in both layers where petals overlap (approx 36 sc)
Round 4 :
Ch3, work 7 dc into each petal top, sl st between petals to form fuller, raised petals (42 dc petals)
Round 5 :
Ch1, sc around between petal bases to tidy edge (approx 48 sc)
Info :
Big stars in cream are the dominant motif. Work them in your main cream color. Block petals by pinning each petal edge outward while wet or steam blocking to achieve a star-shape.
Round 6 :
Optional picot finish: *(sc, ch3, sl st into 3rd ch)* around each petal tip for subtle points; fasten off
— Medium Star Flower (make 36 in blue and gold) :
Round 1 :
6 sc in magic ring (6)
Round 2 :
(ch4, sl st in ring) x 6 to form loop petals; join (6 loops)
Round 3 :
Into each loop work: (ch2, 5 dc, ch2) then sl st into next loop to create raised 6-point petals; join (6 raised petals)
Round 4 :
Ch1, sc around to tidy (approx 48 sc)
Info :
These medium stars are worked in a slightly tighter tension for crisp petal ridges. Use accent color (blue or gold) and block to open petals.
— Small Star Flower (make 48) :
Round 1 :
6 sc in magic ring (6)
Round 2 :
(ch3, sl st in ring) x 6 to make tiny loops, join and fasten off (6 tiny points)
Info :
Small stars are used as dense filler pieces between larger motifs. Work several and block lightly. Use alternate colors to create the checkerboard effect shown in the runner.
— Connector Lattice Motif (make multiple to chain angels and stars) :
Round 1 :
Ch6, join into ring, ch3, 15 dc into ring, join (16)
Round 2 :
Ch1, sc in each st (16)
Round 3 :
Ch4, *sk next st, sc in next, ch4* repeat around to form loop spaces (8 ch-4 loops)
Round 4 :
Into each ch-4 space: sl st, ch3, 3 dc, ch3, sl st to create small star-like joiners; join and fasten off (8 little join stars)
Info :
These lattice motifs are the glue between angels and star flowers. Position them so each of their small loops catches adjacent motif points with a single sl st or sc when joining.
— Border & Edge (work after all motifs are joined) :
Round 1 :
With cream yarn, walk the outer edge of the joined runner and sc evenly into the outermost points (approx 400 sc around entire runner depending on size)
Round 2 :
Ch3, *skip 2, (5 dc in next), skip 2, sc* repeat around to create scalloped edge. Adjust repeats so scallops are evenly distributed
Round 3 :
Ch1, sc around to tidy (approx 420 sc)
Round 4 :
Optional decorative picot row: *sc, ch3, sl st into 3rd ch* around to add delicate points
Info :
Block the entire runner after edge is finished to set the scallops and even joins. Use many pins and block into the exact rectangular shape you want for your table (or slightly tapered like the sample). Let dry fully before removing pins.
— Joining Motifs Step-by-Step :
Info :
Lay out all motifs on a flat surface to match the photo pattern: angels spaced evenly, big stars filling main negative spaces, with medium and small stars creating a patchwork lattice. Keep alternate colors balanced along the length.
Round 1 :
Begin by joining angel dress tops to connector lattice rings: with wrong sides together, align the top of the dress (rounds 1-4 area) over the connector ring. Using cream yarn and a tapestry needle, sew through both pieces with mattress or whip stitch at 8 evenly spaced points.
Round 2 :
Attach wings next: position each wing at the shoulder (dress rounds 6-8) and sew with small sl st or whip stitch through the wing top and dress yoke, taking care to keep both wings symmetric.
Round 3 :
Sew halos behind head: place halo so top of ring sits approx 2 mm above head top. Use slip stitches or small tacking stitches in metallic/gold yarn to secure halo at three points behind the head.
Round 4 :
Connect star motifs: match star petal tips to neighboring star or connector loop points. Join with sl st through the tip of one petal into the next motif's ch space. For a stronger seam use a single sc join in cream to create continuity.
Round 5 :
Stabilize the runner by weaving in a few long invisible stitches that cross behind several joins (do not pull tight; these are only to stop motifs from shifting during blocking).
Info :
Test a small section first: join three motifs and pin them; if the tension between joins looks good, continue across the runner. Keep joins balanced by mirroring the order in each angel repeat to maintain an even pattern.
— Decorative Embroidery & Finishing Touches :
Round 1 :
Optional embroidered stars on dress chest: using gold embroidery thread, work a small star stitch or French knot at the center of the dress yoke.
Round 2 :
Optional tiny arms: crochet a slim tube ch6, sc in 6 back and forth for 12 rows, finish and sew to shoulder area for the little folded arm effect seen in the photo (work in gray-blue accent color)
Info :
Weave in all ends carefully on the wrong side; trim close. If using beads for heads, secure with a dot of fabric glue behind the bead for extra security before sewing halo and head into place.
This runner is a beautiful mix of lace and personality: each angel and star comes together in a gentle chain of texture and color that brightens any tabletop. Making it is a satisfying journey — small motifs each week become a treasured heirloom. Enjoy the relaxing rhythm of crochet, the meditative blocking, and the joyful reveal once all pieces are joined. 🧶✨ May it bring warmth and charm to your home and make a lovely handmade gift for special occasions. 🎁