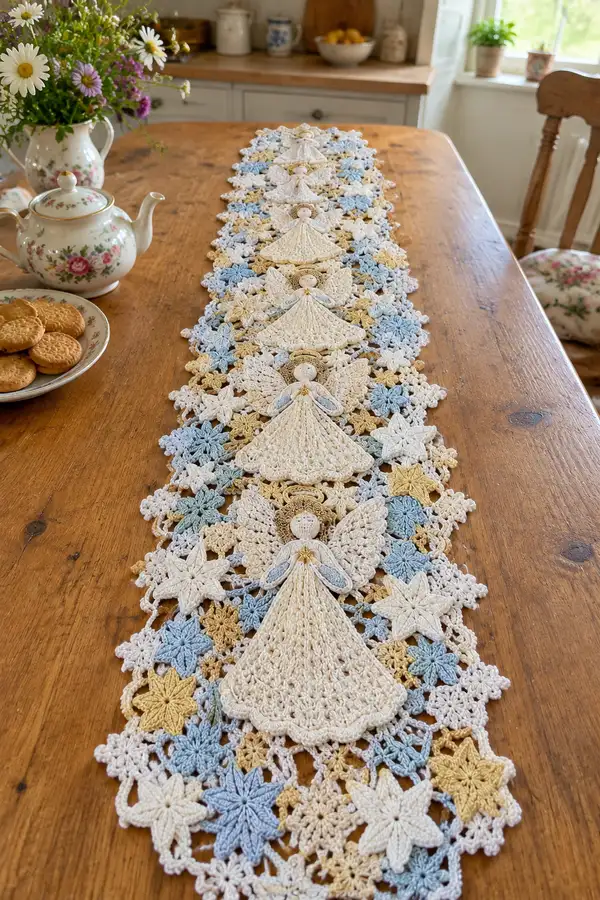
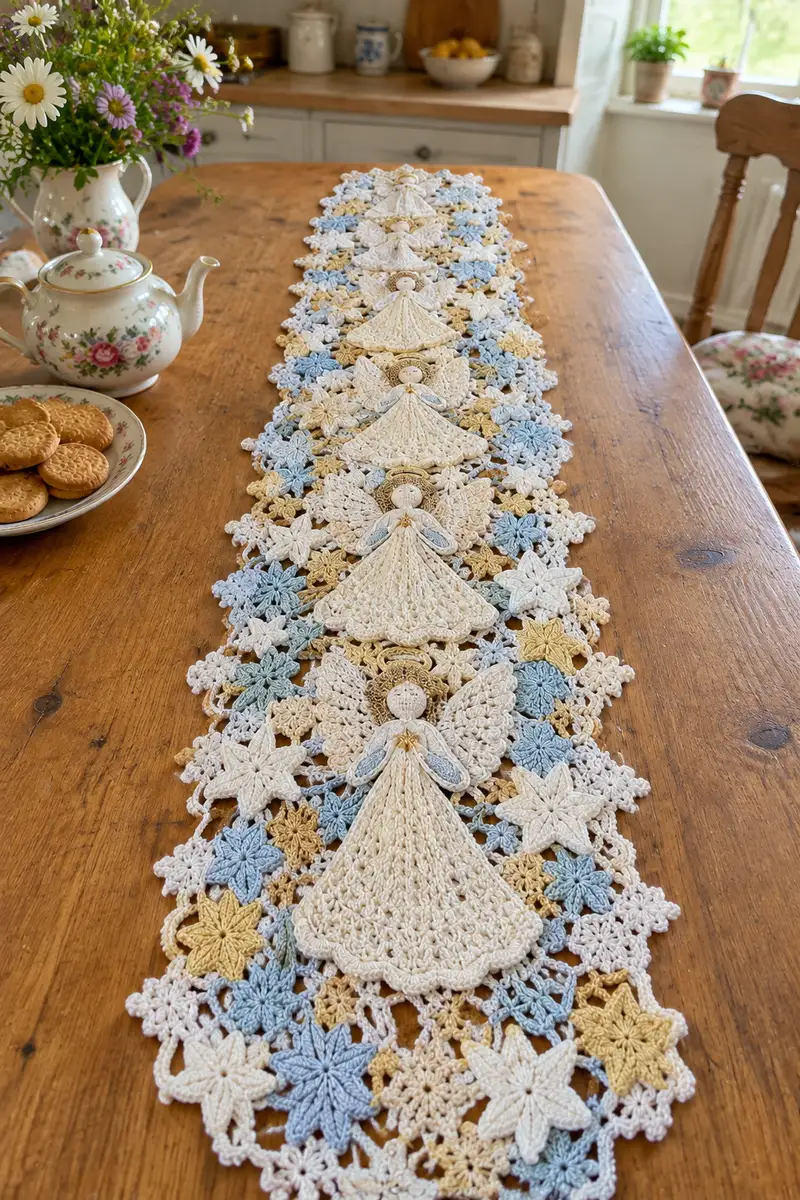
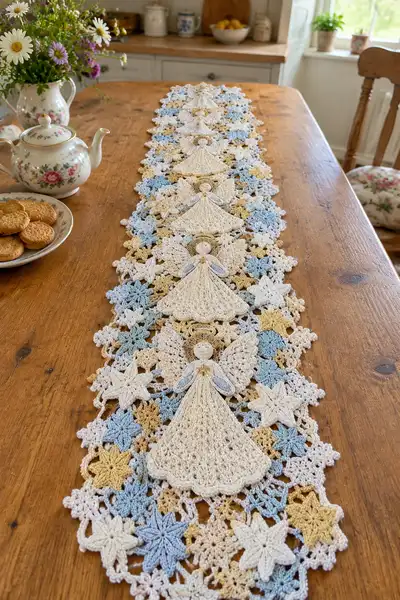
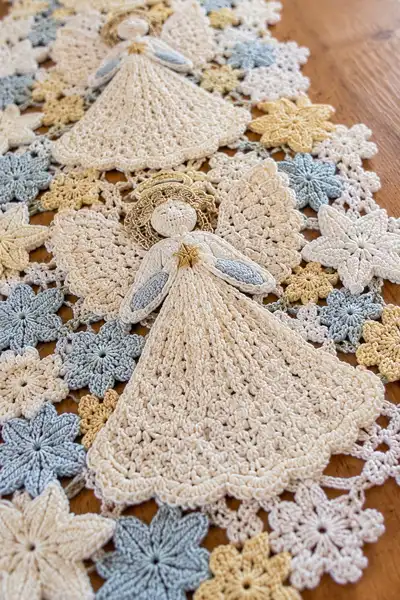
Create a dreamy, vintage-inspired table runner composed of linked angel motifs, star florals and delicate lace connectors. This pattern recreates the layered angels with scalloped skirts, textured wings and tiny halo details in soft cream, pale blue and warm gold. Perfect for a dining table or mantel, the runner is made from multiple motifs joined into an elegant continuous strip.
Progress Tracker
0% Complete
— Materials & Gauge :
Info :
Use a 2.5mm hook with a light fingering/4-ply mercerized cotton. Gauge is not critical, but aim for motifs that measure approximately 6.5cm (2.5 in) across for the medium star motif when blocked. Adjust hook size for consistent motif sizing.
— Angel Head (Make 6) :
Round 1 :
mr, 6 sc in ring (6)
Round 3 :
(1 sc, inc) x6 (18)
Round 4 :
(2 sc, inc) x6 (24)
Info :
Use the same yarn as the angel body (cream). Stuff lightly later with fiberfill. Mark the first stitch of each round with a stitch marker for accuracy.
Round 5 :
1 sc in each st (24)
Round 6 :
1 sc in each st (24)
Round 7 :
(3 sc, dec) x6 (18)
Round 8 :
(2 sc, dec) x6 (12)
Info :
Begin stuffing the head firmly but sparingly after round 5. The finished head should be a small, firm ball approximately 2.5cm (1in) diameter.
Round 9 :
(1 sc, dec) x6 (6)
Round 10 :
6 sc in continuous round if preferred for a smoother finish (6)
Info :
Fasten off leaving a long tail for sewing head into the skirt crown. Use tail to stitch through head center and into the neckline later to secure snugly.
— Halo / Hair Trim (Make 6) :
Round 1 :
mr, ch1, 10 sc in ring, sl st to join (10)
Round 2 :
(ch3, sl st in next st) x10 to form loops around (10 loops)
Round 3 :
Optional: Work 10 picots around by (sl st to loop, ch3, sl st in 3rd ch) for decorative halo edge
Info :
Use gold yarn or metallic thread for halo. If using fine metallic wire, stitch halo loosely around the crown after attaching to head for shape retention.
— Angel Body / Skirt (Make 6) :
Round 1 :
With cream: mr, 8 hdc in ring (8)
Round 3 :
(1 hdc, inc) x8 (24)
Round 4 :
(2 hdc, inc) x8 (32)
Round 5 :
(3 hdc, inc) x8 (40)
Info :
Skirt shaping uses CROCHET TENSION to create flared A-line. Switch to dc where noted for lacy effect. Keep the rounds worked in continuous spiral when possible to avoid seam lines.
Round 6 :
1 dc in each st (40)
Round 7 :
(4 dc, inc) x8 (48)
Round 8 :
1 dc in each st (48)
Round 9 :
1 dc in next 3 st, *dc2tog over next 2 st, 1 dc in next 4 st; rep from * around (40)
Round 10 :
1 dc in each st (40)
Round 11 :
(3 dc, inc) x10 (50)
Round 12 :
1 dc in each st (50)
Info :
At this stage the skirt is gaining width; block gently before adding shell edging so scallops sit nicely. Keep counts consistent to create a gentle flare that matches photos.
Round 13 :
(4 dc, inc) x10 (60)
Round 14 :
1 dc in each st (60)
Round 15 :
(5 dc, inc) x10 (70)
Round 16 :
1 dc in each st (70)
Round 17 :
Work a decorative shell round: *skip 2 st, (5 dc) in next st, skip 2 st, sl st in next st; rep around to form scallops (14 shells)
Round 18 :
Ch1, sc in each st around including sl st joins to tidy scallops (approx 70)
Round 19 :
Optional second shell: *ch1, (3 dc, ch2, 3 dc) in shell center, sl st in next shell center; rep around to increase scallop depth (14 large scallops)
Info :
Fasten off leaving a long tail to sew skirt to wings and head. If you prefer a narrower skirt, reduce increase rounds to reach approx 40-50 sts before scallop edging.
— Angel Wings (Make 6 pairs) :
Round 1 :
With cream: mr, 6 sc in ring (6)
Round 3 :
(1 sc, inc) x6 (18)
Round 4 :
1 sc in each st (18)
Round 5 :
(2 sc, inc) x6 (24)
Round 6 :
1 sc in each st (24)
Info :
This forms the wing base. Wings are worked flat; we will add feather texture using front post stitches and layered shells for a feathery look.
Round 7 :
Ch1, turn, work fpdc rows across the wing base to create ribs: fpdc in next 12 sts, turn (12)
Round 8 :
Ch1, fpdc back across 12 sts (12)
Round 9 :
Join back to wing base edge with sl st, *ch3, sl st between 2 base stitches to make small picot points, rep along top edge (approx 12 picots)
Round 10 :
Edge the wing with shells: *sc in edge st, skip 1, (3 dc, ch1, 3 dc) in next st; rep across then sl st to join (creates 6 shell feathers)
Round 11 :
Repeat shell edging once more to create layered feathers, working shells into ch1 spaces for depth
Info :
Make two symmetrical wings for each angel. Use a stitch marker to ensure the wings mirror each other (reverse the order of rows for the opposite wing).
Round 12 :
Optional: Work a row of slip stitches around wing edge for a neat finish (approx 36 sl st)
Round 13 :
Fasten off leaving long tail for sewing. Press or block lightly to set shape.
— Angel Arms (Make 6 sets) :
Round 1 :
With cream: ch6, do not join; begin working in 2nd ch from hook: 5 sc across (5)
Round 2 :
Ch1, turn, 1 sc in each st for 6 rows total forming a flat tube approximately 6 rows high (5)
Round 3 :
Fold lengthwise and sc through both layers across to form a narrow arm tube: 5 sc across (5)
Info :
Stuff arms lightly with fiberfill to give gentle shape. Attach arms to sides of skirt at neckline beneath head.
— Angel Assembly (Per Angel) :
Info :
Sew the wings to the back of the skirt by aligning wing base with the skirt upper rounds (rounds 6-10 of skirt). Use mattress stitch or small whip stitches. Then position arms on top of wings slightly forward and sew through the same indentation to anchor.
Step 1 :
Use the long tail from head to sew head into the center top of the skirt (skirt round 4-6 area). Secure through the crown and pull tight so head sits snugly above the skirt.
Step 2 :
Sew halo behind head so it sits like a ring over top; tack 3-4 stitches in the back to hold in place.
Step 3 :
Sew wings centered on the skirt back with top of wing base matching skirt round 4-6. Sew arms to skirt front just below the head and add a small star sequin or embroidered star over hands.
Info :
Place each completed angel over a section of the motif field so angels sit in a line down the runner center. Leave tails of yarn for later tacking to the background motifs during joining.
— Medium Star Motif (Make many) :
Round 1 :
mr, ch1, 12 hdc in ring, sl st to join (12)
Round 2 :
(ch4, sl st in next st) x12 to make 12 loops (12 loops)
Round 3 :
Into each loop work: (sc, hdc, 3 dc, hdc, sc) all in same loop to make a petal (12 petals)
Round 4 :
Join petals with sl st between petals around; make sure petals are blocked flat (approx 60 sts total counted loosely as petals)
Info :
This medium star resembles the 8-point stars in the photo. Use pale blue and cream for variety. Block each star flat to exact size before joining.
Round 5 :
Optional: Add a second petal layer by slipping between petals and working a small 5-tr cluster into between-petal spaces to create a layered star effect
Round 6 :
Fasten off and leave a long tail for join-as-you-go or sewing
— Small Star / Flower Motif (Make many) :
Round 1 :
mr, 8 dc in ring (8)
Round 2 :
Ch1, sc in same st, *ch3, skip 1, sc in next st; rep around to create 8 small loops (8 loops)
Round 3 :
In each loop work: (sc, hdc, 3 dc, hdc, sc) to form small petals (8 petals)
Round 4 :
Optional picot edging: *sl st to next petal, ch3, sl st in 3rd ch; rep around for tiny points
Info :
These small motifs fill gaps between larger stars and around angels. Use a mix of blue, gold and cream. Blocking ensures consistent size for tidy joins.
Round 5 :
Fasten off leaving tail for joining
— Tiny Connector Motif (Make many) :
Round 1 :
mr, ch5, sl st to ring, rep 8 times to create 8 tiny loops; sl st to join (8 loops)
Round 2 :
In each loop work 3 sc to create small hex centers which will be used as connecting nodes (approx 24 sc)
Info :
These are efficient tiny motifs to bridge multi-point joins where three or four motifs meet. Keep these consistent in size to maintain even gaps.
Round 3 :
Fasten off leaving long tail for join-as-you-go attachment
— Join-As-You-Go Mesh (Main Field) :
Info :
The runner is made by laying out a repeated pattern of one angel motif followed by bands of medium stars and small flowers. Use a mixture of join-as-you-go and whip-stitch joining. Plan the layout first: repeat sequence is Angel - 6 medium stars across - row of small stars - repeat. Use blocking pins to hold motifs during joining.
Round 1 :
Begin with a central medium star; with long tail, position a small connector at a corner and sl st through both motifs to join (approx 4 sl st per join)
Round 2 :
Continue joining adjacent medium star petals to connector motifs using sl st into corresponding petals to create a lace lattice. Each medium star will have 6-8 join points depending on petal count
Round 3 :
As you join, insert the angel skirt top into the central open space created by a 4-star cluster so the head can be sewn down into the center during final assembly
Info :
When joining, use a tapestry needle with a length of yarn to whip stitch through both motif loops for a flat join. For decorative joins, use a small chain of ch3 and sl st to create bridging loops that appear in the finished photo.
Round 4 :
To connect six medium stars into a circular halo around each angel: join each star to its neighbors at two petal intersections forming a ring; this ring will cradle the angel's skirt bottom
Round 5 :
Add small star motifs in the gaps between medium stars by sewing small star petal points to the medium star ch3 loops; secure with small invisible stitches
Round 6 :
Continue working bands: for the long runner, repeat the sequence horizontally to build a strip. Aim for repeating this 6-8 motif wide sequence to match photographed runner width (approx 6 motifs across at center)
Info :
Keep track of motif placement with pins and label motif colors during layout. This avoids color pattern drift and ensures even distribution of gold and blue accents.
Round 7 :
Work small connector motifs between 3-4 meeting points: use the tail to whip through adjacent motif edges and draw connector into place. Make sure connectors are tensioned evenly to sit flat (join approx 3-4 sts per connector)
Round 8 :
Where three motif points meet, tie off tails on the back with a secure knot then hide tails by weaving several centimeters into motif backs.
— Lace Edge Border :
Round 1 :
With background color, pick up loops along runner long edges. Work a scallop edging by: *ch3, skip 1, 5 dc in next loop, skip 1, sc in next loop; rep around to form scalloped edge (approx count depends on runner length)
Round 2 :
Work a picot round into scallops: *sc in center of scallop, ch3, sl st in 3rd ch, sc in next scallop center; rep to accentuate points
Info :
For the short scallop at the runner ends, curve the edging to follow motif shapes. Add extra chains in corners to avoid puckering.
Round 3 :
Fasten off and weave in ends. Block the full runner gently to even out joins and open lilies/flowers to their final shape.
— Decorative Embroidery & Star Centers :
Round 1 :
Use contrast yarn (gold) to embroider tiny star centers: with a tapestry needle, pull a loop through petal centers and secure small star stitches or French knots (approx 3-5 knots per angel)
Round 2 :
Attach small sequin or button if desired to angel hands/center with a few secure stitches
Info :
Keep additional embellishments small and flat to maintain runner's ability to lie flat on the table. Always secure embroidery threads with multiple passes to prevent unraveling over time.
— Blocking & Finishing :
Step :
Block each motif individually by pinning to the blocking board, spraying lightly with water and leaving to dry. Pin scallops and points to shape precisely.
Step :
Once motifs are dry, lay out the entire runner flat. Baste join seams with long basting stitches using a contrasting fine thread to hold arrangement while final joining is sewn.
Info :
Blocking is essential for even joins and the finished look. Take your time across this step; it dramatically improves professional finish and motif regularity.
— Final Notes on Variations and Sizing :
Info :
To make the runner longer, simply add more repeats of the angel and band sequence. For a narrower runner, reduce the number of motifs across the width. Using finer thread and smaller hook will create a more delicate piece; heavier cotton will make a sturdier runner.
Info :
Throughout the pattern, keep counts and symmetry consistent. If a motif appears smaller after blocking, re-block to even up sizes or re-make the motif with slightly adjusted hook size to match the set.
This elegant angel and star mosaic runner is a joyful mix of lacework and miniature sculptural motifs — perfect for seasonal and special-table styling! Each motif is a small work of art, and bringing them together creates a flowing, heavenly border for your table. I hope you enjoy making and gifting this heirloom-quality textile. 🕊️✨🧶