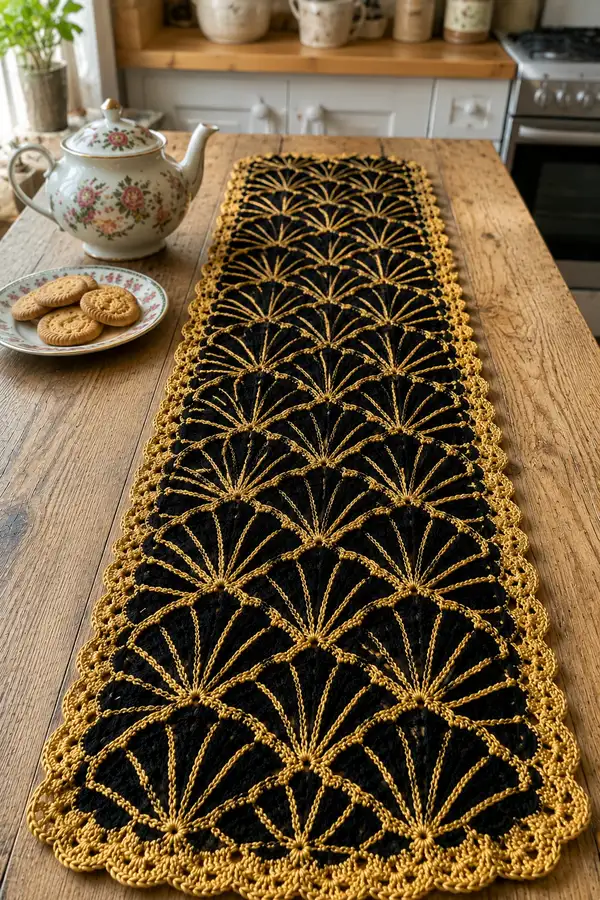
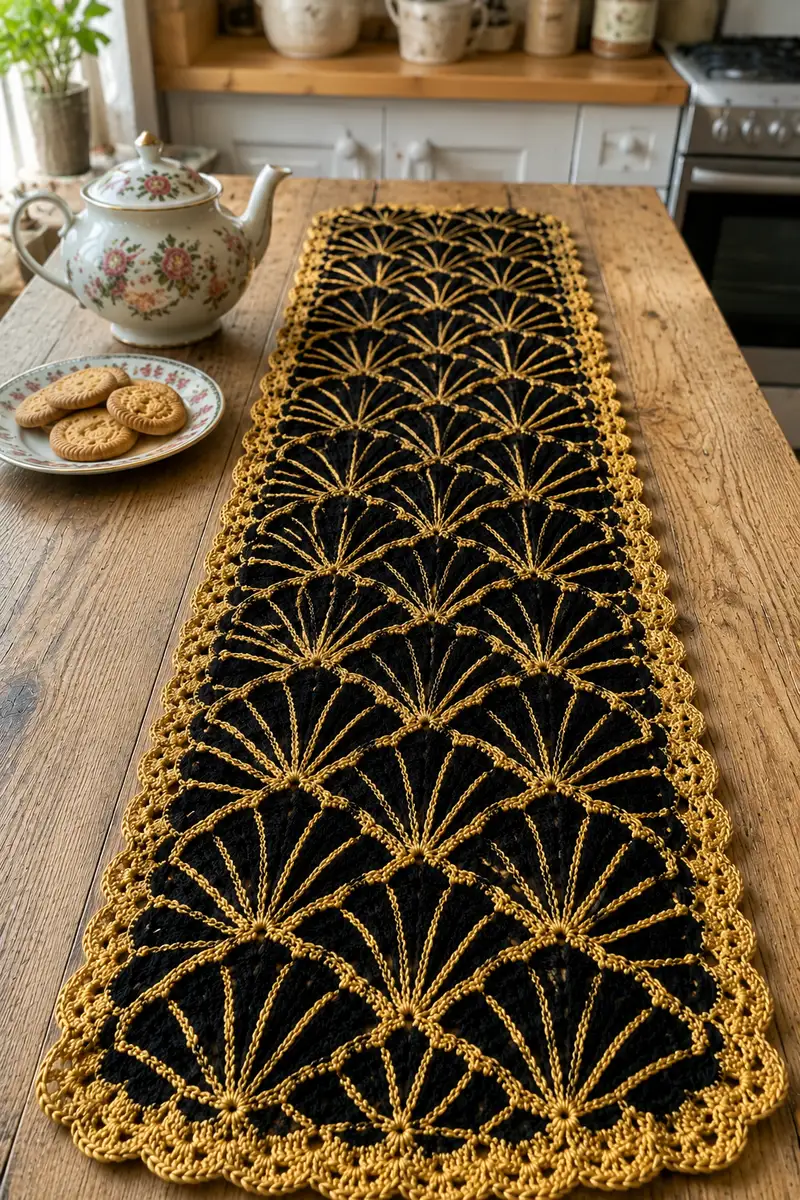
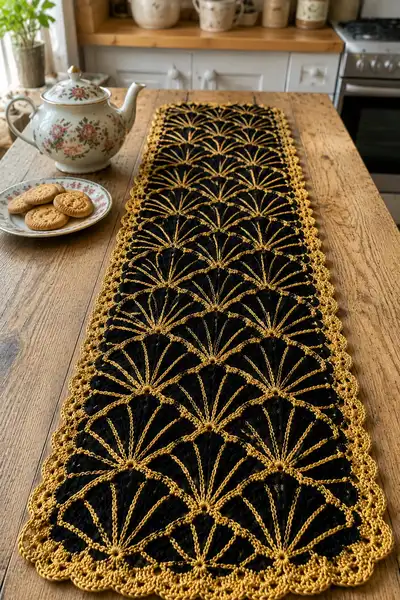
Elegant Art Deco fan motifs in striking black and gold combine to create a dramatic table runner perfect for special occasions. This pattern uses a repeated circular fan medallion worked in black with an overlay of gold spokes and a scalloped gold border. The finished runner is modular — make it shorter or longer by changing the number of motifs in each row.
Progress Tracker
0% Complete
— Notes & Gauge :
Info :
Gauge is not critical for this modular runner, but for reference: one finished fan medallion measures approximately 10.5 cm (4.1 in) across when using DK cotton and a 3.5mm hook. Adjust hook or yarn to match the look you want. Work tightly for crisp lace and to avoid holes in the black background.
Info :
Decide runner layout before beginning: the photographed runner is 6 motifs across and 10 motifs long (6x10 = 60 motifs). The instructions below describe how to make a single medallion, add the gold fan overlay, join motifs as you go, and work a multi-round scalloped border. Make as many motifs as required for your desired length.
— Motif Base - Make X (each motif) :
Round 1 :
mr, 8 sc in magic ring (8)
Round 2 :
Inc in each st around (8 inc) (16)
Round 3 :
(1 sc, inc) x 8 (24)
Round 4 :
(2 sc, inc) x 8 (32)
Round 5 :
(3 sc, inc) x 8 (40)
Round 6 :
(4 sc, inc) x 8 (48)
Info :
At this point the motif is a stable round with 48 sts. Place a stitch marker in the first stitch of this round to mark the beginning for later reference. This round will be the anchor for the gold overlay spokes.
Round 7 :
1 sc in each st around (48)
Round 8 :
1 sc in each st around (48)
Round 9 :
1 sc in each st BLO around (48)
Info :
Working Round 9 in BLO creates a slightly recessed ridge which gives a subtle frame that helps the gold overlay stand out. Keep tension steady; these rounds form the flat top of the medallion.
Round 10 :
(6 sc, ch 2) x 6, join with sl st to first sc (48 plus six ch-2 spaces)
Info :
Round 10 establishes six evenly spaced chain-2 corner-like spaces around the outer edge. These will help visually divide the medallion into 6 arcs; the gold overlay will form spokes that fan across those arcs. If you prefer more arcs (8), adjust by making (4 sc, ch2) x8 — but for the Art Deco fan we will use 6 wide arcs.
Round 11 :
*Into each ch-2 space: (sc, ch3, sc)* x6, sl st to join (48)
Info :
These chain-3 loops help widen the medallion gently and create anchor points for later overlay joins. We are keeping the outermost round tidy so the overlay chains have consistent spacing.
Round 12 :
1 sc in each sc and 1 sc in each ch-3 space around (count = 48 + 6 = 54)
Info :
By the end of Round 12 the motif will measure roughly the target width. If your gauge is different, block each motif to the same size before overlay to ensure even joins.
— Motif Finishing Rounds (Base Edge Stabilizer) :
Round 13 :
1 sc in each st around, working evenly (54)
Round 14 :
1 sc in each st BLO around to create an edge ridge (54)
Round 15 :
sl st into next st, ch1, *sc in next 3 sts, ch2* repeat around to create small picot-like gaps for overlay anchoring. End with sc and sl st to first sc (counts remain consistent but note 6 or 8 ch-2 spaces depending on previous layout)
Info :
Fasten off black yarn leaving a 25 cm (10 in) tail for joining if you choose to seam motifs later. We will add the gold overlay and join motifs before working the outer border for a cleaner look.
— Gold Fan Overlay (on each motif) :
Info :
Switch to gold yarn. For crisp gold chain spokes use a slightly smaller hook (3.0mm) if you want tighter chains. The overlay is worked with long chain loops anchored at the center and at the outer edge in a repeating pattern to create fan spokes. Work the overlay on each motif after blocking for best appearance.
Round 1 (Overlay) :
Attach gold yarn with a sl st to the central stitch of Round 6 (the center area). Ch1, sc around the central 8-st hub keeping stitches close so the center is firm — make 8 sc around center (8)
Round 2 (Overlay) :
*Ch 12, sl st into the next sl st/space at the outer ridge (this forms one long spoke)* Repeat 12 times around so you have twelve evenly spaced chain spokes radiating from the center. Fasten off and weave in short tail at center or tie gently and invisibly secure the center with a few sc stitches to anchor all chain bases.
Info :
We are using 12 spokes routed across the medallion to create a 6-arc fan: pairs of adjacent spokes will form the visible fan arcs. Keep chain loops the same length; use a measuring guide or chain counter if necessary. Anchor each spoke to the same structural stitch on the outer edge (Round 12's sc or ch-3 spaces) to maintain spacing.
Round 3 (Overlay)
Working from one spoke to the next, flatten pairs of spokes slightly and secure them into a small cluster: sl st into outer edge where spoke lands, ch2, sl st back to base of adjacent spoke, repeat around so each pair of spokes is subtly connected at the outer edge (Result: 6 connected pairs)
Info :
This step visually defines the fan arcs. You can replace the ch2 + sl st connecting step with a tiny picot or a 3rd chain if you prefer a more delicate connector. Keep the same method across all motifs so joined seams match.
Round 4 (Overlay - Decorative Rope)
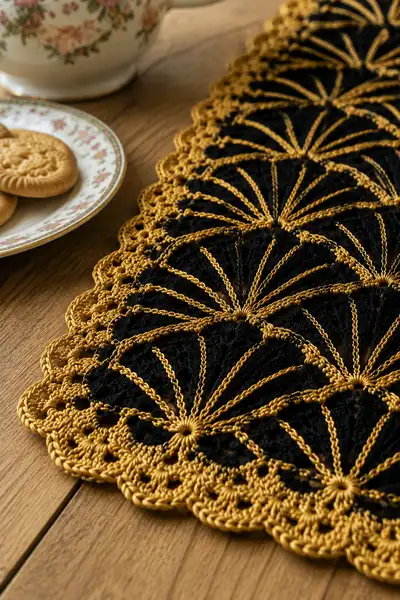
Join gold at the center base of any spoke. Work a surface chain 'rope' by: ch 1, *insert hook from front to back through the stitch on Round 9 near the spoke's path, pull up a loop, ch 1* repeat along the curve of one fan arc until you reach the next spoke base, sl st to secure. Repeat for each of the 6 arcs. This creates the raised gold rope seen in the photo following the fan curve.
Info :
Surface chain technique: keep loops uniform and don't pull too tight. The goal is a slightly raised chain that visually outlines the fan sectors over the black medallion. Use a small stitch marker to note the spoke bases so you place chains consistently.
Round 5 (Overlay - Final Fan Tip)
Using gold, at the center between the two center-most spokes, make a tiny star by making 5 sc into the center stitch, then pull yarn tight and sl st to secure — this creates the gathered center knot effect visible in the photograph. Fasten off and weave ends neatly on the underside.
Info :
The small gold star at the center anchors the spokes visually and adds a jewel-like touch. If you prefer a flatter center, simply work a small sl st knot with gold and hide the tail.
— Joining Motifs (Join-As-You-Go or Sew) :
Info :
Decide whether to join motifs by seaming after making all motifs, or join-as-you-go (JAYG) as you create the last round of each motif. JAYG saves sewing time and creates a neater edge for the border. The method below describes joining on the motif's final stabilizer round (Round 15 of the base) using single crochet joins into matching stitch positions on an adjacent motif.
Join Step 1 :
Lay out your motifs in the planned grid. Start at the top-left motif and work left to right. When you finish Round 15 on a motif that has a neighbor to the left, work as follows: finish the sc indicated, then instead of ch2, insert hook into corresponding Round 15 st of the neighbor motif, pull up loop, sc to join; continue around, joining at every corresponding stitch along the shared edge. This creates a seam of sc joining both motifs.
Info :
To find corresponding stitches on adjoining motifs, match the center spokes and outer scallop points; stitch markers placed at the arc points before joining are very helpful. Join into the same round number on both motifs to avoid offsets.
Join Step 2 :
When joining vertically (row-to-row), join at the top edge of the lower motif to the bottom edge of the upper motif in the same way. For corner intersections where four motifs meet, work an invisible knot by passing the hook through all four corresponding stitches and sl st to secure tightly—this keeps the intersection neat and flat.
Info :
Keep joins loose enough to allow the fabric to lie flat; if joins are too tight the runner will pucker. After joining, check a sample of 4 motifs laid flat and adjust tension on remaining joins if needed.
— Assembled Panel Check :
Info :
Once all motifs are joined into a rectangle (for the shown runner: 6 across x desired number down), press and block the assembled panel flat to unify motif sizes. Pin each seam gently and spray-block to the precise rectangular dimensions you want. This step is critical before working the border rounds to ensure scallops line up.
— Border - Preparation :
Info :
We will work the border in gold for maximum contrast. The border consists of a multi-round edge that builds a stable foundation, then a series of scallops and picot trims to echo the fan motif. Count the number of external edge stitches around the assembled panel; record the number. The border rounds below assume an edge multiple of 6 for visual symmetry — if your panel count differs, adjust by adding or subtracting repeats evenly along the long sides.
— Border Round 1 :
Round 1 :
With gold yarn attached at a corner, work 1 sc evenly into each outer edge stitch around the entire panel, placing (3 sc) into each corner to maintain flatness; join with sl st to first sc. (Total = depends on your panel - record this number)
Info :
Work loosely for this first round so the scallops can sit flat. If you find the runner wants to curl, add an extra sc in the corners or slightly reduce tension on the first round of sc along the long edges.
Round 2 :
Ch1, *sc in next 5 sts, ch2, sk 1* repeat around to create evenly spaced ch-2 loops for scallops; at corners work (sc, ch3, sc) to create a rounded corner space. Join with sl st. (St count remains close to previous but count ch-2/3 spaces)
Info :
These ch-2 and ch-3 loops are the anchor points for the decorative scallops worked next. If your panel edge is particularly long, you can space sc groups to 6 or 7 sts between ch-2s for a larger scallop; keep symmetry on opposite sides.
Round 3 :
Into each ch-2 loop: (sc, hdc, 3 dc, hdc, sc) — a classic 7-st scallop. Into corner ch-3: (sc, hdc, 5 dc, hdc, sc). Join with sl st to first sc.
Info :
This is the first actual scallop formation; the 3-dc center gives a full rounded shell that echoes the fan shape. Work all scallops with consistent tension for a uniform border.
Round 4 :
Ch1, sl st to center dc of each scallop, *ch4, sl st into center dc of next scallop* repeat around to create a decorative loop chain on top of each scallop. At corners work additional ch4 loops to maintain corner curve. Join with sl st.
Info :
This chained loop gives the lacy top row seen in the photos and adds height so the scallops read clearly when the runner is on the table. Keep loops consistent; use a stitch marker at the first scallop to keep alignment.
Round 5 :
Into each ch4 loop: (sc, ch2, sc) to create tiny arches across each scallop top. Fasten off and weave in ends, or continue to Round 6 to deepen border.
Info :
If you want a more pronounced border like the photographic example, continue with additional rounds that add a small raised rope and picot trim as shown below.
Round 6 (Border - Raised Rope)
Join gold at the base of any scallop. Work a raised chain rope around the scallops: *(sc in the next sc at base of scallop, ch6, sl st around back post of the next sc to create a loop that arches over the scallop)* repeat around. This creates the elongated chain arches that mirror the fan arcs on the medallions.
Info :
For a clean look, work this round from the right side and maintain identical chain length for each arch. Block lightly after this round to set shape.
Round 7 :
Into each arch: (sc, picot, sc) — picot = ch3, sl st into first ch — this adds little points at the top of each arch. Join with sl st and fasten off, weaving in long tails into the back.
Info :
The picot points add that delicate beaded trim seen on the runner edge. If you prefer a simpler finish, work sc around each arch instead of picots.
— Optional Extra Rounds for Heavier Border :
Round 8 :
Join gold and work 1 sc into every stitch around the base of scallops to tidy, then (sc, ch3, sc) into each picot to create a neat little loop above each picot. Join and fasten off. (This will add a small decorative picot fringe.)
Info :
Add or subtract these extra decorative rounds until you get the exact profile you want. The pictured runner uses a relatively full scallop and arch height to echo the fans.
— Finishing Touches :
Info :
After the border is complete, block the entire runner to final dimensions. Use rust-proof pins, pin each scallop and arch so they are uniform, and spray or steam block following yarn manufacturer instructions. Weave in any remaining tails along the underside and trim flush.
Info :
For extra security at high-use edges, weave a second pass of yarn along the first sc joining round on the reverse. If your metallic gold yarn frays, add a small dab of fabric glue to hidden tails to secure them.
— Sizing & Repeats Guidance :
Info :
To create a runner similar to the pictured dimensions, make motifs to cover a width of six motifs across. Each motif is approximately 10.5 cm (4.1 in) across; 6 across yields ~63 cm (24.8 in) width including joins and border. For length, repeat rows to reach desired measurement — the shown runner is about 10 rows long (approximately 105 cm / 41 in) before border. Adjust by adding or removing rows of motifs.
Info :
If you prefer a square placemat rather than a long runner, arrange 3 x 3 motifs and apply the same border instructions scaled down proportionally; reduce the number of scallop repeats on the border to match the smaller circumference.
— Care Instructions :
Info :
Handwash gently in cool water and reshape while damp. Avoid harsh chemicals on metallic or mercerized yarns — test a small sample first. Press lightly from the reverse with a damp cloth if needed. Store flat when not in use to preserve shape of the scallops and arches.
— Troubleshooting & Tips :
Info :
If your runner waves along the long edges, add an extra sc into the border's base round every 10-12 sts to increase length slightly in the border. If the border puckers, reduce hook size on the border by 0.25–0.5 mm or ease tension while working scallops.
Info :
Should the gold overlay chains slump, consider using a slightly twisted or plied cotton with more body or stitch the chain rope more firmly into anchor points along its curve. Always keep test samples when changing yarn or hook to validate appearance.
Completing this Art Deco fan motif runner is such a satisfying experience — the repeated medallions come together like a quilt of little suns, and the gold overlay instantly elevates the whole piece. The modular construction means you can make a small set of placemats or a long dramatic runner using the same motif. I hope you enjoy blocking and seeing each scallop settle into place — there’s a real sense of occasion when you place it on the table! 🧶✨