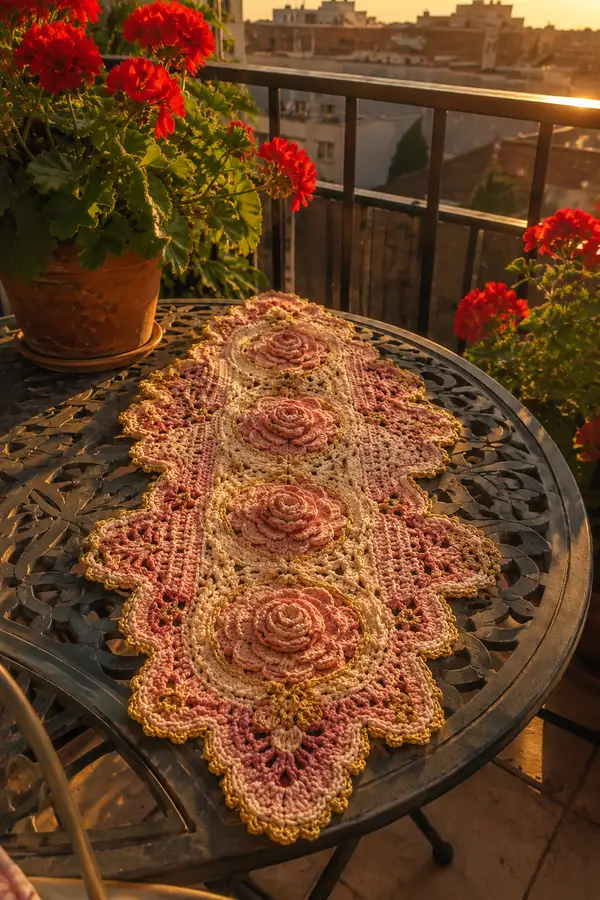
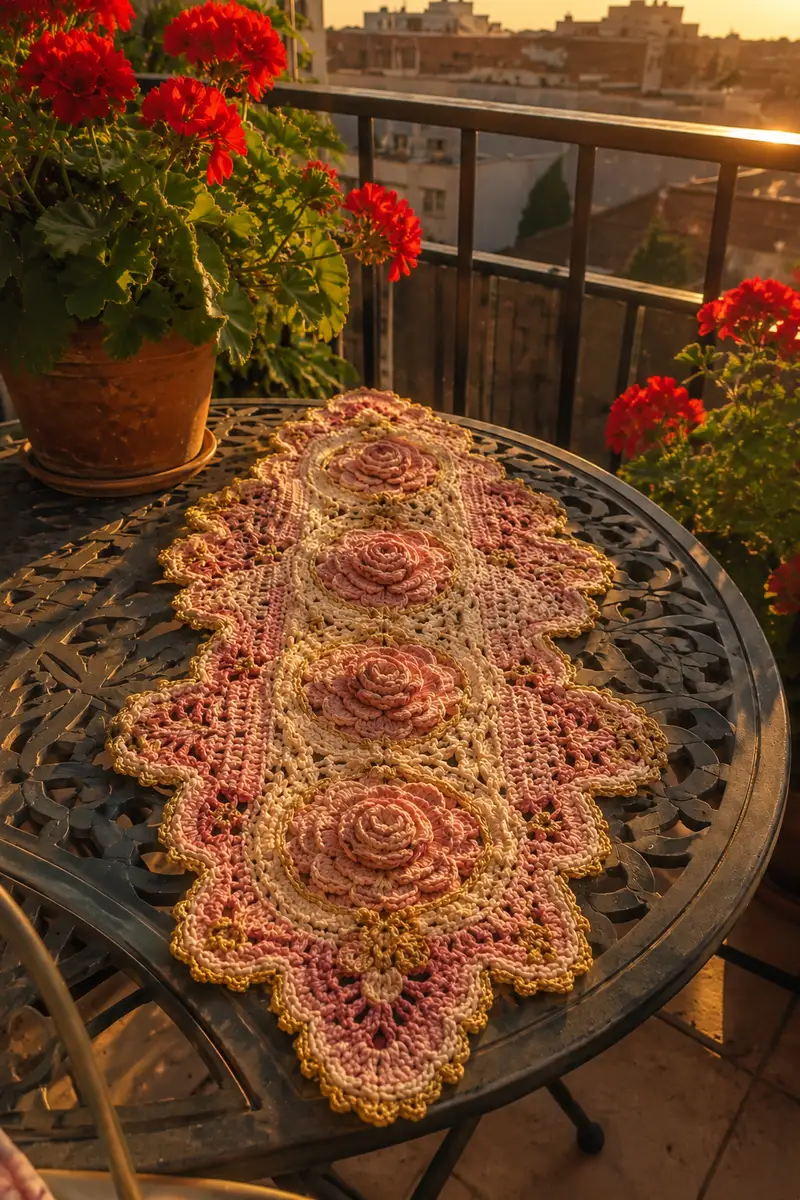
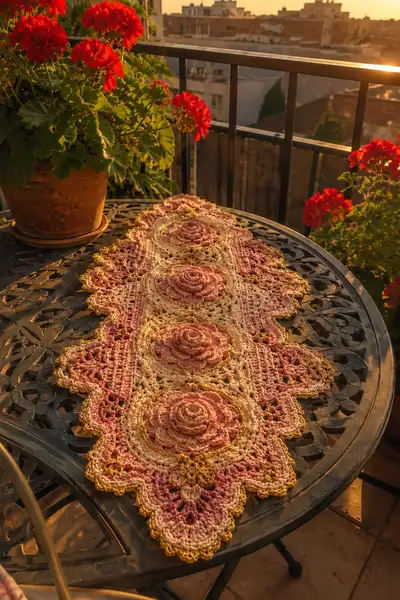
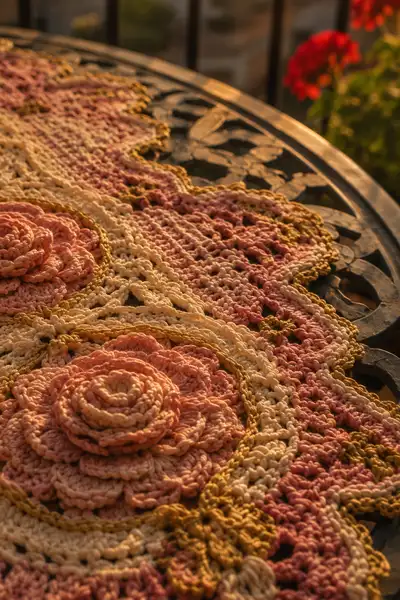
A romantic, vintage-inspired table runner featuring four raised rose medallions linked by ornate lace panels in soft blush, cream and antique gold. This pattern recreates the layered 3D roses, scalloped baroque edges and delicate openwork you see in the photos. Step-by-step instructions guide you through each motif, joining and final scalloped border to produce a stunning heirloom centerpiece.
Progress Tracker
0% Complete
— Rose Medallion (make 4 identical medallions) :
Round 1 :
Make a magic ring. 6 sc in magic ring (6)
Round 3 :
(1 sc, 1 inc) x 6 (18)
Round 4 :
(2 sc, 1 inc) x 6 (24)
Round 5 :
(3 sc, 1 inc) x 6 (30)
Info :
Work these first rounds in Cream to create the medallion base. Keep rounds snug but not tight so the centre lays flat.
Round 6 :
(4 sc, 1 inc) x 6 (36)
Round 7 :
(5 sc, 1 inc) x 6 (42)
Round 8 :
(6 sc, 1 inc) x 6 (48)
Round 9 :
1 sc in each st around (48)
Info :
Change to Blush yarn now for the layered rose center. Fasten off Cream with a 6-8" tail for later outline stitching if desired.
Round 10 :
With Blush, join in any st. (sc in next st, ch 3, sk next st) x 24 creating 24 ch-3 loops around (24 loops)
Round 11 :
Into each ch-3 loop: (sc, hdc, sc) — make 24 small petals (24 petal groups). Join with sl st to first sc (24)
Info :
Work petals with lighter tension so petals puff up; do not pull yarn too tight in the loop rounds.
Round 12 :
1 sc in each base sc and 2 sc around each petal (work: sc in next base st, sc in next petal st, sc in next petal st) x 24 (48)
Round 13 :
(2 sc, 1 inc) x 12 (60)
Round 14 :
1 sc in each st (60)
Round 15 :
Begin first rose layer: *ch 4, sl st into next st to form a loop; in next loop (ch 4, sl st)* repeat to make 20-24 small loops around decorative ring. Count 30 loops total approximate—work to visual spacing (30 loops)
Info :
Round 15 is a decorative chain row to prepare anchors for the 3D petal layers. Keep loops even—this row determines petal spacing.
Round 16 :
Into each chain-loop: (sc, dc, tr, dc, sc) to form a fuller petal—work into each loop around producing 30 petals (30 petals)
Round 17 :
Work 1 sc around each petal tip and base to anchor petals (60)
Round 18 :
Change to smaller hook (3.5mm) if desired. In front of petals, working into the previous round's stitches, create petal-row 2: (ch2, 5 dc cluster in same st, sl st to next base) x 15 producing 15 larger outer petals (15 clusters)
Info :
These rounds build the layered 3D rose. Work the inner petals slightly narrower and the outer petals taller to create a graduated look. Adjust number of outer petals to fit spacing; mathematical count above assumes even spacing on a 60-st base.
Round 19 :
Work 1 sc between each outer petal cluster and 3 sc over each cluster to stabilize (60)
Round 20 :
Switch to Cream. 1 sc in each st around to create a frame (60)
Round 21 :
(4 sc, 1 inc) x 12 (72)
Round 22 :
1 sc in each st (72)
Round 23 :
Working in FLO: (3 sc, 1 inc) x 18 (90)
Info :
Working in BLO or FLO for one round adds definition and helps the outer frame sit slightly raised. Use FLO here to create a slight ridge that will later be outlined in gold.
Round 24 :
1 sc in each st (90)
Round 25 :
Create decorative lace anchors: *sk 2, (dc, ch2, dc) in next st, sk 2, sc in next 4 sts* repeat around (repeat yields 15 lace arches; anchors placed every 6 sts) (90 base stitches remain)
Round 26 :
Work into each arch: (sc, ch3, 3 dc, ch3, sc) forming raised scallops—repeat 15 times (15 scallops)
Round 27 :
Change to Antique Gold yarn. 1 sc around each scallop base and 1 sc in each remaining st to even out (90)
Round 28 :
Edge row: *(sc, ch2, picot (ch3, sl st to 3rd ch)), ch2, sc) in next scallop point* repeat around to produce a tiny picot-edged frame (90)
Info :
Fasten off leaving a 6" tail for sewing. Block each medallion flat, pinning petal layers gently into shape so raised petals remain defined. Four medallions will be joined later with rectangular lace panels; keep them blocked and dry until joining.
— Central Connecting Panel (make 3, between medallions) :
Round 1 :
With Cream yarn, ch 36, join with sl st to form a loose loop (36 foundation chains — counts used as chain base)
Round 2 :
Ch1, sc in each ch around working in rounds by turning after each row if preferred; 36 sc (36)
Round 3 :
Inc row: (4 sc, 1 inc) x 6 (42)
Round 4 :
1 sc in each st (42)
Info :
This rectangular strip will be worked as an elongated oval/rectangle to link two medallions. Keep it slightly narrower than the medallion diameter so the lace insert reads as a transitional panel.
Round 5 :
Begin open lace: *ch 4, sk 3, sc in next 2 sts, ch 4, sk 3, sc in next 2 sts* across to create open mesh rows. Resulting number of spaces depends on your exact count; aim for 10-12 chain arches (42)
Round 6 :
Repeat Round 5 working into chain arches: in each ch-4 arch work (sc, hdc, 3 dc, hdc, sc) forming decorative arches across the strip (approx 12 arches)
Round 7 :
1 sc across to tidy (42)
Round 8 :
Repeat lace row: *ch5, sk 4, sc in next 2 sts*, continue to form deeper arches and visual interest (42)
Info :
Strip length: make three strips to link the four medallions in sequence (medallion - strip - medallion - strip - medallion - strip - medallion). After making the first 3 strips, compare length to medallion spacing and adjust arch counts if needed for balanced spacing.
Round 9 :
Decorative row: work into arch spaces with (sc, dc, tr, dc, sc) to create fan motifs (42)
Round 10 :
Change to Antique Gold. 1 sc around to highlight panels and prepare for joining (42)
Round 11 :
Edge scallop: *sc, ch 3, picot (ch 3 sl st to 3rd ch), ch 3, sc* across to make small scallops (42)
Info :
Make three such connecting strips. Block strips flat to same gauge as medallions to make joining straightforward.
— Corner Fillers and Alignment Motifs (make 2 small triangular connectors) :
Round 1 :
With Cream, ch 12, join to form small loop (12)
Round 2 :
1 sc around (12)
Round 3 :
(2 sc, inc) x 3 (15)
Round 4 :
Work open lace: ch 5, sl st to anchor every 3rd stitch to form triangular openwork; continue until you have a small triangular filler (approx 15)
Round 5 :
Change to Gold and work 1 sc around to highlight points (15)
Info :
These little pieces fill the negative space at the long edges where medallions meet the border scallops—make two or four depending on how your runner sits on the table edges.
— Main Border and Scalloped Edging :
Round 1 :
With Cream yarn, join at any external medallion point and ch 1. Work 1 sc evenly into spaces around the medallion and into the edges of connecting panels to create a continuous foundation round. Aim for an even stitch count around the whole runner; if necessary, add or reduce sc along strips so final border stitch count is divisible by 6 for scallops (example final foundation 360 sc — your count will vary depending on gauge)
Round 2 :
1 sc in each st foundation round to tidy (360)
Info :
Before continuing, lay the runner flat and confirm that medallions and strips are nicely aligned. Adjust by shifting a few stitches along the strips if necessary so scallops fall symmetrically at ends.
Round 3 :
Begin scallop placement: *(sc, ch3, 5 dc in next st, ch3, sc) in next sc; sk 2 sc; repeat across entire foundation around creating scallop anchors. This will create roughly 60 scallop anchor points around the runner (360 base >> 60 scallops)
Round 4 :
Work into each 5-dc fan: sl st to join, then (sc, hdc, 7 dc cluster, hdc, sc) across each fan for elevated scallops (60 scallops)
Round 5 :
Change to Antique Gold. 1 sc around each scallop and in the valleys to create a gold outline (360)
Info :
Gold outlining lifts the baroque motifs visually; work a tidy sc row so that picot edging will sit cleanly on top.
Round 6 :
Edging row: *(ch 3, picot (ch3, sl st to 3rd ch), ch 3, sl st) into the top of each scallop to create delicate points—repeat for every scallop (60 picots)
Round 7 :
Optional decorative starpoint: work a small star motif between scallops with Olive/Deep Gold. Join color, ch 2, (5 tr cluster in same st, sl st to anchor) then sl st back to foundation (60 small starpoints)
Round 8 :
Fasten off and weave ends. Gently steam-block or wet-block to smooth and set scallops.
Info :
If your stitch counts differ from the example counts above, distribute increases evenly across strips to reach a multiple of 6 for even scallops; this preserves the border symmetry.
— Joining and Assembly :
Info :
Before joining, block all medallions and strips flat. Pin in place on a blocking board or large towel matching the photo composition: medallion, strip, medallion, strip, medallion, strip, medallion.
Round 1 :
Place first medallion and first strip right sides together. Using a long tail from the medallion's outer cream round, whip stitch through the corresponding foundation stitches of medallion and strip. Use even stitches and keep seam flat. Work along entire seam keeping stitches invisible from the right side (sewn seam length equal to medallion perimeter approx 90 sts)
Round 2 :
Repeat joining for each medallion/strip junction: medallion-to-strip-to-medallion until four medallions are joined in sequence (3 joins between 4 medallions)
Info :
Pin motifs together before sewing to ensure consistent spacing. Use extra small stitches at corners to hold junctions firmly.
Round 3 :
Attach corner fillers at any triangular negative spaces using mattress stitch; secure with a few extra passes of thread for stability (15-20 stitches per small filler)
Round 4 :
Once runner is fully joined, work the border and scalloped edging as described in Border section, sewing into the joined seams to create a continuous finishing row.
Info :
After final border, block entire runner again—pin scallops carefully and spray or wet-block, letting sit until fully dry for crisp scallops and flat lace panels. This ensures the medallions keep their raised rose shape while the lace lays flat.
— Finishing Notes & Optional Embellishments :
Info :
Weave in all ends along the wrong side. If you like, use a contrasting thread to stitch an outline around each rose center for extra definition; use tiny whip stitches in Antique Gold just at petal bases to mimic the photo highlight.
Info :
To create the deepest three-dimensional petals, you can add a weak starch spray to the petals only after blocking to hold them slightly up—test on a scrap first to avoid hardening the fiber.
Info :
Optional: sew a lightweight felt backing in Cream to the underside for table protection and to prevent snagging if the runner is placed on a metal table (hand-stitch with whip stitch through outer border only).
Info :
Care instructions: Hand wash cold and reshape; avoid hot water or aggressive agitation to keep petals intact. Lay flat to dry, re-block if necessary before storing.
Completing this Baroque Rose Medallion table runner is a truly rewarding journey—each medallion blooms as you work and the lace panels bring a vintage elegance to any table. The soft blush, cream and gold palette reads heirloom and romantic. Enjoy the meditative feel of repeating motifs, then celebrate with a beautifully blocked, showstopping centerpiece. 🧶🌹✨