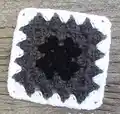
About This Basic Granny Square Pattern
This pattern creates a classic granny square you can use alone or join into larger projects like blankets, cushion covers, shawls, or scarves. It uses basic US crochet terminology and is designed to be forgiving — gauge is not critical. You can work the rounds in as many colours as you like and stop when the square reaches your desired size.
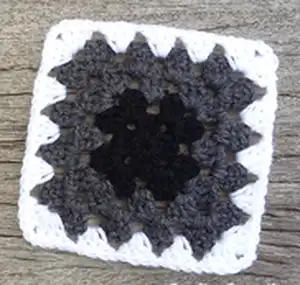
Easy to memorize and perfect for stash-busting, the square grows quickly with repeated corner clusters. The instructions include step-by-step rounds and a finishing note to weave in ends for a neat result.
Why You'll Love This Basic Granny Square Pattern
I absolutely love this pattern because it is timeless and endlessly adaptable for all kinds of projects. I enjoy how quickly a square grows with just a few simple rounds — it gives immediate satisfaction. The pattern lets me experiment with colour combinations without worrying about precise gauge. Best of all, it is perfect for beginners and experienced crocheters alike, making it a go-to pattern for gifts and home decor.
Switch Things Up
I love changing up colours in each round to create ombre or rainbow granny squares that look amazing when joined together.
I sometimes use thicker yarn and a larger hook to make oversized, chunky squares for quick blankets and cushions.
I like to try a smaller hook and fine yarn to make tiny squares for delicate accessories or motifs.
I often add a contrasting border round in a bright colour to make each square pop and unify a multi-colour blanket.
I also experiment with different joining methods like whipstitch, mattress stitch, or join-as-you-go to alter the final look and drape.
I sometimes embroider a small motif on finished squares for a personalized touch or attach buttons and beads for decoration.
I recommend trying textured yarns like boucle or chenille for a fluffy, cosy finish that changes the feel of the square.
I occasionally substitute some rounds with shell stitches or clusters to create hybrid granny motifs for a unique pattern.
I suggest planning a colour layout on a flat surface before joining to balance colours across your finished project.
I often block a few test squares if using very different yarn types to check how they sit together before committing to a large project.
Common Mistakes & How to Fix Them
✗ Skipping the slip stitch join when forming the starting ring can make the centre loose; join with a slip stitch to the first chain to form a neat ring.
✗ Not counting the clusters correctly during rounds leads to unbalanced corners; mark the corner spaces and verify cluster counts after each round.
✗ Pulling stitches too tightly when changing colours or attaching yarn can distort the square; use relaxed, consistent tension and weave in ends smoothly.
✗ Failing to turn work as directed can make corners pull to one side; follow the instruction to tie off and turn work to keep corners flat and avoid blocking.
✗ Forgetting to weave in ends as you go results in a bulky finish; tie off each round and weave in ends before continuing to the next colour.