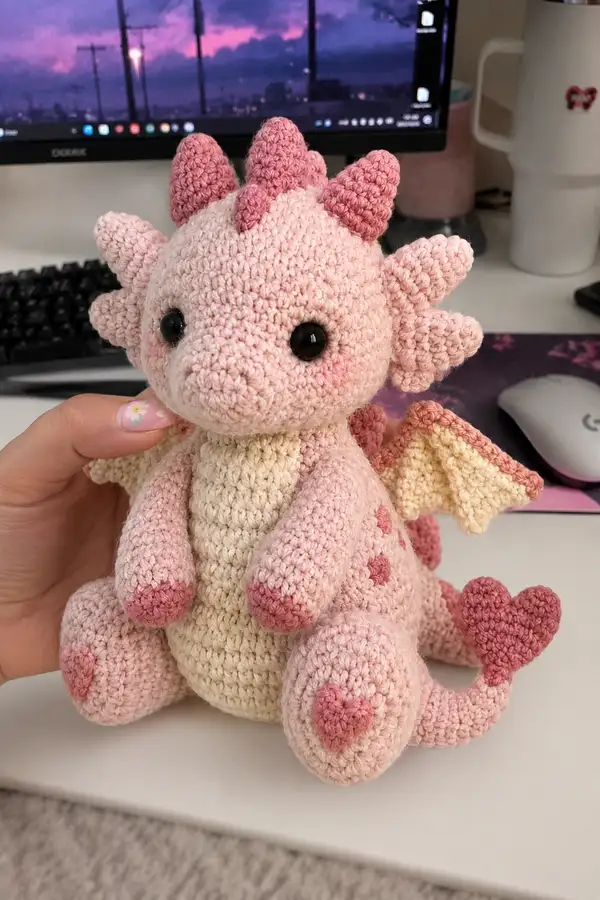
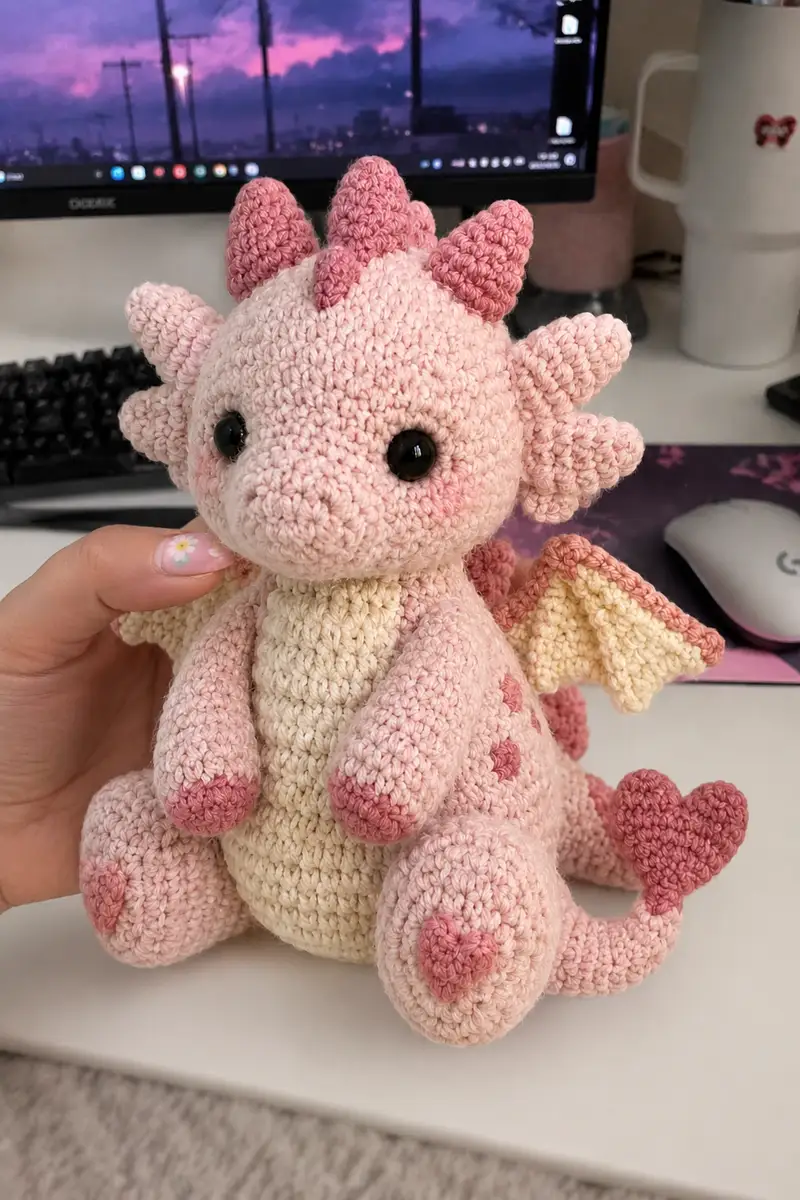
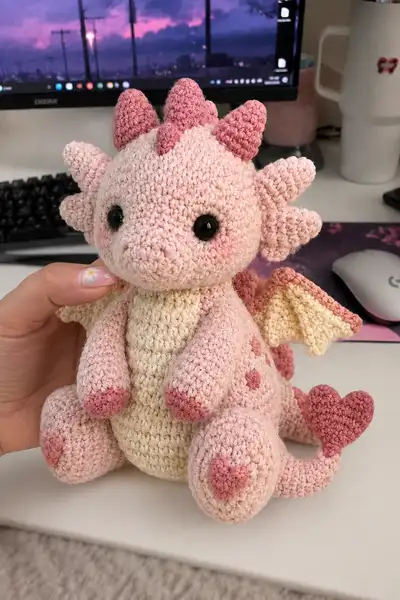
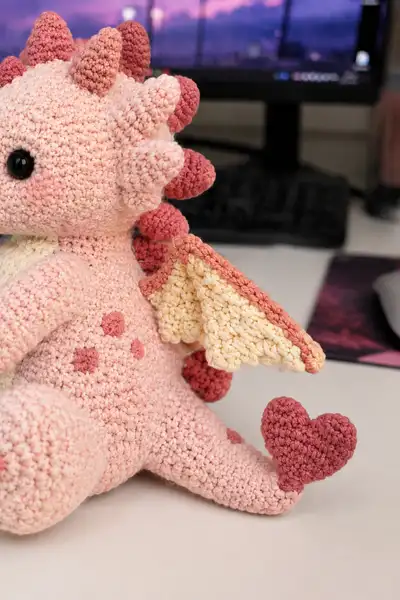
This sweet blush-pink dragon features a rounded head, tiny curved wings, heart-tipped tail and textured dorsal spikes — all in soft pastel tones. The pattern includes detailed shaping for a cuddly, seated pose with a cream belly and rosy blush spots. Make a charming gift-ready plush with friendly safety eyes and embroidered details.
Progress Tracker
0% Complete
— Head :
Round 1 :
6 sc in magic ring (6)
Round 3 :
(1 sc, 1 inc) x 6 (18)
Round 4 :
(2 sc, 1 inc) x 6 (24)
Round 5 :
(3 sc, 1 inc) x 6 (30)
Round 6 :
(4 sc, 1 inc) x 6 (36)
Round 7 :
(5 sc, 1 inc) x 6 (42)
Round 8 :
(6 sc, 1 inc) x 6 (48)
Round 9 :
1 sc in each st (48)
Round 10 :
1 sc in each st (48)
Info :
Use a stitch marker at the start of every round. Position safety eyes between rounds 13-14 and 14-15, about 8-10 stitches apart depending on eye size for the soft look in the photo
Round 11 :
1 sc in each st (48)
Round 12 :
1 sc in each st (48)
Round 13 :
1 sc in each st (48)
Round 14 :
1 sc in each st (48)
Info :
Attach safety eyes now if using them: push stems through at chosen positions and secure washers. Check spacing visually using pins before locking
Round 15 :
1 sc in each st (48)
Round 16 :
1 sc in each st (48)
Round 17 :
1 sc in each st (48)
Info :
Begin subtle shaping for muzzle by pulling a few stitches tighter near the center front; you will later embroider nostrils or sew a small oval muzzle if desired
Round 18 :
(6 sc, 1 dec) x 6 (42)
Round 19 :
1 sc in each st (42)
Round 20 :
(5 sc, 1 dec) x 6 (36)
Round 21 :
1 sc in each st (36)
Info :
Start stuffing head firmly but not rock-hard. Add fiberfill gradually through the opening so the head keeps a round, plush shape
Round 22 :
(4 sc, 1 dec) x 6 (30)
Round 23 :
(3 sc, 1 dec) x 6 (24)
Round 24 :
(2 sc, 1 dec) x 6 (18)
Round 25 :
(1 sc, 1 dec) x 6 (12)
Info :
Fasten off leaving a 25cm tail for sewing head to body. Finish stuffing gently and close opening with yarn needle by sewing through front loops to create a smooth finish
— Dorsal Spikes / Horns (Make 7 total, varying sizes) :
Spike Size A (front-most, make 1) Round 1 :
6 sc in magic ring (6)
Round 3 :
(1 sc, 1 inc) x 6 (18)
Round 4 :
(2 sc, 1 inc) x 6 (24)
Round 5 :
1 sc in each st (24)
Round 6 :
(2 sc, 1 dec) x 6 (18)
Round 7 :
(1 sc, 1 dec) x 6 (12)
Info :
Leave a 20cm tail for sewing. Lightly stuff each spike so it retains a rounded cone shape; do not overfill or it will flatten when sewn
Spike Size B (mid spikes, make 4) Round 1 :
6 sc in magic ring (6)
Round 3 :
(1 sc, 1 inc) x 6 (18)
Round 4 :
1 sc in each st (18)
Round 5 :
(1 sc, 1 dec) x 6 (12)
Info :
Alternate colors for some spikes if you want a two-tone effect as seen in photos; carry a second color or join with a slip stitch for a clean color break
Spike Size C (back-most, make 2) Round 1 :
6 sc in magic ring (6)
Round 3 :
1 sc in each st (12)
Round 4 :
(1 sc, 1 dec) x 4 (8)
Round 5 :
8 dec into 4 dec pairs - finish small cone (4)
Info :
Make varying sizes so the dorsal line looks organic. Pin spikes along the center back from forehead to tail joining points before sewing to check spacing
— Body :
Round 1 :
6 sc in magic ring (6)
Round 3 :
(1 sc, 1 inc) x 6 (18)
Round 4 :
(2 sc, 1 inc) x 6 (24)
Round 5 :
(3 sc, 1 inc) x 6 (30)
Round 6 :
(4 sc, 1 inc) x 6 (36)
Round 7 :
(5 sc, 1 inc) x 6 (42)
Round 8 :
(6 sc, 1 inc) x 6 (48)
Round 9 :
(7 sc, 1 inc) x 6 (54)
Round 10-12 :
1 sc in each st (54)
Info :
Switch to cream yarn at Round 13 for belly panel (see belly section) or work belly as separate panel sewn in later. If changing color, carry yarn inside to avoid bulky joins
Round 13 :
1 sc in each st (54) - change to cream in the first stitch of the round
Round 14-18 :
1 sc in each st (54)
Info :
Begin adding slight decreases on back rounds to shape the seated belly and provide a natural curve for the hips. Keep body relatively soft so the head sits well
Round 19 :
(7 sc, 1 dec) x 6 (48)
Round 20 :
1 sc in each st (48)
Round 21 :
(6 sc, 1 dec) x 6 (42)
Round 22 :
1 sc in each st (42)
Round 23 :
(5 sc, 1 dec) x 6 (36)
Info :
Stuff the body moderately: firmly at the base for seating stability and looser in upper belly for a squishy feel. Stop stuffing before closure to allow head insertion
Round 24 :
1 sc in each st (36)
Round 25 :
(4 sc, 1 dec) x 6 (30)
Round 26 :
(3 sc, 1 dec) x 6 (24)
Round 27 :
(2 sc, 1 dec) x 6 (18)
Round 28 :
(1 sc, 1 dec) x 6 (12)
Round 29 :
6 dec (6) - leave a long tail for sewing to head
Info :
Do not fully close the body here — leave opening large enough to insert the neck area or sew head-on. Fasten off with long tail or use mattress stitch to join neatly
— Belly Panel (Cream) :
Round 1 :
6 sc in magic ring (6)
Round 3 :
(1 sc, 1 inc) x 6 (18)
Round 4 :
(2 sc, 1 inc) x 6 (24)
Round 5-8 :
1 sc in each st (24)
Info :
Work belly panel slightly oval by making 2 extra stitches on two opposite rounds if you prefer an elongated belly. Block or stretch slightly and pin panel to body to check fit
Round 9 :
1 sc in each st (24) - fasten off leaving long tail for sewing
Info :
Sew belly panel to cream rounds of body centered on front belly. Use long tail and ladder stitch for an invisible join; ensure panel edges align with body rounds 13-18 described above
— Arms (Make 2) :
Round 1 :
6 sc in magic ring (6)
Round 3 :
(1 sc, 1 inc) x 6 (18)
Round 4-6 :
1 sc in each st (18)
Info :
Work arm tip in contrast rose color for paw pads by joining rose at round 7. Keep changes neat by fastening off cream and starting rose with a slip stitch
Round 7 :
Change to rose: 1 sc in each st (18)
Round 8 :
(3 sc, 1 dec) x 4 + (2 sc) (14) - shape wrist
Round 9-12 :
1 sc in each st (14)
Info :
Stuff the hand portion firmly. For a soft bendable arm consider inserting thin wire down the center before stuffing, securing ends by wrapping with yarn
Round 13 :
(2 sc, 1 dec) x 4 + (2 sc) (10)
Round 14-16 :
1 sc in each st (10)
Round 17 :
(1 sc, 1 dec) x 2 + (2 sc) (6)
Round 18 :
6 sc - fasten off leaving long tail for sewing
Info :
Sew arms to body at side seams on rounds 18-20 of body. Use mattress or whip stitch and make small reinforcing stitches through body rounds to anchor arms securely
— Legs (Make 2) :
Round 1 :
6 sc in magic ring (6)
Round 3 :
(1 sc, 1 inc) x 6 (18)
Round 4 :
(2 sc, 1 inc) x 6 (24)
Round 5 :
(3 sc, 1 inc) x 6 (30)
Round 6-8 :
1 sc in each st (30)
Info :
Change to rose for toe pad at Round 9 if you want colored paw pads. In the sample, small heart motifs are added to the front of foot later as appliques
Round 9 :
1 sc in each st (30)
Round 10 :
(4 sc, 1 dec) x 5 (25)
Round 11-14 :
1 sc in each st (25)
Round 15 :
(3 sc, 1 dec) x 5 (20)
Round 16 :
1 sc in each st (20)
Round 17 :
(2 sc, 1 dec) x 5 (15)
Round 18 :
1 sc in each st (15)
Round 19 :
(1 sc, 1 dec) x 5 (10)
Round 20 :
10 sc - finish stuffing foot firmly for good base stability
Round 21 :
Decreasing if necessary to 8 sc then fasten off leaving long tail for sewing (8)
Info :
Sew legs to bottom sides of body so the dragon can sit. Space legs evenly and use extra whip stitches through body rounds to secure them
— Tail :
Round 1 :
6 sc in magic ring (6)
Round 3 :
1 sc in each st (12)
Round 4 :
(2 sc, 1 inc) x 4 (16)
Round 5-8 :
1 sc in each st (16)
Round 9 :
(3 sc, 1 dec) x 4 (12)
Round 10-12 :
1 sc in each st (12)
Round 13 :
(2 sc, 1 dec) x 4 (8)
Round 14 :
1 sc in each st (8)
Round 15 :
Attach rose color now and make 1 sc in each st (8)
Round 16 :
(1 sc, 1 dec) x 2 (6)
Info :
Do not stuff tail too firmly so it remains slightly flexible. Leave a long tail to sew the heart tip on. Add dorsal spikes along tail by sewing small spikes between rounds 6-14
— Heart Tail Tip :
Round 1 :
4 sc in magic ring (4)
Round 3 :
(1 sc, 1 inc) x 4 (12)
Round 4 :
1 sc in each st (12)
Round 5 :
(2 sc, 1 dec) x 3 + (3 sc) (9)
Round 6 :
1 sc in each st (9)
Round 7 :
Finish shaping the two lobes: work short separate pieces (make 2 small rounds with 6 sc base each and flatten) then sew both onto the main heart base to create a heart silhouette
Info :
Sew the heart securely to tail end; pad heart lightly so it keeps a rounded look. Use extra stitches through the tail end to anchor firmly if toy will be handled often
— Wing (Make 2) :
Round 1 :
6 sc in magic ring with cream (6)
Round 3 :
(1 sc, 1 inc) x 6 (18)
Round 4 :
1 sc in each st (18)
Round 5 :
(2 sc, 1 inc) x 6 (24)
Round 6 :
1 sc in each st (24)
Round 7 :
Change to rose trim: 1 sc in each st (24)
Round 8 :
Work scalloped edge: *skip next st, 5 dc in next st, skip next st, sl st in next* repeat around to make 6 scallops total - finish with sl st join
Info :
Flatten wing and shape scallops so they look like the soft scalloped membrane in the photo. Sew wings to body at upper back area between rounds 12-16. Use pins to match wing angle on both sides
Round 9 :
Fasten off leaving long tail for sewing; weave in ends securely
— Foot & Body Hearts / Spots (Make several) :
Heart Applique Round 1 :
6 sc in magic ring (6)
Round 3 :
(1 sc, 1 inc) x 6 (18) - shape heart lobes by flattening and sewing small seam to create indentation
Info :
Sew small hearts to front of feet and body as decoration. For multiple round spots, simply embroider circles or crochet tiny 6-12 st rounds and sew on
— Finishing Touches & Embroidery :
Info :
Embroider nostrils with two small satin-stitched dots centered on the muzzle. Add blush with pastel or fabric-safe chalk to cheeks under eyes. Add a few decorative surface slip stitches to accent the belly seam if desired
Info :
Weave in all remaining ends through several stitches and trim close. Use a small amount of fabric glue on safety eye washers for extra security if making for a child
Info :
Pin all pieces in place before sewing: head to body, arms and legs to sides, wings to upper back, dorsal spikes along center back, and heart to tail. Double-check symmetry and spacing visually and with a ruler if needed
Completing this sweet blush dragon is such a treat — each little spike and heart brings the character to life! The textures from scalloped wings and round spikes make it fun to assemble, and the pastel palette reads warm and gentle. Enjoy the slow progress as parts come together into a plush companion you will be proud of. Share your finished dragon and celebrate every stitched detail! 🧶💕