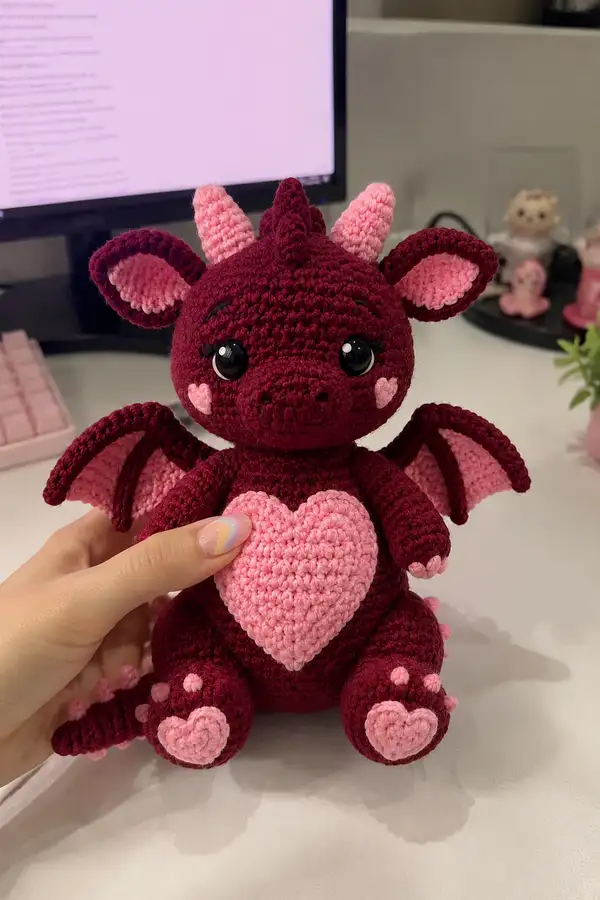
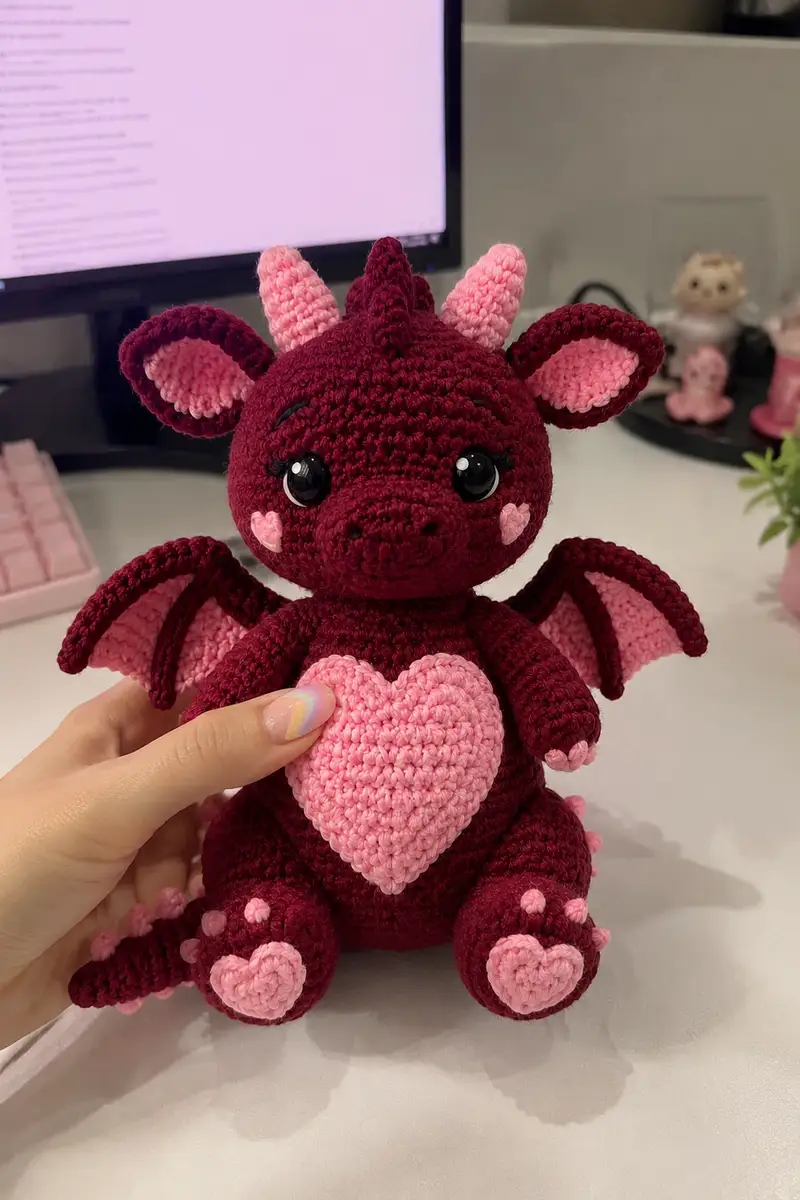
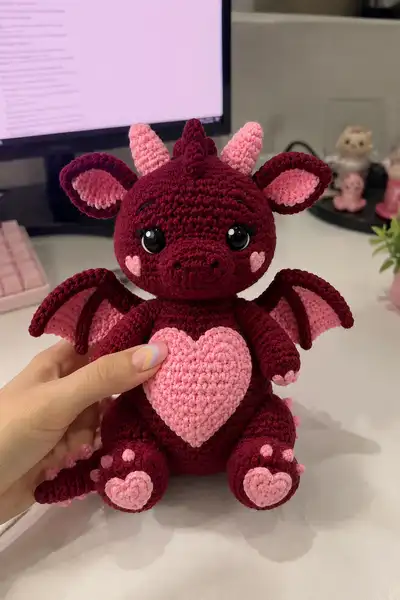
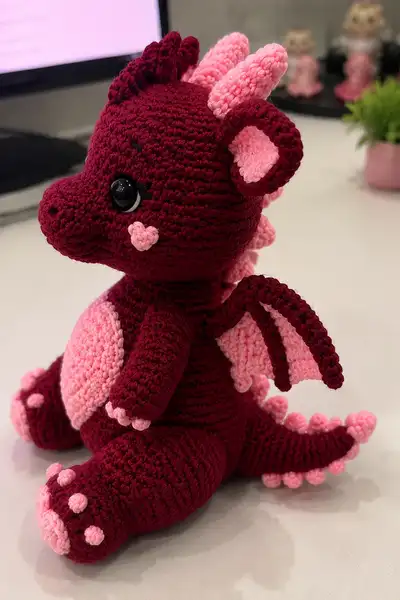
Create an enchanting Big Burgundy Sweetheart Dragon with a pale pink heart belly and charming heart-shaped paw pads. This plush amigurumi features a rounded snout, expressive safety eyes, inner-ear contrast, double-tone horns and dorsal spikes, delicate wings with pink membranes, and a cuddly, weighted body for a seated pose. Perfect as a heartfelt gift or display piece, the pattern carefully guides you through detailed shaping, color changes, and assembly for a polished finish.
Progress Tracker
0% Complete
— Head :
Round 1 :
6 sc in magic ring (6)
Round 3 :
(1 sc, 1 inc) x 6 (18)
Round 4 :
(2 sc, 1 inc) x 6 (24)
Round 5 :
(3 sc, 1 inc) x 6 (30)
Round 6 :
(4 sc, 1 inc) x 6 (36)
Round 7 :
(5 sc, 1 inc) x 6 (42)
Round 8 :
(6 sc, 1 inc) x 6 (48)
Round 9-20 :
1 sc in each st (48)
Info :
Place safety eyes between rounds 13-15, approximately 9-11 stitches apart (adjust for expression). Mark the first stitch of each round with a stitch marker. If embroidering eyelids, note placement now.
Round 21 :
(6 sc, 1 dec) x 6 (42)
Round 22 :
(5 sc, 1 dec) x 6 (36)
Round 23 :
(4 sc, 1 dec) x 6 (30)
Info :
Begin stuffing the head moderately at round 23. Add fiberfill in small amounts and shape with your fingers as you go so the snout and cheeks form smoothly.
Round 24 :
(3 sc, 1 dec) x 6 (24)
Round 25 :
(2 sc, 1 dec) x 6 (18)
Round 26 :
(1 sc, 1 dec) x 6 (12)
Info :
Do NOT close completely. Leave the last round open to form the neck tube to attach to the body; fasten off leaving a long tail for sewing later if you prefer to close after joining.
Round 28 :
Join yarn and work 1 sc in each st around to form a short neck tube (6)
Round 29 :
1 sc in each st (6)
Round 30 :
1 sc in each st (6)
Round 31 :
1 sc in each st (6)
Round 32 :
1 sc in each st (6)
Round 33 :
(1 sc, 1 inc) x 3 (9)
Round 34 :
1 sc in each st (9)
Round 35 :
Fasten off leaving long tail for sewing to body or for continuing when joined; weave in or leave tail for final finishing.
Info :
Embroider nostrils and small mouth before final closing if you prefer to work on facial details flat. Use two small French knots or 3-4 backstitches for nostrils. Add tiny heart-shaped cheeks (pink) using a puffy nub or small sewn heart applique placed under the eyes.
— Snout / Muzzle :
Round 1 :
6 sc in magic ring (6)
Round 3 :
(1 sc, 1 inc) x 6 (18)
Round 4 :
1 sc in each st (18)
Round 5 :
(2 sc, 1 inc) x 6 (24)
Round 6-8 :
1 sc in each st (24)
Round 9 :
(2 sc, 1 dec) x 6 (18)
Round 10 :
(1 sc, 1 dec) x 6 (12)
Info :
Stuff snout lightly so it keeps shape but remains soft; whip stitch snout onto the head centered on rounds 10-12 of the head (approximately). Use pins to place before sewing to obtain the desired snout tilt.
— Body :
Round 1 :
6 sc in magic ring (6)
Round 3 :
(1 sc, 1 inc) x 6 (18)
Round 4 :
(2 sc, 1 inc) x 6 (24)
Round 5 :
(3 sc, 1 inc) x 6 (30)
Round 6 :
(4 sc, 1 inc) x 6 (36)
Round 7 :
(5 sc, 1 inc) x 6 (42)
Round 8 :
(6 sc, 1 inc) x 6 (48)
Round 9-14 :
1 sc in each st (48)
Info :
If adding the belly heart applique later, change to pale pink yarn for the next few rounds to create a slightly recessed area for better attachment; otherwise continue in burgundy. Use BLO for a small ridge if you want a 'belt' effect where the head meets the body.
Round 15 :
(6 sc, 1 dec) x 6 (42)
Round 16 :
(5 sc, 1 dec) x 6 (36)
Round 17 :
(4 sc, 1 dec) x 6 (30)
Info :
Begin stuffing body moderately at round 17. Add more stuffing as you work upward to keep the top firm for head attachment, but keep lower belly softer to allow the dragon to sit. Use small pieces of stuffing to avoid lumps.
Round 18 :
1 sc in each st (30)
Round 19 :
1 sc in each st (30)
Round 20 :
(2 sc, 1 inc) x 10 (40)
Round 21-24 :
1 sc in each st (40)
Info :
Form a seated base by adding a slight increase region and then stuffing firmly for stability. The increases in round 20 broaden hips for the seated posture.
Round 25 :
(5 sc, 1 dec) x 6 (36)
Round 26 :
(4 sc, 1 dec) x 6 (30)
Round 27 :
(3 sc, 1 dec) x 6 (24)
Round 28 :
(2 sc, 1 dec) x 6 (18)
Round 29 :
(1 sc, 1 dec) x 6 (12)
Info :
Do NOT close the body completely. Keep live stitches or leave a long tail for sewing. Attach the head by aligning the neck tube stitches and whip-stitching around to create a seamless join. If you prefer, you may crochet the head-to-body join by slip stitching through both pieces before sewing to tighten the fit.
— Arms (Make 2) :
Round 1 :
6 sc in magic ring (6)
Round 3 :
(1 sc, 1 inc) x 6 (18)
Round 4-6 :
1 sc in each st (18)
Info :
Work additional rounds for the palm if you want the hands to be slightly flattened. For this dragon, keep cylindrical arms that taper into the shoulder when sewn in place.
Round 7 :
(2 sc, 1 dec) x 6 (12)
Round 8-12 :
1 sc in each st (12)
Round 9 :
Change to pale pink for the finger tips: 1 sc in each st (12)
Round 13 :
Switch back to burgundy: 1 sc in each st (12)
Round 14 :
(3 sc, 1 inc) x 3 (15)
Round 15-18 :
1 sc in each st (15)
Round 19 :
(2 sc, 1 dec) x 3 (12)
Round 20 :
Fasten off leaving long tail for sewing; stuff hand firmly but leave shoulder end open for attaching to body.
Info :
Before sewing, arrange arm angle by pinning in place to rounds 14-16 of the body. Sew with ladder stitch to secure. Optionally insert a thin wire for posing before finishing stuffing, ensuring wire ends are wrapped in yarn to avoid poking out.
— Legs (Make 2) :
Round 1 :
6 sc in magic ring (6)
Round 3 :
(1 sc, 1 inc) x 6 (18)
Round 4 :
(2 sc, 1 inc) x 6 (24)
Round 5-8 :
1 sc in each st (24)
Info :
Form the foot by working a block of rounds to create a flat base. You can flatten the foot slightly later when sewing to the body for a stable seated posture.
Round 9 :
(2 sc, 1 dec) x 6 (18)
Round 10-14 :
1 sc in each st (18)
Round 11 :
Change to pale pink for paw pad: 1 sc in each st (18)
Round 15 :
Switch back to burgundy and work (1 sc, 1 dec) x 6 (12)
Round 16-20 :
1 sc in each st (12)
Round 21 :
(1 sc, 1 dec) x 4 then 1 sc x 4 (8 + 4 = 12) adjust to shape (12)
Round 22 :
Fasten off leaving long tail for sewing; stuff foot firmly and shape toes with stuffing. Attach small pale pink bobbles for toes (see paw details section)
Info :
Position legs at the lower body rounds (approx rounds 20-24 of the body) and sew through several rounds to secure. Make sure legs are spaced evenly so the dragon sits upright without tipping.
— Ears (Make 2) :
Round 1 :
6 sc in magic ring (6) - inner ear in pale pink
Round 3 :
(1 sc, 1 inc) x 6 (18)
Round 4 :
1 sc in each st (18)
Info :
Switch to burgundy and work the outer ear as a separate round set to form a border around the pink inner ear for a layered look. Pin inner ear to outer ear and slip stitch together or sew using whip stitch for a clean edge.
Round 5 :
Join burgundy around the pink ear and sc evenly around the perimeter to create outer ear (approx 24 sc) (24)
Round 6 :
1 sc in each st (24)
Round 7-8 :
Fold slightly and sl st a couple of stitches at the base to give ear a curved shape; fasten off leaving tail for sewing.
Info :
Sew ears to head around rounds 6-8, spaced roughly 10-12 stitches apart (center to center) and angled slightly forward for a friendly expression.
— Horns & Dorsal Spikes :
Large Horns (Make 2) Round 1 :
6 sc in magic ring (6) - pale pink
Round 3 :
(1 sc, 1 inc) x 3 (9)
Round 4-8 :
1 sc in each st (9)
Round 9 :
1 sc around decreasing once at the base to create a tapered end if desired; fasten off leaving tail for sewing.
Small Spike (Make 8-10) :
6 sc in magic ring, fasten off leaving tail for sewing (6) - make several in pale pink and burgundy alternation to line the head/neck and tail
Info :
Sew horns symmetrically on top of the head (one on each side) and sew dorsal spikes along the center of the head down to the tail in an alternating color sequence for visual contrast. Place the largest spikes near the neck decreasing towards the tail tip.
— Wings (Make 2) :
Outer Wing Frame Round 1 :
6 sc in magic ring (6) - burgundy
Round 3 :
(1 sc, 1 inc) x 6 (18)
Round 4 :
(2 sc, 1 inc) x 6 (24)
Round 5 :
Work in BLO for 1-2 rounds to create a ridge along the wing edge 1 sc BLO around (24)
Inner Membrane :
Using pale pink, join at wing edge and sc evenly across to form the inner membrane; shape a rounded triangle approx 20-22 sts wide and 6-8 rows high; fasten off leaving tail for sewing.
Info :
Sew inner membranes to outer frames, leaving the top edge flexible. Add an optional internal rib by sewing a line of backstitches or surface slip stitches to simulate wing fingers.
Round 6-10 :
Shape wing curve by reducing 2-4 stitches along inner arc across successive rounds and continue shaping until you reach desired wing span; fasten off leaving tail for sewing.
— Tail :
Round 1 :
6 sc in magic ring (6)
Round 3 :
(1 sc, 1 inc) x 3 (9)
Round 4-10 :
1 sc in each st (9)
Info :
For a tapered tail, begin decreasing after round 10 by doing (1 sc, 1 dec) x 3 to reduce to 6 sts and continue several rounds of 6 sc to the tip. Add pale pink bobble spikes along the top by sewing small 6-sc nubs (bobble clusters) every 3-4 rounds.
Round 11 :
(1 sc, 1 dec) x 3 (6)
Round 12-16 :
1 sc in each st (6)
Round 17 :
Fasten off leaving long tail for sewing; add pale pink bobble spikes by making 6 sc nubbles and sewing them along the tail top spaced evenly.
— Heart Belly Applique :
Round 1 :
Make a small heart: 6 sc in magic ring using pale pink (6)
Round 2 :
Work evenly in spirals adding increases to shape the heart lobes: 6 inc spaced to reach 12 (12)
Round 3 :
Shape the lobes and arch by working short rows and front loop shaping; typical instruction: 1 sc in next 6, (1 sc, 1 inc) x 3 on lobes then 1 sc across center. End with 1 sc around perimeter for neat edge. Final heart width approx 18-22 sts across (worked to fit belly).
Info :
Make two halves of the heart if needed and sew together to make a plump applique. Stuff lightly for a raised effect and sew to the body centered on the front upper belly between rounds 10-14 of the body.
— Paw Heart Pads & Toes :
Round 1 :
6 sc in magic ring pale pink (6)
Round 3 :
Arrange increases and short shaping to form small heart or oval pad (approx 12-16 sts) and fasten off leaving tail for sewing.
Info :
Sew a larger pale pink heart to the center of each foot and three small pale pink bobbles for the toes placed at the top of each foot. Secure firmly with extra stitches so they withstand play.
— Small Decorative Hearts (Cheeks) :
Round 1 :
6 sc in magic ring pale pink (6)
Round 2 :
6 inc or shape into a very small heart by stitching extra chains and sc; fasten off leaving tail for sewing.
Info :
Sew one little heart to each cheek under the eyes. Position symmetrically and tack in place with several stitches to hold shape.
— Assembly & Final Details :
Info :
Weave in all ends partially at this stage, but leave longer tails for final joining where specified. Pin all parts in position before sewing to ensure good balance and expression. Use ladder stitch to sew pieces for invisible seams and whip stitch for stronger attachments.
Eye Placement :
Before final sewing, insert safety eyes between head rounds 13-15. Lock washers should be firmly attached. If embroidering eye shine, use white embroidery floss and a small stitch.
Nose & Mouth Embroidery :
Use black yarn to embroider two small nostrils on the snout tip and a short curved mouth under the snout. Lightly stuff cheeks to make the smile curve naturally.
Info :
Attach wings centered on the upper back between rounds 8-12 and angle them slightly outward. Sew head to body using the neck tube stitches to create a hidden seam and maintain a firm joint. Attach arms to sides so the paws rest slightly on the belly heart for a 'hugging' look.
Tip :
After all pieces are attached, block lightly with a damp cloth (if yarn allows) and let dry to even out stitches. Use a small dab of craft glue behind safety eye washers for extra security when gifting to young children.
This Big Burgundy Sweetheart Dragon brings whimsical charm and cuddly personality to life with every stitch. From its sculpted snout to the heart-shaped belly and paw pads, each element is designed to be delightful and gift-ready. The layered colors and little bobble spikes add playful texture while the clear assembly instructions make finishing satisfying. Enjoy the process of assembling this sweet dragon and share the joy of handmade gifting! 🧶💖