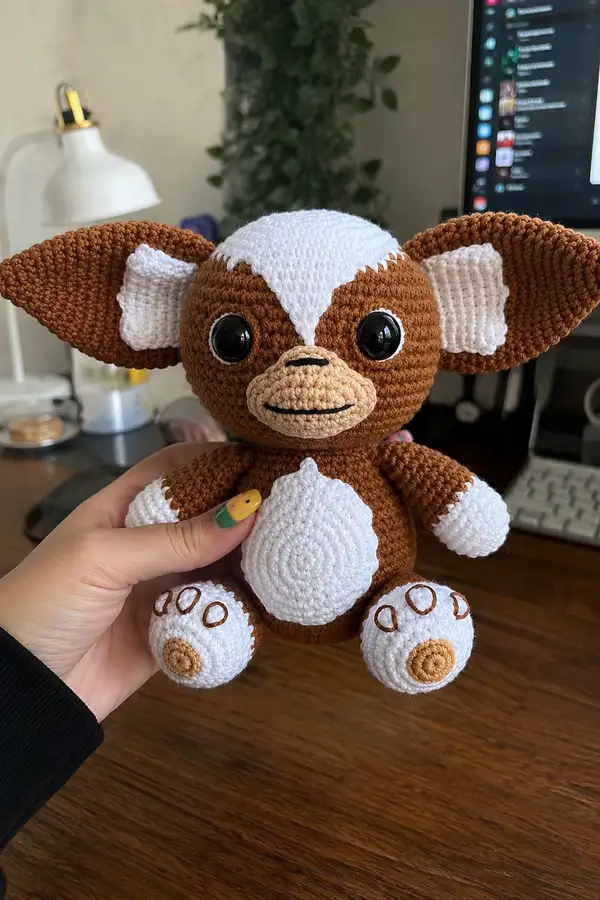
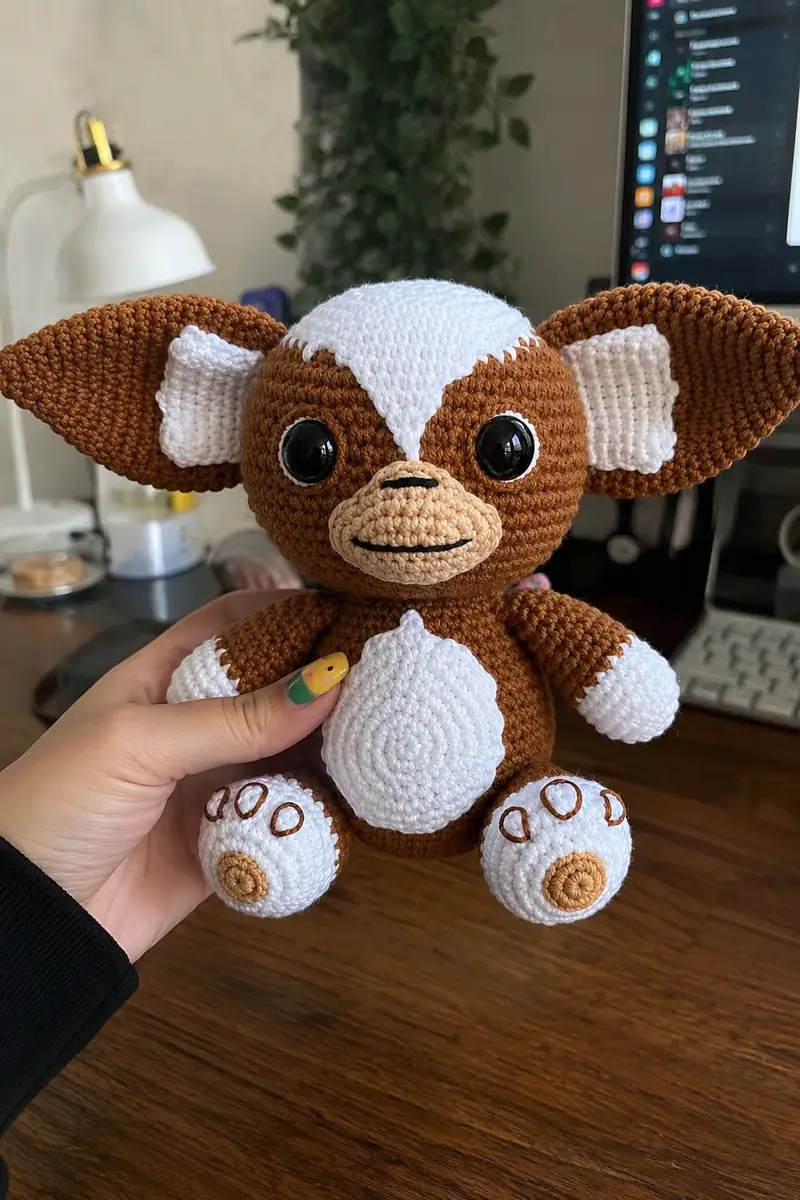
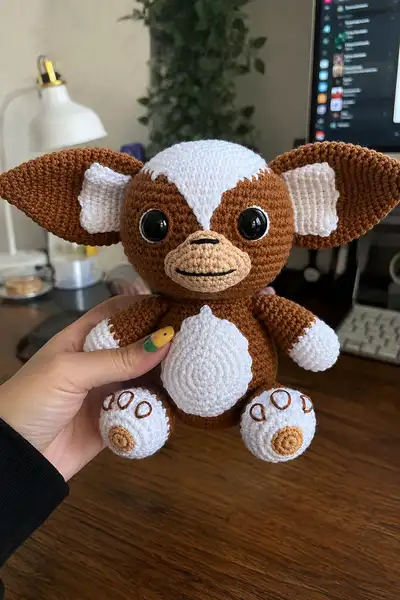
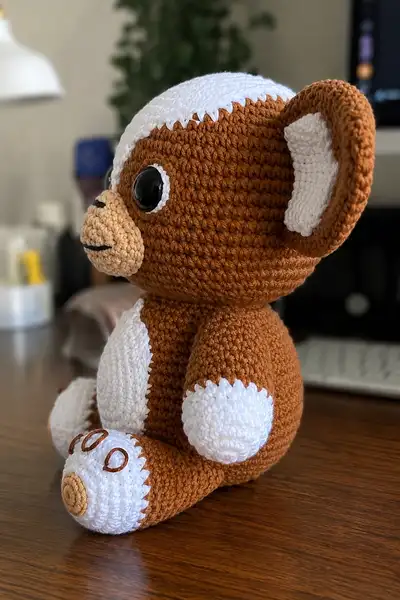
This cuddly big-eared creature features warm caramel-brown tones with crisp white patches on the head, belly, paws and inner ears. Large glossy safety eyes, a soft tan muzzle, and embroidered paw details give this plush lots of personality. The pattern uses simple amigurumi construction with clear sections for head, body, limbs and facial pieces so you can assemble a professional-looking plush toy.
Progress Tracker
0% Complete
— Head :
Round 1 :
6 sc in magic ring (6)
Round 3 :
(1 sc, inc) x 6 (18)
Round 4 :
(2 sc, inc) x 6 (24)
Round 5 :
(3 sc, inc) x 6 (30)
Round 6 :
(4 sc, inc) x 6 (36)
Round 7 :
(5 sc, inc) x 6 (42)
Round 8 :
(6 sc, inc) x 6 (48)
Info :
If you plan to add the white crown directly, prepare your white yarn now. I recommend crocheting the white crown as an inserted color from round 9 or crocheting a separate white panel and sewing it on later for a crisp edge.
Round 9 :
(7 sc, inc) x 6 (54)
Round 10-15 :
1 sc in each st (54) — work 6 rounds even to build head height (rounds 10,11,12,13,14,15)
Info :
Place safety eyes between rounds 13 and 14 with approximately 10-12 stitches between centers for the look in the photo. Mark the rightmost stitch as reference with a pin so both eyes match symmetrically.
Round 16 :
(7 sc, dec) x 6 (48)
Round 17 :
(6 sc, dec) x 6 (42)
Round 18 :
(5 sc, dec) x 6 (36)
Info :
Begin stuffing head firmly but not rigidly at this stage. Use small amounts of fiberfill and shape as you go. The head should be firm enough to hold the large eyes and muzzle attachment.
Round 19 :
(4 sc, dec) x 6 (30)
Round 20 :
(3 sc, dec) x 6 (24)
Round 21 :
(2 sc, dec) x 6 (18)
Round 22 :
(1 sc, dec) x 6 (12)
Info :
Fasten off leaving a long tail for sewing head to neck. If you are crocheting the head continuously into the neck/upper body instead of as separate pieces, stop decreasing at round 20 and prepare to join to the body. For this pattern we make head and body separate for easier assembly.
— White Crown (applique or joined color) :
Info :
Option A: Crochet crown as joined color rounds on the head. Option B (recommended for a neat jagged edge): Crochet a separate white panel and sew it centered across the top front of the head. The following is for a separate white panel that you will sew on.
Round 1 :
6 sc in magic ring (6)
Round 3 :
(1 sc, inc) x 6 (18)
Round 4 :
(2 sc, inc) x 6 (24)
Round 5 :
(3 sc, inc) x 6 (30)
Round 6 :
1 sc in each st (30)
Round 7 :
1 sc in each st (30)
Info :
Shape the bottom of the panel into a gentle triangle by removing a few stitches on the lower edge when sewing on — this mirrors the jagged white crown edge in the photo. Block the panel slightly flat to fit the curve of the head.
— Muzzle (Make 1) :
Round 1 :
6 sc in magic ring using light tan (6)
Round 3 :
(1 sc, inc) x 6 (18)
Round 4 :
1 sc in each st (18)
Round 5 :
(2 sc, dec) x 4, 2 sc (14)
Round 6 :
1 sc in each st (14)
Round 7 :
(1 sc, dec) x 4, 2 sc (10)
Round 8 :
1 sc in each st (10)
Round 9 :
Surface: Using black embroidery thread, stitch a small oval nose at the top center of the muzzle and a vertical mouth line that quickly flares to a short horizontal stitch for the smile. We will attach the muzzle centered between the eyes at approximately round 13 of the head.
Info :
Stuff muzzle lightly but firmly so it keeps a rounded pillow shape. Leave a long tail for sewing to the head. Use pins to position before stitching — the muzzle should sit directly under the safety eyes, centered about 6-8 stitches beneath the eye line.
— Body :
Round 1 :
6 sc in magic ring (6)
Round 3 :
(1 sc, inc) x 6 (18)
Round 4 :
(2 sc, inc) x 6 (24)
Round 5 :
(3 sc, inc) x 6 (30)
Round 6 :
(4 sc, inc) x 6 (36)
Round 7 :
(5 sc, inc) x 6 (42)
Round 8 :
(6 sc, inc) x 6 (48)
Round 9-14 :
1 sc in each st (48) — work 6 rounds even to build the torso height and girth
Info :
If adding the white belly panel, prepare it now (instructions below). To create a clothing-like ridge around the belly, work 1 round in BLO before the belly edge if desired.
Round 15 :
(6 sc, dec) x 6 (42)
Round 16 :
(5 sc, dec) x 6 (36)
Round 17 :
1 sc in each st (36)
Info :
Begin stuffing the body firmly, leaving room at the top for attaching the head. The body should be firmer near the base so the toy sits upright but not rock-hard.
Round 18 :
(4 sc, dec) x 6 (30)
Round 19 :
(3 sc, dec) x 6 (24)
Round 20 :
(2 sc, dec) x 6 (18)
Round 21 :
(1 sc, dec) x 6 (12)
Info :
Fasten off leaving a long tail for sewing to the head. If you prefer to create a neck join by reverse stitching a few rounds together, leave the top opening unclosed and use ladder stitch to join head and body for a snug, invisible seam.
— Belly Patch (applique) :
Round 1 :
6 sc in magic ring with white (6)
Round 3 :
(1 sc, inc) x 6 (18)
Round 4 :
(2 sc, inc) x 6 (24)
Round 5 :
(3 sc, inc) x 6 (30)
Round 6 :
(4 sc, inc) x 6 (36)
Round 7 :
1 sc in each st (36)
Info :
Starch or lightly steam-block the belly patch to create a flat oval. Center the patch on the front of the body and sew in place with matching white yarn using small, neat stitches around the edge. The patch in the photo is slightly oval and has a subtle ridged spiral made by working even rounds — use this approach for similar texture.
— Arms (Make 2) :
Round 1 :
6 sc in magic ring (6)
Round 3 :
(1 sc, inc) x 6 (18)
Round 4 :
1 sc in each st (18)
Info :
Switch to white yarn to work the paw tip as a separate section if you want a crisp color change. Alternatively crochet the arm entirely in brown then add the white paw tip as a sewn-on applique ring.
Round 5 :
Change to white: 1 sc in each st (18)
Round 6 :
1 sc in each st (18)
Round 7 :
1 sc in each st (18)
Info :
Stuff paw tip lightly but firmly — fingers are not individually defined so keep a small, compact fill. When stuffing, keep less filling in the upper arm to allow a natural flop to the limb.
Round 8 :
Change back to brown: 1 sc in each st (18)
Round 9-15 :
1 sc in each st (18) — work 7 rounds even to form upper arm
Round 16 :
(3 sc, dec) x 3 (15)
Round 17 :
1 sc in each st (15)
Round 18 :
1 sc in each st (15). Fasten off leaving long tail for sewing. Lightly stuff the arm so it sits nicely against the body when attached.
Info :
Sew arms to body at approximately rounds 10-12 of the body (counting from bottom up) so the paws sit just below the belly patch. Adjust placement slightly for a natural shoulder slope.
— Legs (Make 2) :
Round 1 :
6 sc in magic ring with white (6)
Round 3 :
(1 sc, inc) x 6 (18)
Round 4 :
1 sc in each st (18)
Round 5 :
Change to light tan center: 6 sc, join in tan and work a 6-sc round in the center for paw center (18 plus central patch). Alternatively create small tan applique and sew center after finishing white toe area.
Round 6 :
Change back to white: 1 sc in each st (18)
Round 7 :
1 sc in each st (18)
Info :
To get the three small toe outlines in brown as shown, embroider three small oval rings onto each white toe area after sewing the legs to the body. Use brown yarn and a yarn needle to stitch neat ovals.
Round 8 :
Change to brown: (1 sc, inc) x 6 (24)
Round 9-16 :
1 sc in each st (24) — work 8 rounds even to form the leg shaft
Round 17 :
(3 sc, dec) x 6 (18)
Round 18 :
1 sc in each st (18)
Round 19 :
(2 sc, dec) x 6 (12)
Round 20 :
1 sc in each st (12)
Round 21 :
(1 sc, dec) x 4 (8)
Round 22 :
8 sc (8). Fasten off leaving a long tail. Stuff foot firmly so it gives good base support. Sew legs to bottom of body evenly spaced for sitting position.
— Ears (Make 2 Outer) :
Round 1 :
6 sc in magic ring with brown (6)
Round 3 :
(1 sc, inc) x 6 (18)
Round 4 :
(2 sc, inc) x 6 (24)
Round 5 :
(3 sc, inc) x 6 (30)
Round 6 :
(4 sc, inc) x 6 (36)
Round 7-10 :
1 sc in each st (36) — work 4 rounds even to expand the ear plate
Info :
To create the curved ear shape you will shape along the inner edge by decreasing on a few stitches when sewing to the head. The ear is lightly stuffed along the outer curve only to keep it gently rounded but still floppy.
Round 11 :
(4 sc, dec) x 6 (30)
Round 12 :
(3 sc, dec) x 6 (24)
Round 13 :
1 sc in each st (24). Fasten off leaving long tail for sewing. Lightly stuff the outer rim with a small amount of fiberfill to give a nice lip to the ear.
— Ears Inner (Make 2) :
Round 1 :
6 sc in magic ring with white (6)
Round 3 :
(1 sc, inc) x 6 (18)
Round 4 :
(2 sc, inc) x 6 (24)
Round 5 :
1 sc in each st (24)
Round 6 :
1 sc in each st (24)
Info :
Sew inner ear panel centered inside outer ear and use small invisible stitches to join only at the seam allowance so inner white sits recessed as shown. This creates the prominent white inner ear shown in the photos.
Round 7 :
Fasten off leaving tail to hand-stitch to outer ear. Repeat for second ear.
— Paw Pads (Make 2 large pads for feet and 2 small centers) :
Large Pad Round 1 :
6 sc in magic ring with white (6)
Round 3 :
(1 sc, inc) x 6 (18)
Round 4 :
(2 sc, inc) x 6 (24)
Round 5 :
1 sc in each st (24)
Info :
Sew a tan small circle to the center of each white pad. Embroider three small brown ovals along the front edge of each foot using long stitches to create the toe rings as seen in the photo. Use matching brown yarn and stitch neatly, keeping loops small.
Small Center Round 1 :
6 sc in magic ring with tan (6)
Small Center Round 2 :
6 inc (12)
Small Center Round 3 :
1 sc in each st (12). Fasten off leaving tail to sew to center of large pad.
— Assembly :
Info :
Block and pin all appliques (white crown, belly patch, inner ears) in place before sewing. Use pins to ensure symmetry and check from multiple angles. Use matching thread or yarn to attach pieces with nearly invisible stitches.
Step 1 :
Attach muzzle to head centered between the eyes. Position muzzle so its top edge lines up about 6-8 stitches below the eye center (approx round 13). Sew with a whip stitch or ladder stitch and stuff as needed to maintain shape.
Step 2 :
Sew white crown applique to the top front of the head so the pointed bottom center falls between the eyes. Use small stitches and hide tails inside the head.
Step 3 :
Sew inner ear panels to outer ears then attach ears to the sides of the head at about round 6-8 on each side. Position ears slightly forward and down for the curious, alert look in the photo.
Step 4 :
Join head to body: line the head opening over the body opening and sew using a blanket or ladder stitch around the neck, adjusting stuffing so the head sits slightly forward. Make sure seams are tight and even.
Step 5 :
Sew arms to body at approximately rounds 10-12 of the body (from bottom) so that the paws sit below the belly patch. Use invisible stitching and reinforce with extra passes if the toy will be handled a lot.
Step 6 :
Attach legs evenly spaced at the base of the body so the toy sits flat. Sew both foot pads to the ends of the legs if you used appliques for toes.
Info :
Weave in all ends securely by threading them through several stitches inside each piece before trimming close. Add extra reinforcement to weight-bearing joins like legs with a few extra passes of yarn.
Finishing :
Using black embroidery thread, add the final mouth line on the muzzle and small oval outlines on the paw pads. Add a couple of safety stitches behind each eye if desired to keep them secure. Brush or lightly steam to remove any minor block lines and reshape ears if needed.
This delightful big-eared amigurumi brings together classic techniques and adorable character details to make a truly special handmade friend. The crisp white markings paired with warm brown tones create an eye-catching, cozy character you'll love to hold and display. Each round, stitch and sewn detail adds personality until your creation truly comes to life. 🧶 Share your finished friend with joy — it makes a perfect gift or a charming addition to your craft shelf! ✨