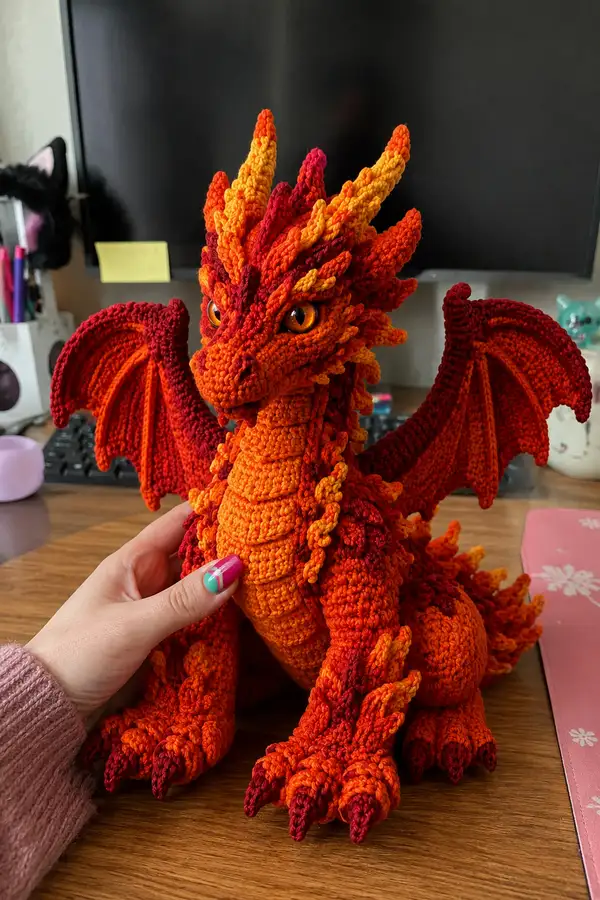
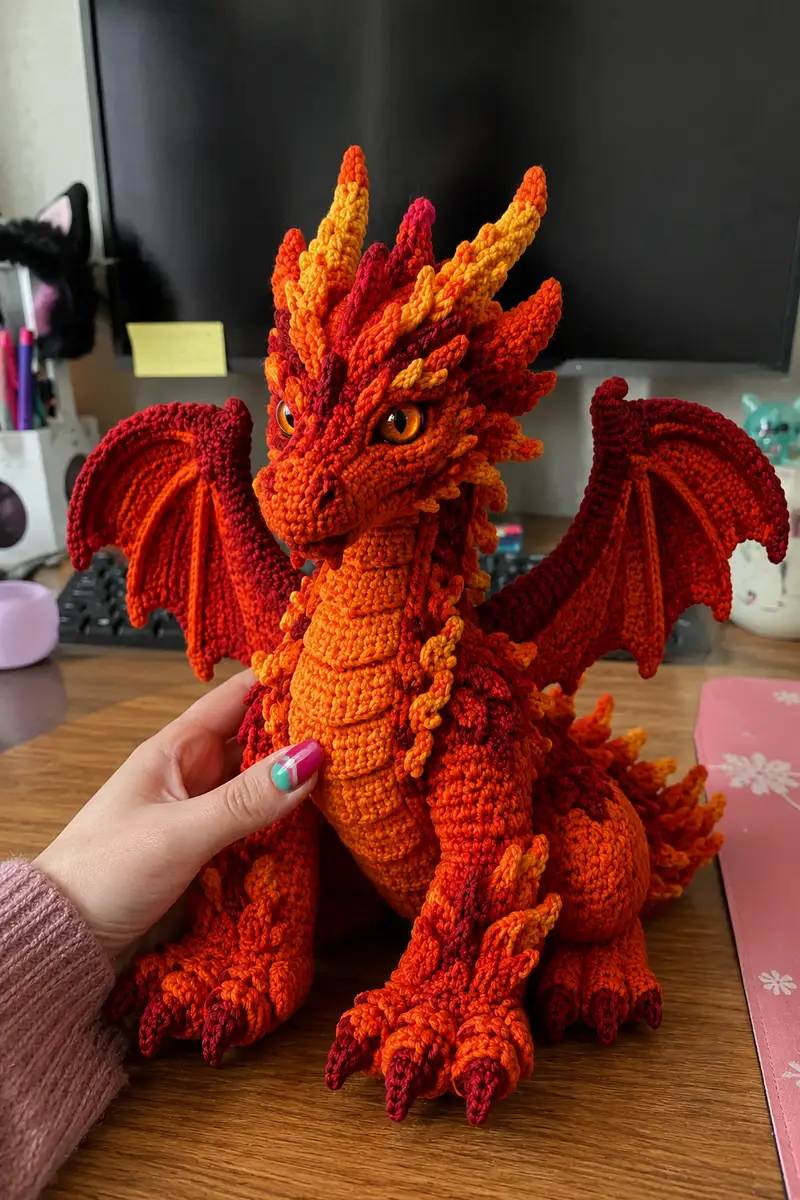
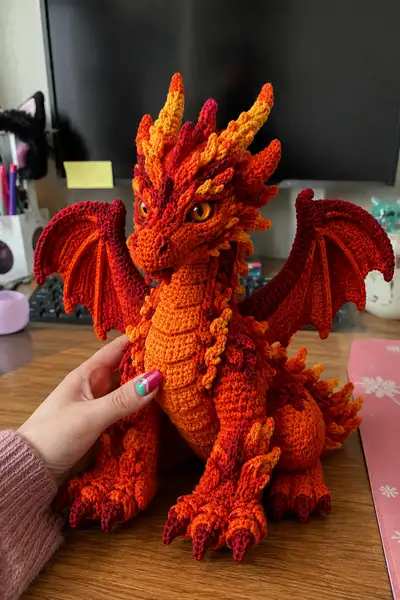
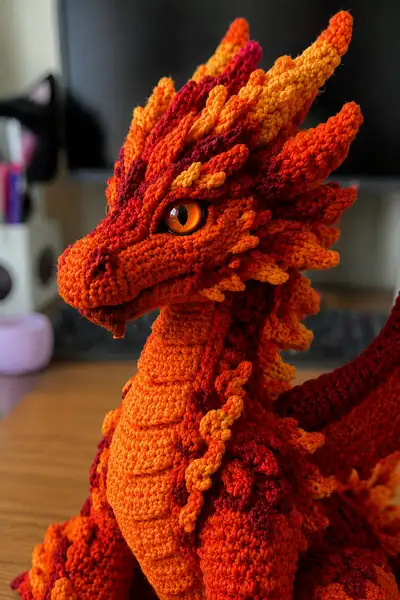
Create an eye-catching lava dragon with fiery orange, red and yellow scales and striking amber eyes. This detailed amigurumi pattern teaches sculpted shaping, layered scale texture, articulated wings and curled tail construction. The finished dragon is richly textured with layered spikes and expressive facial features—perfect for display or a dramatic handmade gift.
Progress Tracker
0% Complete
— Head :
Round 1 :
6 sc in magic ring (6)
Round 3 :
(1 sc, 1 inc) x 6 (18)
Round 4 :
(2 sc, 1 inc) x 6 (24)
Round 5 :
(3 sc, 1 inc) x 6 (30)
Round 6 :
(4 sc, 1 inc) x 6 (36)
Info :
Use a smaller hook or tighten your tension if you see gaps between stitches; this head is sculpted and needs a dense fabric. Keep a stitch marker at the first stitch of each round.
Round 7 :
(5 sc, 1 inc) x 6 (42)
Round 8 :
(6 sc, 1 inc) x 6 (48)
Round 9 :
(7 sc, 1 inc) x 6 (54)
Round 10 :
(8 sc, 1 inc) x 6 (60)
Round 11-14 :
1 sc in each st (60)
Info :
Place safety eyes between rounds 13 and 14 approximately 10-12 stitches apart (center-to-center) depending on desired expression. Use measuring and pin eyes to check symmetry before securing.
Round 15 :
(8 sc, 1 dec) x 6 (54)
Round 16 :
(7 sc, 1 dec) x 6 (48)
Round 17 :
(6 sc, 1 dec) x 6 (42)
Info :
Begin stuffing head firmly now. Add small amounts of stuffing at a time to avoid lumps; aim for a firm but yielding head to support facial shaping.
Round 18 :
(5 sc, 1 dec) x 6 (36)
Round 19 :
(4 sc, 1 dec) x 6 (30)
Round 20 :
(3 sc, 1 dec) x 6 (24)
Round 21 :
(2 sc, 1 dec) x 6 (18)
Round 22 :
(1 sc, 1 dec) x 6 (12)
Info :
Do not fasten off here if you plan to attach the snout as a separate piece; leave a long tail for sewing. Final facial sculpting is done by stitching and shaping the snout and eyelids into place.
— Snout / Muzzle :
Round 1 :
6 sc in magic ring (6)
Round 3 :
(1 sc, 1 inc) x 6 (18)
Round 4 :
(2 sc, 1 inc) x 6 (24)
Round 5 :
1 sc in each st (24)
Info :
Work the snout slightly elongated: continue even rounds until the snout measures about 2.5-3 cm tall at the widest yarn gauge before beginning decreases. Use stitch markers to identify the top center for shaping nostrils.
Round 6 :
(3 sc, 1 dec) x 6 (18)
Round 7 :
1 sc in each st (18)
Round 8 :
(2 sc, 1 dec) x 6 (12)
Round 9 :
1 sc in each st (12)
Round 10 :
(1 sc, 1 dec) x 4, 2 sc (8)
Round 11 :
1 sc in each st (8)
Info :
Create nostril shaping by embroidering two short vertical stitches at the front tip with burgundy or black yarn; place nostrils symmetrically one or two stitches apart near the tip.
Round 12 :
Increase along underside: ch1, turn, 8 sc along stitches to form lower lip and seam area (work even; do not join) (8)
Round 13 :
Fold snout lengthwise and sew slit closed, leave top slightly stuffed to form muzzle arch. Fasten off leaving long tail for sewing to head.
Info :
Pin snout into position on the head with the center of the snout aligning between the eyes. Use the long tail to stitch the snout to the head with whip stitch, aligning the nose tip and smoothing seam with gentle pulls.
— Eye Socket & Brow Details (Make 2) :
Round 1 :
6 sc in magic ring (6)
Round 3 :
1 sc in each st (12)
Round 4 :
Work 6 sc across the front row then 6 sc reduced on the back to create a slightly cupped eyelid (12)
Info :
Sew eyelid pieces just above and slightly overlapping the eye washer to create a hooded look. Pin carefully and check symmetry before final stitches.
Round 5 :
1 sc in each st (12)
Round 6 :
Fasten off leaving long tail for sewing; add a single sl st along upper rim for definition if desired
— Head Spikes and Mane (Make approx 40 varying sizes) :
Spike Small — Round 1 :
5 sc in magic ring (5)
Spike Small — Round 2 :
5 inc (10)
Spike Small — Round 3 :
(1 sc, 1 inc) x 5 (15)
Spike Small — Round 4 :
1 sc in each st (15)
Spike Small — Round 5 :
Work a tapered tip: (2 sc, 1 dec) x 3 (12)
Spike Small — Round 6 :
(1 sc, 1 dec) x 4 (8)
Spike Small — Round 7 :
Fasten off leaving long tail for sewing; shape by pulling through to create a pointed spike
Spike Medium — Round 1 :
6 sc in magic ring (6)
Spike Medium — Round 2 :
6 inc (12)
Spike Medium — Round 3 :
(1 sc, 1 inc) x 6 (18)
Spike Medium — Round 4 :
(2 sc, 1 inc) x 6 (24)
Spike Medium — Round 5 :
1 sc in each st (24)
Spike Medium — Round 6 :
(2 sc, 1 dec) x 6 (18)
Spike Medium — Round 7 :
(1 sc, 1 dec) x 6 (12)
Spike Medium — Round 8 :
Fasten off leaving tail for sewing
Info :
Make spikes in mixed colors: use deep red for inner ridge spikes, bright yellow for top tips, and fiery orange for base spikes. Vary length by changing how many even rounds you work before tapering.
— Neck (front plates & ringed collar) :
Round 1 :
6 sc in magic ring (6)
Round 3 :
(1 sc, 1 inc) x 6 (18)
Round 4 :
(2 sc, 1 inc) x 6 (24)
Round 5-8 :
1 sc in each st (24)
Info :
Neck is worked to create a cylinder that will be attached to both head and body. For the decorative belly plates, we will add ridged horizontal strips worked in BLO in later rounds.
Round 9 :
1 sc in each st BLO (24) — begin plate ridge base
Round 10 :
1 sc in each st (24)
Round 11 :
1 sc in next 3 sts, ch3, skip 3 sts, 1 sc in next 3 sts, ch3, skip 3 sts, 1 sc in remaining sts (24) — create small loops to anchor plates
Round 12 :
1 sc in each st (24)
Info :
To create distinct belly plates: with the same yarn, work short curved plates separately (see 'Belly Plates' section) and sew them across the front of the neck lining up with BLO ridges here.
Round 13-20 :
1 sc in each st (24) — continue neck length to about 6-7 cm depending on gauge
Info :
Stuff the neck lightly—firmer at the base, lighter near the head so the head can tilt. Insert a short length of wire for internal support only if you plan to position the head forward; wrap wire ends with fiberfill and secure.
— Belly Plates (Make 8-10) :
Plate — Round 1 :
6 sc in magic ring (6)
Plate — Round 2 :
6 inc (12)
Plate — Round 3 :
1 sc in next 2 sts, 1 hdc in next 2 sts, 1 dc in last 2 sts to create curved plate (12)
Plate — Round 4 :
Work 1 sc in each st around, sl st to base and fasten off leaving tail for sewing
Info :
Sew plates in horizontal rows centered on the front of the neck and body. Overlap slightly to create the layered armored look; use the BLO ridges on the neck as guides for spacing.
— Body :
Round 1 :
6 sc in magic ring (6)
Round 3 :
(1 sc, 1 inc) x 6 (18)
Round 4 :
(2 sc, 1 inc) x 6 (24)
Round 5 :
(3 sc, 1 inc) x 6 (30)
Round 6 :
(4 sc, 1 inc) x 6 (36)
Round 7 :
(5 sc, 1 inc) x 6 (42)
Round 8 :
(6 sc, 1 inc) x 6 (48)
Round 9-12 :
1 sc in each st (48)
Info :
This body is broad and should feel heavy enough to support the dragon sitting; use slightly firmer stuffing in the bottom to keep it upright. If you want a more stable base, stuff tightly and add a small weight (bag of beads) inside the bottom sphere, secured in a fabric zip bag.
Round 13 :
(6 sc, 1 dec) x 6 (42)
Round 14 :
(5 sc, 1 dec) x 6 (36)
Round 15 :
(4 sc, 1 dec) x 6 (30)
Round 16 :
1 sc in each st (30)
Round 17-20 :
1 sc in each st (30) — continue body height until you reach about 8-9 cm from base
Round 21 :
(3 sc, 1 dec) x 6 (24)
Round 22 :
(2 sc, 1 dec) x 6 (18)
Round 23 :
(1 sc, 1 dec) x 6 (12)
Round 24 :
6 dec (6) — leave an opening for attaching neck and tail; do not fasten off yet
Info :
Attach the neck to the body by lining up the neck opening with the neck hole on the body. Stuff the body firmly before final closure. Leave a 2-3 cm hole for inserting the tail core later.
— Arms (Make 2) :
Round 1 :
6 sc in magic ring (6)
Round 3 :
(1 sc, 1 inc) x 6 (18)
Round 4-6 :
1 sc in each st (18) — form hand base
Info :
Stuff the paw portion firmly now so the fingers keep a rounded shape. If using poseable wire, insert a short wire core in the arm at this stage and wrap ends to avoid poking through stitches.
Round 7 :
(2 sc, 1 dec) x 6 (12)
Round 8-12 :
1 sc in each st (12) — work wrist and lower arm length
Round 13 :
(1 sc, 1 dec) x 4 (8)
Round 14-16 :
1 sc in each st (8) — upper arm
Round 17 :
Increase at shoulder: (1 sc, 1 inc, 2 sc) x 2 (10)
Round 18 :
Fasten off leaving long tail for sewing to body
Info :
Sew arms onto the body at rounds 12-14 on the body so they sit slightly forward. Use mattress or ladder stitch around the arm opening for an invisible seam.
— Hand Claws (Make 6 per paw) :
Round 1 :
4 sc in magic ring (4)
Round 3 :
1 sc in each st (8)
Round 4 :
(1 sc, 1 dec) x 2 (6)
Round 5 :
(1 sc, 1 dec) x 1, 2 sc (4)
Round 6 :
Fasten off leaving tail for sewing. Make claws in dark burgundy for contrast. Sew three front claws and three rear claws to each paw as in reference photo.
— Legs (Make 2) :
Round 1 :
6 sc in magic ring (6)
Round 3 :
(1 sc, 1 inc) x 6 (18)
Round 4 :
(2 sc, 1 inc) x 6 (24)
Round 5-7 :
1 sc in each st (24) — build foot base
Round 8 :
(2 sc, 1 dec) x 6 (18)
Round 9-12 :
1 sc in each st (18) — ankle
Round 13 :
(1 sc, 1 inc) x 6 (24) — widen for calf
Round 14-18 :
1 sc in each st (24)
Round 19 :
(3 sc, 1 dec) x 6 (18)
Round 20 :
(2 sc, 1 dec) x 6 (12)
Round 21 :
(1 sc, 1 dec) x 4 (8)
Round 22 :
Fasten off leaving long tail for sewing to body; stuff foot firmly with extra fill in sole for stability
Info :
Position legs symmetrically so the dragon sits balanced; sew through multiple rounds of body for security. Add three claw motifs to the front of each foot following claw instructions above.
— Wings (Make 2 main wings + 2 inner supports) :
Wing Support (internal) — Round 1 :
6 sc in magic ring (6)
Wing Support — Round 2 :
6 inc (12)
Wing Support — Round 3-6 :
1 sc in each st (12) — create a slim tube to slide wire through if making poseable wings
Info :
For poseable wings: insert thin wire along the central support tube before stuffing. Ensure wire ends are bent and wrapped with yarn so they cannot poke through stitches.
Wing Base — Round 1 :
8 sc in magic ring (8)
Wing Base — Round 2 :
8 inc (16)
Wing Base — Round 3 :
(1 sc, 1 inc) x 8 (24)
Wing Base — Round 4 :
(2 sc, 1 inc) x 8 (32)
Wing Base — Round 5-8 :
1 sc in each st (32) — shape top ridge
Info :
Switch to deep red at Round 6 if you want a contrasting wing edge. Work the membrane separately in rows joined to this base later.
Wing Membrane — Row 1 :
Ch 18, sc in 2nd ch from hook and across (17)
Wing Membrane — Row 2 :
Ch1, turn, 1 sc in each st (17)
Wing Membrane — Row 3 :
Ch1, turn, (1 sc, 1 inc) across to widen wingspan to 22 sts
Wing Membrane — Row 4-8 :
Ch1, turn, 1 sc in each st; with each row inching outward to create triangular membrane shape until width matches wing base
Wing Membrane — Finishing :
Join membrane to wing base by single crocheting along edge; add 2-3 rows of sc around outer wing rim to create a thick edge and then add small spike motifs along the top ridge for decoration
Info :
Pin wings to the body at the position shown (just above midline of back). Sew deeply through rounds 10-16 of body to ensure wings stay attached under play. Reinforce base with extra stitches at four anchor points.
— Tail :
Round 1 :
6 sc in magic ring (6)
Round 3 :
(1 sc, 1 inc) x 6 (18)
Round 4-6 :
1 sc in each st (18)
Round 7 :
(2 sc, 1 dec) x 6 (12)
Round 8-10 :
1 sc in each st (12)
Round 11 :
(1 sc, 1 dec) x 4 (8)
Round 12-15 :
1 sc in each st (8) — tapering tail to desired length
Round 16 :
(1 sc, 1 dec) x 2 (6)
Round 17-20 :
1 sc in each st (6) — finish small tip, fasten off leaving long tail for sewing. Add internal wire through tail if you want it poseable, embedding wire through the body opening and securing it before final closure.
Info :
Sew spike motifs along the top of the tail from base to tip varying sizes to create flowing flame ridge. For dramatic contrast, use yellow tips on the highest spikes.
— Tail Spikes (Make 12-16) :
Round 1 :
5 sc in magic ring (5)
Round 3 :
1 sc in each st (10)
Round 4 :
(2 sc, 1 dec) x 2, 2 sc (8)
Round 5 :
Fasten off leaving tail for sewing; shape to a point and secure
Info :
Stagger tail spikes: larger ones at the base, smaller near the tip. Use deep red for inner ridge and bright yellow for tips to simulate molten lava flicker.
— Decorative Scale Tufts (Make many) :
Tuft — Round 1 :
4 sc in magic ring (4)
Tuft — Round 2 :
4 inc (8)
Tuft — Round 3 :
1 sc in each st (8)
Tuft — Round 4 :
Fasten off, leave long tail for sewing. Make clusters in orange and red to glue or sew around shoulders and hips for texture.
Info :
These tufts are quick and add volume to the silhouette; attach densely around the back of the shoulders and along the spine where you want more texture.
— Assembly & Closing :
Info :
Before final sewing of the body opening, place tail core (wire or extra stuffing bag) into the hole and position so tail exits straight. Attach the neck and head: pin carefully and check orientation of facial features before stitching.
Info :
Use the long tails left on major components to sew them together with an invisible ladder stitch. Reinforce high-stress areas (wing base, leg joins) with extra passes and a drop of fabric glue inside joins for added stability if desired.
Info :
Attach spikes and tufts after the major shapes are sewn. Lay out each spike row, pin each spike and then sew from the base of the spike into the body, knotting securely and weaving in tails.
Info :
For final detailing, use surface crochet or embroidery around the eyes to emphasize brow lines, and add a few stitched vertical lines on the neck plates to suggest segmentation.
This big fiery lava dragon is a sculptural celebration of color and texture—handmade magic you can display with pride! Its layered spikes, amber glass eyes and dramatic wing silhouette make it a standout piece. Each section stitches together to form a character full of personality and warmth. 🐉🔥 I hope you enjoy every stitch and reveal—share your finished dragon and spread the sparkle! ✨