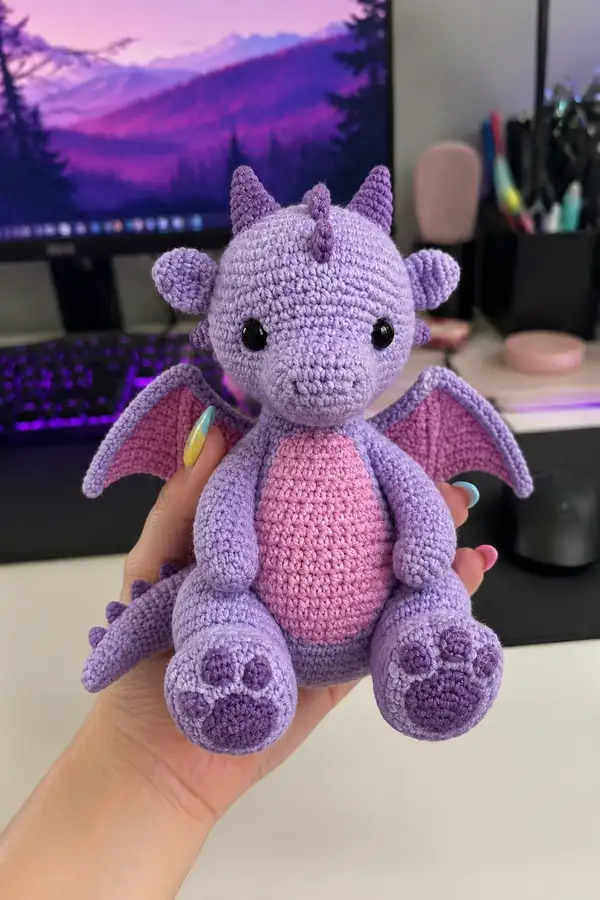
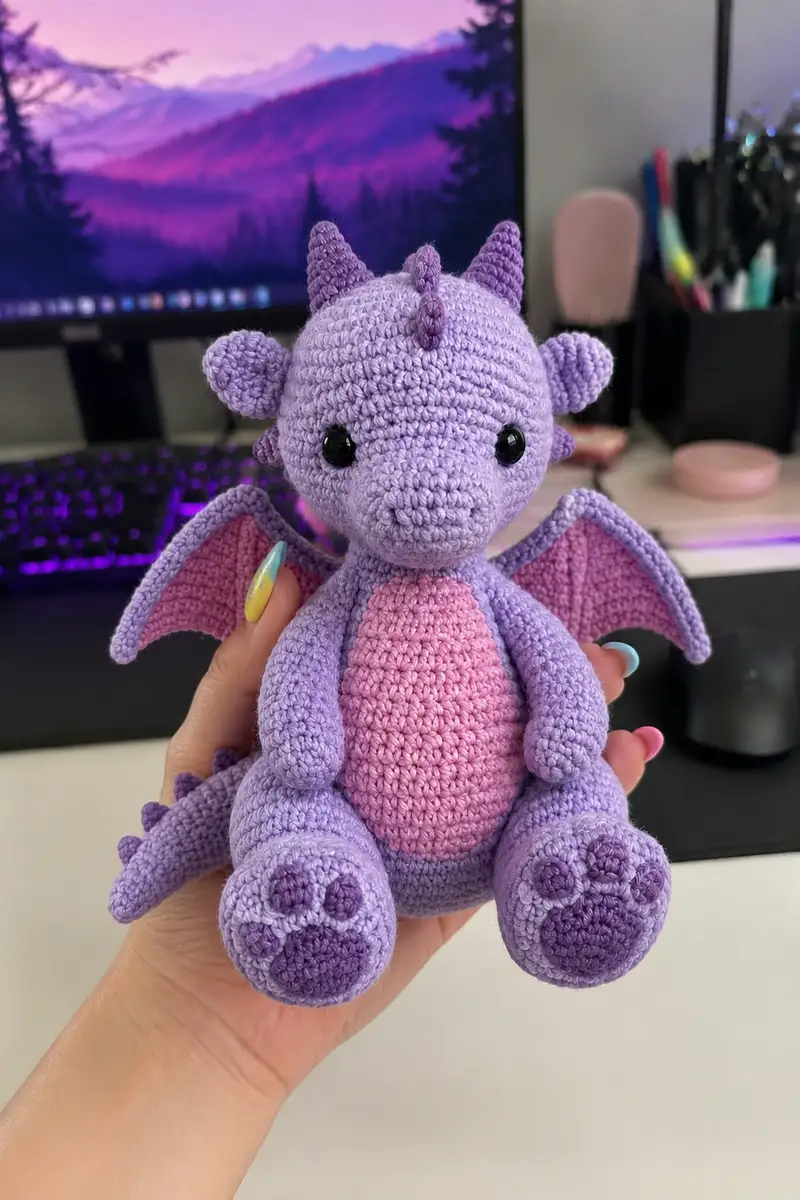
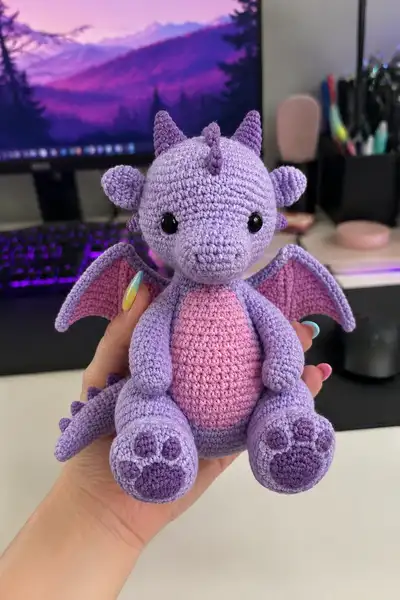
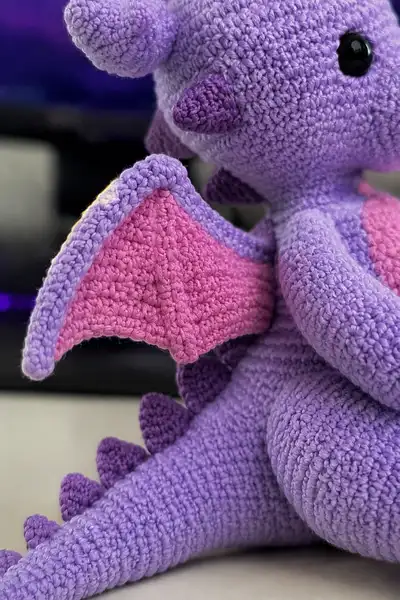
This sweet lavender dragon amigurumi features soft pastel purple body, contrasting pink belly panel, dark purple spikes, and detailed wings with pink inner membranes. The plush sits upright with rounded limbs, embroidered paw pads, and glossy safety eyes for a kawaii expression. Perfect as a cuddle buddy or decorative desk companion, the pattern includes full step-by-step instructions and assembly tips to recreate the exact look shown in the photos.
Progress Tracker
0% Complete
— Head :
Round 1 :
6 sc in magic ring (6)
Round 3 :
(1 sc, 1 inc) x 6 (18)
Round 4 :
(2 sc, 1 inc) x 6 (24)
Round 5 :
(3 sc, 1 inc) x 6 (30)
Round 6 :
(4 sc, 1 inc) x 6 (36)
Round 7 :
(5 sc, 1 inc) x 6 (42)
Round 8 :
(6 sc, 1 inc) x 6 (48)
Round 9-12 :
1 sc in each st (48)
Info :
Work rounds 9-12 to create the forehead height. Keep tension consistent and place a stitch marker at the first st of round 9 to track rounds. If you prefer a slightly taller head, add two more even rounds here.
Round 13-16 :
1 sc in each st (48)
Info :
Place safety eyes between rounds 13-14, approximately 9-11 stitches apart measured across the front (for the look in the reference place them about 10 sts apart). Pin eyes and step back to evaluate expression. If you want larger eyes, place them slightly higher.
Round 17-20 :
1 sc in each st (48)
Info :
At round 20 decide on snout shaping: the dragon has a slightly elongated snout. We will work a short snout extension next by alternating into front stitches on the next few rounds. Keep stitches tidy; you will later embroider small nostrils if desired.
Round 21 :
(6 sc, 1 dec) x 6 (42)
Round 22 :
(5 sc, 1 dec) x 6 (36)
Info :
Begin stuffing head firmly but not overstuffing. Use small amounts of fiberfill and shape with your fingers; focus on cheeks and forehead first, then add filler towards the snout.
Round 23 :
(4 sc, 1 dec) x 6 (30)
Round 24 :
(3 sc, 1 dec) x 6 (24)
Round 25 :
(2 sc, 1 dec) x 6 (18)
Round 26 :
(1 sc, 1 dec) x 6 (12)
Info :
Lightly finish stuffing through the small opening before closing. For a neck that will be sewn easily, keep stuffing slightly looser near the opening and firmer in the head core.
Round 28-33 :
1 sc in each st (6) — work 6 rounds to form a short neck tube (6)
Info :
Leave a long tail (~12-15 inches) for sewing the head to the body. Fasten off and weave the tail through the remaining 6 sts, pull closed or leave open depending on whether you prefer to sew the neck into the body opening without closing completely.
— Snout/detail cones (make 1) :
Round 1 :
6 sc in magic ring (6)
Round 2 :
(1 sc, inc) x 3 (9)
Round 3 :
1 sc in each st (9)
Round 4 :
(2 sc, dec) x 3 (6)
Info :
Stuff lightly and position at the center top of the snout or between the eyes as a little horn/crest. Sew securely with a running stitch around the base.
— Body :
Round 1 :
6 sc in magic ring (6)
Round 3 :
(1 sc, inc) x 6 (18)
Round 4 :
(2 sc, inc) x 6 (24)
Round 5 :
(3 sc, inc) x 6 (30)
Round 6 :
(4 sc, inc) x 6 (36)
Round 7 :
(5 sc, inc) x 6 (42)
Round 8 :
(6 sc, inc) x 6 (48)
Round 9 :
(7 sc, inc) x 6 (54)
Round 10-18 :
1 sc in each st (54)
Info :
If you want the fuller belly effect seen in the photo, work rounds 10-18 evenly and then we will shape the lower back with gentle decreases. Keep the front smooth for belly panel attachment. Mark the front center with a stitch marker to help align the belly later.
Round 19 :
(6 sc, dec) x 6 (48)
Round 20 :
(5 sc, dec) x 6 (42)
Round 21 :
(4 sc, dec) x 6 (36)
Info :
Begin stuffing the body moderately — firmer in the bottom area so the dragon can sit, lighter near the top where the head will attach. Use small stuffing increments to maintain a nice round profile.
Round 22 :
(3 sc, dec) x 6 (30)
Round 23-26 :
1 sc in each st (30)
Round 27 :
(2 sc, dec) x 6 (24)
Round 28 :
(1 sc, dec) x 6 (18)
Info :
Leave the body opening slightly open if you want to insert the neck tube and sew the head directly down into the opening; otherwise, fasten off leaving a long tail for sewing. If you plan to attach the belly panel separately, do not completely close the front area yet — you will want access to the inside to secure the panel edges.
— Belly Panel (Make 1, pink) :
Info :
This oval belly can be worked flat and sewn to the front of the body. We will start with a small magic ring and increase into an oval by working short rows. Use pink yarn.
Round 1 :
6 sc in magic ring (6)
Round 2 :
Inc in each st around (12)
Round 3 :
(1 sc, inc) x 6 (18)
Round 4 :
1 sc in next 3 sts, (inc)x3, 1 sc in next 3 sts, (inc)x3 (24) — create an oval by working increases on two opposite sides
Round 5-8 :
1 sc in each st (24) — flatten and shape oval with slight easing as needed
Info :
Hold the panel against the front of the stuffed body, match center marks, and tack-stitch the top edge first. We will fully attach it after other pieces are in place to ensure correct placement.
— Arms (Make 2) :
Round 1 :
6 sc in magic ring (6)
Round 3 :
(1 sc, inc) x 6 (18)
Round 4-8 :
1 sc in each st (18)
Info :
Stuff the hand portion firmly to create a rounded paw; keep the arm tube less stuffed so it remains flexible. Pin the arms to the body temporarily to decide on length — in the reference arms are about 8-9 rounds long from the base of the hand up the tube.
Round 9 :
(1 sc, dec) x 6 (12)
Round 10-12 :
1 sc in each st (12)
Round 14-16 :
1 sc in each st (6) — work 3 rounds to form neck tube for sewing (6)
Info :
Leave a long tail for sewing the arm into the sides of the body. Sew through the top of the small tube to create a flattering shoulder seam. If you want slightly bendable arms, insert a thin wire into the tube before finishing stuffing; make sure to fold or cap wire ends to avoid sharpness.
— Legs / Feet (Make 2) :
Round 1 :
6 sc in magic ring (6)
Round 3 :
(1 sc, inc) x 6 (18)
Round 4 :
(2 sc, inc) x 6 (24)
Round 5-7 :
1 sc in each st (24)
Info :
These rounds create the foot base. We will add a slightly flattened sole and separate paw pads later. Stuff the foot firmly to hold shape for sitting.
Round 8 :
(3 sc, dec) x 6 (18)
Round 9-14 :
1 sc in each st (18)
Round 15 :
(2 sc, dec) x 6 (12)
Round 16 :
1 sc in each st (12)
Round 17 :
(1 sc, dec) x 4, 2 sc (8) — shape ankle
Round 18-20 :
1 sc in each st (8) — work 3 rounds as a small neck for sewing into hip
Info :
Keep the foot sole nicely rounded and the ankle narrower for a charming seated pose. Leave long tails for sewing the legs to the bottom of the body; pin first to ensure balanced spacing.
— Foot Soles & Paw Pads (Make 2 soles, plus 6 small toe pads each) :
Round 1 :
6 sc in magic ring (6)
Round 3 :
(1 sc, inc) x 6 (18)
Round 4 :
1 sc in each st (18) — fasten off and leave tail for sewing
Small toe pads :
Make 3 small rounds per foot: Round1: 6 sc in magic ring (6). Round2: inc in each st (12). Fasten off leaving a tail. Sew these to the sole as shown in the photo (one large pad plus three small toe pads).
Info :
Sew the sole to the bottom of the stuffed foot using the long tail. Position three small toe pads near the top front of the sole and one larger circular pad behind them to mirror the reference paw design. Secure firmly with hidden stitches and weave ends inside the foot.
— Ears / Ear-fins (Make 2) :
Round 1 :
6 sc in magic ring (6)
Round 3 :
(1 sc, inc) x 6 (18)
Round 4-6 :
1 sc in each st (18)
Round 7 :
(1 sc, dec) x 6 (12)
Round 8 :
6 dec (6) — leave tail for sewing
Info :
Flatten the ear slightly and sew to the sides of the head between rounds 10-12, angled slightly forward. The ear-fin in the reference is small and rounded; pin in place before securing to ensure symmetry.
— Horns (Make 3 small head horns + 2 larger horns) :
Small horn Round 1 :
6 sc in magic ring (6)
Round 2 :
(1 sc, inc) x 3 (9)
Round 3 :
1 sc in each st (9)
Round 4 :
(2 sc, dec) x 3 (6)
Round 5 :
1 sc in each st (6) — fasten off leaving tail for sewing
Info :
Make three small horns to place along the head ridge (two larger horns on top back of the skull and one central little crest at forehead). Make two slightly larger horns by doing an extra round of 1 sc in each st after round 5 if you want a taller horn.
— Tail :
Round 1 :
6 sc in magic ring (6)
Round 3 :
(1 sc, inc) x 6 (18)
Round 4-7 :
1 sc in each st (18)
Info :
The tail tapers gradually and has several small spike cones sewn along the top. Work the tail with slightly tighter tension; you can add a small amount of stuffing in the wider middle and less towards the tip for a tapered look.
Round 8 :
(2 sc, dec) x 4, 2 sc (14)
Round 9-12 :
1 sc in each st (14)
Round 13 :
(1 sc, dec) x 4, 2 sc (10)
Round 14-20 :
1 sc in each st (10) — work 7 rounds to reach desired tail length
Round 21 :
(1 sc, dec) x 2, 2 sc (6)
Round 22-24 :
1 sc in each st (6) — final taper and neck for sewing (6)
Info :
Leave a long tail for sewing the tail onto the lower back. Add a couple of rounds of extra stuffing near the base if you want the dragon to hold an upright tail curve when sitting.
— Tail Spikes (Make 8-10) :
Round 1 :
6 sc in magic ring (6)
Round 2 :
(1 sc, inc) x 3 (9)
Round 3 :
1 sc in each st (9)
Round 4 :
(2 sc, dec) x 3 (6)
Round 5 :
6 dec or sc in each st (6) — fasten off leaving a tail for sewing
Info :
Sew spikes along the top center line of the tail and down the back. For the reference spacing place them approximately every 3-6 rounds along the tail length. Use darker purple for contrast.
— Wings (Make 2 inner pink membranes and 2 outer lavender borders then join) :
Info :
Wings are worked flat in two parts: inner membrane (pink) is a shallow triangular/oval that is then bordered by a lavender outer edge worked in BLO to create a raised ridge. Work the inner membrane first.
Inner Wing Round 1 :
6 sc in magic ring (6) (pink)
Inner Wing Round 2 :
6 inc (12)
Inner Wing Round 3 :
(1 sc, inc) x 6 (18)
Inner Wing Round 4 :
(2 sc, inc) x 6 (24)
Inner Wing Round 5-8 :
1 sc in each st (24)
Inner Wing Round 9 :
(3 sc, dec) x 6 (18)
Inner Wing Round 10 :
(2 sc, dec) x 6 (12)
Inner Wing Round 11 :
(1 sc, dec) x 4, 2 sc (8) — shape edge into gentle point
Info :
Fasten off the pink membrane leaving a tail for joining. Lay the membrane flat and shape slightly while damp-blocking if desired to get the gentle scalloped inner surface. Make two mirror images (flip one to be left/right).
Outer Wing (lavender) Round 1 :
Join lavender to any outer stitch, 1 sc in each st around the inner membrane working through both loops of the outer chain (24)
Outer Wing Round 2 :
1 sc in each st BLO (24) — this creates a raised ridge along the outer edge
Outer Wing Round 3-6 :
1 sc in each st (24) — work 4 rounds to create thickness
Outer Wing Round 7 :
(3 sc, dec) x 6 (18)
Outer Wing Round 8 :
(2 sc, dec) x 6 (12)
Outer Wing Round 9 :
1 sc in each st (12) — fasten off and weave in ends
Info :
Use steam or gentle blocking to create a firm, slightly sculpted wing shape. Optionally insert a pipe cleaner in the outer ridge to pose the wing slightly upwards; if you do, stitch closed and cover wire ends carefully.
— Wing Edging Detail :
Join Round :
Using lavender, join with sl st along outer edge to create a neat crafted finish. Work 1 sc into every other stitch if you want a scalloped look or into each stitch for a crisp frame (recommended: 1 sc into each stitch for the framed look in the reference).
Info :
Pin wings to sides of body between rounds 12-14 as shown in the photo. Sew the inner top edge to the body first, then tack the lower scallop to the flank so the wing sits open but connected.
— Back Spikes (Make 6-8 medium cones) :
Round 1 :
6 sc in magic ring (6)
Round 2 :
(1 sc, inc) x 3 (9)
Round 3 :
1 sc in each st (9)
Round 4 :
(2 sc, dec) x 3 (6)
Round 5 :
1 sc in each st (6) — fasten off leaving tail for sewing
Info :
Sew these along the center back from base of neck to the tail base. Space them about every 2-4 rounds depending on size of tail. Use dark purple for contrast and stitch firmly into the amigurumi body to prevent loose pieces.
— Assembly & Finishing :
Info :
Weave in ends as you go but keep long tails where assembly is required. Block flat pieces (wings, belly) gently for best fit before sewing. Use pins to test symmetry. Sew using mattress stitch or ladder stitch for invisible seams. For safety eyes, ensure they are firmly locked before final stuffing.
Info :
Attach the head at the body opening by inserting the neck tube into the top of the body opening. Pin, check tilt, then sew with long tail in an even round of stitches to create a secure connection.
Info :
Sew arms at side seams approximately between body rounds 12-14. Sew legs at bottom base spaced evenly (approx 10-12 sts apart) so the dragon can sit balanced. Attach tail to lower back center between rounds 4-6 of the body for proportionally accurate placement.
Info :
Sew horns to the head top: two larger ones slightly behind the forehead and a smaller crest between the eyes. Attach ear-fins on sides between rounds 10-12 slightly forward and angled. Add paw pads to foot soles using small sewn circles in dark purple, as described above.
Info :
Optional face details: embroider two small nostrils and a subtle smile with darker purple yarn. Add a tiny blush with fabric-safe pastel on cheeks for extra cuteness. Double-knot and weave all tails thoroughly into the body interior.
Info :
Final shaping: once all pieces are attached, run your fingers to smooth stuffing if needed and add a little filler through seams if small gaps appear. Trim any visible threads close to the fabric and secure with a dab of craft glue inside if necessary for extra security near high-stress seams such as legs and wings.
This adorable lavender dragon is a perfect weekend project that yields a sweet, huggable companion full of personality. The two-tone wings, tiny horns, and paw pad details make it stand out as a thoughtful handmade gift. The step-by-step instructions and assembly notes will guide you through each stitch so you can craft a polished finished piece with pride. Happy stitching — may your new dragon bring smiles and cozy vibes to its new home! 🧶🐉