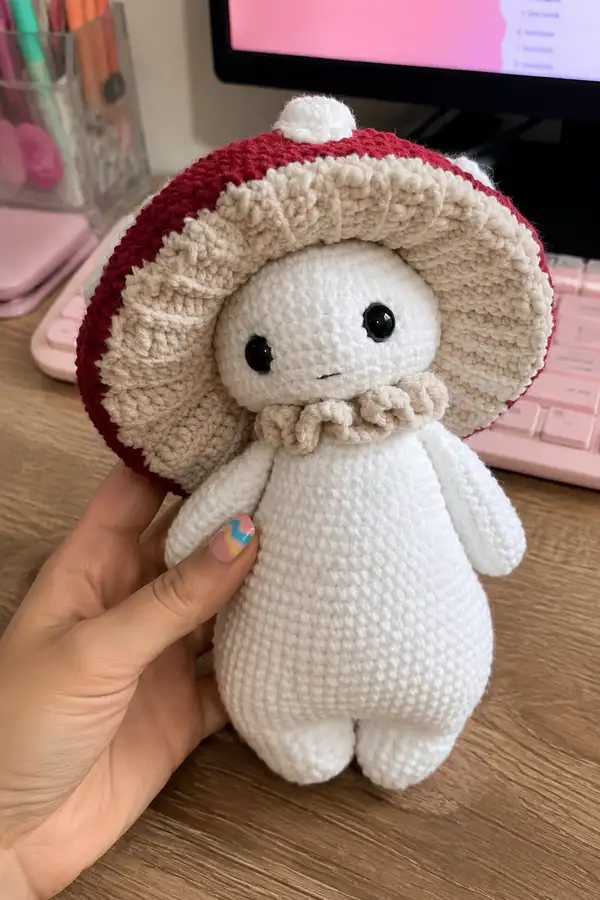
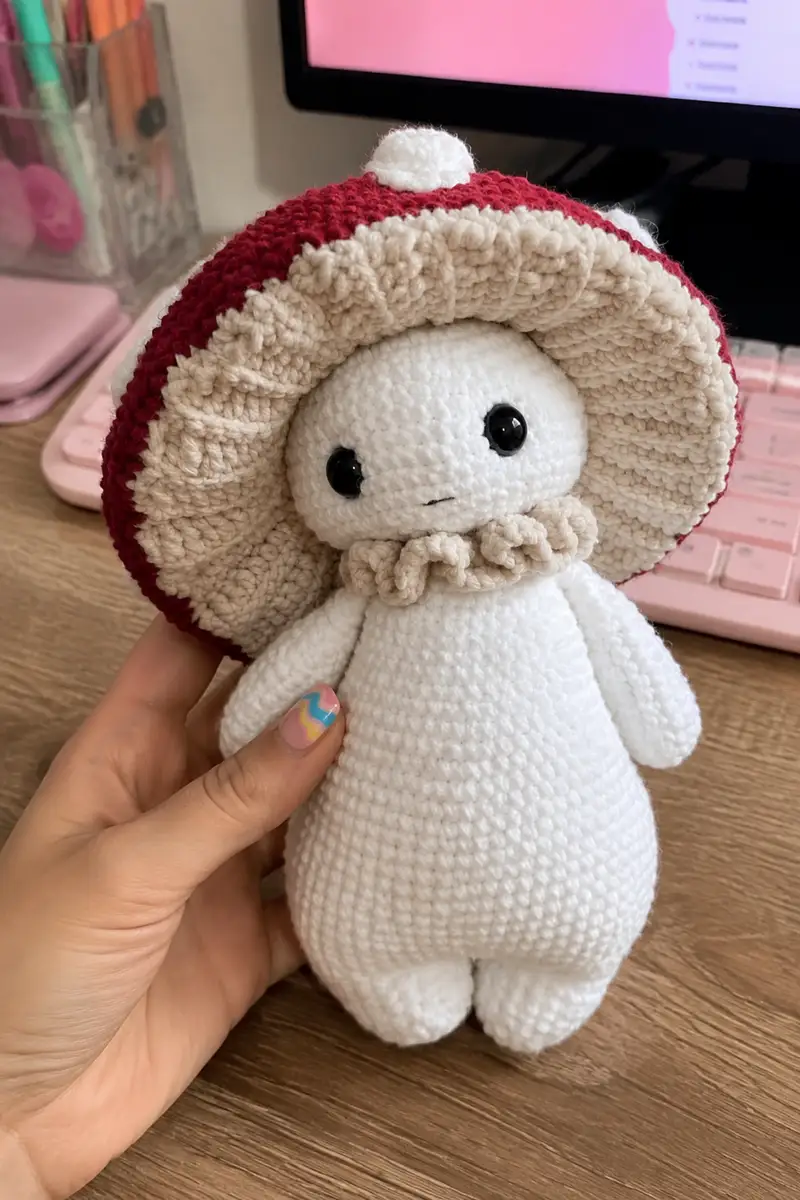
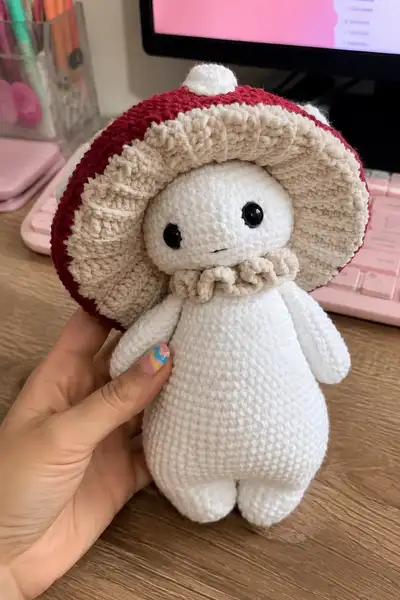
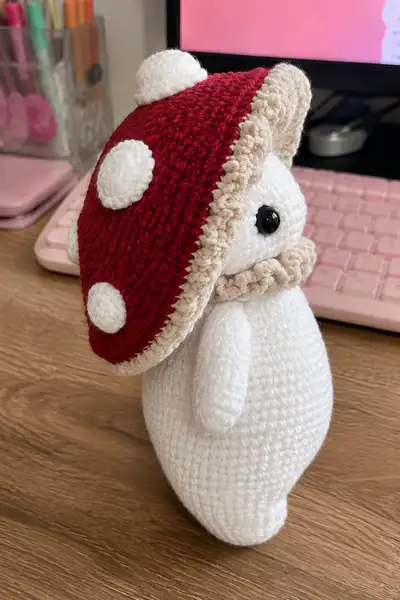
Create an ultra-charming mushroom friend with a large red cap, ruffled beige underside, cozy ruffled collar and soft white body. This amigurumi combines simple shaping with textured details like a fluted brim and spotted cap. Perfect as a decorative plush or a cuddly companion—sized to sit on a shelf or cuddle in your arms.
Progress Tracker
0% Complete
— Head :
Round 1 :
6 sc in magic ring (6)
Round 3 :
(1 sc, inc) x 6 (18)
Round 4 :
(2 sc, inc) x 6 (24)
Round 5 :
(3 sc, inc) x 6 (30)
Round 6 :
(4 sc, inc) x 6 (36)
Round 7 :
(5 sc, inc) x 6 (42)
Round 8 :
(6 sc, inc) x 6 (48)
Round 9-14 :
1 sc in each st (48) (6 rounds)
Info :
Place safety eyes between rounds 12 and 13, spacing them approximately 9-10 stitches apart (center of face). Use pins to check placement visually. If using smaller eyes, place slightly closer together for the same sweet expression.
Round 15 :
(6 sc, inc) x 6 (54) - gentle crown increase to create subtle roundness
Round 16-18 :
1 sc in each st (54) (3 rounds)
Info :
Embroider mouth now if you prefer a fixed tiny line; use black embroidery thread/yarn and a yarn needle to stitch a short straight mouth centered 3-4 stitches below eye line. Attach eyes securely before final stuffing.
Round 19 :
(6 sc, dec) x 6 (48)
Round 20 :
(5 sc, dec) x 6 (42)
Round 21 :
(4 sc, dec) x 6 (36)
Info :
Begin stuffing head firmly but evenly. Use small amounts of stuffing and push into the crown with a stuffing tool or blunt pencil for even distribution. Focus more fill on forehead and cheeks for a round look; keep the base slightly less stuffed to ease neck joining.
Round 22 :
(3 sc, dec) x 6 (30)
Round 23 :
(2 sc, dec) x 6 (24)
Round 24 :
(1 sc, dec) x 6 (18)
Info :
At 6 sts remaining you have a small neck stub. Continue with 6 rounds of 1 sc in each st to form a short neck tube that will help joining head to body (this creates a stable seam). Stuff lightly as you work the neck tube to maintain shape but keep flexible.
Round 26-31 :
1 sc in each st (6) (6 rounds for neck length)
Round 32 :
Fasten off leaving a long tail for sewing the head to the body. Weave tail along neck stitches for a neater join when sewing.
— Body :
Round 1 :
6 sc in magic ring (6)
Round 3 :
(1 sc, inc) x 6 (18)
Round 4 :
(2 sc, inc) x 6 (24)
Round 5 :
(3 sc, inc) x 6 (30)
Round 6 :
(4 sc, inc) x 6 (36)
Round 7 :
(5 sc, inc) x 6 (42)
Round 8 :
(6 sc, inc) x 6 (48)
Round 9 :
(7 sc, inc) x 6 (54)
Round 10 :
(8 sc, inc) x 6 (60)
Round 11-18 :
1 sc in each st (60) (8 rounds) - body height building
Info :
If you prefer a slightly narrower body, stop increases at round 9 (54 sts). For a wider plush, add one more increase round before working even. Stuff moderately as you work the even rounds so the bottom stays smooth and rounded.
Round 19 :
(8 sc, dec) x 6 (54)
Round 20 :
(7 sc, dec) x 6 (48)
Round 21 :
(6 sc, dec) x 6 (42)
Round 22 :
(5 sc, dec) x 6 (36)
Info :
Begin stuffing body firmly now, concentrating on bottom for a stable base and adding less at the top to make seam joining the head easier. Use small stuffing pieces for even shaping; press and adjust as you decrease rounds.
Round 23 :
(4 sc, dec) x 6 (30)
Round 24 :
(3 sc, dec) x 6 (24)
Round 25-28 :
1 sc in each st (24) (4 rounds) - neck tube area to ease sewing head on
Info :
When your body reach 24 sts and the neck tube looks the right width to match the head's neck (6 sts x 4 rounds) align them and try a loose stitch-together to test fit. Adjust stuffing if body feels too stiff for sewing.
Round 29 :
Begin decreasing to tidy the neck opening if desired: (2 sc, dec) x 6 (18)
Round 30 :
(1 sc, dec) x 6 (12)
Round 31 :
6 dec (6) - leave opening slightly larger for sewing head on
Info :
Fasten off leaving long tail. Stuff the body to your liking before final closing and sewing the head. Use the tail to sew head to body using a whip or ladder stitch, pulling evenly to avoid puckering on the neck seam.
— Arms (Make 2) :
Round 1 :
6 sc in magic ring (6)
Round 3 :
(1 sc, inc) x 6 (18)
Round 4-6 :
1 sc in each st (18) (3 rounds) - shape hand/rounded end
Info :
Stuff the hand end fairly firmly so the arm keeps a rounded tip. If making poseable arms, pull a piece of wire through now before stuffing further and fold the raw wire ends inward to avoid poking through.
Round 7 :
(2 sc, dec) x 6 (12)
Round 8-12 :
1 sc in each st (12) (5 rounds) - forearm/wrist length
Round 13 :
(1 sc, dec) x 4 (8) - slight taper toward shoulder
Round 14-16 :
1 sc in each st (8) (3 rounds) - upper arm length
Info :
Stuff the arm lightly for a soft but stable limb—denser stuffing at the hand, lighter in the upper arm. Fasten off leaving long tail for sewing. Repeat for second arm. Attach arms at the body rounds roughly 22-26 for a natural mid-body placement; see assembly notes for exact positioning.
— Feet (Make 2) :
Round 1 :
6 sc in magic ring (6)
Round 3 :
(1 sc, inc) x 6 (18)
Round 4 :
(2 sc, inc) x 6 (24)
Round 5-6 :
1 sc in each st (24) (2 rounds) - foot base flattened
Info :
Slightly stuff the foot, focusing on the toe area, then flatten slightly to create the twin-toe effect seen in the photo. You can sew a small seam down the center of the base to hold the valley between toes if desired.
Round 7 :
(2 sc, dec) x 6 (18)
Round 8 :
(1 sc, dec) x 6 (12)
Round 9-12 :
1 sc in each st (12) (4 rounds) - ankle/upper foot tube
Round 13 :
Fasten off leaving long tail; stuff foot firmly and sew into body bottom at rounds 2-4 from base so feet anchor securely (see assembly)
— Cap Dome (Top Red Section) :
Round 1 :
6 sc in magic ring (6)
Round 3 :
(1 sc, inc) x 6 (18)
Round 4 :
(2 sc, inc) x 6 (24)
Round 5 :
(3 sc, inc) x 6 (30)
Round 6 :
(4 sc, inc) x 6 (36)
Round 7 :
(5 sc, inc) x 6 (42)
Round 8 :
(6 sc, inc) x 6 (48)
Round 9 :
(7 sc, inc) x 6 (54)
Round 10 :
(8 sc, inc) x 6 (60)
Round 11 :
(9 sc, inc) x 6 (66)
Round 12 :
(10 sc, inc) x 6 (72)
Round 13 :
(11 sc, inc) x 6 (78)
Round 14 :
(12 sc, inc) x 6 (84)
Round 15 :
(13 sc, inc) x 6 (90)
Round 16 :
(14 sc, inc) x 6 (96)
Round 17-20 :
1 sc in each st (96) (4 rounds) - dome height
Info :
Try the cap on top of the head (without sewing) to check for size and tilt. The cap should overhang the head fairly widely. You can increase or decrease rounds to get the correct overall diameter—adding another increase round will add 6 sts to the circumference per round.
Round 21 :
(14 sc, inc) x 6 (102)
Round 22 :
(15 sc, inc) x 6 (108)
Round 23 :
(16 sc, inc) x 6 (114)
Round 24 :
(17 sc, inc) x 6 (120)
Round 25-28 :
1 sc in each st (120) (4 rounds) - begin forming wide brim
Info :
When working this many stitches in a round, use markers every 10-12 stitches to avoid losing your place. The brim will be thick once the underside ruffle is added; this large flat area will become the top of the cap which sits outward from the head.
Round 29 :
1 sc in each st BLO (120) - this creates a slight step for the underside ruffle to attach neatly
Round 30 :
Fasten off red top. Leave long tail for joining. Set aside to later join to underside ruffle and head.
— Cap Underside & Brim Ruffle (Beige) :
Info :
Work underside ruffle separately and then seam to red top along the outer edge where you left the red BLO round. The underside is worked as a flat circle that flares and then a fluted ruffle is added by shell clusters.
Round 1 :
With beige yarn, 6 sc in magic ring (6)
Round 3 :
(1 sc, inc) x 6 (18)
Round 4 :
(2 sc, inc) x 6 (24)
Round 5 :
(3 sc, inc) x 6 (30)
Round 6 :
(4 sc, inc) x 6 (36)
Round 7 :
(5 sc, inc) x 6 (42)
Round 8 :
(6 sc, inc) x 6 (48)
Round 9 :
(7 sc, inc) x 6 (54)
Round 10-14 :
1 sc in each st (54) (5 rounds) - build underside height to meet red brim
Info :
Try joining the beige underside to the red brim temporarily with pins to check the curve. The beige underside will be slightly smaller in radius than the top, so it naturally cups the head; the ruffle is added on the edge of this underside to create the pleated look.
Round 15 :
Work 1 sc in next 2 sts, *shell in next st: (2 dc, ch2, 2 dc) in same st*, skip next st, 1 sc in next 2 sts; rep across until the round is complete. If you used 54 sts, aim to place 18 shells spaced evenly (adjust pattern to maintain shells count across whole round).
Round 16 :
1 sc in each st across, working behind shells to secure them and create the fluted ruffle effect. Fasten off leaving long tail for sewing to red top.
Info :
Use the long tails from both red top and beige underside to whipstitch the two pieces together along the edge where you worked the red BLO round. Align shells evenly and ease any small mismatches by gently stretching the shell edge while sewing for an even pleat look.
— Cap Spots (Make 5 assorted sizes) :
Small Spot (Make 3) Round 1 :
6 sc in magic ring (6)
Small Spot Round 2 :
6 inc (12)
Small Spot Round 3 :
1 sc in each st (12) - Fasten off leaving tail to sew onto red top
Medium Spot (Make 2) Round 1 :
6 sc in magic ring (6)
Medium Spot Round 2 :
6 inc (12)
Medium Spot Round 3 :
(1 sc, inc) x 6 (18) - Fasten off leaving tail to sew onto red top
Info :
Sew spots onto the red top before attaching top to the underside. Space them attractively—two on one side, one at back and one near the top center depending on how many you make. Sew through several rounds of the spot to the red top to secure and make sure spots are stuffed very lightly or left flat for a smooth look.
— Collar Ruffle (Beige) :
Round 1 :
With beige yarn, 36 sc in magic ring or chain 36 and join to make a ring (36)
Round 2 :
1 sc in each st (36)
Round 3 :
*ch2, skip next st, 5 dc in next st (shell), skip next st, ch2, 1 sc in next st*; rep around to create small lacy frill (adjust repeats to maintain spacing)
Round 4 :
1 sc in each st tightening the base of shells to give a ruffled, gathered look. Fasten off leaving tail for sewing to neck.
Info :
Position collar onto neck seam between head and body. The collar sits around base of the head and covers the joint. Pin it in place before sewing, slightly gather as needed to mimic the photo's tight ruffled collar.
— Pom (Small white top knob) :
Round 1 :
6 sc in magic ring (6)
Round 3 :
1 sc in each st (12)
Round 5 :
Fasten off leaving long tail; stuff and flatten slightly. Sew to top center of red cap firmly.
— Assembly Preparation & Final Finishing :
Info :
Before sewing parts together, block or shape any ruffles gently with steam or water (test a small scrap first). Use pins to temporarily position cap on the head, collar around the neck seam, and arms at the side seam to check balance and tilt. Sew with matching yarn and a tapestry needle using small, tight stitches for invisible seams.
Info :
To attach head to body: Insert head neck tube into the body neck opening; align rounds and use mattress/ladder stitch to pick up between corresponding rounds of stitches. Pull evenly and stuff slightly from head or body if seam gaps appear. Tie securely and weave in ends inside the body.
Info :
Sew the cap top to underside with right sides together along the edge prepared earlier. Make sure the beige shells are visible on the underside. Add spots and the pom after the two cap sections are sewn and secure very tightly if the toy is for small children.
Info :
Weave in all loose ends, and if desired, apply a tiny dab of fabric glue to the bases of the safety eyes under the yarn inside the head for added security (not necessary with quality safety eyes but good for gifts for small children - check safety recommendations).
Info :
Final shaping: adjust stuffing, reshape ruffles and brim until you're happy with the tilt. A couple of small tacking stitches from the underside of the brim to the head crown can help keep the cap tilted without being obvious.
This big mushroom friend pattern combines classic amigurumi shaping with delightful ruffles and a dramatic cap to create a memorable handmade companion. Each detail—from the spotted cap to the tiny ruffled collar—is written to be achievable and fun. The assembly brings everything together into a charming keepsake you will be proud to display or gift. 🧶🍄 Enjoy every stitch of bringing this sweet mushroom to life! 🎨