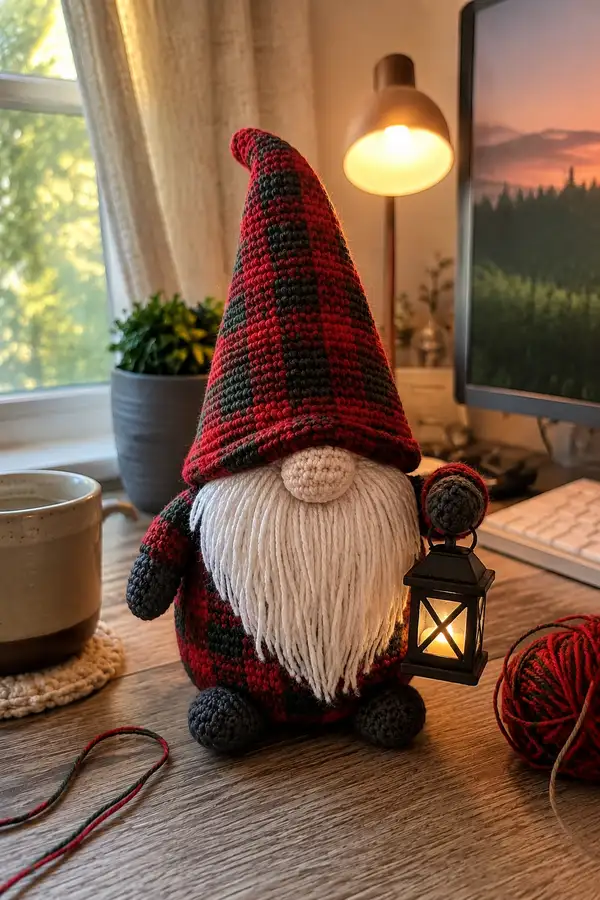
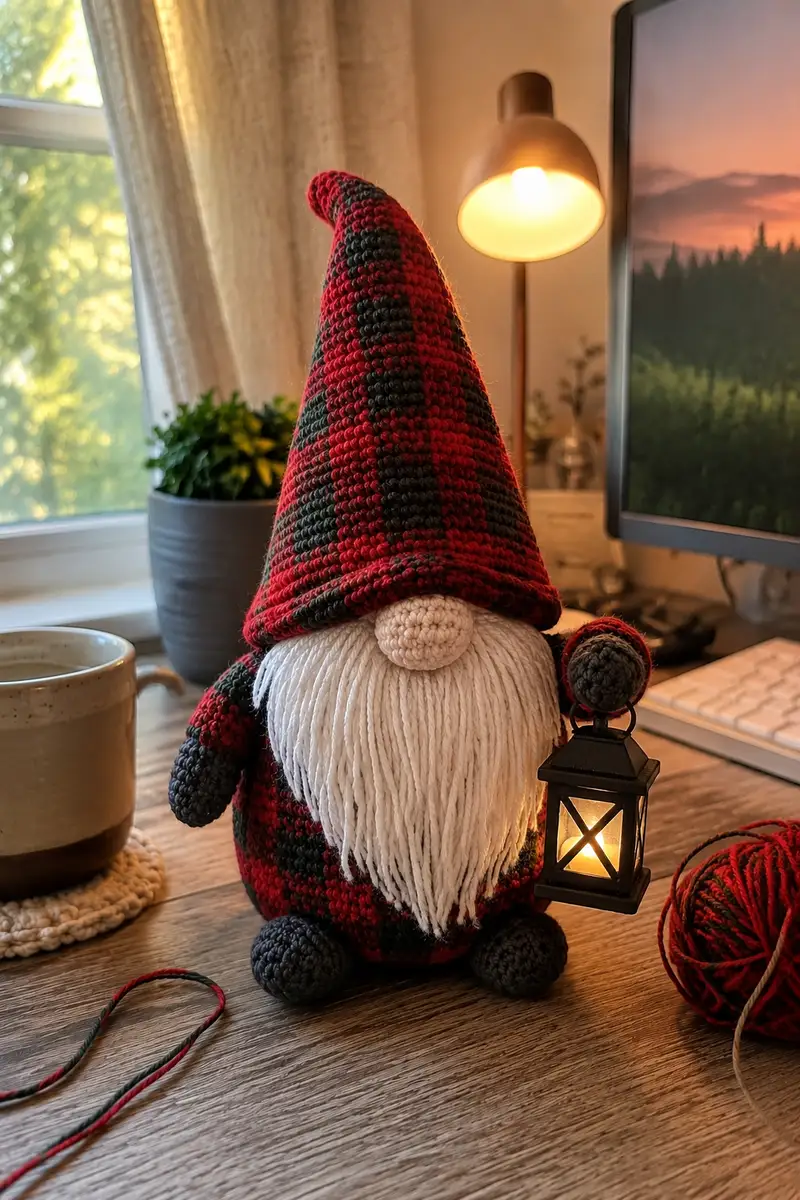
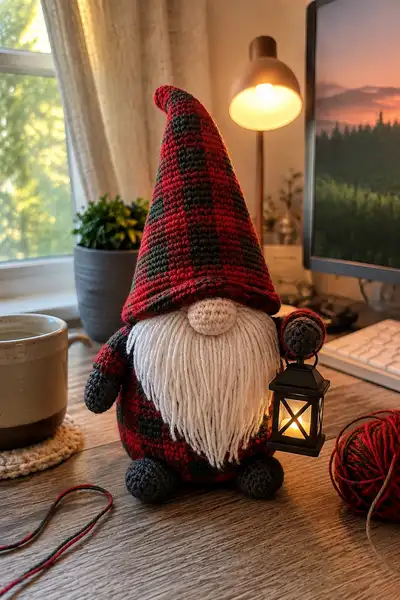
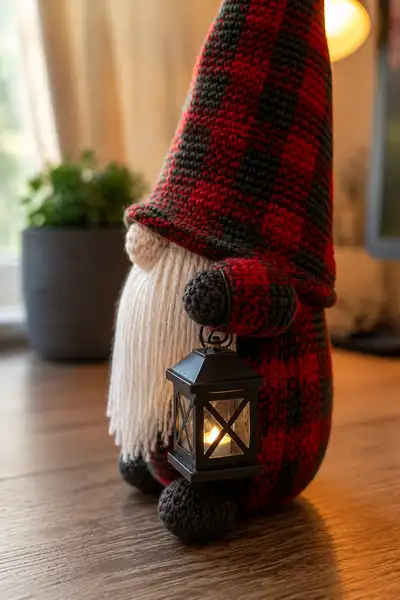
Create a cozy, classic Christmas gnome with an oversized plaid hat, long white yarn beard, bulbous nose, and tiny lantern. This amigurumi features a rounded body, small arms and feet in charcoal, and a dramatic tall hat in red/black plaid. The pattern includes step-by-step rounds for each part and clear assembly guidance so you can replicate the character shown.
Progress Tracker
0% Complete
— Head :
Round 1 :
6 sc in magic ring (6)
Round 3 :
(1 sc, inc) x 6 (18)
Round 4 :
(2 sc, inc) x 6 (24)
Round 5 :
(3 sc, inc) x 6 (30)
Round 6 :
(4 sc, inc) x 6 (36)
Round 7 :
(5 sc, inc) x 6 (42)
Round 8 :
(6 sc, inc) x 6 (48)
Round 9-12 :
1 sc in each st (48) - work even to build head height
Info :
Positioning note: the nose will be attached around rounds 10-12 centered on the front. Use a stitch marker to mark the center front if helpful.
Round 13-16 :
1 sc in each st (48) - continue even, checking for desired head height
Info :
If you want a slightly elongated head (as in the sample), continue even for two extra rounds before starting decreases; otherwise begin decreases on Round 17
Round 17 :
(6 sc, dec) x 6 (42)
Round 18 :
(5 sc, dec) x 6 (36)
Info :
Begin stuffing head firmly but not overfilled. Use small amounts of fiberfill and tamp down well to achieve a smooth, round shape. Continue stuffing gradually as you decrease.
Round 19 :
(4 sc, dec) x 6 (30)
Round 20 :
(3 sc, dec) x 6 (24)
Round 21 :
(2 sc, dec) x 6 (18)
Round 22 :
(1 sc, dec) x 6 (12)
Info :
Fasten off leaving a long tail for sewing. The head opening will be used to join to the top of the body; leave enough tail to stitch securely.
— Nose :
Round 1 :
6 sc in magic ring (6)
Round 3 :
(1 sc, inc) x 6 (18)
Round 4 :
1 sc in each st (18)
Round 5 :
(2 sc, dec) x 6 (12)
Info :
Stuff lightly just to keep shape—nose should be firm but slightly soft. Fasten off leaving a long tail for sewing. Sew nose centered on head around rounds 10-12. Use pins to check placement before attaching.
— Beard (fringe method) :
Info :
Beard is made from multiple yarn strands attached by folding each strand in half and pulling the fold through a stitch to create a lark's head knot. Use cream/white worsted weight yarn cut to desired beard length (approx 10-12 cm / 4-5 in). Attach densely covering from under nose down to the body seam.
Step 1 :
Cut 120-160 strands of yarn to double the final beard length. Strands will be folded in half before attaching.
Step 2 :
Working from center front under the nose, attach strands row by row. Each stitch holds one or two folded strands depending on desired fullness. Work across 8-12 stitches per row for three or four rows to achieve the full triangular beard shape.
Info :
Trim beard to a tapered point if desired by combing and trimming with sharp scissors. For a fuller look, use more strands or double up per stitch.
— Body :
Round 1 :
6 sc in magic ring (6)
Round 3 :
(1 sc, inc) x 6 (18)
Round 4 :
(2 sc, inc) x 6 (24)
Round 5 :
(3 sc, inc) x 6 (30)
Round 6 :
(4 sc, inc) x 6 (36)
Round 7 :
(5 sc, inc) x 6 (42)
Round 8 :
(6 sc, inc) x 6 (48)
Round 9 :
(7 sc, inc) x 6 (54)
Round 10-14 :
1 sc in each st (54) - work even to create the widest part of body
Info :
If making the plaid effect, use a variegated buffalo-plaid yarn or change colors every 4-6 rounds to create large horizontal stripes. Carry unused yarn neatly on the inside or cut and weave in ends depending on desired finish.
Round 15 :
(7 sc, dec) x 6 (48)
Round 16 :
(6 sc, dec) x 6 (42)
Round 17 :
(5 sc, dec) x 6 (36)
Info :
Begin stuffing the body from the base upward. Stuff firmly at the bottom so the gnome sits stably and less densely toward the neck. Aim for a pear-shaped form with wider bottom and slightly tapered top for the neck.
Round 18 :
(4 sc, dec) x 6 (30)
Round 19 :
(3 sc, dec) x 6 (24)
Round 20 :
(2 sc, dec) x 6 (18)
Round 21 :
(1 sc, dec) x 6 (12)
Info :
Fasten off leaving a long tail for sewing and closing. The top opening will be used to join the head: position head over the top, align, and sew with the head tail for a secure seam. Weave tail inside body once sewn for a neat finish.
— Left Arm (make 1) :
Round 1 :
6 sc in magic ring (6) - make in charcoal for hand
Round 3 :
(1 sc, inc) x 6 (18)
Round 4-5 :
1 sc in each st (18) - round to shape the hand
Info :
Change to plaid/body yarn at the next round to create a sleeve. Carry charcoal inside or finish off and rejoin for a cleaner color change.
Round 6 :
Join plaid yarn, 1 sc in each st (18)
Round 7-12 :
1 sc in each st (18) - work even to desired arm length (6 rounds of sleeve)
Round 13 :
(2 sc, dec) x 4 + 1 sc (14) - slight taper toward shoulder
Round 14 :
1 sc in each st (14)
Round 15 :
(1 sc, dec) x 4 + 1 sc (10)
Round 16-18 :
1 sc in each st (10) - leave opening for sewing
Info :
Stuff the hand portion firmly and the sleeve lightly. Leave a long tail for sewing. Position the arm so that the hand sits just under the brim of the hat and slightly forward for a natural pose.
— Right Arm (make 1) :
Round 1 :
6 sc in magic ring (6) - charcoal for hand
Round 3 :
(1 sc, inc) x 6 (18)
Round 4-5 :
1 sc in each st (18)
Info :
For the lantern-holding arm, consider inserting thin floral wire into the arm before finishing to provide support. Fold ends of wire and secure under stuffing to avoid sharp ends.
Round 6 :
Join plaid yarn, 1 sc in each st (18)
Round 7-12 :
1 sc in each st (18)
Round 13 :
(2 sc, dec) x 4 + 1 sc (14)
Round 14 :
1 sc in each st (14)
Round 15 :
(1 sc, dec) x 4 + 1 sc (10)
Round 16-18 :
1 sc in each st (10)
Info :
Sew a small loop at the hand for the lantern handle or leave a small opening to slip the lantern ring onto. Stuff hand firmly so it can support the lantern weight when attached.
— Left Leg (make 1) :
Round 1 :
6 sc in magic ring (6) - charcoal for foot
Round 3 :
(1 sc, inc) x 6 (18)
Round 4 :
(2 sc, inc) x 6 (24)
Round 5-6 :
1 sc in each st (24) - round foot base
Round 7 :
(2 sc, dec) x 6 (18)
Round 8 :
1 sc in each st (18)
Round 9 :
Change to plaid yarn, 1 sc in each st (18) - begin leg
Round 10-16 :
1 sc in each st (18) - work even to desired leg height
Round 17 :
(1 sc, dec) x 6 (12)
Round 18 :
1 sc in each st (12) - leave opening for sewing
Info :
Stuff feet firmly and legs lightly. When attaching to body bottom, make sure both legs are equidistant from center and that feet allow the gnome to sit upright. Use pins to align before sewing.
— Right Leg (make 1) :
Round 1 :
6 sc in magic ring (6) - charcoal
Round 3 :
(1 sc, inc) x 6 (18)
Round 4 :
(2 sc, inc) x 6 (24)
Round 5-6 :
1 sc in each st (24)
Round 7 :
(2 sc, dec) x 6 (18)
Round 8 :
1 sc in each st (18)
Round 9 :
Change to plaid yarn, 1 sc in each st (18)
Round 10-16 :
1 sc in each st (18)
Round 17 :
(1 sc, dec) x 6 (12)
Round 18 :
1 sc in each st (12)
Info :
Sew legs to body bottom at rounds 1-3 of body. Space them approximately 8-10 stitches apart depending on desired stance. Reinforce with extra passes if the figure will be handled often.
— Hat (tall pointed cone) :
Info :
Hat is worked in continuous rounds from the tip down and then folded over at the brim to create the rolled cuff. Use plaid variegated yarn or alternate color changes every 4-6 rounds to create the buffalo-plaid effect. A tall hat will measure approx 28-35 cm from tip to brim depending on gauge.
Round 1 :
6 sc in magic ring (6)
Round 3 :
(1 sc, inc) x 6 (18)
Round 4 :
(2 sc, inc) x 6 (24)
Round 5 :
(3 sc, inc) x 6 (30)
Round 6 :
(4 sc, inc) x 6 (36)
Round 7-10 :
1 sc in each st (36)
Info :
If using self-striping yarn, observe color transitions and plan where the brim will fold so that a pleasing pattern is visible when the hat is rolled. Carry unused color inside if switching manually.
Round 11-26 :
1 sc in each st (36) - continue working even; this section creates the tall cone. For a taller hat, continue even to round 40 before shaping the brim.
Round 27 :
(5 sc, inc) x 6 (42) - slight flare for brim area
Round 28-30 :
1 sc in each st (42)
Info :
To form a rolled brim like the sample, fold up approx 3-5 rounds of the bottom edge and seam into place with matching yarn. Alternatively, work several rounds in BLO to create a ridge before folding.
Round 31-36 :
1 sc in each st (42) - continue until hat reaches desired length. If you want the hat to be floppy at the tip, reduce stuffing or none at all. Fasten off leaving a long tail to whip the folded brim closed if needed.
Info :
To attach hat: place over head, tilt forward so the nose peeks out, and sew around the hat base to the head at the neck seam. Use a ladder stitch for an invisible join and keep the front lower edge slightly down over the nose for that signature gnome look.
— Lantern (tiny prop) :
Info :
The sample uses a small metal lantern prop with a working tea light. If crocheting your own, make a miniature lantern with a few rounds for a boxy shape and add cross bars with embroidery yarn or surface crochet. You can also adapt a small purchased lantern.
Round 1 :
6 sc in magic ring (6) - black or dark yarn
Round 3 :
1 sc in each st (12)
Round 4 :
(2 sc, inc) x 4 (16)
Round 5-8 :
1 sc in each st (16) - build small cube height
Round 9 :
sl st around and fasten off leaving tail to sew lid and base. Add small stitched 'X' or frame shapes on each side with embroidery thread to mimic lantern panes.
Info :
Attach a small metal or crocheted ring to the top and sew to the gnome's right hand loop. Insert a small battery tea light into the lantern for safe glow, or use crocheted panels with a flicker LED inside.
— Finishing touches :
Info :
Assemble in the following order: attach legs to body, attach body to head, attach nose and beard to head, sew hat in place, attach arms (lantern on right arm). Use pins to check symmetry and alignment before sewing.
Round - Assembly Tip :
Weave in and secure all tails, and do a final shaping of beard and hat. Trim beard ends to a neat, tapered triangle and optionally lightly fray strands with a comb for softer texture.
Info :
Optional: add a small safety stitch at the hat top to create a little curl or bend as seen in the sample. Use a length of yarn to pull the tip into a gentle curve and secure inside with a few invisible stitches.
This big plaid gnome is a delightful mix of classic holiday charm and handcrafted personality — from its towering plaid hat to its lush white yarn beard. Every stitch brings warmth to your home decor and makes a lovely gift. I hope you enjoy making it as much as I enjoyed translating the design into a detailed pattern. 🎄🧶✨