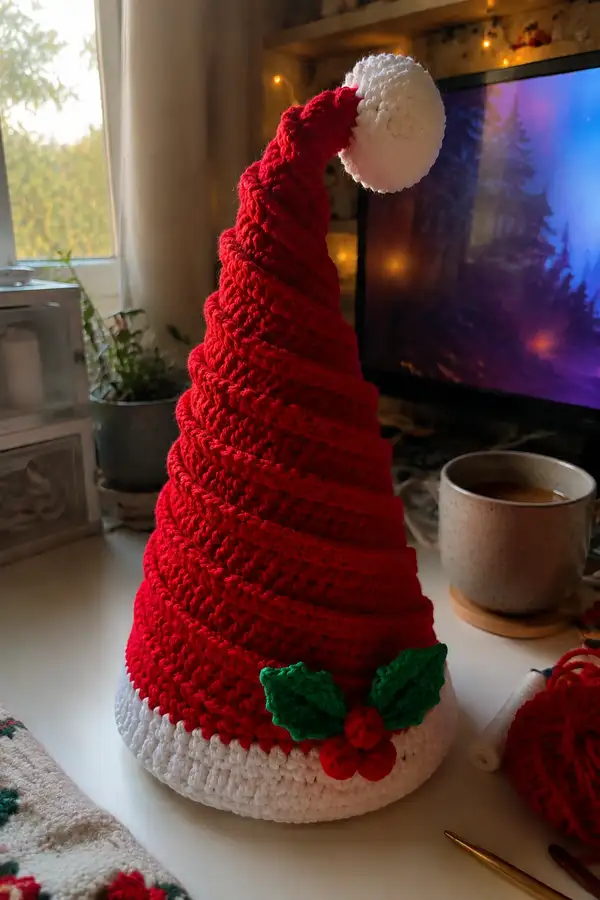
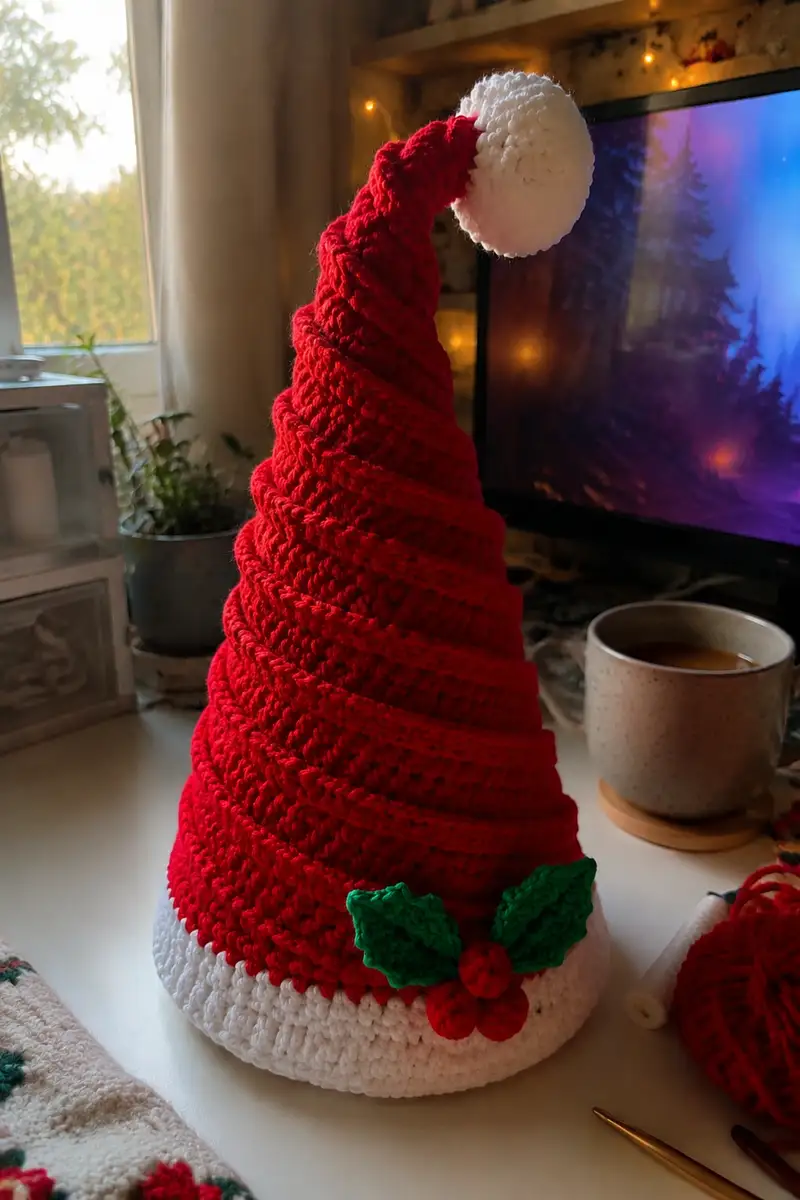
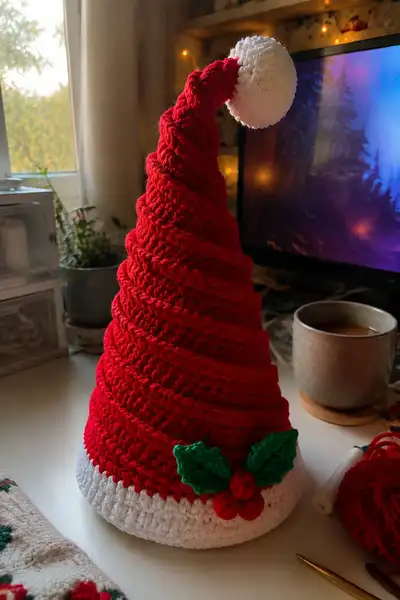
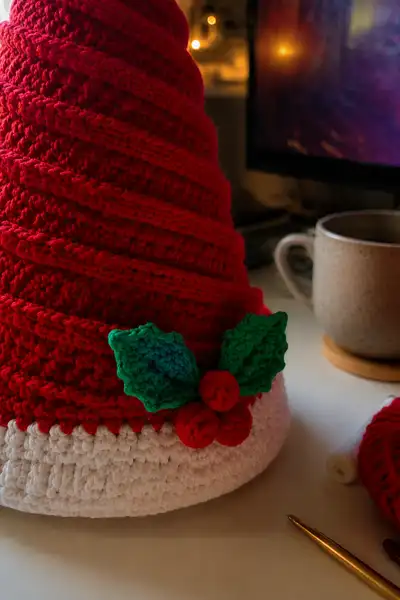
Make a tall, whimsical spiral Santa hat amigurumi with a plush white pom pom and festive holly. This pattern recreates the tall cone-shaped hat with deep diagonal ridges, a wide white brim, and three little red berries with two green leaves as shown. Designed to sit upright as a decorative piece or tabletop accent, it works up with worsted weight yarn and creates a sturdy, sculpted cone full of texture and holiday charm.
Progress Tracker
0% Complete
— Body (Brim) :
Round 1 :
With white yarn, 6 sc in mr (6)
Round 3 :
(1 sc, inc) x 6 (18)
Round 4 :
(2 sc, inc) x 6 (24)
Round 5 :
(3 sc, inc) x 6 (30)
Round 6 :
(4 sc, inc) x 6 (36)
Round 7 :
(5 sc, inc) x 6 (42)
Round 8 :
(6 sc, inc) x 6 (48)
Round 9 :
(7 sc, inc) x 6 (54)
Round 10 :
(8 sc, inc) x 6 (60)
Info :
Brim circumference target is 60 sts. If your stranded gauge differs slightly, increase consistently until circumference matches the desired width. The brim is intended to be thick and sturdy so the hat sits upright.
Round 11-14 :
1 sc in each st (60)
Info :
Work rounds 11-14 even to build a cushioned brim. Keep tension slightly firmer than body so the brim holds shape. Place a stitch marker at the beginning of each round.
Round 15 :
1 sc in each st BLO (60)
Round 16 :
1 sc in each st (60)
Round 17 :
1 sc in each st (60)
Round 18 :
1 sc in each st (60)
Info :
Fasten off white yarn leaving a 20-25 cm tail for joining red yarn. Weave tail into the inside of the brim to secure. The top of the brim is now ready to join your red yarn for the cone. Position the join at the inside back of the hat so the seam is less visible.
— Head (Cone / Spiral Body) :
Info :
Join red yarn to the top inside loop of any stitch on the brim. We will work in continuous spiral rounds from here to create the tall cone. Use a stitch marker to mark the start of the spiral and move it up each round. The spiral texture is created by alternating BLO ridge rounds with regular rounds and occasional decrease rounds. The cone begins at 60 sts and will gradually reduce to about 6 sts at the tip.
Round 1 :
Join red, 1 sc in each st around (60)
Round 2 :
1 sc in each st BLO (60)
Round 3 :
1 sc in each st (60)
Round 4 :
1 sc in each st BLO (60)
Round 5 :
1 sc in each st (60)
Info :
These first five rounds establish the spiral ridge rhythm. The BLO rounds form shallow ridges; keep BLO stitches tight to keep ridge definition strong. If the rib looks loose, switch to a hook 0.25-0.5mm smaller for BLO rounds only.
Round 6 :
1 sc in each st BLO (60)
Round 7 (Decrease 1) :
(8 sc, dec) x 6 (54)
Round 8 :
1 sc in each st (54)
Round 9 :
1 sc in each st BLO (54)
Round 10 :
1 sc in each st (54)
Round 11 :
1 sc in each st BLO (54)
Round 12 :
1 sc in each st (54)
Info :
Begin a steady cycle: five rounds of texture (alternating BLO and regular) followed by a decrease round. This creates long diagonal ridges visible on the finished hat. Keep track of each decrease cycle — this hat uses 9 decrease cycles to taper from 60 to 6 stitches.
Round 13 (Decrease 2) :
(7 sc, dec) x 6 (48)
Round 14 :
1 sc in each st (48)
Round 15 :
1 sc in each st BLO (48)
Round 16 :
1 sc in each st (48)
Round 17 :
1 sc in each st BLO (48)
Round 18 :
1 sc in each st (48)
Info :
Stuff the lower cone lightly through the brim opening if you want the hat to be sturdier. Add a 1-2 cm layer of stuffing around the base only — do not overstuff yet; more stuffing will be added as you decrease further.
Round 19 (Decrease 3) :
(6 sc, dec) x 6 (42)
Round 20 :
1 sc in each st (42)
Round 21 :
1 sc in each st BLO (42)
Round 22 :
1 sc in each st (42)
Round 23 :
1 sc in each st BLO (42)
Round 24 :
1 sc in each st (42)
Info :
Keep the spirals continuous by not breaking yarn between BLO rounds and regular rounds — the contrast of texture appears because you are working into different loops, not because of color changes. Move your stitch marker each round to keep track of the start position as you spiral up.
Round 25 (Decrease 4) :
(5 sc, dec) x 6 (36)
Round 26 :
1 sc in each st (36)
Round 27 :
1 sc in each st BLO (36)
Round 28 :
1 sc in each st (36)
Round 29 :
1 sc in each st BLO (36)
Round 30 :
1 sc in each st (36)
Info :
As circumference reduces, the spacing of your ridges will compress and the spiral will begin to ascend at an obvious angle — this is expected. If you want a looser spiral, add an extra regular round between decrease cycles.
Round 31 (Decrease 5) :
(4 sc, dec) x 6 (30)
Round 32 :
1 sc in each st (30)
Round 33 :
1 sc in each st BLO (30)
Round 34 :
1 sc in each st (30)
Round 35 :
1 sc in each st BLO (30)
Round 36 :
1 sc in each st (30)
Info :
At this point the cone is beginning to narrow noticeably. Add more stuffing into the lower half through the brim as you go, distributing it evenly so the bottom retains shape while the upper cone remains lighter for the tip curl.
Round 37 (Decrease 6) :
(3 sc, dec) x 6 (24)
Round 38 :
1 sc in each st (24)
Round 39 :
1 sc in each st BLO (24)
Round 40 :
1 sc in each st (24)
Round 41 :
1 sc in each st BLO (24)
Round 42 :
1 sc in each st (24)
Info :
When the cone reaches ~24 sts, begin to think about the final tip shape — you can choose a long tapered tip like the photo or a slightly shorter stiffer top. For a curlier tip, add extra single crochet rounds without decreases to lengthen the cone before continuing decreases.
Round 43 (Decrease 7) :
(2 sc, dec) x 6 (18)
Round 44 :
1 sc in each st (18)
Round 45 :
1 sc in each st BLO (18)
Round 46 :
1 sc in each st (18)
Round 47 :
1 sc in each st BLO (18)
Round 48 :
1 sc in each st (18)
Info :
Begin stuffing the upper cone section more firmly now so the hat keeps its tall shape. Use small handfuls of fiberfill, pressing lightly and shaping with your fingers. Keep the top lighter than the base so the hat can tip and curl slightly.
Round 49 (Decrease 8) :
(1 sc, dec) x 6 (12)
Round 50 :
1 sc in each st (12)
Round 51 :
1 sc in each st BLO (12)
Round 52 :
1 sc in each st (12)
Round 53 :
1 sc in each st BLO (12)
Round 54 :
1 sc in each st (12)
Info :
We are approaching the final taper. Make sure you have enough yarn to reach the tip — switch to a smaller hook if your stitches become loose when working into very few stitches.
Round 55 (Decrease 9) :
6 dec (6)
Round 56 :
1 sc in each st (6)
Round 57 :
1 sc in each st BLO (6)
Round 58 :
1 sc in each st (6)
Round 59 :
1 sc in each st (6)
Round 60 :
1 sc in each st (6)
Info :
Fill the cone more fully through the last few rounds to round the tip. If you want a floppy tip that curls, leave the stuffing slightly looser and shape the tip with your fingers before closing.
Round 61 :
(1 sc, inc) x 6 (9) — optional small shaping round to create a slightly bulbous tip
Round 62 :
1 sc in each st (9)
Round 63 :
1 sc in each st (9)
Round 64 :
1 sc in each st (9)
Round 65 :
3 dec, 1 sc (6)
Info :
Close tip by slip stitching and cutting yarn leaving long tail. Weave tail through remaining stitches, pull tight, and fasten off securely. Use remaining tail to attach the pom pom or sew it on later (pom pom instructions follow).
— Pom Pom (White) :
Option A - Crocheted Pom Pom (fuzzy sphere) Round 1 :
With white yarn, 6 sc in mr (6)
Round 3 :
(1 sc, inc) x 6 (18)
Round 4 :
(2 sc, inc) x 6 (24)
Round 5 :
(3 sc, inc) x 6 (30)
Round 6-9 :
1 sc in each st (30)
Info :
Stuff the pom lightly to create a plush, round shape. For a fluffier pom, you can use a pom pom maker or commercial pom pom and attach it instead of crocheting a sphere.
Round 10 :
(3 sc, dec) x 6 (24)
Round 11 :
(2 sc, dec) x 6 (18)
Round 12 :
(1 sc, dec) x 6 (12)
Info :
Fasten off leaving a long tail for sewing. Flatten the opening with the yarn tail, sew the hole closed, and use the remaining tail to stitch the pom pom to the tip of the cone. For added fullness, brush the pom pom with a pet brush or pick to loosen fibers.
Option B - Maker Pom Pom :
Use a 6-8 cm pom pom maker or cardboard circle template to create a large fluffy pom pom in white. Attach securely with strong thread or yarn and weave ends into the inside of the hat.
— Holly Leaves (Make 2) :
Round 1 :
With green yarn, ch 6, sc in 2nd ch from hook and across (5)
Round 2 :
Ch 1, turn, sc in first st, hdc in next, dc in next, hdc in next, sc in last (5)
Round 3 :
Ch 1, turn, sc in first st, (sc, ch1, sc) in next to create small point, sc in next, (sc, ch1, sc) in next, sc last (9)
Round 4 :
Work single crochet and slip stitch along outer edges to shape three points on each leaf: sc, sl st, sc in next, sl st, sc across. Fasten off leaving tail for sewing.
Info :
For sharper holly points, use smaller hook, pick up fewer stitches in the points, or add more picot-style ch1 sl st to create defined edges. Block lightly by pinning to shape if desired.
— Holly Berries (Make 3) :
Round 1 :
With red yarn, 6 sc in mr (6)
Round 3 :
1 sc in each st (12)
Round 5 :
Fasten off leaving long tail. Slightly stuff and close the remaining opening with tail. Make 3 berries and set aside.
Info :
Arrange berries in a small cluster and sew them together slightly before attaching to the brim so they don't shift. Use tail ends to stitch cluster securely to the hat brim.
— Finishing & Assembly :
Info :
Before attaching decorative elements, pin the holly and berries in the desired position on the white brim to check balance. The photos show the holly placed slightly to one side of the front of the brim. Place the pom pom on the tip and check that the hat balances upright when set down; adjust stuffing if necessary.
Step 1 :
Attach pom pom: Using the tail left on the pom pom or pom pom maker's cord, sew through the tip of the cone (rounds 63-65 area or the final tip) firmly. For a crocheted pom pom sphere, sew through the sphere multiple times and anchor to the cone with several passes.
Step 2 :
Sew holly leaves: Using green yarn tails, position both leaves on the brim at rounds 12-14 area of the brim (counting from brim base), approximately 10-14 stitches apart. Use blind stitches to hide sewing on the inside of the brim. Stitches should run through the brim and the base of the leaf for secure attachment.
Step 3 :
Sew berries: Cluster three berries together and secure into place between the two leaves. Sew through the base of each berry and into the brim, then back into the berry several times. Weave tails into the inside of the brim when finished.
Step 4 :
Weave in all remaining ends using the yarn needle. Hide ends by weaving into several rounds of stitches inside the brim or cone. Trim close to work and secure with a knot if necessary.
Info :
If you want extra stiffness for display, insert a light cardboard cone or plastic cone form inside before closing the top (place it before last stuffing and sew the tip around the form). This will help the hat keep a very tall shape for tabletop display.
Step 5 :
Optional: Add a small loop of yarn at the inside top of the brim to hang the hat as a tree topper or ornament. Sew through the brim stitches and knot securely, then weave tail into the brim interior.
Info :
Final blocking: Lightly steam or mist the leaves and hat if using acrylic or machine-washable yarn. Reshape the cone gently, pinch the ridges to emphasize the spiral, and press the leaves flat if needed for a crisp finished look.
This big red spiral Santa hat is a delight to finish — the spiral texture and wide white brim create a whimsical silhouette that’s pure holiday cheer. Sewing on the tiny holly and berries adds a sweet, handmade detail that makes this piece feel like a treasured seasonal accent. Whether you tuck it on a mantel, make several for a festive display, or give one as a handmade gift, this hat will bring cozy smiles and extra sparkle to your home. 🧶🎁✨