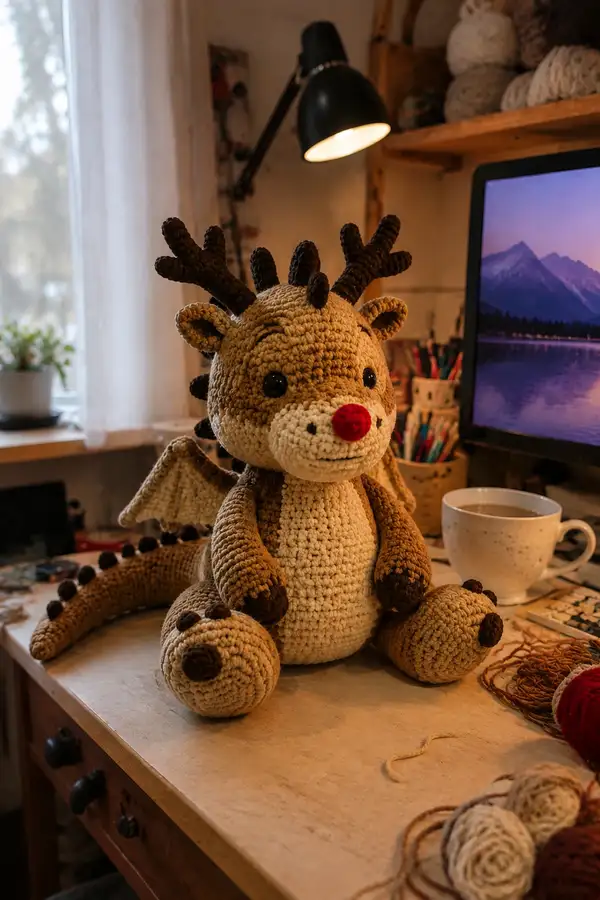
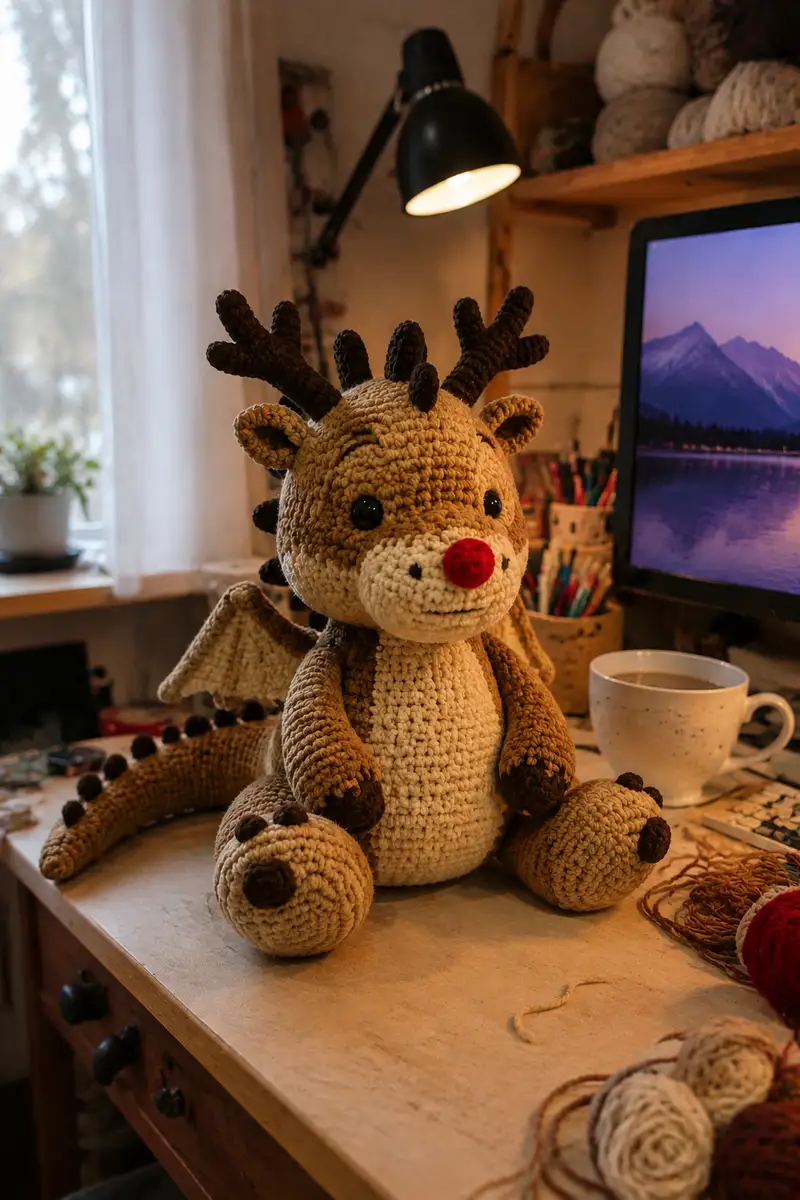
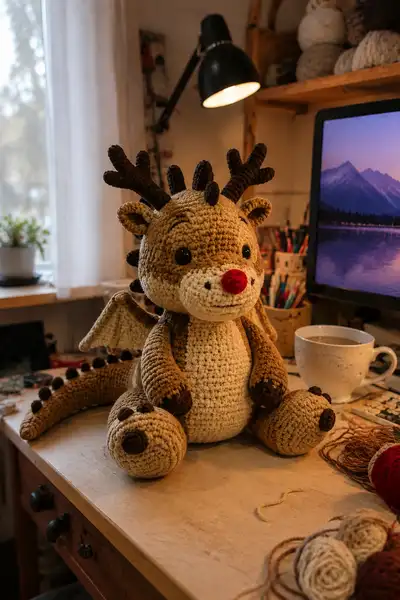
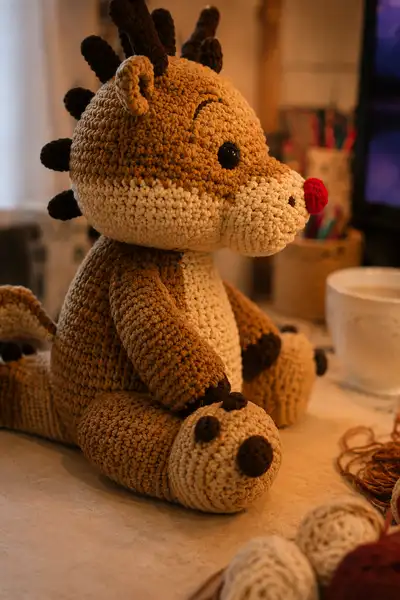
Make a cuddly hybrid reindeer-dragon amigurumi featuring soft tan body, cream belly, dark brown antlers and spikes, and a cheerful red nose. This pattern guides you through shaping a large rounded head, sculpted muzzle, wings, long tail with textured spikes, and roomy limbs for sitting pose. Detailed stitch counts and assembly tips help you achieve a professional finish.
Progress Tracker
0% Complete
— Head :
Round 1 :
6 sc in magic ring (6)
Round 3 :
(1 sc, 1 inc) x 6 (18)
Round 4 :
(2 sc, 1 inc) x 6 (24)
Round 5 :
(3 sc, 1 inc) x 6 (30)
Round 6 :
(4 sc, 1 inc) x 6 (36)
Round 7 :
(5 sc, 1 inc) x 6 (42)
Round 8 :
(6 sc, 1 inc) x 6 (48)
Info :
Work these rounds in warm tan. Place a stitch marker in first stitch of each round to keep track; the head will be worked mostly in continuous rounds (spiral). Tight tension keeps stuffing from showing.
Round 9 :
1 sc in each st (48)
Round 10 :
1 sc in each st (48)
Round 11 :
1 sc in each st (48)
Info :
Place safety eyes between rounds 13-14, approximately 10-12 stitches apart (measured across the face) depending on how wide you want the expression. For 12mm eyes, place them slightly above the muzzle starting at round 14.
Round 12 :
1 sc in each st (48)
Round 13 :
1 sc in each st (48)
Round 14 :
1 sc in each st (48)
Info :
If you want a slightly squarer forehead, work rounds 11-15 evenly and then add a subtle decrease later. Adjust eye spacing now by marking the stitches where the eyes should sit rather than relying on approximate counts.
Round 15 :
1 sc in each st (48)
Round 16 :
1 sc in each st (48)
Round 17 :
1 sc in each st (48)
Round 18 :
(6 sc, 1 dec) x 6 (42)
Round 19 :
(5 sc, 1 dec) x 6 (36)
Info :
Begin stuffing head firmly now with polyester fiberfill. Add small amounts and distribute evenly to avoid lumps. Keep head quite firm but still soft to the touch so the safety eyes stay snug.
Round 20 :
(4 sc, 1 dec) x 6 (30)
Round 21 :
(3 sc, 1 dec) x 6 (24)
Round 22 :
(2 sc, 1 dec) x 6 (18)
Round 23 :
(1 sc, 1 dec) x 6 (12)
Info :
Fasten off leaving a long tail for sewing. Finish closing the head top with a yarn needle, weaving the tail through the remaining stitches and pulling tight. Leave the lower neck stitches open for neck attachment to the body.
— Muzzle / Snout :
Round 1 :
6 sc in magic ring (6)
Round 3 :
(1 sc, 1 inc) x 6 (18)
Round 4 :
(2 sc, 1 inc) x 6 (24)
Round 5 :
1 sc in each st (24)
Info :
Switch to light cream yarn before Round 6, joining on any stitch. This muzzle will be attached to the front of the head covering rounds 10-16 area. Stuff the muzzle moderately so it keeps a rounded snout shape.
Round 6 :
1 sc in each st (24)
Round 7 :
(3 sc, 1 dec) x 6 (18)
Round 8 :
(2 sc, 1 dec) x 6 (12)
Round 9 :
(1 sc, 1 dec) x 6 (6)
Info :
Stuff firmly but leave a small opening for sewing. Close final rounds and leave a long tail for sewing the muzzle to the head. Position so the muzzle protrudes about 6-8 stitches below the eyes.
Round 10 :
Sc around to close slightly, then fasten off leaving long tail for sewing
— Red Nose :
Round 1 :
6 sc in magic ring (6) in bright red (6)
Round 3 :
(1 sc, 1 inc) x 6 (18)
Round 4 :
1 sc in each st (18)
Info :
Stuff lightly and attach to the center front of the muzzle using the long tail, sewing evenly so it sits flush. Weave ends into the muzzle to hide them.
— Body :
Round 1 :
6 sc in magic ring (6)
Round 3 :
(1 sc, 1 inc) x 6 (18)
Round 4 :
(2 sc, 1 inc) x 6 (24)
Round 5 :
(3 sc, 1 inc) x 6 (30)
Round 6 :
(4 sc, 1 inc) x 6 (36)
Round 7 :
(5 sc, 1 inc) x 6 (42)
Round 8 :
(6 sc, 1 inc) x 6 (48)
Round 9-12 :
1 sc in each st (48)
Info :
Change to light cream for the belly start. Join cream in the front-most stitch and work belly rounds in rows or continuous rounds depending on preference. Work belly center as 18-20 stitches across for a broad front panel.
Round 13 :
Change to cream: 1 sc in next 18 sts (work back-and-forth or continue in round and mark edges) (48 total)
Round 14-18 :
1 sc in each st (48). Continue belly in cream for 6 rounds to create a long front panel.
Info :
Start stuffing body lightly at round 16. The body should be moderately firm but softer than the head so the toy can sit. Keep stuffing as you work to maintain shape. Do not overstuff to allow head to rest into neck area.
Round 19 :
(6 sc, 1 dec) x 6 (42)
Round 20 :
(5 sc, 1 dec) x 6 (36)
Round 21 :
(4 sc, 1 dec) x 6 (30)
Round 22 :
(3 sc, 1 dec) x 6 (24)
Round 23 :
(2 sc, 1 dec) x 6 (18)
Round 24 :
(1 sc, 1 dec) x 6 (12)
Info :
Leave top neck opening large enough to sew head to body. Fasten off leaving long tail for sewing. Reinforce the neck seam by slip stitching the head into the body opening before final sewing if preferred.
— Arms (Make 2) :
Round 1 :
6 sc in magic ring (6)
Round 3 :
(1 sc, 1 inc) x 6 (18)
Round 4 :
1 sc in each st (18)
Round 5 :
1 sc in each st (18)
Info :
Switch to dark brown at Round 6 for paw tips. Keep rounds worked in continuous spiral for smooth shaping. Stuff the paw tips firmly and the arm length lightly so they can drape frontwards.
Round 6 :
Change to dark brown: 1 sc in each st (18)
Round 7-15 :
Switch back to tan: 1 sc in each st (18) for 9 rounds to build arm length (Rounds 7-15)
Round 16 :
(2 sc, 1 dec) x 4, 2 sc (14)
Round 17 :
1 sc in each st (14)
Round 18 :
(1 sc, 1 dec) x 4, 2 sc (10)
Round 19 :
1 sc in each st (10)
Round 20 :
Fasten off leaving long tail for sewing; stuff firmly at paw and lightly to wrist
Info :
If you want cable-style arms or poseable arms use a thin floral wire inserted before final stuffing and fold ends back so they don't poke through stitches. Sew arms on to body at rounds 18-22 on sides for a natural seated position.
— Legs / Feet (Make 2) :
Round 1 :
6 sc in magic ring (6)
Round 3 :
(1 sc, 1 inc) x 6 (18)
Round 4 :
(2 sc, 1 inc) x 6 (24)
Round 5 :
1 sc in each st (24)
Round 6 :
1 sc in each st (24)
Info :
At Round 7 begin to shape an elongated foot by switching to tan for the upper foot and dark brown for toe pads later. The feet will be broad so the toy sits easily—work evenly to keep a rounded, flat base.
Round 7 :
1 sc in each st (24)
Round 8 :
1 sc in each st (24)
Round 9 :
(3 sc, 1 inc) x 6 (30)
Round 10-14 :
1 sc in each st (30)
Info :
Switch to dark brown for toe pad details. Make three small circles to sew onto the top of each foot for toes: each toe pad: 6 sc in mr, 6 inc (12), 1 sc around (12). Fasten off and leave tail for sewing.
Round 15 :
Change to dark brown and work 1 sc in each st around top edge to create toe contrast (30)
Round 16 :
(4 sc, 1 dec) x 5 (25)
Round 17 :
(3 sc, 1 dec) x 5 (20)
Round 18 :
(2 sc, 1 dec) x 5 (15)
Round 19 :
(1 sc, 1 dec) x 5 (10)
Round 20 :
Fasten off leaving long tail for sewing. Stuff foot firmly to create a stable base for sitting.
— Ears (Make 2) :
Round 1 :
6 sc in magic ring (6)
Round 3 :
1 sc in each st (12)
Round 4 :
1 sc in each st (12)
Round 5 :
(3 sc, 1 dec) x 3 (9)
Round 6 :
Fold ear lightly and sc through both layers across top edge to form a cup shape (9)
Info :
Sew ears to the head at rounds 6-9 on either side of the antler base. Position forward slightly for a friendly look. Stuff ears very lightly or not at all depending on desired flop.
Round 7 :
Fasten off leaving long tail for sewing
— Antlers (Make 2 large + 3 small spikes) :
Round 1 :
6 sc in magic ring (6) in dark chocolate brown
Round 3 :
1 sc in each st (12)
Round 4 :
(2 sc, 1 inc) x 4 (16)
Round 5 :
1 sc in each st (16)
Round 6 :
(3 sc, 1 inc) x 4 (20)
Round 7-10 :
1 sc in each st (20) to lengthen stem
Info :
Branch the antler by creating three small protrusions: for each branch make a small tube of 6-8 rounds starting with 6 sc in mr then 1 sc in each st for 5-7 rounds. Sew these tubes to the main stem at staggered spacings. If you want poseable antlers insert thin wire before final stuffing.
Round 11 :
Work decreases to taper: (3 sc, 1 dec) x 4 (16)
Round 12 :
(2 sc, 1 dec) x 4 (12)
Round 13 :
(1 sc, 1 dec) x 4 (8)
Round 14 :
Fasten off leaving long tail for sewing; stuff lightly
Info :
Make three small spike-protrusions for the head crown by crocheting 6 sc in mr, then 4-6 rounds of 1 sc in each st, fasten off leaving long tail. Position these behind the antlers as crown spikes and sew them vertically into place around the head top.
— Dorsal Spikes / Tail Knobs :
Round 1 :
6 sc in magic ring (6) in dark brown
Round 3 :
1 sc in each st (12)
Round 4 :
Fasten off leaving tail for sewing; make 10-12 for dorsal spine and 6-8 small ones for tail depending on tail length
Info :
Sew evenly down the center of the tail and the top of the head/back. Use pins first to space them about 8-12 stitches apart for an even look. Slightly stuff each knob for a rounded bead-like texture.
— Tail :
Round 1 :
8 sc in magic ring (8)
Round 3 :
(1 sc, 1 inc) x 8 (24)
Round 4 :
(2 sc, 1 inc) x 8 (32)
Round 5-10 :
1 sc in each st (32) to build length
Round 11 :
(4 sc, 1 dec) x 5, 2 sc (28)
Round 12-18 :
1 sc in each st (28) lengthening towards a tapered end
Round 19 :
(3 sc, 1 dec) x 5 (24)
Round 20 :
(2 sc, 1 dec) x 5 (20)
Round 21 :
(1 sc, 1 dec) x 5 (15)
Round 22 :
(1 sc, dec) x 5 or continue decreasing until you reach desired tip width (10)
Round 23 :
Fasten off leaving long tail for sewing; attach dorsal knobs along the top spaced evenly
Info :
Stuff the tail more firmly at the base and lighter as you go to the tip so the tail curves naturally. Sew tail to back lower body centered at rounds 2-6 from the bottom.
— Wings (Make 2) :
Round 1 :
Ch 8, turn, 1 sc in 2nd ch from hook, 6 sc across, 3 sc in last stitch to work along the opposite side, 6 sc back along the chain (18) (attach and work in rounds to form a small wing)
Round 2 :
Increase at tip and base to flare: (sc, inc) across tip sections to reach 24 sts total
Round 3-7 :
1 sc in each st (24) to build wing surface
Round 8 :
Work 1 sc BLO for one round to create a defined ridge (24)
Round 9 :
Fasten off leaving tail for sewing; lightly stuff base only to help wings sit upright when attached
Info :
Sew wings to back of the upper body at rounds 8-12. Angle them slightly outward and forward. Reinforce with extra stitches at the base so wings remain stable during display or gentle play.
— Paw Pads (Make 6 small circles) :
Round 1 :
6 sc in mr in dark brown (6)
Round 3 :
1 sc in each st (12)
Round 4 :
Fasten off leaving tail for sewing; sew three pads to top of each foot and one pad at bottoms if desired for stability
— Small Head Details (Eyebrows & Nostrils) :
Info :
Use black yarn and a yarn needle to embroider small eyebrow arches above the eyes. Use dark brown to stitch two small nostril marks on the muzzle in a 'v' shape. Place eyebrows around round 13-15 area and nostrils centered on muzzle front.
— Assembly & Final Touches :
Info :
Block and shape parts lightly with steam if yarn allows. Use pins to position limbs, tail, wings and antlers before sewing to check symmetry. Reinforce load-bearing joins like legs and tail with a second pass of sewing if the toy will be handled often.
Round 1 :
Sew head to body using mattress stitch and the long tail left from head. Align center front of head (muzzle) with cream belly panel for natural posture.
Info :
Weave all ends into nearby stitches and trim. Optionally add a few hidden stitches of fabric glue under the antlers base for added stability. Add safety eye washers firmly behind eyes.
This Big Reindeer Dragon mixes sweet seasonal charm with whimsical dragon details for a truly lovable plush companion. The step-by-step, round-by-round instructions help you build each sculpted section with confidence. Enjoy the satisfaction of stitching antlers, trimming tiny dorsal knobs and finishing a bright red nose that brings the face to life. 🧶 Make it for a gift or a festive display — every stitch matters and is worth the smile. 🎁✨