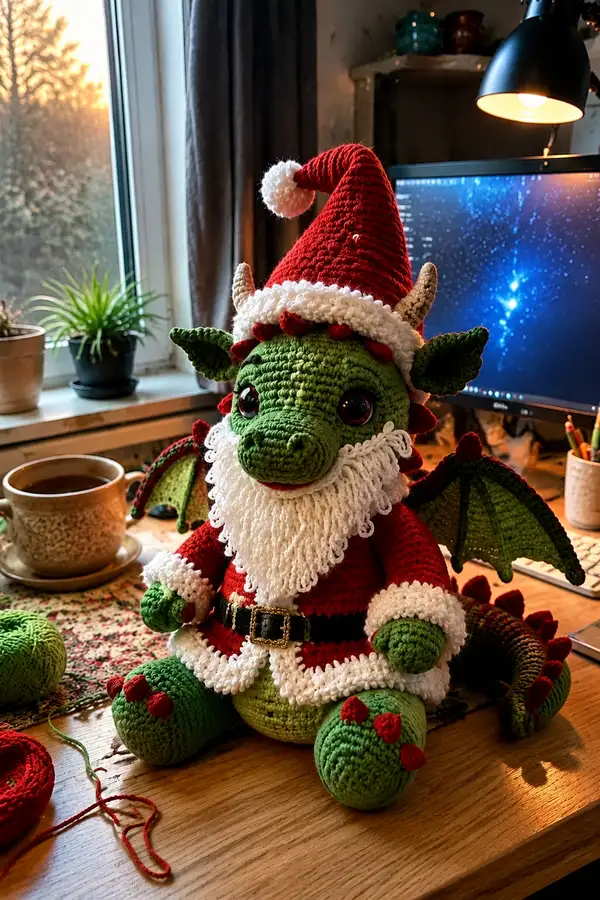
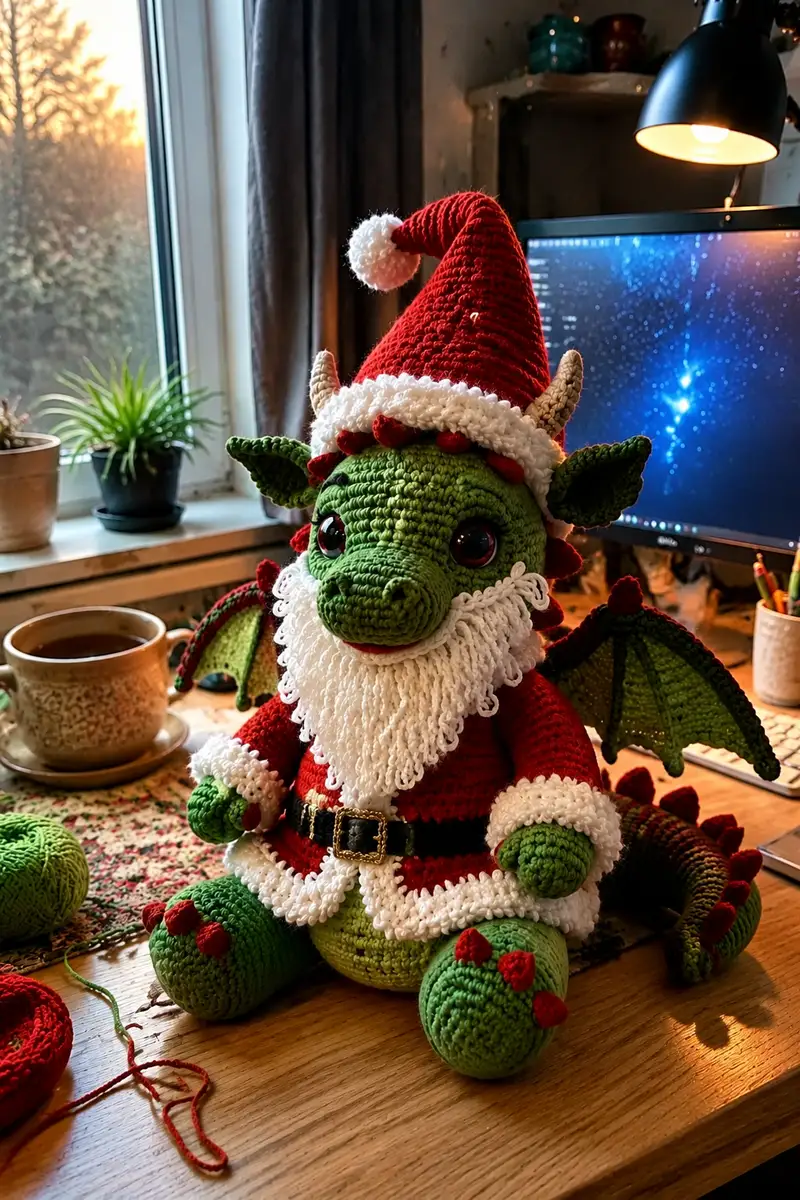
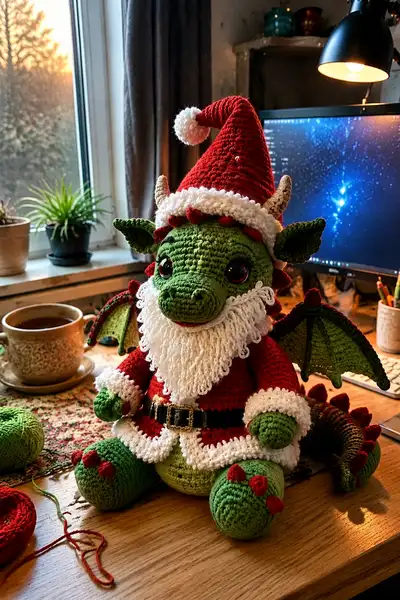
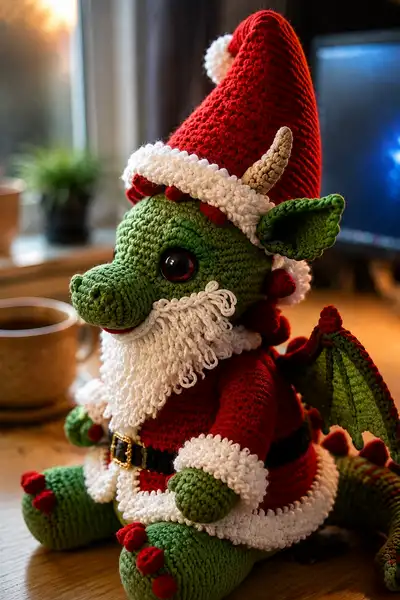
Create a cuddly, festive dragon dressed as Santa — complete with a tall red Santa hat, fluffy white beard, wings, horns, dorsal spikes and a cozy red coat trimmed in faux fur. This pattern includes detailed round-by-round instructions for head, snout, body, limbs, wings, tail, accessories and assembly to recreate the exact charming character shown. Perfect as a holiday centerpiece or a special handmade gift.
Progress Tracker
0% Complete
— Head :
Round 1 :
6 sc in magic ring (6)
Round 3 :
(1 sc, inc) x 6 (18)
Round 4 :
(2 sc, inc) x 6 (24)
Round 5 :
(3 sc, inc) x 6 (30)
Round 6 :
(4 sc, inc) x 6 (36)
Round 7 :
(5 sc, inc) x 6 (42)
Round 8 :
(6 sc, inc) x 6 (48)
Round 9 :
(7 sc, inc) x 6 (54)
Round 10 :
(8 sc, inc) x 6 (60)
Info :
Switch to darker or main green as needed if you used a separate color for increase rounds. Keep marker at first stitch of each round. Head will be worked in continuous rounds—do not join. Tight tension creates smooth sculpting.
Round 11-14 :
1 sc in each st (60)
Info :
Place safety eyes between rounds 13 and 14. For the same look as the sample, position eyes about 10-12 stitches apart when counted across the round (adjust for expression). Insert safety eyes before further stuffing.
Round 15-18 :
1 sc in each st (60)
Info :
Begin stuffing the head lightly starting at round 15 so you can sculpt cheek fullness. Add fiberfill in small amounts to maintain control and shape—the head should be firm but squeezable.
Round 19 :
(8 sc, dec) x 6 (54)
Round 20 :
(7 sc, dec) x 6 (48)
Round 21 :
(6 sc, dec) x 6 (42)
Round 22 :
(5 sc, dec) x 6 (36)
Info :
Continue stuffing as you decrease. Sculpt cheeks by adding a little extra stuffing to the sides just under the eyes for the dragon's rounded face. If adding jaw insert pieces (like felt), add now before rounds reduce the opening too much.
Round 23 :
(4 sc, dec) x 6 (30)
Round 24 :
(3 sc, dec) x 6 (24)
Round 25 :
(2 sc, dec) x 6 (18)
Round 26 :
(1 sc, dec) x 6 (12)
Info :
Fasten off leaving a long tail for sewing the head onto the body later. Do not close the head completely if you plan to anchor the hat or inner cap—leave opening to secure neck join.
— Snout / Muzzle :
Round 1 :
6 sc in magic ring (6)
Round 3 :
(1 sc, inc) x 6 (18)
Round 4 :
(2 sc, inc) x 6 (24)
Round 5-6 :
1 sc in each st (24)
Round 7 :
(2 sc, dec) x 6 (18)
Round 8 :
(1 sc, dec) x 6 (12)
Info :
Before fully closing, stuff snout firmly. Pin snout centered under eyes and sew onto head with ladder stitch. Many sample images show a slightly upturned snout — sew with a slight upwards tilt for character.
— Nose / Nostrils :
Round 1 :
5 sc in magic ring (5)
Round 2 :
1 sc in each st (5)
Info :
Make two nostrils and sew them onto the tip of the snout symmetrical left and right. Use darker green or embroider with yarn if you prefer a flatter look.
— Eyes & Eyebrows (optional embroidered lids) :
Info :
Use 18mm safety eyes. If embroidering lids, use a couple of rows of sc in a darker green around the eye placement to create the feeling of eyelids. Ensure safety eyes are secured before further stuffing.
— Beard (Loop Stitch) :
Round 1 :
Attach white yarn at chin edge, ch1, sc evenly along chin curve where beard will attach (approx 26 sc) (26)
Round 2 :
Using loop stitch: *pull loop to desired length, yo, pull through, sc in next st* repeat around to create long curving loops (26)
Round 3 :
Repeat loop-stitch round to add density and fullness (26)
Round 4 :
Turn loops into curls by trimming loop ends slightly or leaving long for a shaggy beard. Fasten off and weave ends behind beard (26)
Info :
Beard density can be adjusted by adding 2-3 loop rounds. Brush loops gently with a comb to fluff for the faux-fur look. For the moustache sections on the cheeks, create two shorter loop-stitch strips and sew at side of muzzle.
— Ears (Make 2) :
Round 1 :
6 sc in magic ring (6)
Round 3 :
(1 sc, inc) x 6 (18)
Round 4 :
1 sc in each st (18)
Round 5 :
BLO 1 sc in each st to create an inner ridge (18)
Round 6 :
Fold ear slightly and sc through both layers across base to shape (approx 8 sc) Fasten off leaving long tail for sewing
Info :
Sew ears to upper sides of head at rounds 10-12. Tilt ears slightly forward and sew the base firmly, add a couple of stitches to shape the fold so ears stand up as shown.
— Horns (Make 2) :
Round 1 :
6 sc in magic ring with beige (6)
Round 2 :
(1 sc, inc) x 3 (9)
Round 3-6 :
1 sc in each st (9)
Round 7 :
(1 sc, dec) x 3 (6)
Round 8 :
6 sc (6) Fasten off leaving long tail for sewing and shaping
Info :
Stuff horns lightly or insert a small pipe-cleaner to hold shape. Sew them at the top of head near the hat brim placement and cover seam with hat trim. Horns on the sample angle outward then slightly backward — pin and test angles before sewing.
— Body :
Round 1 :
6 sc in magic ring (6)
Round 3 :
(1 sc, inc) x 6 (18)
Round 4 :
(2 sc, inc) x 6 (24)
Round 5 :
(3 sc, inc) x 6 (30)
Round 6 :
(4 sc, inc) x 6 (36)
Round 7 :
(5 sc, inc) x 6 (42)
Round 8 :
(6 sc, inc) x 6 (48)
Round 9 :
(7 sc, inc) x 6 (54)
Round 10 :
(8 sc, inc) x 6 (60)
Round 11-14 :
1 sc in each st (60)
Info :
Work the body largely in red to form the Santa coat. If you prefer a separate underlying belly color, change to lighter or darker green for the underside starting at round 12 before switching to red for the coat to create layered look. For pictured look, the belly is slightly lighter green—see underbelly section below.
Round 15 :
(8 sc, dec) x 6 (54)
Round 16 :
(7 sc, dec) x 6 (48)
Round 17 :
(6 sc, dec) x 6 (42)
Round 18 :
(5 sc, dec) x 6 (36)
Info :
At round 18 start stuffing the body firmly. The body must be well-stuffed to support the heavy head and accessories. Add fiberfill in small handfuls and compress with your fingers to avoid lumps.
Round 19 :
(4 sc, dec) x 6 (30)
Round 20 :
(3 sc, dec) x 6 (24)
Round 21 :
(2 sc, dec) x 6 (18)
Round 22 :
(1 sc, dec) x 6 (12)
Info :
Fasten off leaving long tail for attaching bottom and for sewing the body closed around stuffing. If creating an opening to insert heavy weighting (e.g. rice sac for stability), leave a small hole and insert weight at this point before fully closing.
— Underbelly Panel :
Round 1 :
With lighter green, ch 14, sc in 2nd ch from hook and across (13)
Round 2-10 :
Turn, ch1, 1 sc in each st (13)
Info :
Sew the underbelly panel to the body front starting under where the coat falls. This creates the two-tone look seen under the wings and at the belly front. Use mattress stitch for smooth seam.
— Arms (Make 2) :
Round 1 :
6 sc in magic ring (6)
Round 3 :
(1 sc, inc) x 6 (18)
Round 4-6 :
1 sc in each st (18)
Round 7 :
(4 sc, inc) x 3 (21)
Round 8-10 :
1 sc in each st (21)
Round 11 :
Change to red for the sleeve cuff. 1 sc in each st BLO to create a ridge and cuff foundation (21)
Round 12-13 :
Switch to white faux-fur trim using loop stitch or multiple short loop rounds: sc evenly around using loop stitch to imitate fluffy cuff (21)
Round 14 :
Switch back to green, 1 sc in each st (21)
Round 15-17 :
1 sc in each st (21) Stuff hand portion firmly; taper into arm by stuffing less as you move up
Round 18 :
(4 sc, dec) x 3 (18) Fasten off leaving long tail for sewing
Info :
Sew arms to body's sides between rounds 14-18 of the body for natural hanging position. Pin before sewing: arms attach at about the side seam near the coat edge and should point slightly forward. Add a few inside stitches into the body to anchor them firmly.
— Hands & Claws Detail :
Round 1 :
Make 3 small claws/knuckles each as 5 sc in magic ring, sc 2 rounds, fasten off. Sew into place on hand top as pictured
Info :
Use red yarn for little claws on the hands and feet. Sew them in clusters of three at the tip of each hand and toe to mimic the sample's triangular claws.
— Legs (Make 2) :
Round 1 :
6 sc in magic ring (6)
Round 3 :
(1 sc, inc) x 6 (18)
Round 4 :
(2 sc, inc) x 6 (24)
Round 5-7 :
1 sc in each st (24)
Round 8 :
(3 sc, inc) x 6 (30)
Round 9-12 :
1 sc in each st (30)
Round 13 :
Start slight decrease for ankle: (3 sc, dec) x 6 (24)
Round 14-15 :
1 sc in each st (24)
Round 16 :
(2 sc, dec) x 6 (18)
Round 17 :
1 sc in each st (18)
Round 18 :
Stuff foot very firmly and shape toes slightly with extra stuffing toward front. Fasten off leaving long tail for sewing.
Round 19 :
Sew three red claws (as small cones) to the foot front spaced evenly. Use hotdog/oval seam technique to attach foot to body bottom area.
Info :
Position legs symmetrically on the lower body rounds (attach near body rounds 2-6 from bottom) so the dragon sits comfortably. Add extra interior stitches for strength if the toy will be posed regularly.
— Wing Panels (Make 2) :
Wing Half A - Inner Membrane Round 1 :
With darker green ch 21, sc in 2nd ch from hook and across (20)
Round 2-6 :
Turn, ch1, 1 sc in each st (20)
Round 7 :
Along one long edge, inc at each end to create a curved edge: sc across adding 2 extra sc across ends (approx 24)
Info :
Work both membrane panels identical and add a center ridge by sewing a strip of darker yarn down the middle after both halves are attached. Membrane should be slightly stretched when attaching to wing bones so it looks taut.
Wing Frame - Bone Ribs (Make 2) :
In red/burgundy, ch 2, 1 sc in second ch, continue 18 sc to lengthen the rib. Make 4-5 ribs per wing (length decreasing from base to tip). Fasten off leaving long tails.
Round 8-10 :
Sew ribs onto membrane spaced evenly and then edge the wing with maroon sc around both sides to create the raised outline. Add small red spikes at outer edge by making 4 sc cone shapes and sewing along the rim.
Info :
If you want poseable wings, insert a thin wire into each rib and secure with several stitches. Reinforce with extra stitches at attachment points to body between rounds 10-14 to keep the wings stable.
— Tail :
Round 1 :
6 sc in magic ring (6)
Round 3 :
(1 sc, inc) x 6 (18)
Round 4 :
(2 sc, inc) x 6 (24)
Round 5-9 :
1 sc in each st (24) Work straight for length
Round 10 :
(3 sc, dec) x 6 (18)
Round 11-13 :
1 sc in each st (18)
Round 14 :
(2 sc, dec) x 6 (12)
Round 15-20 :
1 sc in each st (12) Stuff tail fairly firm at base, taper toward tip
Round 21 :
(1 sc, dec) x 4 (8)
Round 22 :
8 sc (8) Fasten off leaving a tail to sew
Tail Spikes (Make 10) :
4 sc in magic ring, sc 2 rounds (4) - Fasten off leaving tail. Sew these repeatedly along tail top edge diminishing in size toward the tip to create the row of red dorsal spikes.
Info :
Space spikes evenly and sew them so they curve slightly outward. Add a few larger spikes near the base and smaller ones near the tip to mimic the sample shape.
— Coat / Jacket (Worked as a skirted jacket) :
Round 1 :
With red, ch circumference to fit body at round 12 and join to make ring (work exact number to match body - approx 60 sts), then 1 sc in each ch (60)
Round 2-6 :
1 sc in each st (60)
Round 7 :
Switch to white faux-fur trim: work loop stitch around entire hem for fluffy edge (60)
Round 8-9 :
Work small scallop edging in white: *ch1, sc in next st, picot* repeat around to create crimped trim look (60)
Round 10 :
Work coat upper body: 1 sc in each st to finish jacket body and create front opening—leave gap front center to allow belt to be sewn on (60)
Info :
Sew coat around body so the base sits just above the legs. Add extra rows for a longer coat or reduce rows for a shorter jacket. Attach coat securely with whip stitch into body rounds so it doesn't shift.
— Belt & Buckle :
Round 1 :
With black, ch length to wrap around coat at midline and sl st into a flat strap. Fasten off leaving long tail for sewing.
Buckle :
Either use a small bought buckle glued or stitched on, or create a gold rectangle by doing 10 sc in gold thread then folding and sewing a small rectangle around the belt to simulate a buckle
Info :
Position the belt around coat rounds at approximately the narrowest waist point and secure with stitches at back to keep it from rotating.
— Hat (Santa Hat) :
Round 1 :
With red, ch4 and join to form small ring, sc 6 in ring (6)
Round 3 :
(1 sc, inc) x 6 (18)
Round 4 :
(2 sc, inc) x 6 (24)
Round 5 :
(3 sc, inc) x 6 (30)
Round 6-16 :
1 sc in each st (30) Keep working in spirals to build a tall cone that will slouch slightly at the top
Round 17 :
Start taper by doing (3 sc, dec) x 6 (24)
Round 18 :
(2 sc, dec) x 6 (18)
Round 19 :
(1 sc, dec) x 6 (12)
Round 21 :
Fasten off leaving long tail and stuff tip lightly. Fold point and shape so hat slouches. Create white fluffy brim by attaching white yarn and doing loop-stitch around base to form thick faux-fur brim. Add white pompom at tip using dense loop method or small pompom maker.
Info :
Hat brim should be wide enough to cover the hat seam at the top of head and cover horn bases. Sew hat brim onto head around round 9-11 so ear/horn seams are hidden.
— Pom Pom :
Round 1 :
Make a dense pompom or a tightly worked loop ball by creating many loop stitches into a small ring and tying tightly. Sew securely to hat tip.
— Fur Trim on Coat and Hat Edge :
Round 1 :
With white, attach at coat hem and use loop stitch around to mimic faux-fur (60). Repeat the same method for sleeve cuffs and hat brim for a consistent texture
Info :
Loop-stitch density controls fluffiness. For a plush look do two loop-stitch rounds and trim loops evenly for consistent length. Alternatively, use eyelash yarn for a different finish but note it will change weight and drape.
— Spikes / Scales on Neck and Back :
Each Spike :
4 sc in magic ring, sc 2 rounds (4) - Fasten off leaving long tail for sewing. Make 12-14 spikes of varying sizes and sew down center back from head to tail.
Info :
Place larger spikes near shoulders and tail base, smaller near head top and tail tip. Sew each spike firmly with an anchor stitch at base to keep them standing up on the seam.
— Small Details & Mouth Lining :
Info :
Sew a small red tongue inside mouth with a few sc rows of red yarn. Add slight embroidery for nostril and smile lines to give personality. Use a matching green yarn to add shadowing lines on the muzzle by sewing short curved stitches.
— Assembly Tips & Final Sculpting :
Info :
1) Block and steam components slightly if needed to shape ears and hat brim. 2) Use fiberfill to shape cheeks and jaw so the beard sits naturally. 3) Sew head to body with the head's tail anchored through body center using mattress stitch. 4) Reinforce wing stitches by sewing through both wing base and body with extra passes for security.
Final Touch :
Attach any purchased buckle, paint or embroider a subtle rosy cheek with cosmetic blush or dilute acrylic paint for a festive glow. Glue or stitch the eyes' safety washers thoroughly to ensure child safety if required.
This big Santa dragon brings holiday wonder to any room — sculpted face, loop-stitch beard, and a tall slouchy Santa hat make it utterly charming. Every sewn seam and sewn spike is a little bit of handmade magic. Gather your yarn and make a special keepsake to display or gift this season — you will love the character that emerges stitch by stitch. 🧶🎁✨