🧢 Beautiful ✨ Detailed πŸ’ Adorable

Big Snow White Dragon with Candy Cane Striped Horns Amigurumi Pattern

Big Snow White Dragon with Candy Cane Striped Horns Amigurumi Pattern
4.3β˜… Rating
10-12 Hours Time Needed
2.8K Made This
βœ‚οΈ

Advanced Level

Designed for experienced crocheters, these patterns involve intricate designs and complex techniques to challenge and inspire.

⏱️

Slow & Steady

A 10+ hour projectβ€”great for savoring the process over several sessions.

🧸

Cute Companion

An adorable friend to cherish, handcrafted with love to bring comfort and joy for years to come.

🧢 Jump to Pattern ↓

About This Big Snow White Dragon with Candy Cane Striped Horns Amigurumi Pattern

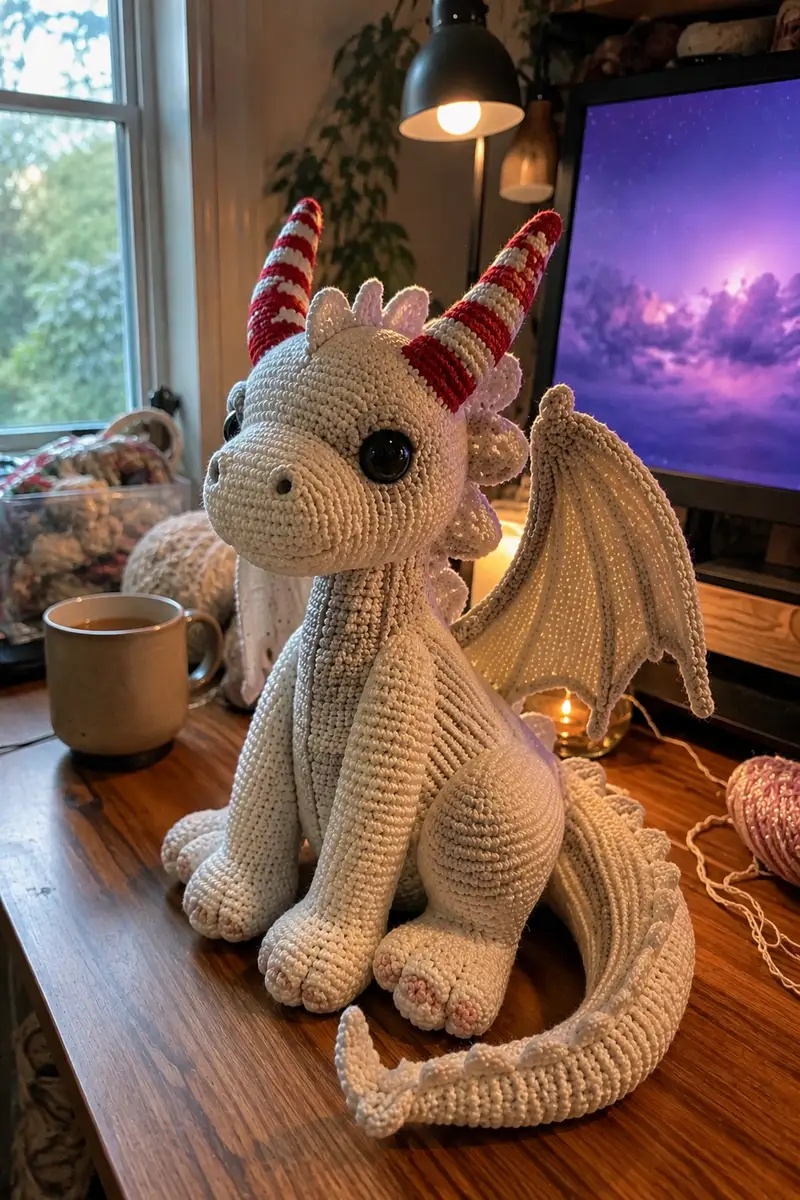
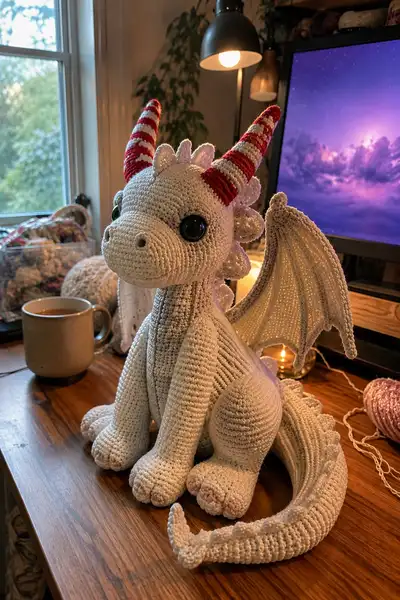
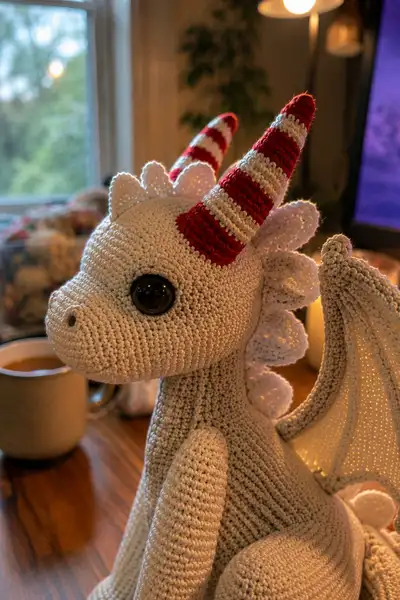
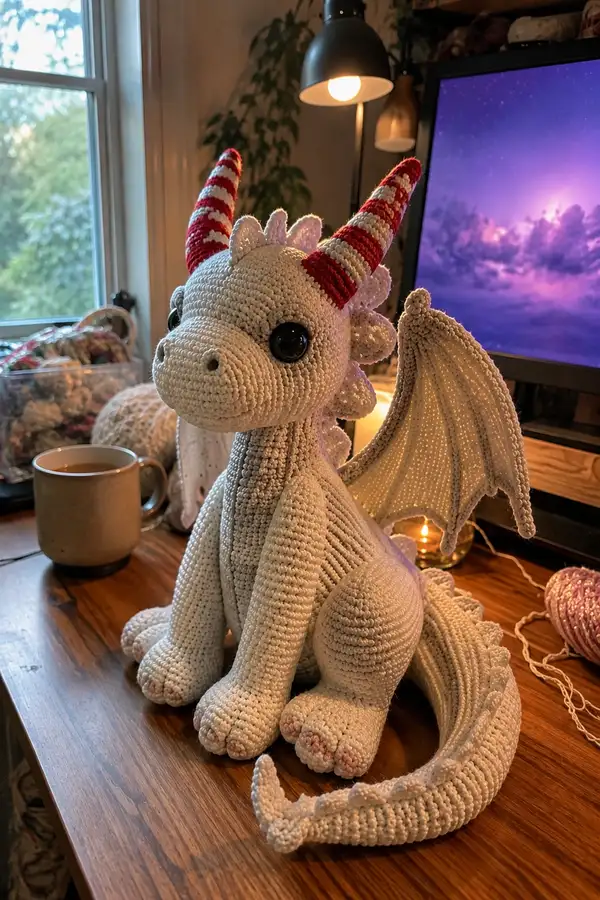
This pattern recreates a large, soft snow-white dragon with candy-cane striped horns, scalloped back plates, large shiny safety eyes and elegant bat-like wings. The body is worked in a tight amigurumi style with subtle ribbed texture down the chest and the inner wing membranes. Horns are worked as tapered spiraled cones with red and white stripes. The finished toy sits upright and has a curving tail with layered spines.

Big Snow White Dragon with Candy Cane Striped Horns Amigurumi Pattern crochet pattern - detailed view of completed project

The construction uses separate pieces sewn together: head and detachable muzzle, long tubular neck, stout body, four limbs, large wings with inner ribs, a flowing tail and many decorative plates. Detailed Info sections guide eye placement, stuffing strategy and color changes.

Why You'll Love This Big Snow White Dragon with Candy Cane Striped Horns Amigurumi Pattern

I love this pattern because it balances sculptural shaping with playful details β€” the candy-cane horns add a whimsical holiday touch while the scalloped ridge and expressive eyes give the dragon personality. I enjoy the combination of smooth amigurumi rounds and ribbed texture on the chest; it makes the finished piece feel refined and tactile. Sewing all the elements together is satisfying, and the end result is a character you can proudly display or gift.

Big Snow White Dragon with Candy Cane Striped Horns Amigurumi Pattern step 1 - construction progress Big Snow White Dragon with Candy Cane Striped Horns Amigurumi Pattern step 2 - assembly progress Big Snow White Dragon with Candy Cane Striped Horns Amigurumi Pattern step 3 - details and accessories Big Snow White Dragon with Candy Cane Striped Horns Amigurumi Pattern step 4 - final assembly and finishing

Switch Things Up

I absolutely loved creating this pattern concept because it lets you play with both sculptural shaping and fun color accents. I recommend trying different horn color combinationsβ€”gold and ivory makes an elegant version, while pastels create a whimsical baby dragon.

I often change the wing membrane color to a soft blush or pale grey for contrast against the body; you can also add embroidery along the ribs to mimic veins for a realistic look. If you'd like a smaller dragon, use DK yarn with a 3.0mm hook; for a giant keeper version, choose bulky yarn and a 5.0mm hook but expect adjustments to stitch counts.

Don't be afraid to experiment with spines: larger plates give a more dramatic silhouette, while tiny scallops create a delicate texture. Adding a little weight to the base helps with stability if you want the dragon to sit upright for display.

Common Mistakes & How to Fix Them

βœ— Skipping stitch markers at round starts can cause misaligned features and uneven shaping; always mark your first stitch of each round βœ— Inconsistent tension between rounds creates lumpy or uneven surfaces; practice maintaining steady, even tension throughout the entire project βœ— Not stuffing gradually as you work causes difficulty reaching inside later; stuff sections as you complete them for best results βœ— Placing safety eyes too low or too high changes expression dramatically; test placement with pins and view from several angles βœ— Carrying yarn for stripes without anchoring causes loose floats; fasten off and weave in ends for crisp color changes βœ— Forgetting to turn inside-out seams when sewing panels can create bulky joins; use ladder stitch for invisible seams whenever possible βœ— Using a hook too large results in holes showing stuffing; go down one hook size from yarn recommendation for tight amigurumi fabric βœ— Rushing the whipstitch for limb attachment can make them sit crooked; pin and baste first to ensure symmetry

Big Snow White Dragon with Candy Cane Striped Horns Amigurumi Pattern

Create a cuddly, large snow-white dragon with candy-cane striped horns, scalloped dorsal plates, expressive big eyes and articulated wings. This warm, detailed pattern includes step-by-step round instructions for head, body, limbs, tail, wings, horns and spines. Perfect for an experienced crocheter who loves character work and decorative color changes.

Advanced 10-12 Hours

Materials Needed for Big Snow White Dragon with Candy Cane Striped Horns Amigurumi Pattern

β€” Main Fabric

  • 01
    Worsted weight yarn (#4), approximately 350-400g in main color (soft ivory/cream for body and wings)
  • 02
    50-80g in bright red (for candy-cane horn stripes)
  • 03
    20-30g in pure white (for horn stripe contrast and inner wing highlights)
  • 04
    20-30g in pale pink or blush (for paw pads and nose shading)
  • 05
    Small amounts (10-15g) in black or dark brown for embroidered nostrils/mouth

β€” Tools Required

  • 01
    3.5mm (E) crochet hook for main work
  • 02
    3.0mm (D) crochet hook for tighter details and horns (optional)
  • 03
    Safety eyes 20mm (large) or 18mm depending on preference
  • 04
    Polyester fiberfill stuffing
  • 05
    Stitch markers (at least 4-6)
  • 06
    Tapestry/yarn needle for sewing pieces and embroidery
  • 07
    Scissors
  • 08
    Pins for assembly and positioning
  • 09
    Optional: 18-22 gauge floral wire or pipe cleaners for internal wing ribs or poseable tail
  • 10
    Optional: Craft glue or Fray Check to secure yarn ends

Progress Tracker

0% Complete

β€” Head :

Round 1 :

6 sc in magic ring (6)

Round 2 :

6 inc (12)

Round 3 :

(1 sc, inc) x 6 (18)

Round 4 :

(2 sc, inc) x 6 (24)

Round 5 :

(3 sc, inc) x 6 (30)

Round 6 :

(4 sc, inc) x 6 (36)

Round 7 :

(5 sc, inc) x 6 (42)

Round 8 :

(6 sc, inc) x 6 (48)

Round 9 :

(7 sc, inc) x 6 (54)

Round 10-14 :

1 sc in each st (54)

Info :

Place large safety eyes between rounds 13 and 14, approximately 12-14 stitches apart center-to-center for the expressive look shown. Use safety eyes 18-20mm. Mark the first stitch of round with a marker to keep symmetry.

Round 15 :

(7 sc, dec) x 6 (48)

Round 16 :

(6 sc, dec) x 6 (42)

Info :

Begin gentle stuffing at the crown so the head keeps its rounded top. Use small amounts of fiberfill and distribute evenly with a stuffing tool.

Round 17 :

(5 sc, dec) x 6 (36)

Round 18 :

(4 sc, dec) x 6 (30)

Round 19 :

(3 sc, dec) x 6 (24)

Round 20 :

(2 sc, dec) x 6 (18)

Info :

Continue stuffing firmly but not overstuffed. For the forward-facing snout shape, stuff the front area more firmly while leaving the back slightly softer to blend into the neck later.

Round 21 :

(1 sc, dec) x 6 (12)

Round 22 :

6 dec (6)

Info :

Fasten off leaving a long tail for sewing the muzzle or for weaving into the neck piece. If you plan to stitch the muzzle on separately, leave head opening a little larger and flatten the base slightly for mounting.

β€” Muzzle / Snout :

Round 1 :

6 sc in magic ring (6)

Round 2 :

6 inc (12)

Round 3 :

(1 sc, inc) x 6 (18)

Round 4 :

(2 sc, inc) x 6 (24)

Round 5-8 :

1 sc in each st (24)

Info :

Create nostril indentations by pulling yarn from inside before fully stuffing. For the cute button nose, embroider two short french knots or small sc circles at the front center once attached.

Round 9 :

(2 sc, dec) x 6 (18)

Round 10 :

(1 sc, dec) x 6 (12)

Round 11 :

6 dec (6)

Info :

Stuff muzzle firmly to create a slightly rounded snout. Leave a long tail and sew muzzle onto the front of the head aligning centerline with eyes and mouth placement (approx between rounds 12-15 of head).

β€” Neck Tube :

Round 1 :

6 sc in magic ring (6)

Round 2 :

6 inc (12)

Round 3 :

(1 sc, inc) x 6 (18)

Round 4-24 :

1 sc in each st (18) worked in continuous rounds to desired neck length (21 rounds worked gives long, graceful neck)

Info :

Work the neck in 18 st tube for a slim profile. Use tension slightly tighter than head to create a bit of firmness. Leave the bottom open for joining to body and the top long tail for sewing to head between rounds 20-22.

β€” Body :

Round 1 :

6 sc in magic ring (6)

Round 2 :

6 inc (12)

Round 3 :

(1 sc, inc) x 6 (18)

Round 4 :

(2 sc, inc) x 6 (24)

Round 5 :

(3 sc, inc) x 6 (30)

Round 6 :

(4 sc, inc) x 6 (36)

Round 7 :

(5 sc, inc) x 6 (42)

Round 8 :

(6 sc, inc) x 6 (48)

Round 9-11 :

1 sc in each st (48)

Info :

To create the ribbed chest texture visible in photos, switch to BLO for rounds 12-20; this creates vertical ridges when worked in continuous rounds. Insert stitch marker at first BLO round.

Round 12-20 :

1 sc in each st BLO (48)

Round 21 :

1 sc in each st (48)

Info :

Begin shaping the chest and belly by decreasing slightly at the sides. Stuff the body moderately once you have a comfortable opening for stuffing β€” not firm, allowing the creature to sit.

Round 22 :

(6 sc, dec) x 6 (42)

Round 23 :

(5 sc, dec) x 6 (36)

Round 24 :

(4 sc, dec) x 6 (30)

Round 25 :

(3 sc, dec) x 6 (24)

Round 26 :

(2 sc, dec) x 6 (18)

Round 27 :

(1 sc, dec) x 6 (12)

Round 28 :

6 dec (6)

Info :

Fasten off leaving long tail for sewing the neck into the body opening. For a stable sitting posture, leave a small flat base by slightly flattening bottom before closing; optionally add a small bit of poly-pellets inside the base for weight.

β€” Front Legs / Arms (Make 2) :

Round 1 :

6 sc in magic ring (6)

Round 2 :

6 inc (12)

Round 3 :

(1 sc, inc) x 6 (18)

Round 4 :

(2 sc, inc) x 6 (24)

Round 5-7 :

1 sc in each st (24)

Info :

These first rounds form the paw. Use extra stuffing here to create a plump paw. If you want small toes visible, embroider seam lines later and add tiny blush dots for pads.

Round 8 :

(2 sc, dec) x 6 (18)

Round 9-14 :

1 sc in each st (18) β€” work in continuous rounds to create wrist and lower arm length

Round 15 :

(1 sc, dec) x 6 (12)

Round 16-20 :

1 sc in each st (12) β€” upper arm, leave opening at top to sew into shoulder

Info :

Stuff the paw firmly and the arm lightly. Insert optional wire for poseable limbs before stitching opening closed. Leave a long tail to sew to body at rounds aligned with body rounds 18-22.

β€” Back Legs / Hips (Make 2) :

Round 1 :

6 sc in magic ring (6)

Round 2 :

6 inc (12)

Round 3 :

(1 sc, inc) x 6 (18)

Round 4 :

(2 sc, inc) x 6 (24)

Round 5 :

(3 sc, inc) x 6 (30)

Round 6-9 :

1 sc in each st (30)

Info :

These rounds form the foot and round thigh. Work more stuffing into the foot and gradual stuffing into thigh so legs can support body weight when seated.

Round 10 :

(3 sc, dec) x 6 (24)

Round 11-15 :

1 sc in each st (24)

Round 16 :

(2 sc, dec) x 6 (18)

Round 17-20 :

1 sc in each st (18)

Round 21 :

(1 sc, dec) x 6 (12)

Round 22 :

6 dec (6) β€” leave opening for sewing into body

Info :

For a realistic seated pose, set the legs so the feet face forward and pad the bottom of the foot with extra stuffing. Sew to body at the base aligning with body rounds 4-8 for a natural posture.

β€” Tail :

Round 1 :

6 sc in magic ring (6)

Round 2 :

6 inc (12)

Round 3 :

(1 sc, inc) x 6 (18)

Round 4 :

(2 sc, inc) x 6 (24)

Round 5-8 :

1 sc in each st (24)

Round 9 :

(3 sc, dec) x 6 (18)

Round 10-16 :

1 sc in each st (18) worked in continuous rounds to lengthen tail

Info :

Work tail in a long tapering tube. Add internal wire if you want the tail to hold a pose. Attach spines along the dorsal edge as you go or sew them on afterwards for better placement control.

Round 17 :

(2 sc, dec) x 6 (12)

Round 18 :

(1 sc, dec) x 6 (8)

Round 19-24 :

1 sc in each st (8) β€” work a small curled tip and fasten off leaving long tail for sewing to body at lower back

β€” Dorsal Spines / Plates (Make 14-18 small plates) :

Round 1 :

6 sc in magic ring (6)

Round 2 :

6 inc (12)

Round 3 :

(1 sc, inc) x 6 (18)

Round 4 :

ch1, turn, 1 sc in each st across to shape scallop; for a pointed plate work 1 sc, hdc, dc, hdc, 1 sc across (18)

Info :

Make plates in white or slightly brighter white for contrast. Block the plates flat and position along the neck, head crown and tail so they overlap like scales. Use pins and then sew along bottom edge only.

β€” Horns (Striped Candy-Cane, Make 2) :

Info :

Work each horn as a tapered cone in spiral rounds. Weave in color changes for candy-cane stripes every 2 rounds of contrasting red and white. Use a smaller hook (3.0mm) for a tighter, neat cone.

Round 1 :

6 sc in magic ring (6) with white base

Round 2 :

6 inc (12)

Round 3 :

(1 sc, inc) x 6 (18)

Round 4 :

(2 sc, inc) x 6 (24)

Round 5 :

(3 sc, inc) x 6 (30)

Info :

Change to red yarn at end of round 5. Work two rounds in red, then two in white, alternating to create thick candy stripes. Carry or fasten off and rejoin to avoid long floats; the horns are small so weaving in ends is recommended.

Round 6-7 :

Work 2 rounds red (30)

Round 8-9 :

Work 2 rounds white (30)

Round 10 :

(4 sc, dec) x 5 (25)

Round 11 :

(3 sc, dec) x 5 (20)

Round 12 :

(2 sc, dec) x 5 (15)

Round 13 :

(1 sc, dec) x 5 (10)

Round 14 :

5 dec (5)

Info :

Stuff very lightly β€” horns are mostly structural and should be slightly soft yet firm. Fasten off leaving a long tail for sewing to head between the plates on the crown. Sew horns at a slight outward angle to match photos.

β€” Wings (Make 2 panels) :

Info :

Each wing is made in two layers: an inner membrane panel (flat) and an outer ribbed border with three raised ribs. Optionally insert light wire along each rib for poseable wings. Work wings flat in rows or in rounds as described.

Wing Panel - Round 1 :

Ch 28, sc in 2nd ch from hook and across (27)

Wing Panel - Round 2 :

ch1, turn, 1 sc in each st (27)

Wing Panel - Round 3-8 :

1 sc in each st (27) β€” continue until panel measures desired height (approx 6-8 rows)

Wing Panel - Info :

Work edge sts in BLO on the last round to create a neat seam to attach outer ribs. Block panel slightly to match the arc of the outer rib.

Outer Rib - Round 1 :

Along panel edge, join yarn and sc evenly around the curved edge to create a rounded frame (approx 36 sc)

Outer Rib - Round 2 :

1 sc in each st BLO (36) β€” creates thicker edge

Outer Rib - Ribs Formation :

Mark three evenly spaced positions for ribs. For each rib: create a narrow tube by ch 1 at rib position, work 12 sc around ch base in rounds to form a raised rib, then join to membrane. Repeat for middle and lower ribs.

Wing Finishing :

Sew outer ribbed frame to the inner membrane, inserting optional wire along each rib before closing. Block wings flat and curve slightly to look natural. Attach wings to back between body rounds 10-14, aligning with spine plates.

β€” Inner Ear / Small Ear Fins (Make 2) :

Round 1 :

6 sc in magic ring (6)

Round 2 :

6 inc (12)

Round 3 :

(1 sc, inc) x 6 (18)

Round 4-5 :

1 sc in each st (18). Fasten off and shape with a light cast to create ear curve. Sew to head behind the eyes, slightly angled outward.

β€” Paw Pads / Toe Details (Make 8 small pads) :

Round 1 :

4 sc in magic ring (4)

Round 2 :

4 inc (8)

Round 3 :

1 sc in each st (8) β€” flatten and sew onto paw fronts. Use pale pink for soft pads.

β€” Assembly Info :

Info :

Before final sewing, pin all pieces in place. Use the long tails left on each piece and a strong yarn needle to ladder stitch pieces together. Sew the neck tube to the body opening first, then attach the head to the neck. Sew limbs symmetrically, attach the tail centered at the back base, then add wings and plates.

Info :

We recommend sewing spines/plates along the seam between head and neck first, then along the neck and body, ending at the tail. Use short whip-stitches at the plate bottom to let the scallops sit free and three-dimensional.

Assembly Instructions

  • Attach the neck tube to the body opening with mattress stitch: align neck bottom with body round 1-3 and whipstitch evenly around, pulling gently so the seam sits smooth.
  • Sew the head to the top of the neck; line up head rounds 20-22 with neck top. Pin first, then sew through head and neck loops only for a clean join so stuffing stays inside.
  • Position and sew front legs to the body at side seams around body rounds 12-16. Pin both legs symmetrical and baste several stitches to check posture before securing.
  • Attach hind legs to lower body at rounds 2-6; ensure feet face forward and test seating stability. Add extra stitches through the body base for reinforcement if needed.
  • Sew the tail to the back center at body rounds 4-6. If using wire, ensure it is well anchored and wrapped with yarn before closing seams.
  • Attach wings to back between body rounds 10-14 with hidden whipstitches; pin both wings to be symmetrical and reinforce with additional stitching through the rib frames.
  • Sew horns to head crown between the dorsal plates and ears at head rounds 8-12. Angle slightly outward and secure with multiple passes.
  • Stitch dorsal plates along head, neck and tail using the bottom of each plate. Use small stitches and leave plates unstitched at top to keep three-dimensional.
  • Add paw pads to the front of each paw using small whipstitches around pad edge. Embroider nails with pale pink or blush.
  • Weave in and secure all ends. Add embroidered nostrils and mouth with a few simple stitches; apply faint blush to cheeks if desired.

Important Notes

  • πŸ’‘Use stitch markers consistently at the beginning of each round to avoid counting errors and maintain proper shaping
  • πŸ’‘Stuff body parts gradually as you work rather than waiting until the end, especially for narrow openings like arms and legs
  • πŸ’‘For safety eyes, position and secure before stuffing head fully - they cannot be repositioned once locked in place
  • πŸ’‘Maintain consistent tension throughout the project; too tight creates stiff, small pieces, too loose creates floppy, holey fabric
  • πŸ’‘When sewing pieces together, use yarn slightly thinner than working yarn for neater, less visible seams
  • πŸ’‘Pin all pieces in position before final sewing to ensure proper placement and symmetry
  • πŸ’‘For amigurumi, work tightly enough that stuffing doesn't show through stitches
  • πŸ’‘When adding wire for poseability, wrap wire ends with small bits of yarn or heat-shrink tubing to avoid poking through the fabric

This large snow-white dragon is a labor of love combining sculptural crochet shaping with whimsical striped horns and scalloped back plates. Each carefully worked section β€” head, neck, body, limbs, wings and tail β€” comes together to form a character full of personality. The detailed round-by-round instructions and Info tips make it manageable to complete over several sessions. 🧢 Take your time, enjoy each stitch, and share your creation proudly. ✨🦴
You ask,

we answer.

FAQs

What is the finished size of this amigurumi?

Based on worsted weight yarn and the stated hook sizes, the completed dragon measures approximately 12-15 inches (30-38 cm) tall when seated. Using thicker yarn or larger hooks will increase size proportionally.

Can I use different yarn weights for this pattern?

Yes! You can substitute yarn weights, but choose a hook 1-2 sizes smaller than recommended for a tight amigurumi fabric. Expect the finished size and stitch counts to vary if changing yarn weight.

Do I need to use safety eyes or can I embroider them?

Both options work. Safety eyes give a glossy professional look, while embroidered eyes are child-safe and allow more expression. Place safety eyes before substantial stuffing.

How much stuffing will I need?

For this size project, plan on 200-300 grams of polyester fiberfill depending on how firmly you stuff. Add a small amount of poly-pellets for weight in the base if desired.

Can I make the arms and legs poseable?

Yesβ€”insert floral wire or pipe cleaners inside limbs before stuffing. Ensure ends are wrapped and secured to prevent poking. Wire allows gentle shaping but not heavy repeated bending.

What if my stitch count is off?

If you detect a mistake, unpick back to the last correct round or use a removable stitch marker in each round to help identify the error. Trying to hide a miscount later often shows in the shaping.

How do I prevent holes when stuffing?

Use a hook slightly smaller than the yarn gauge and maintain tight tension. Stuff in small increments with a stuffing tool, and distribute fiberfill evenly to avoid lumps.

Can I customize colors and details?

Absolutely. Swap horn colors for seasonal themes, add embroidery, change eye sizes, or use variegated yarn for a textured body. The structure is forgiving for proportion tweaks.