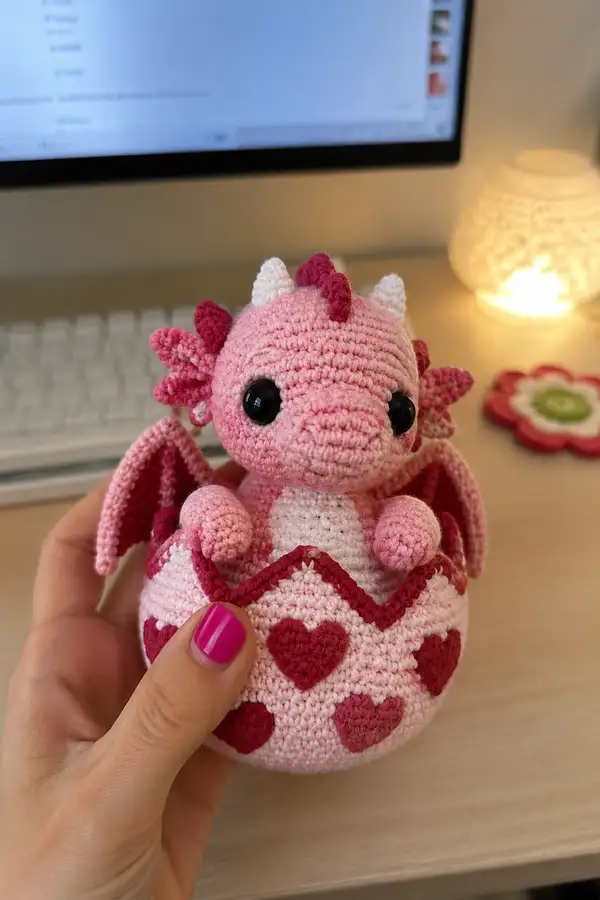
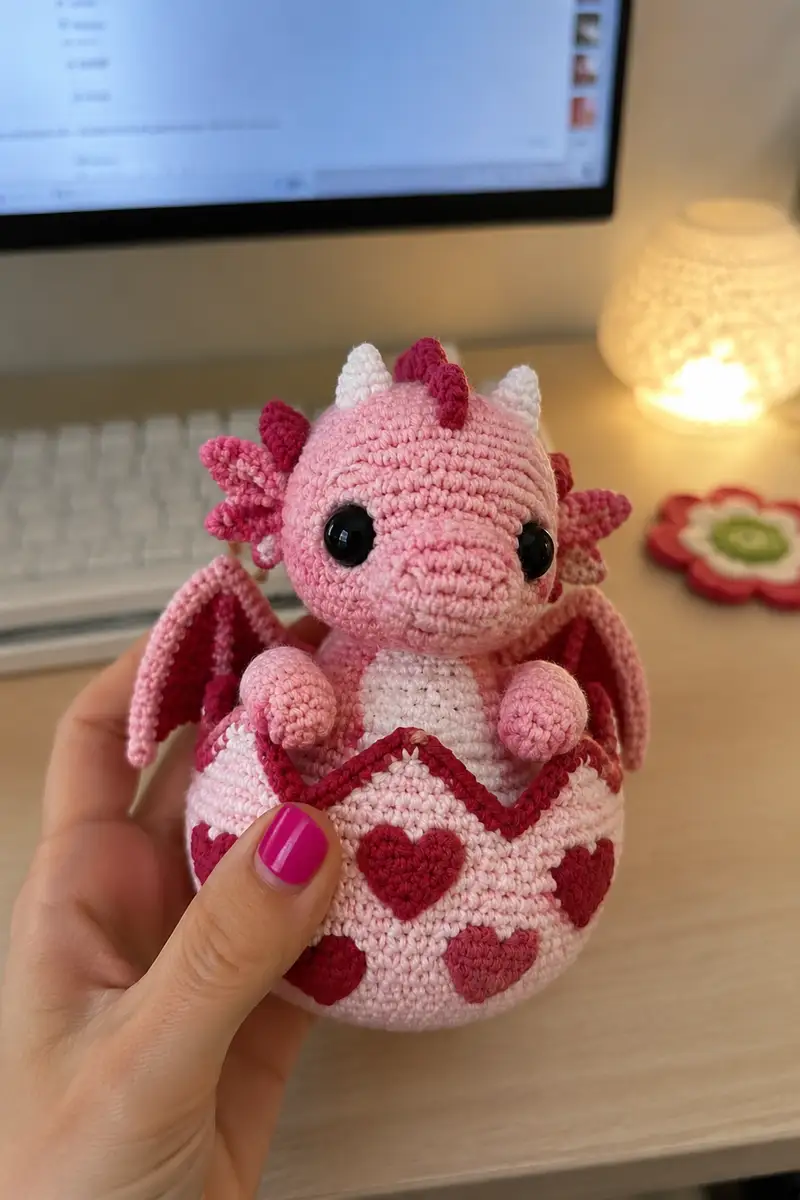
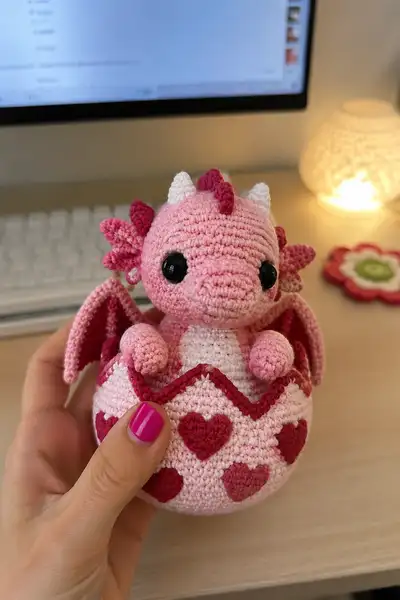
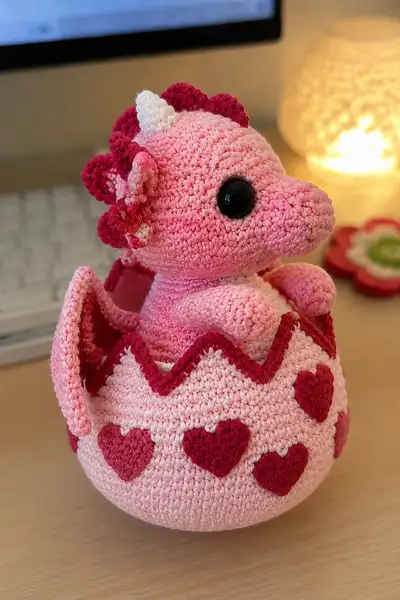
Create an adorable pink baby dragon that peeks out of a decorative heart-patterned egg. This pattern features a detailed head with snout, expressive safety eyes, tiny horns and frilled ears, foldable wings with contrasting inner color, short arms, and a cute zigzag egg shell decorated with heart appliques. Worked in single crochet amigurumi style, this cuddly hatchling is perfect as a gift for Valentine occasions or a sweet desk companion.
Progress Tracker
0% Complete
— Head :
Round 1 :
6 sc in magic ring (6)
Round 3 :
(1 sc, inc) x 6 (18)
Round 4 :
(2 sc, inc) x 6 (24)
Round 5 :
(3 sc, inc) x 6 (30)
Round 6 :
(4 sc, inc) x 6 (36)
Round 7 :
(5 sc, inc) x 6 (42)
Round 8 :
(6 sc, inc) x 6 (48)
Round 9-14 :
1 sc in each st (48)
Info :
Place safety eyes between rounds 12-13, approximately 11-13 stitches apart (center-to-center) for the large cute look. Mark the first stitch of each round. If you prefer embroidered eyes, do not insert safety eyes now.
Round 15 :
(6 sc, inc) x 6 (54)
Round 16-19 :
1 sc in each st (54)
Info :
This is the fullest part of the head. Add a small amount of stuffing now to shape the skull before adding the snout. Keep stitches tight so stuffing doesn't show.
Round 20 :
(6 sc, dec) x 6 (48)
Round 21 :
(5 sc, dec) x 6 (42)
Round 22 :
(4 sc, dec) x 6 (36)
Round 23 :
(3 sc, dec) x 6 (30)
Info :
Begin stuffing head firmly but not overstuffed. Use small amounts of fiberfill pressed into shape with a stuffing tool or blunt pencil for even distribution. Continue stuffing a little as you decrease.
Round 24 :
(2 sc, dec) x 6 (24)
Round 25 :
(1 sc, dec) x 6 (18)
Round 27 :
Fasten off and leave a long tail for sewing (do not close fully; leave opening for snout attachment and neck join)
Info :
Do not over-fasten off. You'll secure the head to the body using a long tail. If adding little embroidered nostrils on the snout, plan placement now relative to the eyes.
— Snout / Muzzle :
Round 1 :
6 sc in magic ring (6)
Round 3 :
(1 sc, inc) x 6 (18)
Round 4 :
(2 sc, inc) x 6 (24)
Round 5 :
1 sc in each st (24)
Round 6 :
(3 sc, inc) x 6 (30)
Round 7-9 :
1 sc in each st (30)
Info :
The snout is shaped as a short stubby muzzle. Stuff lightly to keep it soft-looking but stable. When you sew it onto the head, position so the bottom of the snout aligns with the lower edge of the safety eyes.
Round 10 :
(3 sc, dec) x 6 (24)
Round 11 :
(2 sc, dec) x 6 (18)
Round 12 :
(1 sc, dec) x 6 (12)
Round 14 :
Fasten off leaving long tail for sewing. Finish shaping and close slightly but keep opening to sew into head. Weave tail through final 6 sts, pull snug just before attaching to head so muzzle remains rounded.
Info :
Sew snout to head starting just under the eyes. Align center and stitch through connecting stitches using mattress or whip stitch. Make sure both sides are symmetric.
— Horns (Make 2) :
Round 1 :
4 sc in magic ring (4)
Round 3 :
(1 sc, inc) x 4 (12)
Round 4 :
1 sc in each st (12)
Round 5 :
(2 sc, dec) x 4 (9) - alternate decreases to keep conical shape
Round 6 :
Fasten off leaving tail for sewing. Lightly stuff and shape to a short conical horn. Sew two horns symmetrically on top of head about 4-6 stitches back from the crown. Use white yarn for horns.
Info :
Place horns just behind the frontal scale row. Pin them and check that they match left and right before sewing.
— Frilled Ear-Flaps / Side Decorations (Make 2) :
Round 1 :
6 sc in magic ring (6)
Round 3 :
(1 sc, inc) x 6 (18)
Round 4 :
(2 sc, inc) x 6 (24)
Round 5 :
1 sc in each st (24)
Round 6 :
Working along one edge only: ch1, turn, FLO 1 sc in next 10 sts to create frill base (10)
Round 7 :
BLO 1 sc in each of 10 sts (10)
Round 8 :
Edge scallop: *skip 1, 5 dc in next st, skip 1, sl st in next* rep across to create 3 scallops. Fasten off leaving long tail for sewing.
Info :
Sew ear-flaps slightly behind the eye level, flaring outward. Use contrasting darker yarn for the scallop edge if desired. These create the dragon's frilly ear-like appendages visible in the photos.
— Head Scales / Crest (Make 7-9 small pieces) :
Round 1 :
4 sc in magic ring (4)
Round 3 :
(1 sc, inc) x 4 (12)
Round 4 :
1 sc in each st (12)
Round 5 :
Fasten off leaving tail for sewing. Make 7-9 scales in magenta/deep pink. Sew them centered along the head crown from forehead to the back of the skull, spacing them a few stitches apart to create the row of ridges seen in the pictures.
Info :
Place larger scales at the center and smaller at the ends for a natural tapered look. Use pins to test placement before sewing.
— Body / Torso :
Round 1 :
6 sc in magic ring (6)
Round 3 :
(1 sc, inc) x 6 (18)
Round 4 :
(2 sc, inc) x 6 (24)
Round 5 :
(3 sc, inc) x 6 (30)
Round 6 :
(4 sc, inc) x 6 (36)
Round 7 :
(5 sc, inc) x 6 (42)
Round 8-12 :
1 sc in each st (42)
Info :
Work in continuous rounds. Use a stitch marker to mark round starts and move it up each round. This body will be the main piece that seats inside the egg; keep a slightly firm but not rock-hard stuffing so it settles nicely in the shell.
Round 13 :
(5 sc, dec) x 6 (36)
Round 14 :
(4 sc, dec) x 6 (30)
Round 15-18 :
1 sc in each st (30)
Round 19 :
(3 sc, dec) x 6 (24)
Round 20 :
(2 sc, dec) x 6 (18)
Info :
Stuff body moderately through the opening you will leave. The torso should be plump enough to sit inside the egg but small enough for the top rim to sit around the dragon's body; check frequently by placing temporarily inside your egg shell piece during assembly.
Round 21 :
(1 sc, dec) x 6 (12)
Round 23 :
Fasten off leaving a long tail to sew to the egg base if you intend to secure the body in place. If you prefer a removable inner body, close more completely and leave less tail. Do not overstuff the top portion where shoulders and neck sit so the head can be sewn on smoothly.
— Belly Panel (White) :
Round 1 :
6 sc in magic ring with white yarn (6)
Round 3 :
(1 sc, inc) x 6 (18)
Round 4 :
(2 sc, inc) x 6 (24)
Round 5-6 :
1 sc in each st (24)
Round 7 :
Fold oval in half and sc through both layers across the top edge to create a slight flattened oval that sits nicely on the torso center; fasten off leaving tail. Sew centered to the front of the torso running from near the neck down 10-12 rounds for a belly stripe.
Info :
Alternatively, you can change color in the body rounds to create a built-in belly panel. This separate panel allows clean edges and is easier for beginners to position precisely.
— Arms (Make 2) :
Round 1 :
6 sc in magic ring (6)
Round 3 :
1 sc in each st (12)
Round 4 :
(2 sc, inc) x 3 (15) - shape the wrist/hand base
Round 5-8 :
1 sc in each st (15)
Round 9 :
(2 sc, dec) x 3 (12)
Round 10-12 :
1 sc in each st (12)
Round 13 :
(1 sc, dec) x 4 (8)
Round 14 :
1 sc in each st (8)
Round 15 :
Fasten off leaving long tail for sewing. Make a small amigurumi ball for the paw if you want extra chubby hands: 6 sc in MR; 6 inc -> 12; 1 sc x 2 rounds -> 12; dec rounds to 6 and fasten off. Sew ball to end of arm. Stuff hands firmly and arms lightly so they hold shape.
Info :
Position arms pointing slightly upward as if clutching the egg rim. Sew securely through several stitches into the torso to ensure they stay in place.
— Legs / Feet (Make 2) :
Round 1 :
6 sc in magic ring (6)
Round 3 :
(1 sc, inc) x 6 (18)
Round 4 :
(2 sc, inc) x 6 (24)
Round 5-7 :
1 sc in each st (24)
Round 8 :
(3 sc, dec) x 6 (18)
Round 9 :
(2 sc, dec) x 6 (12)
Round 10 :
1 sc in each st (12)
Round 11 :
Stuff feet firmly. (1 sc, dec) x 4 (8)
Round 12 :
Fasten off leaving tail for sewing. Sew legs low on the body so the dragon sits inside the egg; if you want them to remain hidden, mount them slightly to the back inside the shell.
Info :
Legs are short and stubby in the sample. Stuff toes/feet firmer than shins for stability when sewing to the underside of the body or inside the egg base.
— Wings (Make 2) :
Info :
Wings are worked in two layers: inner membrane in deep pink and outer wing in light pink. You will join at the base and fold to create a slight curve. Optionally insert a thin floral wire along the inner edge before final whip stitch to make wings poseable.
Outer Wing Round 1 :
6 sc in magic ring (6) (light pink)
Outer Wing Round 2 :
6 inc (12)
Outer Wing Round 3 :
(1 sc, inc) x 6 (18)
Outer Wing Round 4 :
(2 sc, inc) x 6 (24)
Outer Wing Round 5 :
(3 sc, inc) x 6 (30)
Outer Wing Round 6-7 :
1 sc in each st (30)
Outer Wing Round 8 :
Shape outer edge: *sc 5, sl st 1* across to create scallop edge; fasten off leaving long tail.
Inner Wing Round 1 :
6 sc in magic ring (6) (deep pink)
Inner Wing Round 2 :
6 inc (12)
Inner Wing Round 3 :
(1 sc, inc) x 6 (18)
Inner Wing Round 4 :
(2 sc, inc) x 6 (24)
Inner Wing Round 5 :
1 sc in each st (24) - leave edge raw to whip stitch to the outer wing
Inner Wing Round 6 :
Fasten off leaving long tail. Place inner wing centered onto outer wing and whip stitch or single crochet together along base only creating a fold; leave top edge free so wing can be folded forward as in the photo.
Info :
Sew wing base to the upper sides of the torso just below shoulder line. Wings in the photos are folded forward slightly; attach so the wing sits partly over the egg rim when the dragon is placed in the shell.
— Tail :
Round 1 :
6 sc in magic ring (6)
Round 3-6 :
1 sc in each st (12)
Round 7 :
(2 sc, dec) x 3 (9)
Round 8 :
(1 sc, dec) x 3 (6)
Round 9-10 :
1 sc in each st (6)
Round 11 :
Fasten off leaving long tail for sewing. Create a few small scales using crest pattern and sew along top of tail. Tail should be short and tucked behind when assembled.
Info :
If you want a more flexible tail, crochet around a short piece of floral wire before stuffing. Ensure the wire ends are folded and padded before enclosing.
— Egg Bottom / Base (Make 1) :
Round 1 :
6 sc in magic ring (6) (light pink)
Round 3 :
(1 sc, inc) x 6 (18)
Round 4 :
(2 sc, inc) x 6 (24)
Round 5 :
(3 sc, inc) x 6 (30)
Round 6 :
(4 sc, inc) x 6 (36)
Round 7 :
(5 sc, inc) x 6 (42)
Round 8-12 :
1 sc in each st (42) - continue to build roundness of shell base
Round 13 :
(5 sc, dec) x 6 (36)
Round 14 :
(4 sc, dec) x 6 (30)
Round 15 :
(3 sc, dec) x 6 (24)
Round 16 :
1 sc in each st (24)
Round 17 :
(2 sc, inc) x 6 (30)
Round 18 :
(3 sc, inc) x 6 (36)
Round 19-22 :
1 sc in each st (36)
Round 23 :
(3 sc, dec) x 6 (30)
Round 24 :
(2 sc, dec) x 6 (24)
Round 25 :
(1 sc, dec) x 6 (18)
Round 26 :
6 dec (6) - close base somewhat but leave enough opening for stuffing and for the body to nest inside
Info :
Stuff the egg bottom firmly to give a stable base so the dragon can sit upright. You may choose to leave the body removable by closing the egg only loosely; otherwise sew the body to the base inside for a permanent fixture.
Round 27 :
Fasten off leaving long tail for sewing the jagged rim piece to the top edge. Maintain a wide enough opening for egg rim attachment. This bottom piece will receive hearts appliques along the outside.
— Egg Top Rim (Jagged Zigzag) :
Round 1 :
Join yarn to top of egg bottom opening (light pink). Ch1, sc evenly around opening so you have a nice even row - aim for 24 sc if opening edge allows (24)
Round 2 :
Create zigzag points: *sc 2, (3 dc, ch1, 3 dc) in next st, sc 2* repeat around to form triangular scallops. Adjust spacing so points are symmetrical. (Approx 6 points)
Round 3 :
With deep pink yarn, sc along the tops of the zigzags to create a contrasting rim: in each point work (sl st, sc, sl st) across the peak to outline it. Fasten off and weave ends.
Info :
This jagged rim will sit around the dragon's shoulders and is visible as the cracked top of the egg. Use contrasting deep pink to accent the peaks as seen in the photos.
— Heart Applique (Make 8) :
Round 1 :
With deep raspberry/magenta: ch 4, sl st to form loop or 6 sc in magic ring (6)
Round 2 :
(1 sc, inc) x 3 around (9) - if working from MR; if starting by chain loop, 1 sc in each ch
Round 3 :
*In next st: (sc, hdc, dc, hdc, sc) to form a lobe; sl st in next st, rep to create two lobes side by side* - shape into heart and fasten off leaving long tail for sewing
Round 4 :
Optional: Edge heart with single crochet in a contrasting shade for definition. Make 8 hearts alternating deep pink and magenta. Sew hearts evenly around the curved surface of the egg bottom spaced as in the image (2 rows: lower and upper row). Use pins for placement and check alignment before sewing.
Info :
Hearts in the photo show two contrasting pink shades. Sew hearts flat to the egg surface with sturdy stitches. Tuck away tails and weave into the inside once sewn.
— Egg Top Half (If crocheting the top separately) :
Round 1 :
6 sc in magic ring (6) (light pink)
Round 3 :
(1 sc, inc) x 6 (18)
Round 4 :
(2 sc, inc) x 6 (24)
Round 5 :
(3 sc, inc) x 6 (30)
Round 6-10 :
1 sc in each st (30) - shape until large enough to drape over the dragon shoulders and match the rim
Round 11 :
Work jagged edge as for rim: *sc 2, (3 dc, ch1, 3 dc) in next st, sc2* around. Fasten off and add the deep pink outline on peaks as described above. If attaching permanently, sew the top half to the rim half around the jagged edge, leaving spaces for the dragon's arms and head to peek out.
Info :
In the pictured design the top rim is left as a single jagged row attached to the bottom shell to create a stable 'bowl' where the dragon sits. Decide whether you want a removable top or a single bowl-like shell.
— Assembly and Finishing Details :
Info :
Block and shape each piece slightly with damp cloth if desired before final sewing. Keep small consistent stitches when joining pieces. Use pins to secure positions and double-check symmetry in front of a mirror or steady view.
Step 1 :
Sew the snout to the center front of the head aligning with the lower edge of the eyes. Use the long tail from the snout and invisible ladder stitch around the base for a neat look.
Step 2 :
Attach horns on top of head slightly behind the front scale row. Attach frilled ear-flaps to the sides of the head level with eyes and slightly behind them to create depth.
Step 3 :
Sew head to torso using long tail from head; position head so that the dragon looks straight ahead. Make several passes with yarn to secure head firmly to the body. If you want the head to be swiveled, attach using fewer stitches but still securely.
Step 4 :
Position and sew arms to the upper sides of the torso so they rest on the egg rim. Sew wings to sides below the shoulders and arrange folding to look like the photo, securing strongly around the base of the wing.
Step 5 :
Sew small scales along the center of the head and down onto the neck and back if desired. Sew tail to back lower center of the torso. Use matching color to make stitches nearly invisible.
Step 6 :
Pin heart appliques around the egg bottom evenly - use 6-8 hearts in two rows as shown. Sew securely. Add any final outlines or a contrasting row of single crochet around the rim for definition.
Step 7 :
Weave in all loose ends, trim remaining tails. Add any embroidered nostrils, mouth, or facial details with matching yarn and a tapestry needle. Add a small dab of blush or fabric paint to cheeks if desired.
Info :
Position the dragon inside the egg to check fit before permanently sewing the torso to the base. If you prefer a removable dragon, do not sew the body to the egg; instead allow it to sit snugly inside the shell. If permanent, sew body firmly to the interior of the bottom shell.
This adorable Valentine dragon is a wonderful combination of playful shaping and thoughtful colorwork. Each little heart and scalloped rim brings personality and charm to the final piece. The assembly is relaxing and satisfying as the separate pieces come together into one charming hatchling. 🧶💕 Make one for a loved one or display it proudly on your shelf — it will brighten anyone's day! ✨