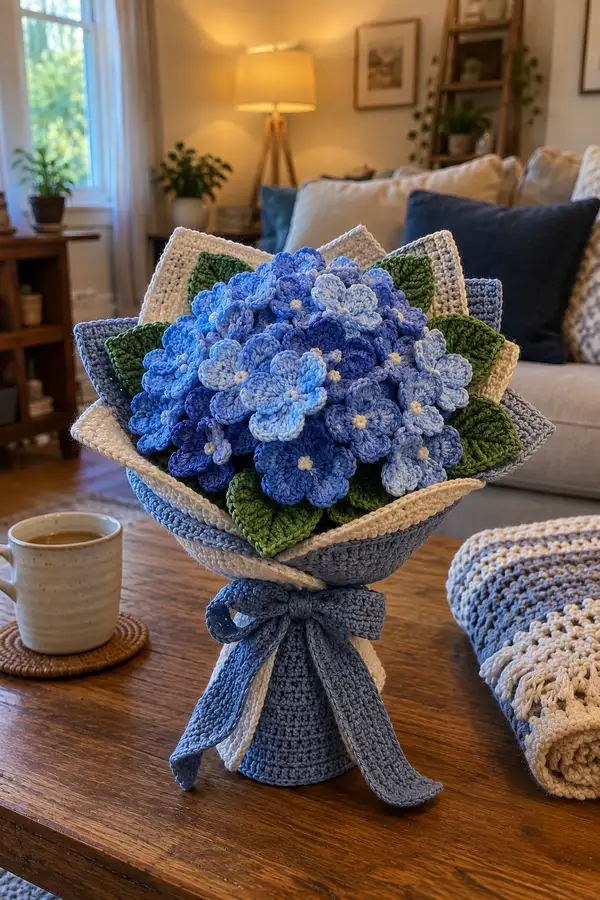
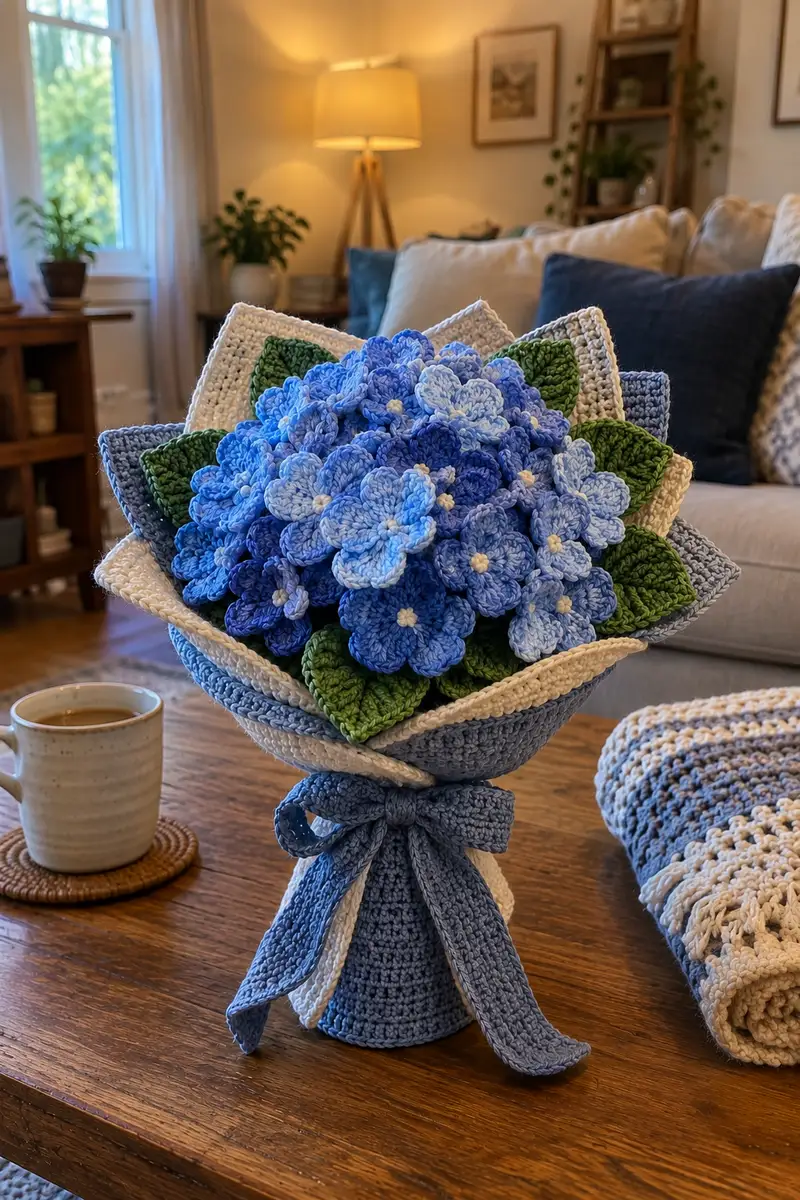
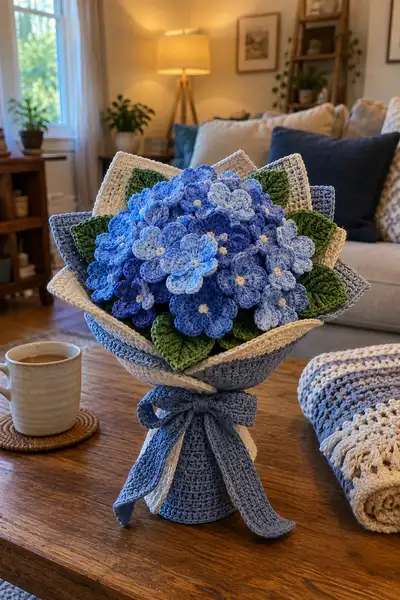
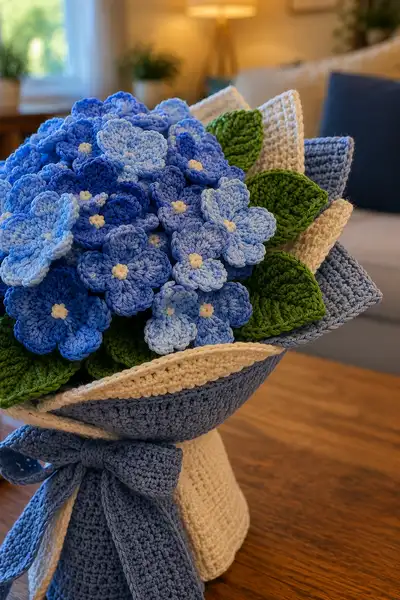
Create a beautiful forever bouquet inspired by blue hydrangeas — a layered cluster of crochet flowers, leaves and a wrapped cone base finished with a neat bow. This pattern includes step-by-step instructions for three flower sizes, realistic leaves, a structured cone wrapper and assembly notes to create a compact tabletop bouquet. Soft blues, cream and greens combine for a natural, elegant arrangement perfect as a gift or home accent.
Progress Tracker
0% Complete
— Flower Motif (Main Hydrangea Flower - Make 30-36 pieces) :
Round 1 :
Make a magic ring, ch 1, 6 sc in magic ring (6)
Round 2 :
Inc in each st around (12)
Round 3 :
(1 sc, inc) x 6 (18)
Info :
These first three rounds form a compact center for the flower. Keep tension even; do not close the ring too tightly or the petals will sit awkwardly.
Round 4 :
(2 sc, inc) x 6 (24)
Round 5 :
1 sc in each st (24)
Info :
Round 4-5 stabilize the disc that anchors petals. If you prefer a smaller center, stop after Round 3 and start petals into those loops instead.
Round 6 (Petal Anchor Round) :
*Ch 3, sk 2 sts, sl st in next st* repeat around to create 6 loops. Join to first sl st (6 loops)
Info :
These loop spaces will be the anchors for each petal. If your flower looks loose, tighten by making ch 2 instead of ch 3 for smaller petal spacing.
Round 7 (Petal 1 - worked in loop) :
In first ch-3 sp: (sl st, ch 1, 2 dc, tr, 2 dc, ch 1, sl st) - form a rounded petal. Finish petal fully before moving to next loop.
Round 8-12 :
Repeat Round 7 into each of the remaining 5 loops to make a total of 6 petals. After final petal, fasten off and weave tail. (6 petals)
Info :
Work petals with a slightly loose tension so they cup up. For a firmer petal, use a hook half-size smaller for the petal stitches only. Use the same color yarn as the disc for a monochrome flower or change to a lighter/darker shade for contrast.
Round 13 (Optional Center Puff) :
With cream yarn, in center ring: attach yarn, *ch 1, work 6 sc into the very center (6)*, fasten off, leaving tail to sew center to disk.
Info :
Sew cream center through a few stitches of the disc to anchor and make a tiny knot look like a hydrangea eye. Make these for every 2-3 flowers to add visual highlights.
Notes :
Each flower motif uses 13 rounds of work if you include optional center. Repeat this motif 30-36 times to create a full dome. Alternate light, medium and dark blue shades to create depth and natural variation.
— Small Flower Motif (Make 10-16 filler flowers) :
Round 1 :
Make magic ring, ch 1, 5 sc in mr (5)
Round 2 :
Inc in each st around (10)
Round 3 (Petal Anchor) :
*Ch 2, sl st in next st* repeat around to make 5 loops. Join (5 loops)
Round 4 (Petals) :
In each ch-2 sp: (sl st, ch 1, 1 dc, 1 tr, 1 dc, ch 1, sl st). Repeat around to create 5 small petals. Fasten off. (5 petals)
Info :
These smaller flowers are great for filling small gaps at the edge of the dome. They use fewer yarn grams and add a delicate texture to the arrangement.
— Tiny Buds / Centers (Make 18-24) :
Round 1 :
With cream or pale yellow, make magic ring, ch 1, 6 sc in mr (6)
Round 2 :
Sl st in each st around to form a tidy small bump. Fasten off leaving long tail for sewing. (6)
Info :
Sew these tiny buds to the centers of some larger or smaller motifs to mimic hydrangea stamens and provide contrast. They are purely decorative but make the cluster read more realistic from a distance.
— Leaf (Medium) (Make 10-14) :
Round 1 :
Ch 10, sc in 2nd ch from hook, hdc in next, dc in next 2, tr in next 2, dc in next, hdc in next, sc in last ch; now work around other side of chain: sc in first turning ch, hdc in next, dc in next, tr in next 2, dc in next 2, hdc in next, sc in last (total 18 sts along curve)
Round 2 :
Turn leaf and work along one side: sl st in first st, *sc in next 2, hdc in next 2, dc in next 2, tr in next 2* then mirror on the other side to keep balance. Fasten off. (18)
Info :
Work leaves flat and leave a long tail for sewing. To add natural curvature, block with a gentle steam and pin with a slight fold along the central axis while damp or apply a drop of diluted craft glue into the fold and let dry.
Round 3 :
Optional: Emboss midrib by working a row of sl st down center: join yarn at leaf base and work sl st through FLO down the center line; fasten off. (for visual midrib)
— Layered Backing Leaves (Make 6-8) :
Round 1 :
Ch 14, sc in 2nd ch from hook, hdc in next 3, dc in next 4, tr in next 2, dc in next 2, hdc in next 1, sc in last; work back along chain to base with mirroring stitches to create a large teardrop leaf. (approx 26 sts)
Round 2 :
1 sc around entire leaf edge to neaten and create slight stiffness. (26)
Info :
These larger leaves are placed around the outer edge of the dome to create a scalloped background and hide the seam where the flowers meet the cone. Use a slightly larger hook or tighter tension to keep them slightly stiffer.
— Bouquet Cone / Wrapper (Worked in two colors - inner cream and outer blue) :
Info :
Use a sturdier hook (4.0mm) and cotton yarn for a structured cone that stands upright. Work the cone in joined rounds from the bottom up; the cone will be flared at the top to hold the dome. Make two panels (inner cream, outer blue) and join them together by single crochet or slipstitching before folding into cone shape.
Round 1 (Base) :
With blue, ch 2, 6 sc in 2nd ch from hook (6)
Round 2 :
Inc in each st (12)
Round 3 :
(1 sc, inc) x 6 (18)
Round 4 :
(2 sc, inc) x 6 (24)
Round 5 :
(3 sc, inc) x 6 (30)
Rounds 6-10 :
1 sc in each st (30)
Info :
Keep the base rounds even to create a stable circular bottom. If you want a slightly wider base, work Rounds 6-7 as increases: (4 sc, inc) x 6 to reach 36 sts before moving on.
Round 11 :
(4 sc, inc) x 6 (36)
Rounds 12-20 :
1 sc in each st (36) — work until cone body reaches approximately 6-7 cm tall (or desired height)
Info :
Work these rounds in blue for the outer shell. Make a matching inner panel in cream following the same starting rounds but stop at Round 16 so inner panel is slightly shorter; this will create a folded rim effect.
Round 21 :
Switch to BLO for one round to create a defined edge: 1 sc in each st BLO (36)
Round 22 :
Switch to cream yarn (inner) and make a second panel: follow Rounds 1-16 of the blue panel to make inner lining (16 rounds total for inner)
Info :
Block or steam both panels lightly. Align edges and join panels wrong sides together by sl st through both layers around the top rim, leaving the base open. Alternatively, sew the panels together with neat whip stitch for a stronger seam.
Round 23 :
Fold panels into cone and join along side seam: using cream yarn, work sc through both panels along the seam edge until cone is formed. Fasten off and weave in ends.
Round 24 :
Optional bottom finishing: join blue around base with a round of sc to hide seam and tidy base: 1 sc in each st (36)
Info :
If you want a freestanding cone, insert a cardboard disc into the base between panels before finishing the bottom; the cone will then stand upright without tipping when flowers are arranged. Use pins to hold disc while you sew the bottom closed.
— Bow & Tie Band :
Round 1 :
With blue, ch 6, join to form loop, ch 1, work 6 sc into loop (6)
Round 2 :
Inc in each st (12)
Round 3 :
1 sc in each st (12)
Round 4-10 :
Work rows (not rounds) for bow tails: ch 1, turn, sc across 12 sts for 14 rows to create two flat long panels for tails. Fasten off leaving long tails for sewing.
Info :
Alternatively, crochet one long strip of sc in the round to form the tie band, then fold and sew to make a double-thickness ribbon. Make a separate loop for the knot and gather tails into it.
Round 11 (Bow Loop) :
Ch 10, 1 sc in 2nd ch and across (9), ch 1, fold strip and sew ends to form a loop. Stuff lightly if you want a puffier knot. Secure to cone with hidden stitches.
Info :
Pin the bow in place before final sewing; you can also secure with a small dab of fabric glue inside the knot if desired.
— Stems & Filling (Optional stems for each flower) :
Round 1 :
Cut lengths of floral wire or pipe cleaner to desired stem length (10-15 cm). Wrap each wire lightly with a thin strip of green yarn by wrapping and securing with glue or by sewing around the wire so that wire is fully covered.
Round 2 :
Sew or tie each flower to the top of wrapped wire using the long tail left from the flower motif. Bring thread through the base of the flower disc and wrap around the wire 3-4 times; secure with a few backstitches and weave in tail. Repeat for all flowers you want to be on stems.
Info :
If you prefer a compact dome without visible stems, skip wiring and instead sew flower bases directly to a small foam disc or a felt disc placed inside the cone. Both methods produce slightly different looks: wired stems allow arranging, sewn bases produce a fixed dome.
— Assembly (Building the Dome) :
Step 1 :
Make a small circular base disc from cream yarn (ch 2, 6 sc in mr, inc to 12, 18) to sit inside the top of the cone. This disc will be the anchor for sewn flowers. (Rounds: ch2; 6; inc to 12; (1 sc, inc)x6 =18)
Info :
Pin disc into the top of cone and baste with a few stitches to hold while assembling the dome. The disc should be slightly smaller than the cone opening to allow a small rim fold.
Step 2 :
Begin sewing the largest flower motifs centrally onto the disc using mattress or whip stitch through the disc and the back of the flower disc. Use the long tail left from each motif to anchor securely. Place 1 central large flower, then surround it with 6 large flowers to form the first ring.
Info :
Alternate colors and sizes (large, medium, small) and leave slight gaps to later fill with small fillers and leaves. Pin each flower before sewing to ensure spacing and dome symmetry.
Step 3 :
Work outward in concentric rings: after the first ring of 6, add medium flowers in the next ring (10-12), then small flowers and tiny buds in outermost gaps to create a rounded dome. Keep the top surface slightly domed — do not flatten the arrangement.
Step 4 :
Sew larger backing leaves around the outer rim of the dome to create a scalloped green background. Tuck medium leaves between flower clusters and sew them through the disc and cone rim for firm hold.
Info :
For a fuller look, add 2-3 rows of filler flowers, sewing them slightly overlapping each other. Use longer stitches when sewing to allow slight movement and depth between layers.
Step 5 :
Attach wired stems (if using) by inserting the wire into the cone and securing with glue or by wrapping repeatedly around an internal anchor (cardboard ring or felt pad). Trim wires to fit and hide ends within cone lining.
Info :
If you used sewn bases onto a felt disc, secure the disc to the cone interior with strong hand stitches around the rim so the dome won't wobble during handling.
— Finishing Touches & Variation Rounds :
Round 1 :
Secure any loose petals by sewing at base with a small invisible stitch. Weave all ends through at least 5 cm and trim close to fabric.
Round 2 :
Optional: Add a light spray of starch or Fabric Stiffener around outer leaves to help hold shape. Test on scrap yarn first.
Round 3 :
Optional: Embroider veins on leaves with a darker green by running short straight stitches from base to tip, 3-4 small stitches per vein.
Info :
View the finished bouquet from different angles before final sewing — small adjustments will dramatically improve symmetry. Consider making 2-4 extra filler flowers to allow experimentation during assembly.
Final Notes :
Total rounds described across sections equate to many repetitive motifs: each main flower ~13 rounds, each small flower ~4 rounds, tiny buds 2 rounds, leaves 2-3 rounds, cone 24 rounds and bow ~11 rounds. Produce the counts needed to fill your dome (recommended 30-36 main flowers, 10-16 small flowers, 18-24 buds, 10-14 medium leaves, 6-8 backing leaves) for a finished bouquet approximately 20-26 cm high and a 15-18 cm wide dome.
This Blue Hydrangea Crochet Bouquet is such a rewarding project — each small motif stacks into a lush, sculptural bloom that looks and feels lovingly handcrafted. The textured cone and neat bow make it a ready-to-display piece without the need for a vase, and the soft blues and greens create a calm, elegant accent for any room. Make extras to build an even larger arrangement or give a single bouquet as a heartfelt, handmade gift. 🌿💙