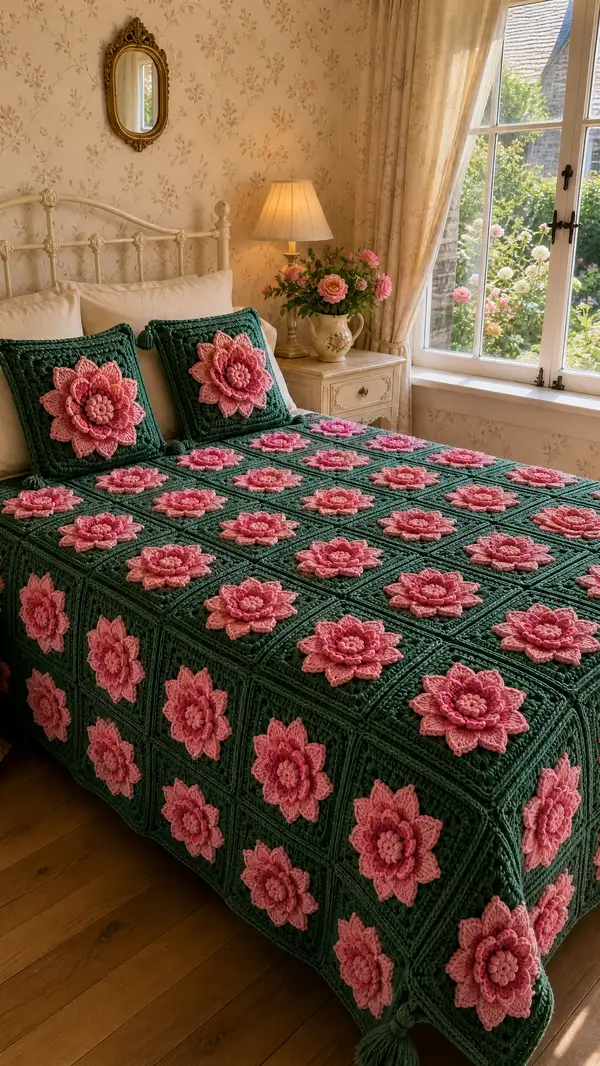
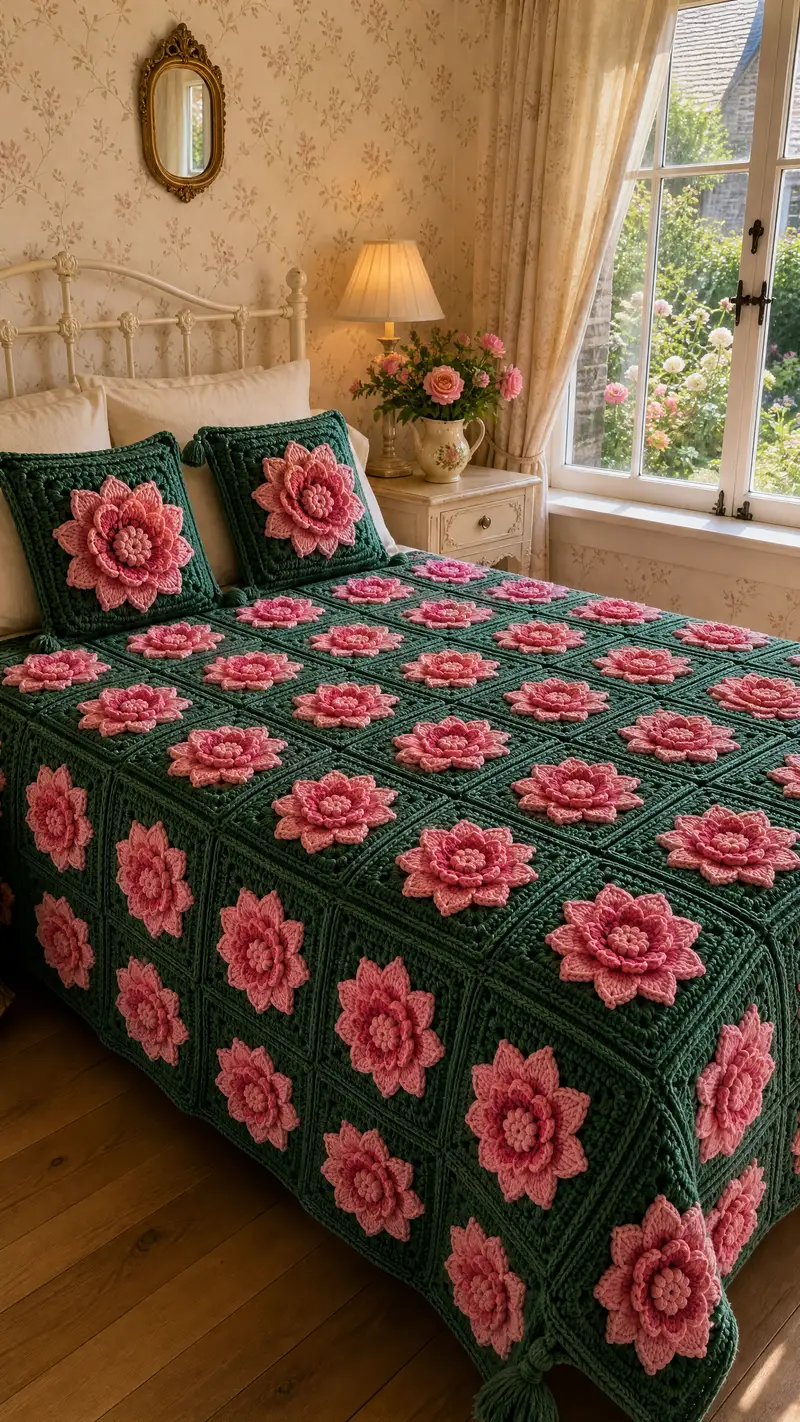
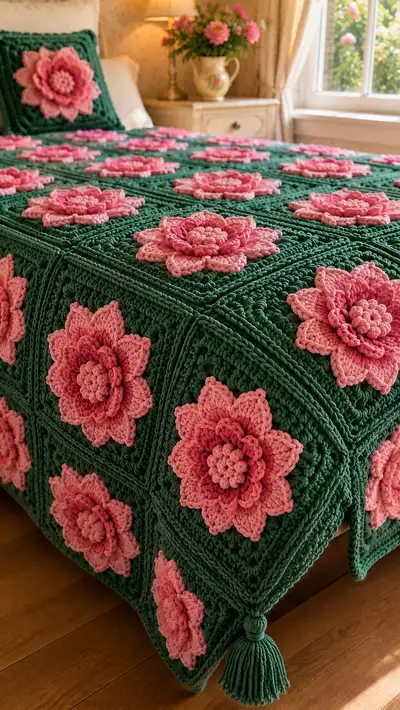
A sumptuous bedspread made from deep green granny squares topped with layered, 3D blush-pink lotus flowers. Each square features a raised multi-layer petal motif in three pink shades, joined into a luxe textured blanket with tasseled corners. This pattern includes full instructions for the flower motif, square base, join-as-you-go assembly, edging, and matching cushion covers. Ideal for makers who love sculptural motifs and a classic vintage-inspired color palette.
Progress Tracker
0% Complete
— General Notes :
Info :
Gauge: Each finished motif (flower + square) in photographed yarn measures approximately 12in / 30cm square. Adjust hook or yarn to obtain a similar scale. This pattern uses super-bulky and bulky cotton yarns for sculptural petals and a dense, cozy square. All rounds are worked in continuous rounds unless otherwise noted. Use a stitch marker to mark the start of each round. We recommend blocking each square lightly to flatten and align petals before joining.
Info :
Special stitch - Puff: Yarn over, insert hook into indicated stitch, yarn over and draw up a loop (repeat this step 4 more times so you have 9 loops on hook), yarn over and pull through all loops, ch1 to close puff. Counts as 1 puff stitch. For a firmer puff use fewer yarn over pulls (3) or use smaller hook.
— Lotus Flower Center (Make 1 for each square) :
Round 1 :
6 sc in magic ring (6)
Round 3 :
(1 sc, 1 inc) x 6 (18)
Round 4 :
(2 sc, 1 inc) x 6 (24)
Round 5 :
(3 sc, 1 inc) x 6 (30)
Round 6 :
(4 sc, 1 inc) x 6 (36)
Round 7 :
1 sc in each st (36)
Round 8 :
1 sc in each st (36)
Info :
Center disc: This small, dense disc forms the heart of the lotus and provides a secure base to attach the inner petal layer. If you prefer a puff center, substitute rounds 6-8 with two rounds of 12 small puff clusters evenly placed around the disc.
Round 9 :
Change to Blush Pink (light). *ch1, 2 sc in next st, skip 1* around to create small defined bumps for petal base (36) — alternate: 36 sc in each st if you prefer no spacing.
Round 10 :
1 sc in each st BLO (36)
Info :
Begin attaching small petals: On Round 11 we will work surface puff petals into the round beneath. Use a smaller hook if you want firmer petals.
Round 11 :
*Insert hook in same st as marked (or every 3rd st for 12 petals), ch2, puff (as defined) in next stitch, sl st in next stitch* — repeat to make 12 compact inner petals (12 petals, center disc still 36 sts)
Info :
When placing inner petals, space them evenly. For 36 base sts make 12 inner petals (every 3rd stitch). Use repair slip-stitch to nest puffs against disc so they sit upright.
Round 12 :
Fasten off inner petal layer leaving long tail for sewing. Weave tail through back of disc to secure; do not trim.
— Petal Layer 2 (mid layer - Make 12 petals per flower) :
Info :
Make each mid-layer petal separately in Rose Pink (mid). These are worked as small teardrop petals and then sewn a round out from the inner layer to produce a fuller, layered bloom.
Petal Round 1 :
Ch6, sc in 2nd ch from hook and across to last ch (5 sc) (5)
Petal Round 2 :
Turn work, 1 sc in first st, inc (2 sc) in second, 1 sc in next, inc in last (7)
Petal Round 3 :
Turn, ch1, (1 hdc, 2 dc, 1 hdc) across the top of the petal into the middle stitches to create a gentle arch (counts remain 7)
Petal Round 4 :
Sl st at base to join, finish off leaving long tail for sewing. Make 12 petals in total for each flower.
Info :
Sewing tip: When attaching each mid petal, place it so its base tucks under the edge of inner petals and is sewn through the center disc fabric. Use the long tail and whip stitch through disc rounds 7-9 for secure anchoring. Space petals evenly — place a marker on the disc for guidance.
— Petal Layer 3 (outer layer - Make 12 larger petals per flower) :
Info :
Outer petals are larger and worked in Deep Rose (dark) for a rich multi-tonal effect. They are made similarly to mid petals but wider and taller to create the dramatic silhouette seen in the photos.
Petal Round 1 :
Ch8, sc in 2nd ch from hook and across (6 sc) (6)
Petal Round 2 :
Turn, 1 sc in first, inc, 2 sc, inc, 1 sc (8)
Petal Round 3 :
Turn, ch1, 1 hdc in first, 3 dc across middle 3 sts, 1 hdc in last (8)
Petal Round 4 :
Optional decorative edge: *ch1, sl st around outer edge of petal* Fasten off leaving long tail for sewing. Make 12 petals per flower.
Info :
When sewing outer petals, overlap slightly over the mid-petals so each layer nests. Use small whip stitch and hide tails under petals. Position outer petals between mid-layer petals for a staggered, fuller look (i.e., offset by 15 degrees).
— Flower Assembly (Attach layers to disc) :
Info :
With the center disc already prepared and inner puffs in place, pin mid petals at even intervals so there is one mid petal between each pair of inner puffs (12 total). Sew each mid petal through the disc and tie off tail. Next, position outer petals offset from mid petals and sew securely. After all petals are sewn, gently shape petals with fingers and steam block lightly if yarn allows.
Step :
Weave in all tails on the back of the flower and trim. Each completed flower should be approximately 10-12cm across in the pictured yarn; adjust hook or petals to achieve desired fullness.
— Granny Square Base (Green foundation for each motif) :
Round 1 :
Ch4, join with sl st to form ring, ch3 (counts as first dc), 2 dc in ring, ch2, *3 dc in ring, ch2* repeat 3 times, join with sl st to top of ch3 (12 dc clusters, 4 ch2 corners)
Round 2 :
Sl st into next 2 dc to reach ch-2 corner, ch3 (counts as dc), 2 dc in same ch-2, ch2, 3 dc in same ch-2, ch1, *3 dc, ch2, 3 dc in next ch-2, ch1* repeat around, join to top of ch3 (24 dc clusters, 4 corners)
Round 3 :
Ch3, dc in each dc across to corner, (2 dc, ch2, 2 dc) in each ch-2 corner, dc across; join (48 dc – counting clusters as individual dc for fabric width)
Round 4 :
Ch2, hdc in each st around working hdc across top of clusters and (3 hdc in corner ch-2 space), join (approx 60 hdc)
Info :
From Round 3 onward you will begin forming a dense, rectangular square. The pictured bedspread squares are worked to a larger size with additional rounds; maintain even tension to keep consistent size across motifs. Use stitch markers at corners.
Round 5 :
Ch2, 1 hdc in each st around; when you reach a corner, work 2 hdc, ch2, 2 hdc in the corner space. Join (increase due to corners) (approx 72 hdc)
Round 6 :
Repeat Round 5 (approx 84 hdc) — square is growing; keep edges flat by ensuring 2hdc-ch2-2hdc at corners only
Round 7 :
Ch3, dc in each st around, working 2 dc in corner spaces (4 dc per corner cluster), join (approx 96 dc)
Round 8 :
Ch2, 1 hdc in each st around in BLO to create a crisp ridge for join-as-you-go later; work (2 hdc, ch2, 2 hdc) in each corner (approx 108 hdc)
Info :
Stop and compare squares regularly to ensure uniform size. Block this square flat, smoothing petal layer off the front and ensuring the back is tidy — blocking improves join accuracy.
Round 9 :
Ch1, sc in each st around (in BLO on previous round for a framed appearance), placing 1 sc in corner ch-2 spaces (approx 108 sc)
Round 10 :
Ch3, FPDC around each of the next 2 rounds to create raised ridges (work FPDC around previous round's stitches), on corners work 3 FPDC in corner ch-2 space; join with sl st (approx 108 FPDC)
Round 11 :
Ch2, 1 hdc in each st around in BLO to create dual ridges framing the flower, join (approx 108 hdc)
Round 12 :
Ch1, sc in each st around, join — finish square body. Measure to ensure this square matches others (approx 30cm square in pictured yarn)
Info :
At this point you can either attach the flower to the square or work an additional decorative frame. For the pictured look the flower is sewn centered on the square and then a narrow raised frame is worked around the square to accentuate each motif.
— Attaching Flower to Square :
Info :
Position the completed flower centered on the square. There should be an even border of green around the bloom. Use pins or removable glue dots to hold center disc in place. Using the long tails left from flower pieces, sew through the back of the square into the center disc and through the base of each petal. Attach mid and outer petals at their bases for maximum stability. Use extra small stitches through the square ridges so the flower remains flush but secure.
Step :
Sew 12 attachment points for inner petals, 12 for mid petals and 12 for outer petals if desired — distribute sewing evenly in rounds 6-10 of the disc to anchor into square stitches. Finish by weaving tails through square back and trimming.
— Join-As-You-Go Method (Connecting Squares) :
Info :
Join squares as you complete rows using join-as-you-go (JAYG) for a clean seam. Work final round of adjacent square until last corner, then slip stitch through corresponding st of adjacent square to join; continue around edges. Alternatively, you may seam by mattress stitch for more flexible seams. The pictured seam shows a raised rope ridge — emulate that by working a round of FPDC along join line afterwards.
Round (Join) :
On Square A final round: when you reach joining side do not finish last loop of sc; instead sl st into corresponding sc on Square B, ch1 and continue. Repeat for each joining stitch. When joining corners, work ch2 join in corner spaces. Continue adding squares row by row until full width is achieved.
Info :
Tip: Place squares face up and join them so seams appear as ridges on top that echo the frame ridges around each blossom. When joining many squares maintain tension to avoid puckering.
— Blanket Border and Edging :
Round 1 :
With full blanket assembled, join green yarn in any corner. Ch2, hdc in same space, work 1 hdc in each st around the whole bedspread, on corners work 2 hdc, ch2, 2 hdc. Join with sl st to starting stitch (gives a uniform first round).
Round 2 :
Ch3, dc in each st around working 3 dc in corner ch-2 spaces, join (this raises the border)
Round 3 :
Ch1, sc in each st around, join (creates tidy edge) — optional color change here to a slightly lighter green or contrast yarn
Round 4 :
Ch2, FPDC in each st around to create a pronounced ribbed frame; when you reach corners work 3 FPDC in corner ch-2 spaces to maintain square corners. Join and fasten off.
Info :
For the deep frame in the photo, add an extra row of FPDC and a final round of sc in BLO for a corded effect. The border depth adds a substantial, tailored feel to the bedspread.
— Tassels (4 - one at each corner) :
Step 1 :
Wrap green yarn around a 10cm wide piece of cardboard 30 times for thick tassel. Slide yarn off, fold in half and tie securely near fold with a short piece of yarn to form head.
Step 2 :
Attach tassel to corner by threading loop through corner ch-2 space and pulling tails through loop to form a lark's head. Attach second tassel if pictured double-head style. Trim ends evenly and optionally add decorative wrap with contrasting yarn.
Info :
Make tassels full and plush to complement the heavy motifs. You may also tie multiple strands for oversized tassels as seen in the photographs.
— Matching Cushion Cover (Make 2 for pair) :
Info :
The cushions echo the bedspread: a single large square with a central lotus and a framed ridge, finished with tassels at each corner and a back flap closure. Use same motif size but work a single square sized to 45cm x 45cm for most cushions.
Round 1 :
Work the same Granny Square Base rounds 1-12 as for bedspread squares, stopping when square reaches cushion size (approximately 45cm) or when you have matched pictured scale. Ensure petal remains centered and secure.
Round 2 :
For back: Make a second plain square or make two halves for envelope closure: work two panels, then seam three sides and insert cushion pad. Tie bottom with buttons or slip-stitch closure inside for a neat finish.
Info :
Alternatively, use a zipper sewn into an edge for removable cushion covers. For a tidy look, finish with a round of sc in BLO around the front to create a frame and add tassels as desired.
— Finishing Touches & Blocking :
Info :
Block all squares flat with petals fanned gently outward. Use steam-blocking or a damp cloth depending on fiber content. Pin edges straight and allow to dry. After blocking, join squares into final bedspread and add final border. Weave in all ends securely.
Step :
Check all petals for stability; add a few unobtrusive slip stitches through petal bases and square rounds to prevent shifting with use. Trim any stray fibers and brush petals lightly for a soft finish.
Info :
Maintenance: Hand wash or machine wash gently on delicate cycle in cool water; reshape and dry flat to maintain flower structure. Cotton yarn may soften and petals will relax slightly after the first wash.
This Blush Lotus Granny Square Bedspread is a labor of love that turns individual blooms into a lavish, tactile blanket you can treasure. Each square is a tiny garden of layered petals that come together to create a beautiful, vintage-inspired centerpiece for your bedroom. The process of making each motif, sewing them together and adding finishing touches is deeply satisfying — every stitch adds character. Wrap yourself in the warmth and charm of handmade craftsmanship and bring floral elegance into your home 🌸🧶