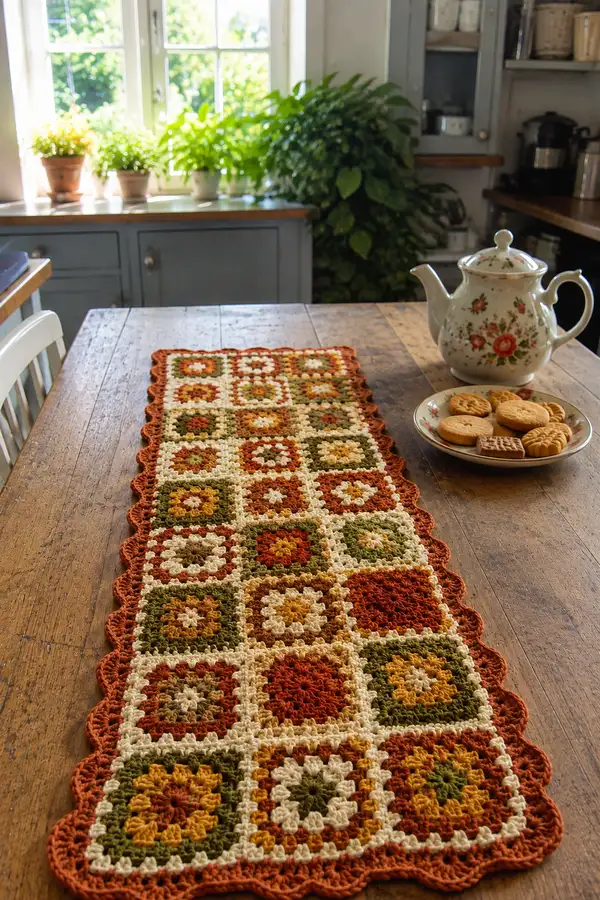
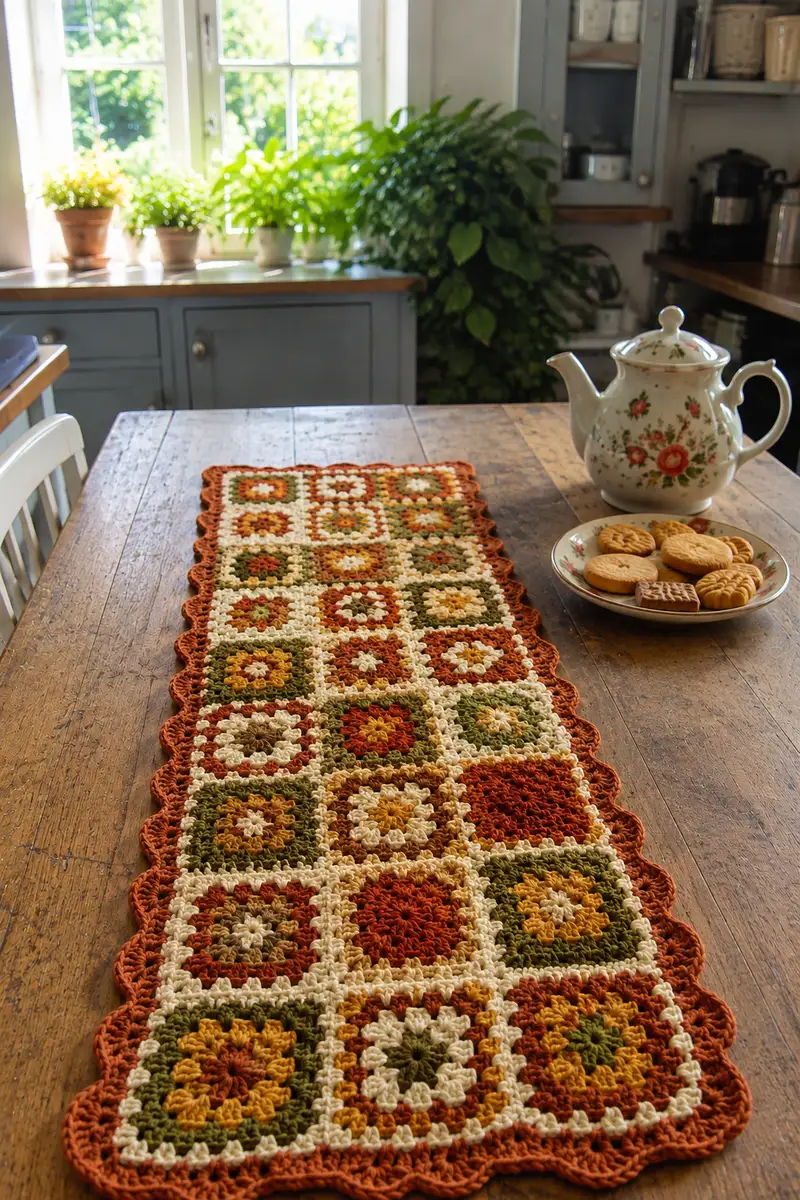
A cozy boho table runner made from joined granny squares in warm rust, mustard, olive, tan and cream. The long narrow runner features textured granny motifs, a creamy join and a scalloped rust border that frames the piece beautifully. Designed to sit perfectly down a farmhouse table or buffet, this pattern uses repeating square units for easy assembly and endless color-play.
Progress Tracker
0% Complete
— Overview :
Info :
This pattern produces one table runner made from 24 granny squares arranged 4 across by 6 down (4 x 6). Each square is worked in 8 rounds to create a textured center and graduated square. Squares are joined with an external cream round and the whole runner is finished with a scalloped rust border. Use worsted cotton and a 4.0mm hook for fabric with body and drape.
Info :
Gauge is not critical for fit but affects final sizing. One finished square (after blocking) should measure approximately 11 x 11 cm (4.5 x 4.5 in) when worked as written. If your squares are too small or large, adjust hook size accordingly.
— Color Layout & Square Count :
Info :
Make a total of 24 granny squares in the following repeating colorways to mimic the photo: Colorway A (Rust center, Mustard round, Cream round, Olive round, Cream frame), Colorway B (Olive center, Tan round, Cream round, Rust round, Cream frame), Colorway C (Mustard center, Rust round, Cream round, Olive round, Cream frame), Colorway D (Tan center, Olive round, Mustard round, Rust round, Cream frame), Colorway E (Cream center, Mustard round, Olive round, Rust round, Cream frame), Colorway F (Rust solid variant for a full rust square then cream frame). Arrange them in a 4 by 6 grid alternating colorways for a balanced look. Exact placement is flexible; swap squares to suit your palette.
— Granny Square (Make 24) :
Info :
All squares follow the same round structure. Each round increases by 12 double crochet stitches (3-dc clusters around the square), producing progressive sizes: Round1 = 12 dc equivalent, Round2 = 24, Round3 = 36, Round4 = 48, Round5 = 60, Round6 = 72, Round7 = 84, Round8 = 96 cluster dc equivalents. Work in joined rounds with slip stitch joins or continuous rounds as preferred. The pattern below uses joined rounds (sl st to top of starting ch3) for neat color changes.
Square 1 - Colorway A :
Start with Color 1 (center): Rust
Round 1 :
Make a magic ring. Ch 3 (counts as first dc), work 2 dc into ring, *ch 2, 3 dc into ring* repeat from * to * two more times to create 4 sets (you will have 4 clusters separated by ch2 spaces). Sl st to top of starting ch3 to join. (12 dc, 4 ch-2 corners)
Round 2 :
Change to Color 2 (mustard). In each ch2 corner from previous round work: (3 dc, ch 2, 3 dc). Sl st to join to top ch3. (24 dc arranged in 4 corner groups)
Round 3 :
Change to Color 3 (cream). Work into each ch2 corner: (3 dc, ch 2, 3 dc). Between adjacent corner groups on each side work 3 dc into the side space. Sl st to join. Total stitches: (4 corners x 6 dc = 24) + (4 sides x 3 dc = 12) = 36 dc.
Info :
At the end of Round 3 the square begins to take a more obvious square shape. If carrying yarn for color changes, carry behind work or fasten off and weave in ends. Use a tail of ~20 cm to weave in later if fastening off.
Round 4 :
Change to Color 4 (olive). In each corner ch2 work (3 dc, ch2, 3 dc). On each side there will now be two side spaces between corners; work 3 dc in each of those side spaces. Sl st to join. Total stitches = 48 dc (24 from corners + 24 from side clusters).
Round 5 :
Change to Color 5 (cream — this will begin the framing round). Repeat corner groups: (3 dc, ch2, 3 dc) in every corner ch2. On sides place three 3-dc clusters across each side's spaces (these are the side clusters that create the graduated edge). Join with sl st. Total stitches = 60 dc.
Info :
Round 5 is the decorative frame round in cream; this creates the consistent joining color in the photo. Make sure your ch1 or ch2 spacing is even so the outer edges lie flat.
Round 6 :
Change to Color 5 (cream continued). Work one more round to firm the frame: In each corner do (3 dc, ch2, 3 dc); in each side space work 3 dc. Join with sl st. Total stitches = 72 dc.
Round 7 :
Still in Color 5 (cream). Work one even round of 3-dc clusters into side spaces and (3 dc, ch2, 3 dc) in corners to enlarge the frame for neat joining later. Join with sl st. Total stitches = 84 dc.
Round 8 :
Final square round in Color 5 (cream). Work same pattern: corners (3 dc, ch2, 3 dc), sides fill with 3-dc clusters in every side space. Sl st to join. Total stitches = 96 dc. Fasten off leaving ~25 cm tail for blocking/weaving or joining.
Info :
Block each square lightly to measurements (approx 11 x 11 cm). Pin to shape while damp or steam-block carefully. Blocking helps ensure all squares are identical in size and makes the join and border lie flat.
Square 2 - Colorway B :
Repeat Rounds 1-8 as for Square 1 but use the following colors: Round1 Olive, Round2 Tan, Round3 Cream, Round4 Rust, Rounds5-8 Cream. Keep stitch counts identical. Fasten off and block.
Square 3 - Colorway C :
Repeat Rounds 1-8: Round1 Mustard, Round2 Rust, Round3 Cream, Round4 Olive, Rounds5-8 Cream. Fasten off and block.
Square 4 - Colorway D :
Repeat Rounds 1-8: Round1 Tan, Round2 Olive, Round3 Mustard, Round4 Rust, Rounds5-8 Cream. Fasten off and block.
Square 5 - Colorway E :
Repeat Rounds 1-8: Round1 Cream, Round2 Mustard, Round3 Olive, Round4 Rust, Rounds5-8 Cream. Fasten off and block.
Square 6 - Colorway F (Rust variant) :
Repeat Rounds 1-8 but work Rounds 1-4 in rust for a deep rust center effect, then change to cream for Rounds 5-8 for the framing. This gives a solid rust focal square. Fasten off and block.
Info :
Continue making squares 7-24 by repeating the colorway sequence so that you have a total of 24 squares. Alternate rows so colors balance across the runner. Place squared on a flat surface in your intended layout before joining to check color flow.
— Joining Squares (Join with cream external join) :
Info :
The photo shows a cream join (one round of cream worked around each assembled square to create a visible grid). There are two approaches: (A) Join-As-You-Go (JAYG) where you work the final cream round as you add squares to a growing panel, or (B) sew/whip stitch the squares together and then work a continuous cream round around the entire assembled panel. Both create similar appearance. This pattern uses JAYG method described below for a neat continuous cream grid.
Joining Setup :
Arrange squares into 4 columns and 6 rows (4w x 6h). Start at top-left square as Square A1 and work left-to-right for Row 1, then attach Row 2 below Row 1, etc. We'll describe joining each square in sequence using the cream framing round as the joining round.
Join Round (for first square in a panel) :
With cream, attach with sl st to any corner ch-2 space of the first square. Ch 3 (counts as dc), work (2 dc, ch2, 3 dc) in the corner to form the corner. Continue around the square following the 3-dc clusters pattern in each side space and (3 dc, ch2, 3 dc) in corners. Sl st to top ch3 and fasten off or continue onto next square if joining.
Join Round (attaching second square in a row using JAYG) :
Position the second square next to the first with right sides facing up. Work the cream round on the second square up to the point where the two squares meet along a side. When you reach the side space where a 3-dc cluster should be placed adjacent to the already-made square, replace the 3 dc cluster by: (sl st into corresponding side space of square already in panel, ch 1, sl st back into current square), or better, work a single crochet through both layers to create a flat seam. Continue working the rest of the round on the new square. At corners, work the corner (3 dc, ch2, 3 dc) as usual. This creates a visible cream seam between squares.
Info :
For a neater join, use the following joint technique for side clusters: when you reach a side space that sits adjacent to an already-joined square, work: sl st into the adjacent square's corresponding st or space, then sl st back into your current working space, then ch1, then continue with the next 3-dc cluster. This secures squares with a low-profile seam. If you prefer a visible ridge, use slip-stitch join or single crochet through both loops of each square.
Joining full rows :
Once Row 1 (four squares) is joined, begin Row 2. Work the first square of Row 2 by joining it to the square above along the top edge using the same JAYG method — when working the cream frame round, align side clusters and replace paired clusters with joining slip-stitches or single crochets through both squares. Continue to add squares left-to-right, always attaching the top edge to the row above and the left edge to the square previously added to the row when applicable.
Info :
Take care to keep the spacing even and corners aligned. Use pins to hold squares together if helpful. When you reach the last square in a row you will join both to the square on the left and to the square above (if not in the top row) — ensure the corner ch2 spaces align by counting clusters across both squares before joining.
Joining tips :
Work the cream joining round with the squares lying flat and right side up for consistent appearance. If you prefer, sew rows together with mattress stitch and then pick up a continuous cream round around the entire assembled panel to form the grid.
— Assembling rows into the runner :
Info :
After joining every square into rows of 4 and then joining rows into a 4 x 6 panel, check overall shape. If any edges ripple, you can adjust by blocking the entire panel moist and re-pinning to a straight long rectangle. Pin edges to measure before final border work.
— Border / Scalloped Edge (Rust) :
Info :
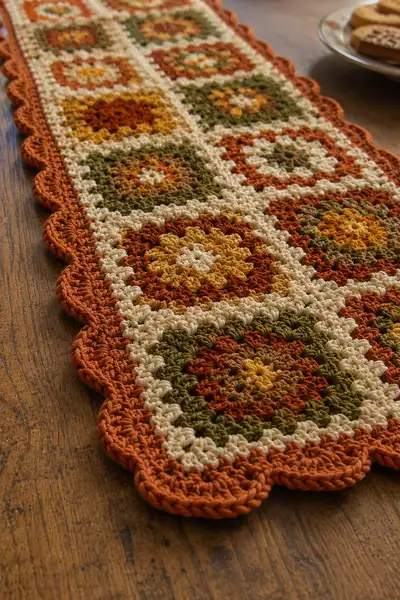
The scalloped border in the photo is a rust-colored shell border worked around the outside of the joined panel. It creates a petal-like scallop repeating around the entire perimeter. We'll work a 4-round cream stabilizing round and then 3 rounds of rust scallops for the final decorative edge.
Border Round 1 (Stabilize - cream) :
With cream held, join with sl st anywhere along an outer corner ch2. Ch1, work 1 sc in same corner space, then work sc evenly across the top of the cream grid edges, placing approximately 1 sc into each 3-dc cluster space and 2 sc into corner ch2 spaces. When reaching a corner, work 2 sc into that corner space, turn the corner and continue along the next edge. This round evens the edge and creates a base for the scallops. Sl st to join and do not fasten off. (Stitch count will vary depending on panel size; keep approximately even spacing: aim for ~3 sc for each cluster run and extra sc in corners.)
Border Round 2 (Evening round - cream) :
Ch 1, work 1 sc into each sc around, placing an extra sc into corner spaces (2 sc). This evens any inconsistencies from Round 1 and builds a neat edge for the shells. Sl st to join. Fasten off cream and weave ends neatly into the join grid.
Info :
Make sure the final cream round produces a flat, even edge; adjust sc spacing if sections appear too loose or too tight. This foundation helps shells sit evenly and prevents scallops from distorting the runner shape.
Border Round 3 (Rust - Shell Row 1) :
Join rust with a sl st to any sc on the evened edge. Ch 1 (does not count), *sk 2 sc, work 5 dc into next sc (5-dc shell), sk 2 sc, sl st into next sc*; repeat from * to * around to form evenly spaced shells. At corners, center a shell in the corner sc pairs to keep scallops continuous. Sl st to join to first shell. This establishes the scalloped look. Count shells and adjust sk spacing to make final shells align evenly around corners.
Info :
Standard 5-dc shells give a bold scallop. If you prefer a larger curve, use 7-dc shells. Keep shell spacing consistent so scallops mirror across long sides.
Border Round 4 (Rust - Shell Row 2, deepen scallops) :
To make the scallops fuller, you can work a second rust round over the shells: sl st to the center stitch of the first shell, ch 1, work 1 sc in center, *ch 3, work 1 sc in center of next shell* around. This small picot-like ch3 between centers emphasizes the scallop spacing. Sl st and fasten off, weave in ends. Alternatively work 3 dc into shell centers for a raised look.
Info :
Make sure to fasten off securely and weave ends along the shell edges. Block the finished runner lightly, pinning scallops to shape so edges remain rounded and even when dry.
— Finishing Touches :
Info :
Weave in all ends on the wrong side of the runner. Use a tapestry needle to bury ends through several clusters to prevent unraveling. Trim any stray fibers. Lightly steam or wet-block the finished piece and pin scallop edges to shape. Let dry fully before use or storage.
Care Instructions :
Hand wash in cool water with mild detergent, reshape while damp and dry flat. Avoid machine washing to preserve the scalloped edge and cotton texture. If you prefer machine washing, use a delicates bag and gentle cycle but expect some softening of structure over time.
Info :
For seasonal variation, swap rust for deep plum, or replace cream with light gray for a different neutral contrast. The modular nature makes resizing simple — add or remove rows of squares to lengthen or shorten the runner.
You've created a beautiful boho granny square table runner that adds warmth and texture to any surface. Each lovingly blocked square and the scalloped rust border combine to make a charming heirloom piece you can treasure. The modular construction means this design is endlessly customizable — make it longer, wider, or use different colors for each season. 🎨🧶 Congratulations on finishing a handmade runner that will brighten your table for many cozy gatherings! 🍂