About This Bonnie Beanie Pattern
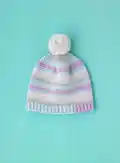
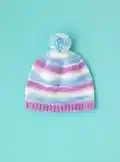
This pattern creates a cozy, striped baby beanie in five sizes from 0–24 months using Paintbox Baby DK prints. The hat is worked in continuous rounds for a smooth finish, then given a turned ribbed brim and tied off with a pom pom. It includes clear round-by-round increases and size-specific instructions so you can make the perfect fit.
Ideal for beginners, the pattern uses US terminology and provides gauge guidance for consistent results. Materials and abbreviations are listed, plus concise finishing notes for assembling the brim and adding a pom pom.
Why You'll Love This Bonnie Beanie Pattern
I absolutely love this pattern because it makes a charming, wearable baby hat with minimal fuss. I enjoy how quickly the crown comes together using simple increases in rounds, giving you visible progress fast. The turned brim adds a tidy, professional finish that I find so satisfying to complete. Making a pom pom for the crown is a fun final touch that really personalizes each hat, and I always enjoy gifting these little beanies to new parents and friends.
Switch Things Up
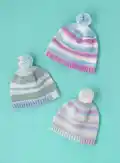
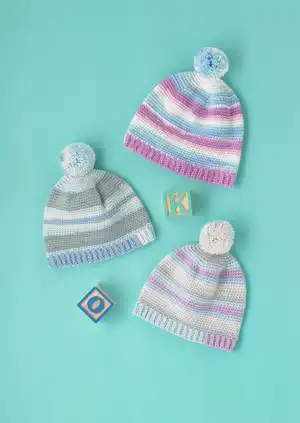
I love swapping colorways to give the Bonnie Beanie a fresh look; try bold solids, tonal ombres, or high-contrast stripes for different moods.
I often change the yarn weight and hook to make mini keychain versions or jumbo chunky beanies; just remember to check gauge each time.
I like replacing the pom pom with a crocheted flower or a small tassel for a delicate finish depending on the recipient's style.
Try knitting the brim instead of crocheting it for a different texture; a ribbed knit cuff adds stretch and a tailored finish.
I sometimes add a fleece lining for extra warmth and a soft interior, especially when making hats for colder climates.
For a fun twist, embroider a simple motif or initials on the brim before joining to personalize each hat.
I recommend experimenting with earflaps for toddler versions to keep ears extra cosy; position them evenly and reinforce seams when attaching.
Want a reversible brim? Work the brim slightly longer and fold to trap a subtle color inside, then join with tidy slip stitches.
I occasionally use variegated or speckled skeins as an accent band to break up stripes and add visual interest without extra color changes.
To make a sibling set, adjust hook size or yarn weight and coordinate colors so each hat feels like part of a matching group while being unique.
Common Mistakes & How to Fix Them
✗ Skipping the place marker after the second round can cause you to lose track of the start of rounds; place a marker in the last stitch and move it up as you work each round.
✗ Joining or turning after the magic ring will create an uneven seam at the crown; work the rounds in continuous spiral as instructed without joining or turning.
✗ Not matching the gauge will make the finished hat come out too large or too small; check the stated gauge of 24 sts and 27 rows over 4in/10cm and adjust hook size accordingly.
✗ Forgetting to continue to the specified round for your size before starting the brim will distort fit; follow the exact round counts given for each age range and only then work the brim.
✗ Pulling the yarn too tightly when making the magic ring can make the crown too small and hard to work; make a loose, adjustable magic ring and tighten after first rounds are established.