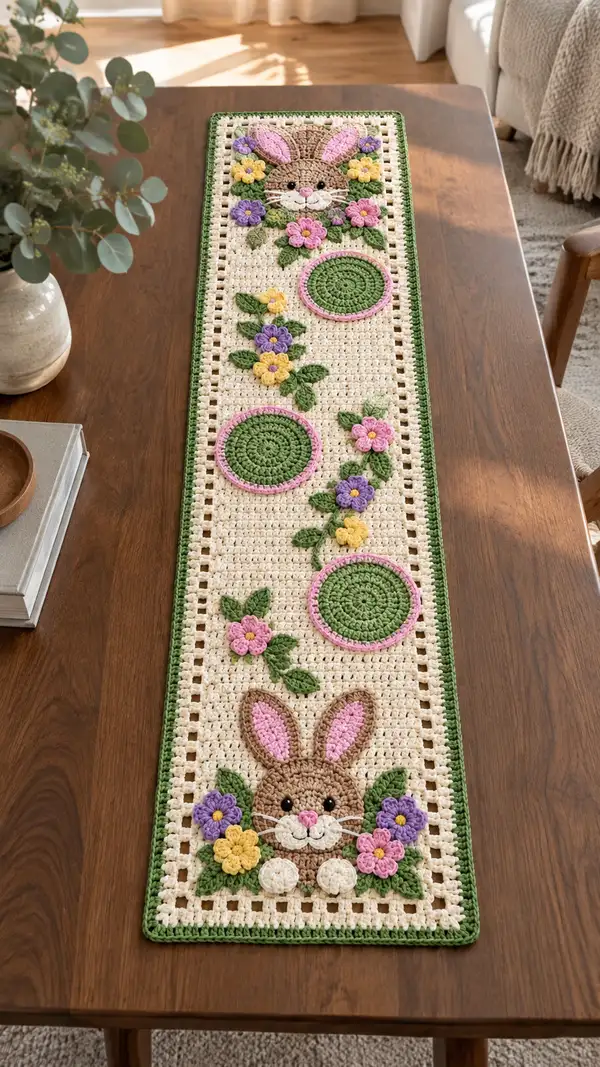
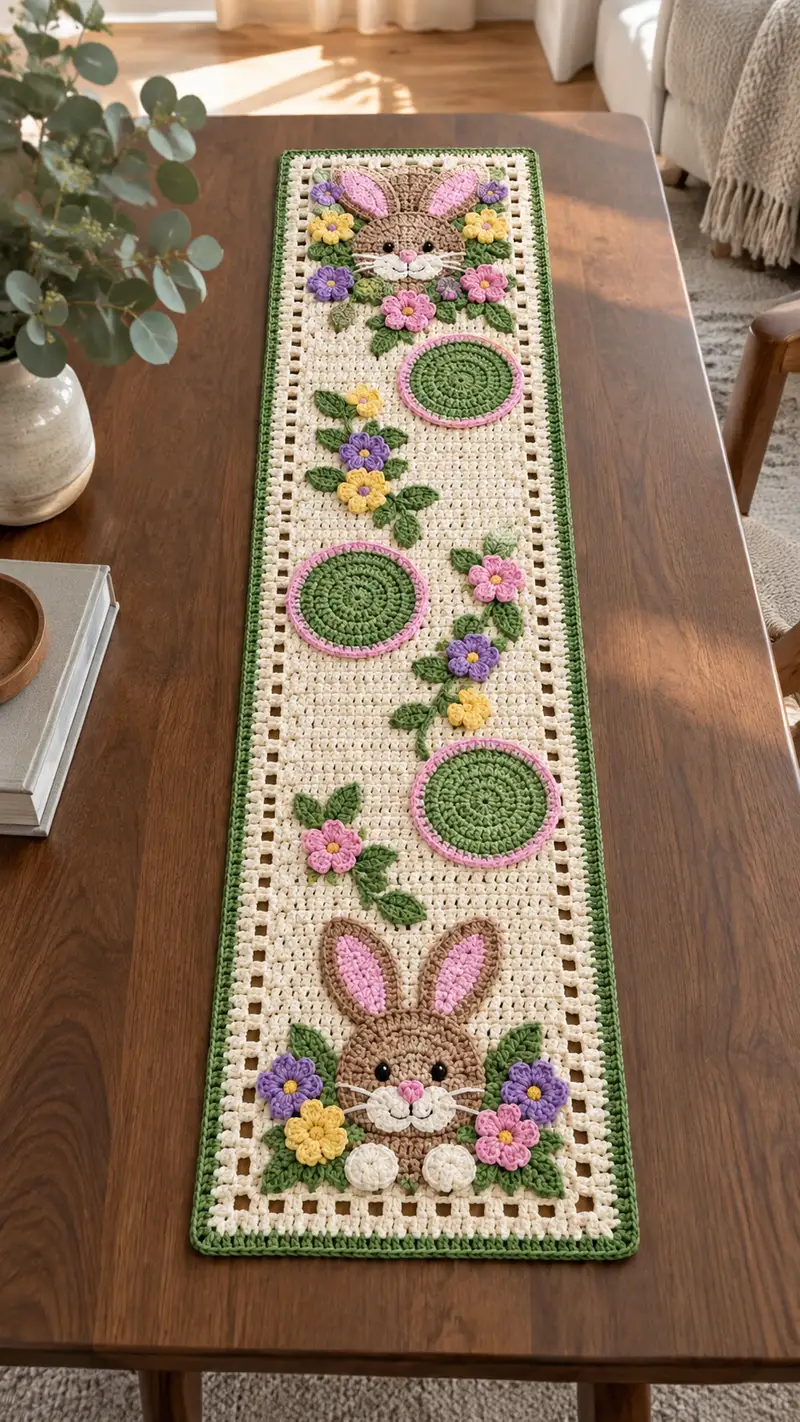
Create a charming Bunny Garden Table Runner featuring two adorable bunny appliques, three circular green egg motifs, and a cascade of colorful 3D flowers and leaves on a cream openwork panel. This long rectangular runner is edged with a leafy green border and layered appliques for a dimensional spring centerpiece. The pattern includes step-by-step instructions for the base panel, all appliques, and assembly so you can recreate this sweet seasonal table accent.
Progress Tracker
0% Complete
— Materials and Gauge :
Info :
Gauge is not critical for this runner but for sizing use 12 dc + 6 rows = 4 in (10 cm) in pattern ground with 4.0mm hook. Work tightly on small appliques with 3.5mm for neat edges. Change hook size to adjust final runner dimensions.
— Abbreviations & Techniques :
Info :
Use standard US terms. Invisible decrease is recommended for rounded head pieces. Use slip stitch joins and whip stitch for sewing appliques. Carry unused yarn behind work or fasten off with long tails for sewing.
— Base Panel (Cream) :
Round 1 :
Ch 72. Turn. (This creates base starting chain for a long narrow runner; adjust chain multiple of 3+2 to change width.)
Round 2 :
Dc in 3rd ch from hook (counts as first dc), dc in each ch across to last 2 ch, 2 dc in last ch; rotate to work along foundation chain opposite side: dc in each foundation ch back across to beginning, join with sl st to top of first dc to create a long tube-like base turned flat (approx 140 dc total). This establishes the first row of dc foundation to create a uniform edge.
Round 3 :
Ch 2 (does not count as dc), 1 dc in each st across the long edge, join with sl st to first dc. (140)
Round 4-6 :
Ch 2, 1 dc in each st around, join. Maintain even edges. (140)
Info :
These first rows create a stable foundation. Keep tension even to avoid ripples. Place stitch markers at ends to keep track of row starts for long straight edges.
Round 7 :
Ch 3 (counts as dc), *ch 1, sk 1 dc, dc in next 2 dc; rep across to last st, dc in last; join. Creates first subtle mesh.
Round 8-10 :
Ch 3, dc in next dc, *ch 1, sk 1, dc in next 2 dc; rep across; join. (140) Continue to build a slightly open ground to show cream mesh and allow appliques to sew cleanly.
Round 11 :
Ch 3, *dc in next 2 dc, ch 1, sk 1; rep across, join. (140)
Round 12-14 :
Repeat Round 11. (140)
Info :
At this point decide placement of motifs. Mark centers for the three circular green motifs roughly evenly spaced along runner center, roughly 1/4, center, 3/4 positions. Also mark 2.5 in from each end for bunny faces. Use removable pins or stitch markers on surface to position appliques before sewing.
Round 15 :
Work openwork filet border rows now to mimic pictured holes: Ch 3, *dc in next 2, ch 2, sk 2, dc in next 3; rep across; join. This creates a square-lattice effect along the central panel.
Round 16-40 :
Repeat Rows 11-15 pattern sequence building length so that runner reaches desired length. For pictured runner repeat these 25 rounds to create a long narrow panel. Adjust number of repeats to match table length. (Maintain approx 140 sts width each round)
Info :
Block the base panel lightly to square edges before applying appliques. Blocking smooths openwork and helps motifs sit flat. Use pins and spritz lightly, allow to dry fully.
— Border (Green) :
Round 1 :
With green yarn join with sl st at any corner of rectangular panel, ch 1, sc evenly along edge placing 3 sc in each corner to keep corners flat. Work sc evenly along long sides approx 140 sc each side, sc in each end row. Join with sl st. (Approx total around 280-300 sc depending on panel length)
Round 2 :
Ch 3, *dc in next 2 sc, ch 1, sk next sc; rep around to form a neat raised dc edge. Join. (Matches stitch count of previous round)
Round 3 :
Ch 1, sc in each st around, placing 3 sc in corners; join and fasten off. Weave in ends. This neat green frame emphasizes the runner edges like the photo.
Info :
For a double-thick edge, repeat Round 3 once more. Keep outer edge smooth by working even sc counts and by blocking lightly once complete.
— Circular Egg Motifs (Make 3) :
Round 1 :
With green, MR, ch 1, 6 sc in MR. (6)
Round 3 :
(1 sc, inc) x6 (18)
Round 4 :
(2 sc, inc) x6 (24)
Round 5 :
(3 sc, inc) x6 (30)
Round 6 :
(4 sc, inc) x6 (36)
Round 7 :
1 sc in each st around (36)
Info :
These centers form raised circular mats. Keep rounds flat by placing increases evenly and not over-tightening slip stitch joins. If cupping occurs, add another increase round evenly spaced.
Round 8 :
Switch to pink yarn. Ch 1, 1 sc in each st around working in FLO to create a thin rim (36). Join and fasten off leaving long tail for sewing.
Info :
Block circles gently to flatten, pin to a round template if needed. Use long tail to sew circles to panel at marked centers using whip stitch through cream base, spacing them centered inside lattice holes.
— Bunny Head (Make 2) :
Round 1 :
With soft brown, MR, 6 sc in MR. (6)
Round 3 :
(1 sc, inc) x6 (18)
Round 4 :
(2 sc, inc) x6 (24)
Round 5 :
(3 sc, inc) x6 (30)
Info :
These rounds form the lower curve of the bunny head. Place stitch marker at start of each round so increases stay symmetrical. Eye placement will be after Round 11.
Round 6 :
(4 sc, inc) x6 (36)
Round 7 :
(5 sc, inc) x6 (42)
Round 8 :
1 sc in each st around (42)
Round 9 :
1 sc in each st around (42)
Round 10 :
1 sc in each st around (42)
Round 11 :
1 sc in each st around (42)
Info :
Place safety eyes between Rounds 8 and 10 approximately 8-10 sts apart depending on desired expression. In pictured runner the eyes are placed on Round 9 spaced 9 sts apart; mark positions before inserting eyes. If embroidering eyes, do so before sewing head to panel.
Round 12 :
(5 sc, dec) x6 (36)
Round 13 :
(4 sc, dec) x6 (30)
Round 14 :
(3 sc, dec) x6 (24)
Info :
Start shallow stuffing if using any fiberfill for a slightly padded head. Note: these heads are flat appliques layered onto the panel; stuffing should be minimal or skipped so they sit flush on runner.
Round 15 :
(2 sc, dec) x6 (18)
Round 16 :
(1 sc, dec) x6 (12)
Info :
Fasten off leaving long tail for sewing. Weave tail through remaining sts and pull closed for a neat back. For appliques leave a wide flat back to sew against cream panel; do not overstuff.
— Bunny Face Details (Snout & Paws & Cheeks) :
Round 1 :
Snout: With white, MR, 6 sc in MR (6)
Round 3 :
(1 sc, inc) x6 (18)
Round 4 :
1 sc in each st around (18)
Info :
Flatten snout and sew centered between eyes onto bunny head. Use satin-stitched nose in pink over central top of snout or add small pink puff stitch for nose as pictured.
Round 5 :
Paws (Make 2 for each bunny): With white, MR, 6 sc in MR (6)
Round 7 :
1 sc in each st around (12)
Round 8 :
Fasten off leaving long tail to sew paws below snout as pictured. Slightly flatten each paw and sew so that they peek over edge of panel for dimensional effect.
Info :
For a raised effect, sew a small running stitch across the base of each paw and pull slightly before attaching. Use long tails to secure with invisible ladder stitch for clean look.
Round 9 :
Embroidery: With thin yarn or embroidery thread, stitch a small triangular nose on snout using satin stitch (pink). Add 3 short straight stitches either side for whiskers using white or cream. Add a tiny mouth below nose using brown or dark pink.
— Bunny Ears (Make 4; Two for each head) :
Round 1 :
Outer Ear (soft brown): MR, 6 sc in MR. (6)
Round 3 :
(1 sc, inc) x6 (18)
Round 4 :
1 sc in each st around (18)
Round 5 :
1 sc in each st around (18)
Info :
Shape ear by working a slight taper at top using decs in following rounds for more pointed ear, or keep rounds even for rounded ear. The pictured ears have a long oval shape with slight taper.
Round 6 :
Switch to pink for inner ear. Join pink at lower center of ear, ch 1, sc in 10-12 sts forming an oval inner ear piece; fasten off leaving long tail to sew to outer ear. Alternatively, work full inner piece: MR, 6 sc, inc to 12, (1 sc, inc)x6 = 18, fasten off and sew centered on brown ear.
Round 7 :
Attach ears to top of bunny head aligning base of ear around upper rounds 3-5 of head. Sew along base with long tail and reinforce with several stitches for stability. Slightly fold ear forward for a natural look.
Info :
Pin ears in place before sewing. Space ears about 8-10 sts apart across top of head depending on head stitch count (on a 42-st head, space approx 12 sts between ear bases).
— Flowers (Small 3D - Make 10 to 14) :
Round 1 :
With yellow (center) MR, ch 1, 6 sc in MR, sl st to join (6)
Round 2 :
Change to petal color (pink, purple or yellow), *ch 3, sl st in same st to form first petal loop; rep around to make 6 loops; join. (6 petals)
Round 3 :
Work 3 sc into each ch-3 loop, sl st to base to form fuller petals; fasten off leaving long tail for sewing. Petal count: 6 with fuller texture.
Info :
Stiffen center slightly with a small dab of fabric glue or add a few stitches to tighten center if using for vertical placement. For layered flowers add a second smaller ring of petals using a contrasting color.
Round 4 :
Make small 3-round version for smaller blossom: MR, 6 sc; ch 3 loops x 6; 2 sc in each loop; fasten off. Use these to fill clusters along vine.
Round 5 :
Sew flowers onto panel using long tail and whip stitch through center into cream panel or onto leaves as shown. Add tiny yellow french knot or seed stitch in center using yarn tail for contrast.
— Leaves (Make 12-16) :
Round 1 :
With green, ch 8. Row 1: sc in 2nd ch from hook, hdc in next, dc in next 3, hdc in next, sc in last. Turn to work along opposite side of chain: sc in last ch, hdc, dc x3, hdc, sc in base. Fasten off. Creates one symmetrical leaf approx 8 ch long.
Round 2 :
Optional texture: Work BLO or FLO single crochets across leaf center to create folded effect: Join at tip, sc evenly across center backbone, fasten off. For smaller leaves use ch 6 and reduce stitches proportionally.
Info :
Sew leaves under flowers and around bunnies to form natural clusters. Layer several leaves slightly offset for a full look. Use long tails to tack leaves at several points so they do not flip up.
— Small Round Accents (White Pom Pads under Bunnies) :
Round 1 :
With white MR, 6 sc in MR (6)
Round 3 :
1 sc in each st around (12)
Info :
Flatten and sew as little pom pads in front of bunny bottom to echo feet and add depth. These small pads are slightly stuffed with minimal fiberfill if a puff is desired.
— Assembly and Placement of Appliques :
Info :
Before sewing any applique, lay out all pieces on the blocked cream panel and pin each element. Placement for pictured runner: bunnies centered at each short end 1.5-2 in from edge, circular green motifs centered along runner at equal distances, floral garlands connecting motifs and ends in a diagonal or serpentine flow. Take reference photo spacing: three circular motifs spaced approximately 7-8 in apart center-to-center along runner length.
Round 1 :
Sew largest bunny head first: align head so lower edge aligns with final mesh row and ears extend slightly onto green border area. Using long tail, sew around perimeter of head with whip stitch, catching cream panel and applique. Use small, even stitches to hide thread.
Round 2 :
Sew snout, eyes and paws: position snout centered between eyes slightly below the eye line; sew with invisible stitches. Position paws so they peek above mesh holes at bottom edge of head; sew securely.
Round 3 :
Sew circular motifs next: center circles on previously marked positions in lattice holes. Sew with long tail using whip stitch to secure around the rim. Sew pink rim slightly overlapping green to ensure strong bond.
Round 4 :
Sew flower clusters and leaves along the runner linking bunnies to circles. Overlap edges of petals and leaves to hide stitches and create a natural vine. Use small blind stitches to hide tails under petals and leaves.
Info :
For durability, sew each applique through both applique and base panel in at least 6-8 places, more for larger pieces. Reinforce flower centers with an extra stitch or two to keep them secure when runner is handled.
— Additional Decorative Edging and Finishing Touches :
Round 1 :
Optional scalloped edge: With pink yarn, join at any corner, *sc in next 3 sts, 5 dc in next st, sc in next 3 sts; rep around. Join and fasten off. This creates a cute trim that echoes pink rims on circular motifs.
Round 2 :
Optional embroidered details: Use small satin stitches to deepen petal centers or add tiny vines connecting flowers with green yarn. Use contrasting French knots in yellow for flower centers if desired.
Info :
Weave in all ends at least 2-3 in into the back of the work and trim close. Block again lightly to flatten appliques and set shape. Ensure runner is fully dry before using.
— Alternate Sizes and Modifications :
Info :
To change runner width change initial foundation ch in multiples of 3+2 and adjust applique placement proportionally. For a wider runner add additional repeats of the filet pattern or add a second column of circular motifs. Swap colors for seasonal looks—pastels for spring, rich tones for autumn.
This Bunny Garden Table Runner brings a delightful touch of spring to your home with layered bunnies and bright flowers. Each applique and round of crochet draws you closer to a finished piece full of personality and charm. Celebrate the process as the openwork panel and dimensional elements come together to create a lovely seasonal centerpiece. I hope this pattern makes you smile as you stitch each flower and bunny—happy crocheting! 🧶🌸