๐Ÿงถ Beautiful โœจ Detailed ๐Ÿ’ Adorable

Bunny in Carrot Amigurumi Pattern

Bunny in Carrot Amigurumi Pattern
4.4โ˜… Rating
5-7 Hours Time Needed
3.7K Made This
โœ‚๏ธ

Beginner Friendly Level

Perfect for those just starting their crochet journey, with clear instructions and simple techniques

โฑ๏ธ

Weekend Treat

Takes 5-7 hours, making it an enjoyable project to finish over a couple of days.

๐Ÿงธ

Cute Companion

An adorable friend to cherish, handcrafted with love to bring comfort and joy for years to come.

About This Bunny in Carrot Amigurumi Pattern

This pattern makes a small amigurumi bunny that fits snugly inside a plush carrot case. The project uses two yarn types (cotton for the bunny and plush for the carrot) to create contrasting textures. Clear round-by-round instructions and photos are provided to guide you through shaping and assembly.

Bunny in Carrot Amigurumi Pattern crochet pattern - detailed view of completed project

Suitable for beginners with basic crochet knowledge and patience for small details. Includes instructions for ears, muzzle, limbs, belly, tail, and a carrot with leaves and a buttonhole.

Why You'll Love This Bunny in Carrot Amigurumi Pattern

I absolutely love this pattern because it combines a cute character with a playful, practical accessory โ€” the carrot case. I enjoy how the plush yarn transforms the carrot into a soft, tactile pocket while the cotton yarn keeps the bunny crisp and defined. I find the step-by-step rounds make the build-up of the toy very satisfying to crochet. Sharing this pattern makes me smile because it becomes a heartfelt little gift that is quick to make and delightful to give.

Bunny in Carrot Amigurumi Pattern step 1 - construction progress Bunny in Carrot Amigurumi Pattern step 2 - assembly progress Bunny in Carrot Amigurumi Pattern step 3 - details and accessories Bunny in Carrot Amigurumi Pattern step 4 - final assembly and finishing

Switch Things Up

I love how versatile this pattern is for customization โ€” you can change yarn colors to create a variety of characters and moods.

I often swap the yellow for pastel shades to make a softer, baby-friendly bunny, or choose bright colors for a playful look.

If you want a larger or smaller version, change your yarn weight and hook size; bulky yarn with a bigger hook yields a chunkier toy while sport or fingering weight makes a tiny keychain buddy.

I sometimes embroider extra facial expressions or add tiny felt cheeks and different buttons to personalize each piece.

Try adding a tiny crocheted scarf or hat to the bunny for seasonal variations โ€” I make holiday outfits to match occasions.

For a posable toy, consider adding a short wire inside the ears or limbs, but be careful if making for small children.

You can transform the carrot into a small pouch by enlarging the opening and adding a snap or zipper; it makes a cute gift container.

Swap the button for a decorative charm or safety lock button if the toy is for a toddler, always prioritizing safety.

I like to experiment with different textures โ€” pair a fuzzy plush carrot with a smooth cotton bunny or use boucle yarn for a quirky look.

Finally, make a whole family of bunnies in different colors and sizes โ€” they make adorable sets for gifting and displays.

Common Mistakes & How to Fix Them

โœ— Skipping the instruction to insert safety eyes between rounds 8 and 9 will misplace the eyes; insert safety eyes exactly between rounds 8 and 9 with 5 stitches between to keep symmetry. โœ— Overstuffing the head or body can distort shaping and make sewing difficult; stuff gradually and firmly but not excessively to maintain round shapes and allow sewing. โœ— Crocheting with loose tension can cause stuffing to show through plush yarn or leave gaps; maintain a tight, consistent tension to prevent stuffing from sticking out. โœ— Forgetting to leave long tails for sewing will make assembly harder; always leave a long tail (about 15 cm) after fastening off for secure sewing and attachment of parts.

Bunny in Carrot Amigurumi Pattern

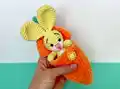
Create a delightful little bunny tucked inside a cozy carrot with this step-by-step crochet pattern. You will learn to crochet the bunny body, ears, limbs, belly and a plush carrot case with a functional buttonhole. The pattern includes clear rounds, materials, and assembly instructions so you can finish a charming handmade gift.

Beginner Friendly 5-7 Hours

Materials Needed for Bunny in Carrot Amigurumi Pattern

โ€” Main Fabric

  • 01
    Cotton yarn Premier Yarns Cotton Fair 290m (317 yds)/100g in yellow color 27-11 Lemon Drops - 20g
  • 02
    Cotton yarn Premier Yarns Cotton Fair 290m (317 yds)/100g in white color 27-01 White - 5g
  • 03
    Plush yarn Premier Yarns Parfait Chunky 120m (131 yds)/100g in orange color 1150-15 Tangerine - 20g
  • 04
    Plush yarn Premier Yarns Parfait Chunky 120m (131 yds)/100g in green color 1150-49 Key Lime or 1150-06 Mint - 5g
  • 05
    Substitute cotton yarn Yarnart Jeans 159m (174 yds)/50g in yellow color 67 - 20g and white color 01 - 5g
  • 06
    Substitute plush yarn Himalaya Dolphin Baby 120m (131 yds)/100g in orange color 80316 - 15g and green color 80347 or 80350 - 5g

โ€” Tools Required

  • 01
    Crochet hook size US B/2 (2.5 mm) for the bunny and small details
  • 02
    Crochet hook size G/6 (4 mm) for the carrot and plush yarn
  • 03
    Black safety eyes 7-8 mm (2 pieces) or substitute with buttons or crocheted eyes
  • 04
    Button for carrot 15-20 mm
  • 05
    Fiber fill stuffing
  • 06
    Tapestry needle for sewing parts
  • 07
    Scissors
  • 08
    Pink and brown cotton yarn for embroidery (nose and eyebrows)
  • 09
    Stitch markers (recommended)

Progress Tracker

0% Complete

โ€” Head :

Info :

With yellow yarn and hook B/2 (2.5 mm) make a magic ring.

Round 1 :

6 sc in magic ring =6 sts

Round 2 :

(2 sc in next st)*6 times =12 sts

Round 3 :

(sc in next 1 st, 2 sc in next st)*6 times =18 sts

Round 4 :

(sc in next 2 sts, 2 sc in next st)*6 times =24 sts

Round 5 :

(sc in next 3 sts, 2 sc in next st)*6 times =30 sts

Round 6-10 :

sc in each st around =30 sts

Round 11 :

(sc in next 3 sts, sc dec)*6 times =24 sts

Info :

If you use safety eyes insert them between rounds 8 and 9 with 5 sts in between. Also stuff the head before making dec.

Round 12 :

(sc in next 2 sts, sc dec)*6 times =18 sts

Round 13 :

(sc in next st, sc dec)*6 times =12 sts

Info :

Fasten off. Leave the long tail for sewing (about 15cm).

โ€” Muzzle :

Info :

With white yarn and hook B/2 (2.5 mm) make a magic ring.

Round 1 :

6 sc in magic ring =6 sts

Round 2 :

sc 2 in each st around =12 sts

Round 3 :

(sc in next st, 2 sc in next st)*6 times =18 sts

Round 4 :

sc in each st around =18 sts

Info :

Join with sl st and fasten off. Leave the long tail of the yarn for sewing.

โ€” Ear (Make 2) :

Info :

With yellow yarn and hook B/2 (2.5 mm) make a magic ring.

Round 1 :

6 sc in magic ring =6 sts

Round 2 :

2 sc in each st around =12 sts

Round 3 :

(2 sc in next 2 sts, sc in next 4 sts)*2 times =16 sts

Round 4 :

sc in next st, 2 sc in next 2 sts, sc in next 6 sts, 2 sc in next 2 sts, sc in next 5 sts =20 sts

Round 5-9 :

sc in each sts around =20 sts

Round 10 :

(sc dec, sc in next 8 sts)*2 times =18 sts

Round 11 :

(sc dec, sc in next 7 sts)*2 times =16 sts

Round 12 :

(sc dec, sc in next 6 sts)*2 times =14 sts

Round 13 :

(sc dec, sc in next 5 sts)*2 times =12 sts

Round 14 :

(sc dec, sc in next 4 sts)*2 times =10 sts

Round 15 :

(sc dec, sc in next 3 sts)*2 times =8 sts

Info :

Join with sl st and fasten off. Leave the long tail of the yarn for sewing. Rep rnds 1-15 for the second ear.

โ€” Body :

Info :

With yellow yarn and hook B/2 (2.5 mm) make a magic ring.

Round 1 :

6 sc in magic ring =6 sts

Round 2 :

2 sc in each st around =12 sts

Round 3 :

(sc in next st, 2 sc in next st)*6 times =18 sts

Round 4 :

sc in each st around =18 sts

Round 5 :

(sc in next 2 sts, 2 sc in next st)*6 times =24 sts

Round 6-8 :

sc in each st around =24 sts

Round 9 :

(sc in next 2 sts, sc dec)*6 times =18 sts

Info :

Stuff the body firmly.

Round 10 :

sc in each st around =18 sts

Round 11 :

(sc in next st, sc dec)*6 times =12 sts

Info :

Join with sl st and fasten off.

โ€” Arm (Make 2) :

Info :

With yellow yarn and hook B/2 (2.5 mm) make a magic ring.

Round 1 :

6 sc in magic ring =6 sts

Round 2 :

(2 sc in next st, sc in next 2 st)*2 times =8 sts

Round 3 :

sc in each st around =8 sts

Round 4 :

(sc dec in next st, sc in next 2 st)*2 times =6 sts

Round 5-8 :

sc in each st around =6 sts

Info :

Stuff the arm, do not stuff it too tight. Fold arm in half and sc two sides together with sc 3. Fasten off, cut yarn and weave in ends. One arm is done. Complete these steps with the second arm. Leave long tail of the yarn for sewing.

โ€” Leg (Make 2) :

Info :

With yellow yarn and hook B/2 (2.5 mm) make a magic ring.

Round 1 :

6 sc in magic ring =6 sts

Round 2 :

2 sc in each st around =12 sts

Round 3 :

(2 sc in next st, sc in next 3 st)*3 times =15 sts

Round 4 :

sc in next 2 st, (sc dec)*4 times, sc in next 5 st =11 sts

Round 5 :

sc in next 2 st, (sc dec)*2 times, sc in next 5 sts =9 sts

Round 6-8 :

sc in each st around =9 sts

Info :

Stuff the leg. Do not stuff it very firmly.

Round 9 :

(sc in next st, sc dec)*3 times =6 sts

Info :

Fold the leg in half and sc two sides together with sc 3. Fasten off, cut yarn and weave in ends. One leg is done. Complete these steps with the second leg. Leave long tail of the yarn for sewing.

โ€” Belly :

Info :

With white yarn and hook B/2 (2.5 mm) make a ch6.

Row 1 :

sc in the second st from the hook, sc in the next 3 stitches, 3sc in the last stitch. Working on other side of your chain: sc in the next 3 stitches, 2sc in the last st = 12 sts

Row 2 :

2sc in the first stitch, sc in the next 3 stitches, 2 sc in the next 3 stitches, sc in the next 3 stitches, 2sc in the next 2 stitches = 18 sts

Info :

Join with sl st, leave the long tail of the yarn for sewing.

โ€” Tail :

Info :

With white yarn and hook B/2 (2.5 mm) make a magic ring.

Round 1 :

6 sc in magic ring =6 sts

Round 2 :

(sc in next st, 2 sc in next st)*3 times =9 sts

Info :

Join with sl st and fasten off. Leave the long tail of the yarn for sewing.

โ€” Bunny Assembly :

Step 1 :

If you use safety eyes, insert them when you crocheted the head or sew the eyes to the head between rounds 8 and 9 with 5 sts in between.

Step 2 :

Sew the head to the body (round 13 of the head to sts from round 11 of the body). To ensure the head does not dangle, fill the body and neck strongly and sew twice.

Step 3 :

Sew arms to the body between rounds 10 and 11 of the body.

Step 4 :

Sew legs to the body between rounds 3 and 4 of the body. Try to stick the needle in the same place that will help to keep limbs flexible.

Step 5 :

Sew the tail to the body between rounds 2 and 5 of the body.

Step 6 :

Sew the ears to the top of the head, make a couple of stitches to sew them together.

Step 7 :

Sew the muzzle between rounds 8 and 13 of the head. Stuff a little during the sewing process for shape.

Step 8 :

Embroider nose with pink yarn and eyebrows with brown yarn between rounds 4 and 8 with 3 sts between.

Step 9 :

Sew the belly between rounds 3 and 11 of the body.
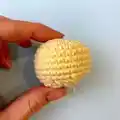
โ€” Carrot :

Info :

With orange plush yarn and hook G/6 (4 mm) make a magic ring.

Round 1 :

6 sc in magic ring = 6 sts

Round 2 :

sc in each st around = 6 sts

Round 3 :

2 sc in each st around = 12 sts

Round 4 :

sc in each st around = 12 sts

Round 5 :

(sc in next st, 2 sc in next st)*6 times =18 sts

Round 6 :

sc in each st around = 18 sts

Round 7 :

(sc in next 2 sts, 2 sc in next st)*6 times = 24 sts

Round 8-15 :

sc in each st around = 24 sts

Info :

Check that the width and height of the carrot are enough to fit the bunny!!!
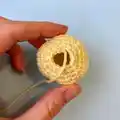
Round 16 :

sc in next 6 sts, Ch 24 = 30 sts

Round 17 :

sc in next 6 sts, sc in next ch 9, skip ch 6 (buttonhole), sc in next ch 9 = 24 sts

Info :

VIDEO for ROUNDS 16-17: https://www.youtube.com/watch?v=wiTx8-0GNjI

Round 18-21 :

sc in each st around = 24 sts

Round 22 :

(sc in next 2 sts, sc dec)*6 times =18 sts

Round 23 :

(sc in next st, sc dec)*6 times =12 sts

Round 24 :

sc dec*6 times =6 sts

Info :

Fasten off, cut yarn and weave in ends.

Info :

With green plush yarn and hook G/6 (4 mm) make the leaves. Make sl st in the round 24 of the carrot, (ch 10, sl st in the same st)*repeat 3 times. Fasten off, cut yarn and weave in ends.

Info :

Sew the button in the middle between rounds 13 and 14.

Assembly Instructions

  • Insert safety eyes between rounds 8 and 9 of the head with 5 stitches in between, or sew eyes after crocheting the head if preferred.
  • Sew the head to the body by matching round 13 of the head to the stitches from round 11 of the body; fill the body and neck strongly and sew twice to prevent the head from dangling.
  • Sew arms to the body between rounds 10 and 11, positioning them slightly forward for a natural pose and sewing securely.
  • Sew legs to the body between rounds 3 and 4, ensuring symmetry and threading the needle through the same points to keep limbs flexible.
  • Sew the tail to the body between rounds 2 and 5, then sew the belly between rounds 3 and 11 of the body for correct placement.
  • Attach ears to the top of the head and make a couple of stitches to secure them together, then sew the muzzle between rounds 8 and 13 and stuff slightly during sewing.
  • Sew the carrot buttonhole edges and attach the green leaves to the round 24 join; sew the button in the middle of the carrot between rounds 13 and 14.

Important Notes

  • ๐Ÿ’กAll pieces are worked in a spiral continuously; do not end the round with a slip stitch or start a round with a chain unless specified.
  • ๐Ÿ’กBegin pieces from a magic ring or ch2 and work the necessary sc in the second stitch from the hook as an alternative.
  • ๐Ÿ’กCrochet tight enough to prevent stuffing from sticking out; adjust tension if using different yarn weights or hook sizes.
  • ๐Ÿ’กInsert safety eyes when indicated (between rounds 8 and 9) and leave long tails for sewing to ensure easy assembly and secure attachments.

This sweet Bunny-in-a-Carrot pattern is perfect for gifting or keeping as a tiny cuddle buddy. ๐Ÿงก It mixes plush and cotton yarns for a delightful tactile contrast and quick make. ๐Ÿงถ Enjoy stitching, assembling, and sharing this little handmade friend! โœจ

You ask,

we answer.

FAQs

What size will the finished piece be?

The finished amigurumi measures approximately 4 in / 10 cm high without ears and 6 in / 15 cm high with ears when using the recommended yarns and hook B/2 (2.5 mm) for the bunny and G/6 (4 mm) for the carrot.

Can I use different yarn weights for this pattern?

Yes, you can use different yarn weights, but the final size and texture will change; use an appropriate hook for your chosen yarn and check gauge before finishing.

Do I need prior crochet experience for this pattern?

This pattern is beginner friendly, so basic knowledge of single crochet, increases, decreases, and working in continuous rounds is recommended.

How long does this project typically take to complete?

Most crocheters complete this project in 5-7 hours, depending on experience, pace, and whether you make the carrot lid and embellishments.

What size safety eyes should I use?

Use black safety eyes 7-8 mm as recommended, and insert them between rounds 8 and 9 with 5 stitches between to maintain facial proportions.