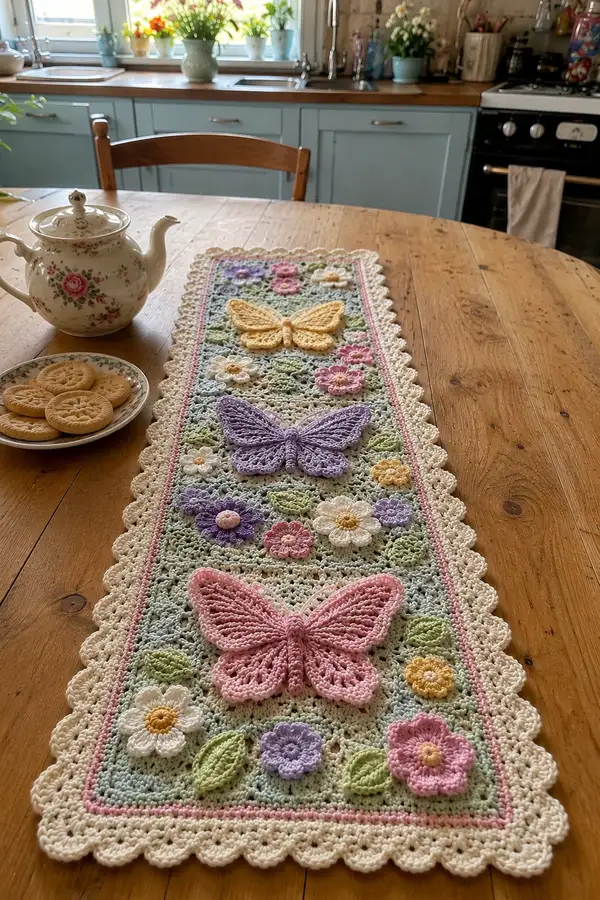
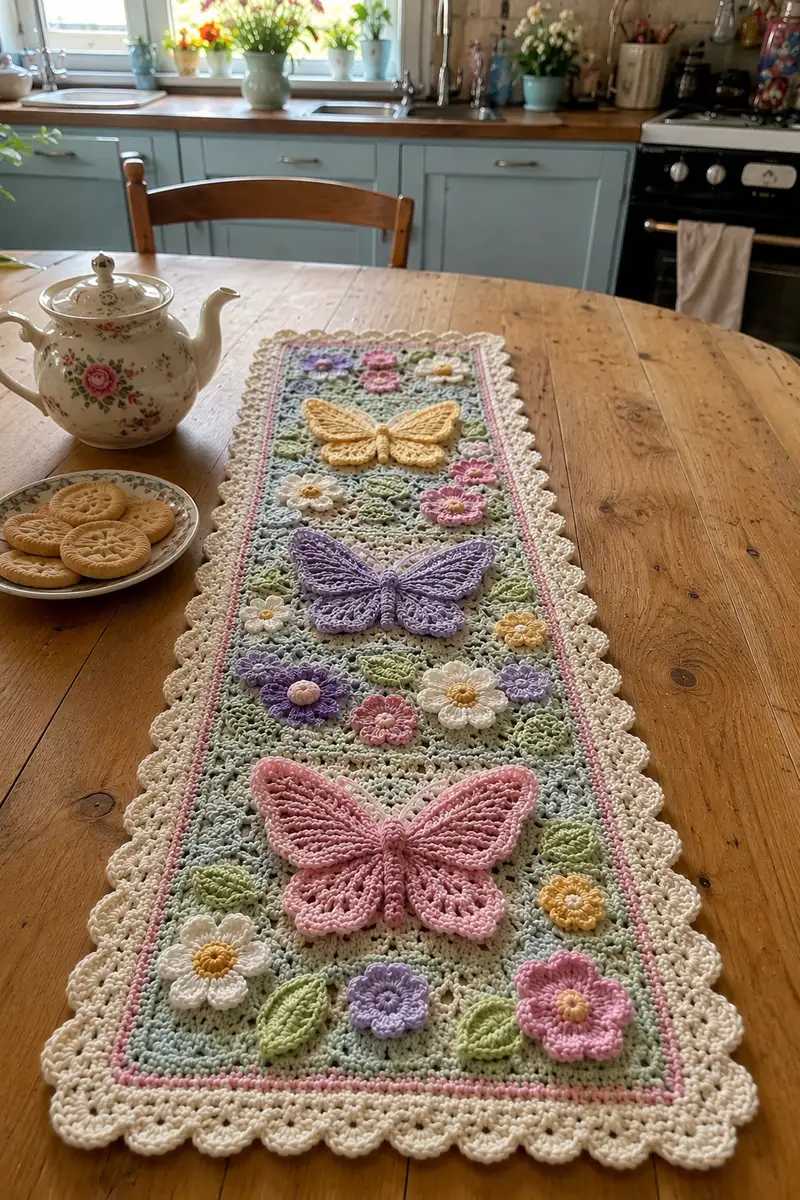
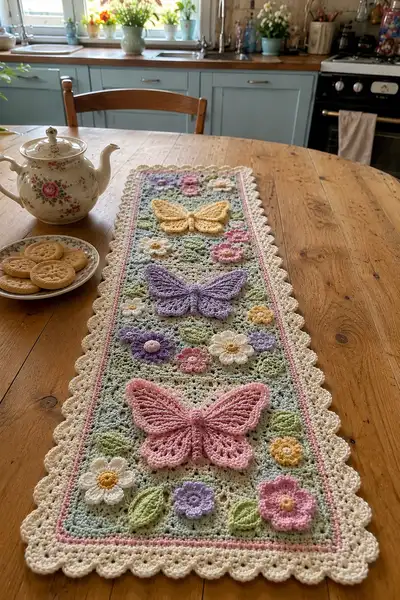
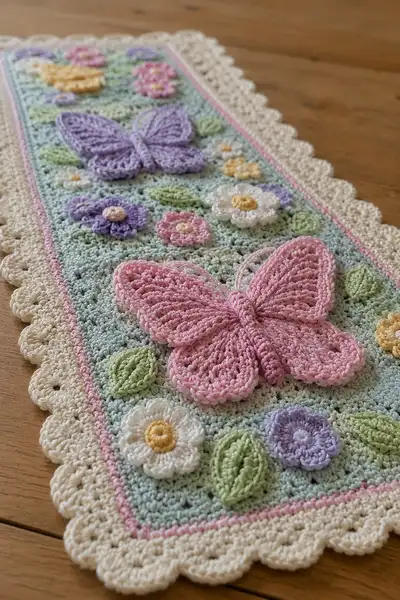
A delicate pastel table runner featuring three dimensional butterflies, layered flowers and soft green leaves arranged on a textured mint background. The runner has a scalloped ivory border and thin pink inner edge for a vintage, cottage-style finish. Worked in DK/8-ply cotton with gentle color changes and surface applique, this pattern combines lacy mesh, raised motifs and a pretty scalloped edging to create a charming centrepiece. Perfect for tea tables, dressers or gifting to a lover of shabby-chic decor.
Progress Tracker
0% Complete
— Materials & Gauge :
Info :
Gauge is not critical for this decorative runner but aim for roughly 18–20 sts and 20 rows = 10cm/4in in single crochet on 3.5mm hook for consistency. Adjust hook if necessary to obtain fabric density that does not show stuffing through motifs. The finished sample measures approximately 90cm long x 23cm wide (35.5in x 9in) with the dimensions shown; you can lengthen by repeating center panel segments.
— Center Panel (worked flat in rows) :
Round 1 :
Using mint/aqua yarn, ch 121 (this is foundation chain for a classic narrow runner; adjust by adding multiples of 4 to widen). Turn. (121 chains)
Round 2 :
Row 1: Insert in 2nd ch from hook, 1 sc in each ch across; ch 1, turn. (120 sc)
Round 3 :
Row 2: 1 sc in first st, *ch 2, skip next 2 sts, sc in next 2 sts* repeat from * to * across ending with 1 sc in final st for a lacy mesh starting row; ch 1, turn. (This creates an open cloud-like mesh; still 120 stitches equivalents across)
Round 4 :
Row 3: 1 sc in first st, *in the ch-2 sp: (1 dc, ch 1, 1 dc), skip next 2 sc, sc in next sc* repeat to last st, 1 sc in final st; ch 1, turn. (Mesh row remains visually even across width)
Info :
Maintain stitch count by treating ch-2 spaces as working positions; use stitch markers along each edge every 10 rows to keep edges straight. If your tension makes the mesh too loose, switch to a 3.0mm hook for the panel rows.
Round 5 :
Row 4: 1 sc in first st, *ch 2, sc in next dc of previous row, ch 2, sc in next sc* repeat across, 1 sc in final st; ch 1, turn.
Round 6-9 :
Rows 5–8: Repeat Rows 3–4 patternening two-row mesh repeat (one lace row with dc groups, one connecting row with sc and ch-2s) to build height; keep edges neat with sc at start and end of each row. (Maintain visual width; treat each edge sc as a stitch marker)
Round 10 :
Row 9: Change to light mint-to-pale aqua variegation if you like (or continue same color). 1 sc in first st, *in ch-2 sp: 1 tr, ch 1, 1 tr; ch 1; sc in next sc* repeat; ch 1 turn. This row gives a slightly taller lacy relief for butterfly bases. (Visual continuity across panel)
Round 11-16 :
Rows 10–15: Continue the 2-row mesh repeat (dc-group lace row, connecting sc row) and alternate one of every six repeats with a taller tr-group row for subtle texture. Use stitch markers at the ends every 6 rows to check straightness. (Panel will grow in length)
Info :
Work until you have a central area tall enough to accommodate your motifs. For the sample in the photos, work 36 rows of mesh (approximately 18 repeats of the two-row mesh) before placing the first butterfly area. You may work the entire panel then attach motifs or work motifs as you go and leave stitch markers for placement later.
Round 17-22 :
Rows 16–21: Continue mesh pattern (approx 6 two-row repeats). After Row 21, fasten off if you prefer to work motifs separately; otherwise continue to Row 36 as described in the Info.
Round 23 :
Row 22: If continuing: work a decorative row of 1 sc in each st BLO to create a subtle ridge that will help the rail color sit flat later. Ch 1 turn. (Counts align with the treated edge sc equivalents)
Round 24-36 :
Rows 23–35: Repeat the established mesh pattern to create three motif zones. For even spacing, divide panel length into thirds and mark centre points for butterfly placement with pins. Continue mesh until you reach desired number of motif rows: approximately 72–74 total mesh rows before inner rail (this includes earlier rows—work until overall panel length for three butterflies aligns visually with 3 large motif positions). Fasten off and weave ends if stopping here.
Info :
Tip: If making a longer runner, simply chain extra multiples of 4 at the start. Keep the width consistent so all motifs will align; adjust number of mesh repeats between motif placements for longer or shorter placement intervals.
— Inner Narrow Rail (pink) :
Round 1 :
With pink blush yarn and RS facing, join with sl st to any outer mesh sc at approx 5 sts in from one long edge to create an even inner rectangular rail. Ch 1, 1 sc in same st, sc evenly along long side placing sc into each sc at edge and 1 sc into each ch-2 space where needed. Count as you go so rail sits ~3mm in from mesh edge. (Length: approx 120 sts along long edge; adjust as per panel)
Round 2 :
Turn short side: sc evenly across width end (maintain neat corners), continue back along opposite long side making same number of sc for symmetry. Aim for single round to form a narrow framed rail. Fasten off and weave ends. (This creates a neat pink inner line)
Info :
Work carefully to keep pink rail taut but not stretched. This narrow rail gives a pretty separation between the mint panel and the ivory scalloped border.
— Butterflies (Make 3 — Large dimensional motifs) :
Info :
Each butterfly is made in joined rounds with raised front post and shell shaping to create lace wings. The butterfly is worked as two wings mirrored with a central body column. All stitch counts below are per butterfly; mirror instructions for the opposite wing as indicated.
Round 1 :
Using pink (or chosen butterfly color), ch 16, join with sl st to form a small loop (or work 6 sc in magic ring if you prefer round start). (16 ch loop)
Round 2 :
Working into the loop: ch 1, 1 sc into each ch around, join with sl st to first sc; (16 sc). Fasten off and turn if you prefer base; or continue without joining for a 3D wing build.
Round 3 :
Rejoin: ch 3 (counts as tr), 1 tr in next st, *ch 1, skip 1 st, 2 tr in next st* repeat across to build a tall scalloped wing edge; join with sl st. (Approx 24 tr positions—this creates outer lacy curve)
Round 4 :
Ch 1, *into each ch-1 sp: (1 dc, ch 2, 1 dc), skip next 2 trs; 1 sc in next st* across the wing; sl st to join. (Wing will have openwork veins)
Round 5 :
Ch 1, 1 sc in each st around working into dc and sc positions for even base; join. (Maintain counts to keep curve symmetrical.)
Info :
At this stage you have a single half-wing. Make 2 half-wings per butterfly and one central body tube. Block each half-wing lightly to open the lace before assembly to maintain shape.
Round 6 :
Wing shaping row: Rejoin at base of half-wing, ch 2, 1 hdc in first st, *(1 hdc, fpdc around previous row's third post to create a raised 'vein', 1 hdc) in each group* repeat across; sl st to join. (Creates defined ribs in wing)
Round 7 :
Mirror wing: Repeat Rounds 1–6 to make the opposite half-wing using same color and identical stitch counts. Block both halves slightly and set aside. (Two half-wings completed)
Round 8 :
Central body: With same color, ch 6, join to make small tube: Round A: 6 sc in loop; Round B: 6 sc around for 4 rounds to create 6x4 column; Fasten off leaving long tail for sewing. (6 sts x 4 rows tube)
Round 9 :
Assembly: Place two half-wings mirrored with right sides up; center tube across middle and sew through the centre base of both wings with mattress or whip stitch, wrapping the tube end to form the segmented body. Weave tail through back to secure. (Butterfly body now attached to wings)
Round 10 :
Optional antennae: Attach a 10cm tail of yarn at top of body and braid or ch 6 for antennae, knot ends and fray slightly or glue ends into back for secure finish. Trim to desired length. (Optional finishing detail)
Info :
Create three butterflies: one in pink, one in lilac, one in buttercup yellow. For visual interest, vary the wing rows slightly so centre butterfly is marginally larger by adding one extra tr-row in Round 3 for length (add 2–4 extra tr evenly across for balance).
— Daisies (Layered Flowers — Make 6 large, 8 small) :
Round 1 :
Large daisy centre (yellow): Magic ring, 6 sc in ring (6). Pull tight and join with sl st. (6)
Round 2 :
Ch 1, 2 sc in each st around (12), join. Fasten off centre and switch to white petals. (12)
Round 3 :
Attach white to any st: *ch 3, in same st: (1 dc, ch 1, 1 dc) to form petal base, sl st in next st* repeat around to make 6 petals; (6 petals). Fasten off leaving tail for sewing.
Info :
For a layered look, make a second slightly smaller petal round using cream or pale pink and sew centered on top offset to create 3D daisies. Use a little polyester stuffing in centre before topping with small yellow button-stitch or French knot made from yarn to give dimension.
Round 4 :
Small rosette: Ch 5, join to ring, Round A: 10 sc around, Round B: *ch 2, 3 dc in next st, ch 2, sl st in next sc* around to make a tiny puff rosette. Fasten off. (Use lilac or pink)
Round 5 :
Make 6 large daisies and 8 small rosettes to scatter around butterflies. Place with pins to check placement before sewing down. (Motifs ready)
— Leaves (Make 18) :
Round 1 :
Using soft sage leaf green, ch 8, 1 sc in 2nd ch from hook, hdc in next, dc in next 2, hdc in next, sc in last; now work other side of chain: sc, hdc, dc, dc, hdc, sl st to starting sc. Fasten off leaving tail for sewing. (Leaf length approx 2–3cm)
Round 2 :
Leaf vein: Rejoin green to centre of leaf on WS, using tapestry needle embroider a midrib by sewing a contrasting hdc line from base to tip and back to create subtle raised vein. (Optional subtle texture)
Info :
Make 18 leaves in total. Some will be sewn flat, some slightly folded and sewn only at base to give lift. Arrange paired leaves near flowers and butterflies for natural movement.
— Small Accent Flowers (Make 10–12) :
Round 1 :
Ch 4 join to make ring: Round A: ch 1, 10 sc in ring; Round B (petal round): *ch 4, sl st into same st* repeat 10 times to make small picot-style petals; finish and fasten off. (Tiny spring filler flowers)
Info :
Vary colors for contrast and place these in clusters to break up space between major motifs. For extra height, make two identical small flowers and sew one onto the other offset by 1–2 petals.
— Motif Placement & Attachment :
Info :
Block the center panel flat and mark exact positions for butterflies and flower clusters using pins. Sample spacing: place a large butterfly centred vertically in each third of the panel, with two large daisies and three small rosettes arranged around each butterfly along with 4–6 leaves per section. Keep bottom and top ends symmetrical.
Round 1 :
Sewing motifs: Using a matching single strand and yarn needle, sew each motif using small invisible stitches around the base where motif meets panel. For butterflies, sew the wing bases and body tube to the mesh row where you created tr-group rows for added anchoring. Sew lightly so wings retain a slight lift off the fabric. (Securely attach all motifs)
Round 2 :
Final placement check: After all motifs are tacked down, check that no motifs create buckling in mesh; if they do, remove a few anchoring stitches and reposition slightly towards a mesh ch-2 space for better distribution.
Info :
Tip: Use short, even stitches and weave in tails through both motif and panel stitches to hide ends. For the central tube body of butterflies, sew around base and then wind tail around body to create the segmented look as in the sample.
— Scalloped Border (Ivory) :
Round 1 :
With cream/ivory yarn, join with sl st to any sc at the very edge of the pink inner rail. Ch 1, sc evenly around entire rectangle, placing 3 sc in each corner to maintain boxy corner shape. Join with sl st to first sc. (Count will approximate 420–460 sc around depending on panel width; keep count to use in next round)
Round 2 :
Ch 3 (counts as dc), *2 dc in next sc, ch 1, sk 1 sc* repeat around to create a small raised texture row. Make sure to place extra dc groups at corners (work 4 dc at corner sc) to keep curvature even; join. (This gives a foundation for scallops)
Round 3 :
Scallop round: *Skip 2 sts, into next st work: (5 dc, sl st) all into same st to create shell; sk 2 sts, sl st in next st* repeat around. At corners, work (7 dc) clusters to fill corner gaps. This will create visible scallops like the sample. Join and fasten off. (Scallop count around: approx 70–76 scallops)
Round 4 :
Optional finishing: If your scallops appear loose, work one round of 1 sc in each dc and sl st around the scallops on RS then block. This tightens edge and gives crisp scallops. Weave in all ends neatly and steam-block scallops into a rounded shape for a polished finish.
Info :
Maintain even tension on border; count shells and adjust the initial sc round counts if needed to have whole numbers of scallops around each side. You can also create a decorative picot on shell peaks by adding (ch 3, sl st) between shells if you prefer a lacy peak.
— Final Finishing & Blocking :
Round 1 :
Lightly block the entire runner: dampen lightly, pin flat to measurement and pin scallops to rounded shape. Use light steam from iron (no direct contact) to set shape and then allow to dry completely before unpinning. This makes motifs sit perfectly and scallops keep curvature.
Round 2 :
Weave all ends on WS using yarn needle, trimming close after securing. Check motif attachments for any loose stitches and re-sew if necessary. Optional: tack centre of butterfly bodies with one hidden stitch to panel to ensure they don't shift.
Info :
If runner is to be used on a dining table, consider applying a non-slip pad underneath or a small slip of felt at ends to prevent sliding. For washable runners, test a small swatch to ensure colors remain fast and do not bleed when wet.
This Butterfly Garden Pastel Table Runner is a joyful mix of lacy texture and three-dimensional charm — perfect for gifting or adding a cottage touch to your home. Each crochet element comes together to create a timeless table accent you can treasure, and the modular motif approach makes it satisfying and flexible to work. Enjoy the meditative rhythm of the mesh and the playful pop of butterflies and flowers as you stitch. 🧶🌸✨