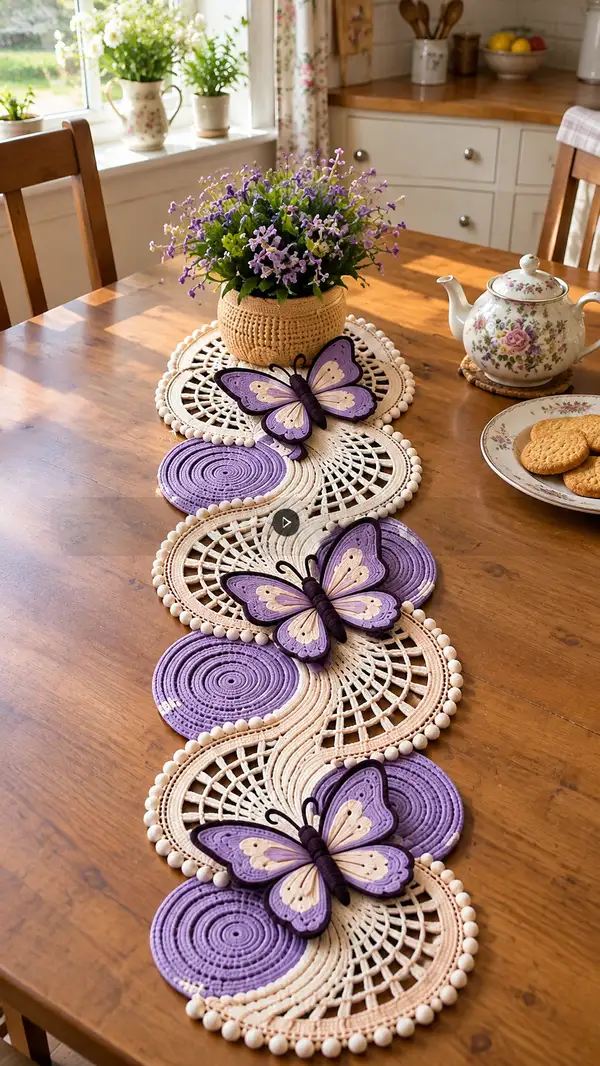
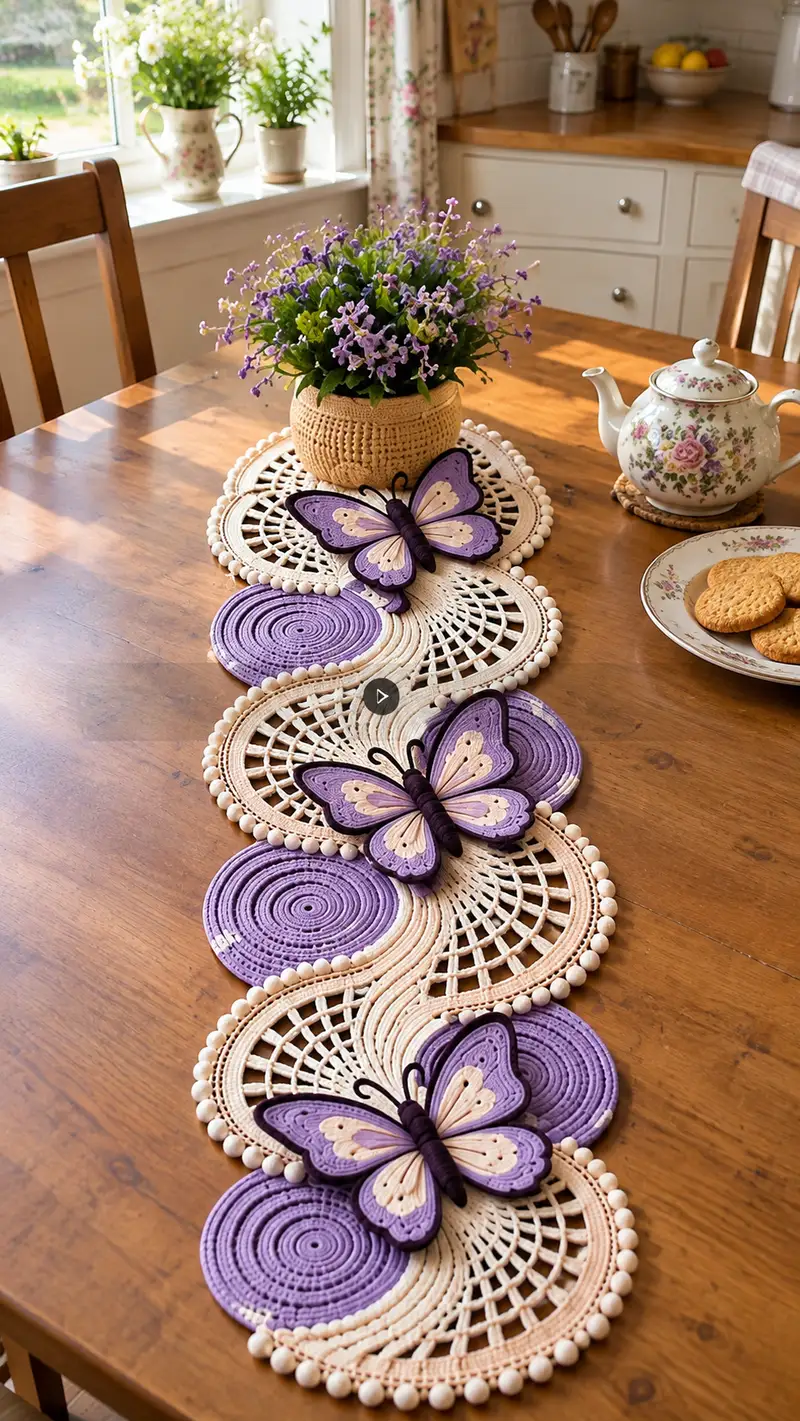
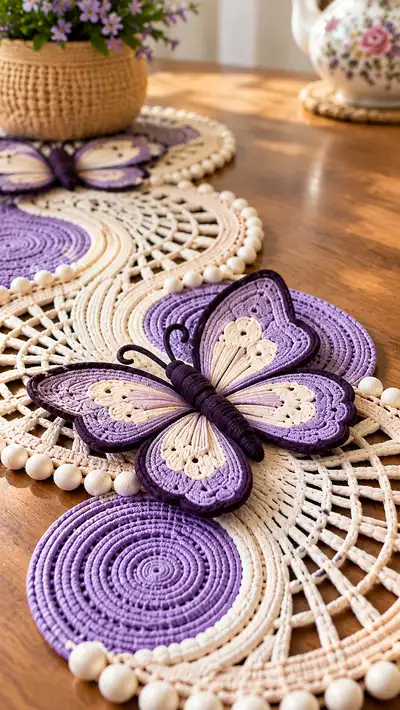
A delicate, handcrafted table runner composed of spiral coasters, open lace fans, beaded edges and layered 3D butterflies in shades of plum, lilac and cream. This elegant runner combines dense coiled motifs and airy lace panels for contrast, finished with a row of wooden-look beads and three sculpted butterflies. Designed to sit along the center of a dining table as a stylish focal piece.
Progress Tracker
0% Complete
— Spiral Disc (make 6 total: alternating plum and lilac) :
Round 1 :
mr, 8 sc in magic ring (8)
Round 3 :
(1 sc, inc) x 8 (24)
Round 4 :
(2 sc, inc) x 8 (32)
Info :
Use a slightly smaller hook for these rounds than for the open lace sections to help discs stay flat and dense
Round 5 :
(3 sc, inc) x 8 (40)
Round 6 :
(4 sc, inc) x 8 (48)
Round 7 :
(5 sc, inc) x 8 (56)
Round 8 :
1 sc in each st (56)
Round 9 :
1 sc in each st (56)
Info :
If you want a slightly smaller disc, stop increases at round 6; for the pictured scale continue to round 7
Round 10 :
1 sc in next 7 sts, (dec) repeat around to shape edge lightly (48)
Round 11 :
1 sc in each st (48)
Round 12 :
1 sc in next 5 sts, (dec) x 8 (40)
Round 13 :
1 sc in each st (40)
Round 14 :
sl st to join, fasten off, leaving tail for sewing (40)
Info :
Weave the tail into the back so the disc looks seamless; make three discs in plum and three in lilac for alternating placement
— Lace Fan Connector (make 5 large fans in cream) :
Round 1 :
ch 6, join with sl st to form ring, ch 1, 12 sc in ring (12)
Round 3 :
(1 sc, inc) x 12 (36)
Round 4 :
(2 sc, inc) x 12 (48)
Info :
These rounds create a small dense center to anchor the open spokes; keep tension even so fans lay flat
Round 5 :
1 sc in each st (48)
Round 6 :
*ch 4, sk 2 sts, sc in next st* around to create initial spoke spaces (approx 12 ch-4 spaces)
Round 7 :
In each ch-4 space: (sc, ch 3, 3 dc, ch 3, sc) forming open fan shells; sc between shells (48)
Info :
Work shells evenly spaced; the openwork creates the airy panels visible between spirals
Round 8 :
Ch 2, *2 dc in top of shell, ch 1* repeat around, finishing with sc between shells for stability (48)
Round 9 :
1 sc in each st and ch space (48)
Round 10 :
Change to BLO and sc around to create a ridge for joining to discs (48)
Info :
Blocking now will open the fan and make later joining accurate; pin into a semi-circle and steam or wet block carefully
Round 11 :
Fasten off leaving tails for sewing to discs and the runner spine (48)
— Beaded Fringe Base (work along edge of each fan and disc) :
Round 1 :
With cream, join at edge with sl st, ch 1, sc evenly across edge (count depends on edge perimeter, approx 56 for fan-disc perimeter)
Round 2 :
*sc in next st, ch 2, place wooden bead on ch 2 loop, sl st into bead loop securing bead, sc next 2 sts* repeat across edge
Info :
You may need to thread beads onto yarn before beginning if bead holes are small; use a large-eye tapestry needle to pull yarn through beads
Round 3 :
Work a tidy sl st row behind beads to lock them in place; fasten off and weave tails
— Small Inner Circles (connector discs, make 6) :
Round 1 :
mr, 6 sc in ring (6)
Round 3 :
(1 sc, inc) x 6 (18)
Round 4 :
1 sc in each st (18)
Round 5 :
sl st to join, fasten off leaving tail for sewing into runner spine (18)
Info :
These small discs sit between the fans and spirals to visually link them; make equal number to match runner layout
— Butterfly Wing (Make 6 wings: 3 left + 3 right; mirror for pair) :
Round 1 :
With lilac, ch 6, join to form ring, ch 1, 10 sc into ring (10)
Round 3 :
(1 sc, inc) x 10 (30)
Round 4 :
(2 sc, inc) x 10 (40)
Info :
These early rounds form a rounded base that will be shaped into the scalloped outer wing edge; maintain even tension
Round 5 :
Change to plum. 1 sc in each st (40)
Round 6 :
Ch 3, *sk 1 st, (3 dc, ch 2, 3 dc) in next st (creates a scallop), sk 1, sc in next st* repeat to end (approx 10 scallops)
Round 7 :
With pale peach, work inside scallops: join at scallop base, ch 1, (sc, hdc, dc, hdc, sc) in each scallop to create inner eye detail
Info :
Use color changes to layer wing details; carry yarn neatly or fasten off and join for small color sections
Round 8 :
Work a row of sc around overall wing edge in plum to define silhouette (approx 40 sc)
Round 9 :
Switch to lilac, work a decorative row: *ch 2, sl st into top of scallop, ch 2, sc into next base* around to create inner ridges
Round 10 :
With plum, FLO 1 sc in each st for a raised border (40)
Round 11 :
Work concentric decorative ridges inside wing: ch 1, sc in each st for 2 rounds to build height (40)
Info :
Mirror this wing to make the opposite side: reverse scallop placement and maintain identical stitch counts for symmetry
Round 12 :
Switch to pale peach for inner teardrop shapes: ch 6, attach at marked stitch, work small teardrop fan with 5 dc cluster and secure (6 teardrops across inner wing)
Round 13 :
With lilac, sc in each st around teardrop cluster to integrate into wing body (maintain total approx 40 sts)
Round 14 :
Edge each wing with a narrow tube: using plum, work in BLO for 6 rounds of sc to create a raised piping effect following edge (40)
Info :
The piping is created by working into the back loop only so the edge folds and becomes prominent; this is what gives the butterflies their sculpted look
Round 15 :
Fasten off leaving long tail for attaching to body. Make sure to block each wing flat but with a slight cupped shape so they sit naturally when sewn to the butterfly body
— Butterfly Body (Make 3) :
Round 1 :
With plum on 4.5mm hook, ch 6, join to ring, 6 sc in ring (6)
Round 2 :
1 sc in each st (6)
Round 3 :
(1 sc, inc) x 3 (9)
Round 5 :
Work in continuous rounds for 6 more rounds to build a slightly elongated cylinder (9)
Info :
Wrap slender lengths of plum yarn around the cylinder to create the ribbed wrapped body visible in the photo. Alternatively, crochet a thicker tube and stuff lightly.
Round 6 :
Stuff lightly, continue 2 rounds (9)
Round 7 :
Decrease: (1 sc, dec) x 3 (6)
Round 8 :
6 sc, sl st, fasten off leaving tails for sewing (6)
Info :
For the wrapped body look, tightly wind the plum yarn around the crocheted cylinder and secure the ends at the back with sewing; this gives the smooth barrel body seen on the butterflies
— Butterfly Antennae (Make 3 pairs) :
Round 1 :
Using thin DK thread or florist wire wrapped with DK thread, leave a 6 inch tail, wrap around wire twice and secure with a small whip stitch (no rounds, this is a wrapped element)
Info :
Bend ends into small curls, secure with a dot of fabric glue if necessary. If using yarn alone, chain 12 and sl st back to create a stable curled antenna; stitch into body.
— Runner Spine (joining backbone strip: continuous cord) :
Round 1 :
With cream, ch 120 (or required length to connect motifs; measure against layout), turn, sc in 2nd ch from hook and across (119 sc)
Round 2-6 :
1 sc in each st for 5 rounds to create a firm flat cord approx 6 rows thick (119)
Info :
This long cord forms the visible connecting spine where small discs and fans are sewn; adjust ch length to match your layout spacing of discs and fans
Round 7 :
Fasten off leaving long tail for attaching to motifs
— Joining Sequence (layout and placement) :
Info :
Arrange motifs alternating: large spiral (plum), fan (cream), small disc, spiral (lilac), fan, small disc, repeat until you have full length for your table. Space motifs so the spine fits beneath and seam lines are hidden under beads.
Round 1 :
Lay a fan and a spiral right sides up, align edges. Using cream tail from fan, sew 1 sc equivalent into each edge stitch of fan and corresponding st of spiral by whip stitch to join. Work slowly and check alignment.
Info :
Use a blunt tapestry needle and sturdy yarn to sew seams; when joining different thicknesses, slip-stitch a small connector loop before final seaming to reduce tension strain.
Round 2 :
Sew small inner disc into gap between fan and spiral to stabilize. Then position the runner spine under seams and tack the spine to the back of the fan and spiral every 8-10 sts with running stitch.
Round 3 :
After sewing all motifs into a single line, join bead fringe to both outer edges of the runner: align beads so they sit on outermost curves and stitch onto the sc row behind beads for secure hold.
— Butterfly Assembly (attaching wings to bodies and to runner) :
Round 1 :
Place two wings (left and right) over a body; overlap inner edges by about 6 sts. Use long tail from wings to sew into body by whip stitch through wing piping and body loops. Make sure wings mirror each other.
Round 2 :
Sew wrapped plum body around cylinder, then stitch antennae centered at the front. Add a few stitches down the center of wings to anchor them to the body so they stay slightly raised.
Info :
Pin butterfly to the runner in the pictured positions: roughly at 1/4, 1/2, and 3/4 length, centered across the runner's width. Check symmetry before final sewing.
Round 3 :
For additional dimensionality, stitch a small row of sc behind each butterfly body to create a seat and then sew to the runner spine using mattress stitch for a nearly invisible attachment.
— Finishing Details and Stabilizing Edge :
Round 1 :
Weave in all loose ends into the back of the motifs using a yarn needle; hide tails within the density of spiral or fan cores
Round 2 :
Block the finished runner flat, pinning beads and butterfly wings so they sit correctly. Light steam or spritz with water, allow to dry completely.
Info :
If runner is too floppy, add a backing strip of interfacing or a second layer of tightly crocheted cord beneath the spine and sew through both layers for added structure
Round 3 :
Optionally add small felt pads under bead positions to protect table finish and keep runner from sliding
Round 4 :
Final inspection: confirm every motif seam has at least 6 secure stitches per inch and beads are locked with a sl st row behind them
Info :
Label the back of runner with a small woven tag or knot to indicate top/bottom orientation for washing and storage
— Care & Maintenance Notes :
Info :
Hand wash gently in cool water with mild detergent; reshape while damp and dry flat. Avoid machine wash to preserve bead stability and butterfly shape
Info :
If beads become loose, secure with a small drop of fabric glue to the knot on the underside and reweave the tail
This butterfly spiral runner blends dense, coiled motifs with delicate lacework and sculpted butterflies to create a picture-perfect table centerpiece. Each repeatable motif is satisfying to crochet and stitches together into a cohesive, elegant runner. The layered butterflies add charming dimension while the beaded edge gives a polished, tactile finish. 🦋🧶 Make one to brighten a special table setting or gift to someone who loves handmade home decor. Happy stitching!