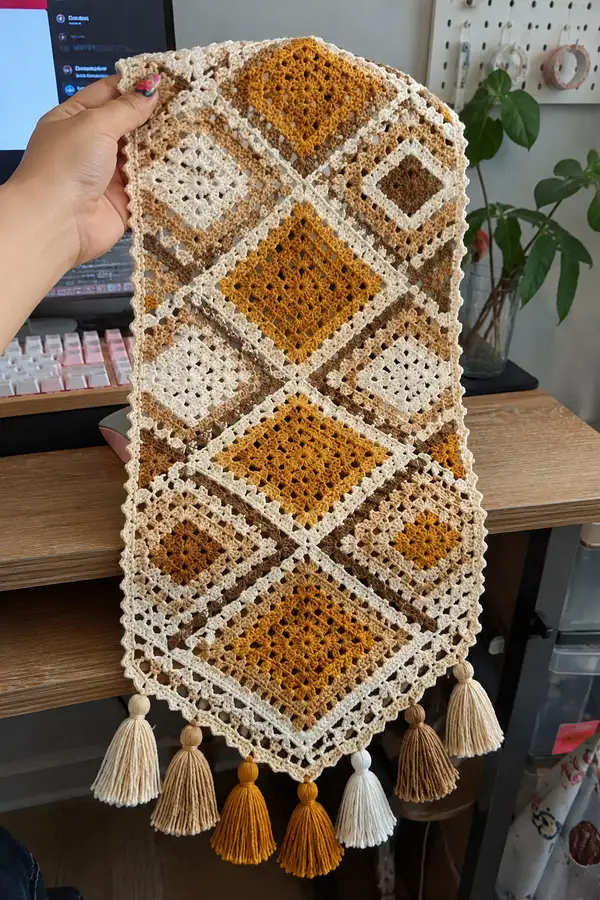
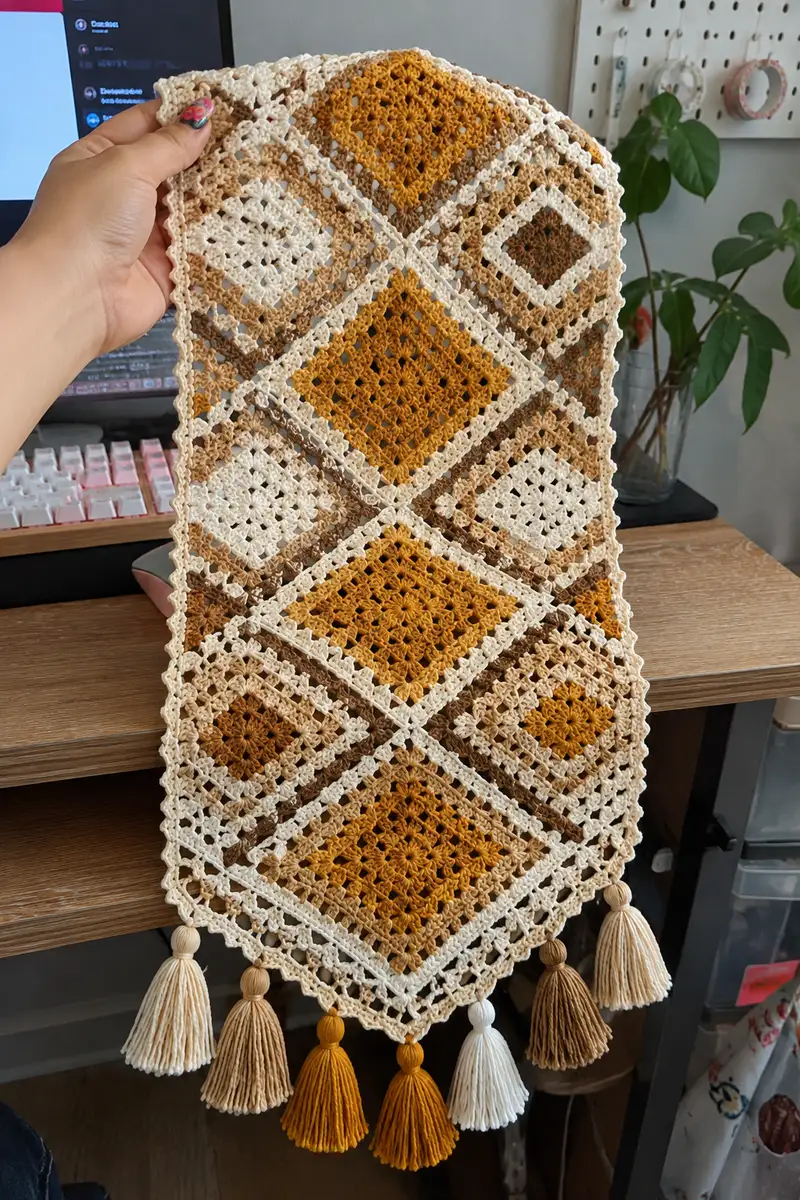
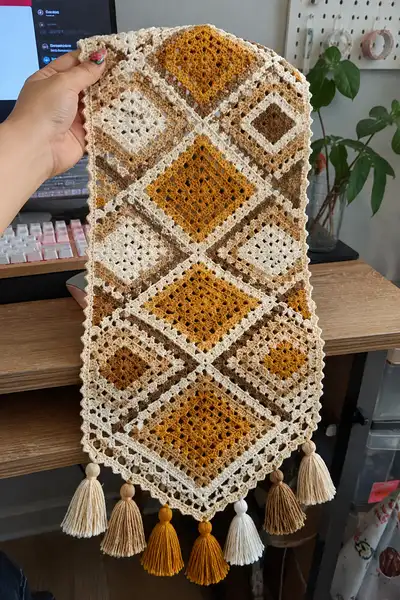
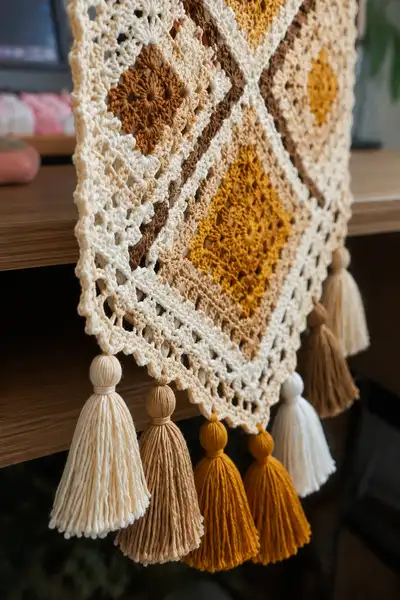
A warm, boho-inspired table runner worked in soft diamond granny motifs and finished with chunky tassels. The runner features layered diamonds in amber, tan and cream with a delicate lacy join and scalloped edge — perfect for mantel, narrow table or dresser accents. The lightweight cotton-like yarn and open stitch pattern create beautiful drape while the tasseled ends add playful texture. This detailed pattern walks you through making each motif, joining on-point and finishing with a multi-row border and hand-tied tassels.
Progress Tracker
0% Complete
— Overview & Notes :
Info :
This pattern is based on an on-point granny diamond motif worked in rounds and joined together to form a runner. The runner shown measures approximately 10" wide by 36" long (not including tassels) when made with worsted weight cotton and a 3.5mm hook. Motifs are made in three colorways and joined using a flat join so the seams form tidy diagonal lines. Adjust number of motifs to lengthen or shorten the runner.
Info :
Gauge is not critical but consistent tension is important so diamonds line up. Each completed motif measures roughly 4" to 4.5" square on the diagonal with specified yarn and hook. Block each motif before joining for clean edges.
— Motif (Diamond Granny) — Make 9 motifs for the sample runner (3 columns x 3 rows) :
Round 1 :
With Color A (Amber), ch4, join with sl st to form a ring. Ch3 (counts as first dc), work 2 dc in ring, ch2, *3 dc in ring, ch2* repeat 2 more times, join with sl st to top of ch3. You have 4 corner clusters (3 dc each) and 4 ch2 corner spaces. (12 dc total arranged as 4 clusters)
Round 2 :
Sl st to first ch2 corner, ch3 (counts as dc), (2 dc, ch2, 3 dc) into same ch2 corner, ch1, *in next ch2 corner work (3 dc, ch2, 3 dc), ch1* repeat around for 4 corners, join with sl st to top of ch3. This creates corner clusters separated by a ch1 picot-style spacer. (Corners: 4 sets of 6 dc; chain spaces: 4 x ch1)
Info :
Round 2 builds the first square outline. Keep tension even and ensure each corner has the three-dc clusters on both sides of the ch2 for a true square corner.
Round 3 :
Ch3, 2 dc in same st, ch1, *3 dc in next ch1 space, ch1* across until you reach next ch2 corner; when at ch2 corner work (3 dc, ch2, 3 dc) in that corner, continue around. Join with sl st. After this round the motif will read as small clusters between corners and will begin to look more square (cluster counts vary based on placement)
Round 4 :
Ch3, 2 dc in same st, ch1, (3 dc, ch1) in each ch1 space across each side; at each corner work (3 dc, ch2, 3 dc). Join with sl st. This builds the sides of the square with evenly spaced mini-clusters.
Round 5 :
Change to Color B (Tan). Info : Change to Tan yarn now. Fasten off Color A or carry inside if making all clusters contiguous. Turn to next round and join new color with a sl st into any corner ch2.
Round 5 :
With Color B, ch3, (2 dc, ch1) in same corner space, work along side: *(3 dc, ch1) in each ch1 space across side*; in each corner work (3 dc, ch2, 3 dc). Join with sl st. This round adds a decorative tan band framing the amber center.
Round 6 :
Ch3, (2 dc, ch1) in same corner, *(3 dc, ch1) in next ch1 space across side*; in corner work (3 dc, ch2, 3 dc). Join with sl st. Maintain consistent stitch count on each side so sides remain even.
Info :
At this stage each side should have an equal number of 3-dc clusters between corners. Count clusters per side to ensure all four sides match so the square lays flat. If necessary, add or skip one side cluster to even up the motif before continuing.
Round 7 :
Change to Color C (Cream). Info : Change to Cream yarn. Join with a sl st to any corner ch2. Ch3, 2 dc in same ch2, ch1. Work (3 dc, ch1) across each side into each ch1 space. At corners work (3 dc, ch2, 3 dc). Join with sl st. This cream round forms the narrow outer frame used later as seam line.
Round 8 :
Ch3, 2 dc in same corner, ch1, *(3 dc, ch1) across side into each ch1 space*; at corner (3 dc, ch2, 3 dc). Join. After this round the motif should measure roughly 4" corner-to-corner for the yarn and hook specified.
Info :
Block each completed motif flat using lightly damp pressing or spray blocking. Pin corners square and allow to dry. Blocking evens stitches and makes joining easier.
Round 9 :
Optional texture round: With same cream color, ch2 (counts as hdc), hdc in next 2 dc, *ch1, skip next dc cluster, hdc in next 3 dc along side*; in each corner work (hdc, ch2, hdc) into corner ch2. Join with sl st. This creates a less open final side for a sturdier seam.
Round 10 :
Finishing frame: ch1, sc evenly around working 1 sc in each dc and 1 sc in each ch1 space and 3 sc in corner ch2 space to form a rounded corner. Join and fasten off, leaving a 12-14" tail for seaming. Weave in the starting tails on the backside of the motif.
Info :
Repeat Rounds 1-10 to make the required number of motifs. For the sample runner make 9 motifs (arranged 3 across by 3 down) alternating color placements so amber centers sit on primary diagonal and tans/creams fill the alternating positions. You may choose to make extra motifs and add rows to lengthen the runner.
— Half-Motifs & Corner Fillers (if you plan a tapered end) :
Round 1 :
Make half-square motifs to fill gaps at ends by working the Motif through Round 6, then fasten off and trim straight edge: after Round 6, fold square along the midline and join the two adjacent sides across the fold with sc to create a half-diamond. Fasten off. This creates neat tapered ends used optionally at runner tips.
Info :
Half motifs are optional. The sample runner uses full motifs angled so the runner tapers to a point; if you prefer a straight rectangular end, omit half-motifs and join full squares straight across.
— Layout & Blocking :
Info :
Before joining, lay out all motifs in the desired diamond-on-point arrangement. For the pictured runner arrange motifs in three columns and three rows with the central column aligned so the amber diamonds form the spine. Block motifs square and allow to dry completely. Measure alignment of points and midpoints to ensure even spacing.
Info :
Use pins to secure motifs into place on a blocking board or towel. Make sure diagonal seams line up and spacing between motifs is consistent. The joining method will bridge the ch1 spaces to create a lacy seam.
— Join Motifs (Flat Crochet Join on Point) :
Info :
We will join motifs making seams run as tidy diagonal lines. Lay two motifs on top of each other wrong sides together so that the outer cream frames align. Use the long tail from each motif or join with new cream yarn at the seam.
Join Round 1 :
With right sides facing up and wrong sides together, join Cream yarn in a ch1 space along the side edge of motif A. Ch1, sc across matching ch1 spaces and ch2 corner space of motif B through both motifs, working 1 sc through both layers in each ch1 and 3 sc through corner ch2 (count as seam sc). Continue along side; when you reach next corner join motifs and continue until the two motifs are joined along one side. Fasten off and weave tail. Repeat to join each pair of adjacent motifs along all sides following layout. (Seam counts vary per motif side depending on number of ch1 spaces)
Info :
Check that you join correspondingly: ch1 spaces to ch1 spaces and corner ch2 to corner ch2. Work loosely enough so joined seam lays flat but not so loose that gaps appear. Block again lightly if needed after joining.
Join Round 2 :
Once all motifs are joined into the runner strip, flip runner wrong side up and use a slip-stitch join to tidy any uneven junctions: join cream yarn and sl st across any visible gaps. Fasten off and weave in ends.
Info :
If you prefer an invisible join, use mattress stitch with a yarn needle to sew matching loops together from behind. Both joins work; the crochet join is faster and adds a decorative seam.
— Main Edge & Scallop Border (worked around entire runner) :
Border Round 1 :
With cream yarn join with sl st to any outermost ch1 space on runner edge. Ch1, sc in same space, *ch2, sk next ch1 or dc cluster and sc in next ch1 or dc to create even single-crochet spacing along edge*; continue around entire runner, working sc in each ch1 space and into outer loops of cluster edges. At pointed tips increase to keep points sharp by working (sc, ch1, sc) into point apex. Join with sl st. (Stitch counts vary; aim for evenly spaced scs around edge)
Info :
The first border round evens the edge and creates base for scallop rounds. Maintain consistent ch2 spacing across sides and increase only at points to keep corners flat. Block after this round if needed.
Border Round 2 :
Ch3 (counts as dc), dc in next sc, *ch1, sk next sc, (3 dc) in next sc; ch1, sk next sc, dc in next sc* repeat around to form a small scallop pattern across sides. At points work (5 dc) into apex sc to create a pointed scallop. Join with sl st. This round is decorative and defines where tassels will attach.
Border Round 3 :
Ch1, sc in each stitch and each ch1 space around, working 3 sc into each 3-dc shell top to flatten the shell. At corners work 5 sc into apex to accentuate point. Join and fasten off. Weave ends through backside.
Info :
You may add an additional picot round if you prefer a more delicate edge: after round 3, with smaller 3.0mm hook, sc in each st then work a picot (ch3, sl st in 3rd ch from hook) into every 4th sc to create subtle points.
— Deep Border Variation (optional layered edge) :
Border Round 4 :
If you prefer a heavier, layered border: With cream yarn rejoin at any point, ch2 (counts as hdc), hdc around working 2 hdc in the side of each shell and 3 hdc into apex sections to bulk the edge. Join and fasten off. This gives a more framed appearance.
Border Round 5 :
Switch to tan yarn for a contrasting ridge: join tan and work 1 row of hdc in FLO around the entire runner. This creates a visible ridge line between cream border and inner motifs. Join and fasten off. Weave in ends.
Info :
Use the Deep Border Variation only if you want a more rectilinear, framed look. The lighter scallop border is closer to the original pictured runner and keeps the look lacy and drapey.
— Tapered Point Finishing (bottom center point) :
Info :
The runner pictured tapers to a centered point at both ends. To do this, when joining the final row of motifs leave the apex motif at the tip unjoined on one side and finish border rounds to a point center, increasing a little at the outermost shell to form a defined point. Sew any half motifs in place under the point as needed.
Round :
Work 2 extra sc in the final apex sc on each side so the point is emphasized and the border forms a neat tip. This small adjustment prevents bunching at the point.
— Tassels (Make 10 or as many as number of points) :
Info :
Tassels are made by wrapping worsted yarn around a 3.5" cardboard form (or length of ruler) to get a long, full tassel. Each tassel shown measures approx 3.5 - 4" finished (not including the wooden bead). Match color order alternately across the bottom point to create the amber/tan/cream rhythm.
Tassel Step 1 :
Wrap yarn about 40-50 times around a 3.5" form for a plush tassel. Slide bundle off carefully and tie a 6" piece of yarn tightly around the top to secure. Fold in half and tie a second stronger wrap 1/2" below the top knot to form the tassel head. Trim ends evenly to length. Optional: slide a wooden bead onto the top loop before sewing to runner for a neat bead-topped finish.
Tassel Step 2 :
Attach tassel by threading the top loop through the border shell apex stitch and pulling the tassel through; then run the tail ends through the loop and pull tight to create a lark's head knot. Secure with an extra knot behind and weave ends through the tassel head to hide them. Position tassels evenly along the bottom scalloped edge and at the apex point.
Info :
Use consistent wrapping tension and number of wraps for each tassel so they all match. If you use beads, make sure bead holes are large enough to accept folded yarn loop or use a blunt needle to pass loop through bead.
— Finishing Touches & Weaving Ends :
Info :
Weave all loose ends into the back of the runner using a yarn needle. For ends left from joining, weave them back and forth across 4-6 stitches to secure. Trim any stray fibers and give the runner a final gentle blocking to shape scallops and straighten tassels.
Final Step :
Steam-block lightly if using cotton: hold a damp cloth over the piece and press with a warm iron on top of the cloth, or lightly spray with water and pin to shape. Allow to dry completely before removing pins. Trim tassels for uniform length and fluff them with a comb if desired.
Info :
For cleaning hand wash gently in lukewarm water with mild detergent and lay flat to dry. Cotton runners may shrink slightly if machine washed; hand washing preserves shape and tassels.
Completing this runner is such a satisfying finish — each motif joins together to create a warm, layered diamond path interrupted by delicate scallops and playful tassels. The amber, tan and cream palette gives an approachable neutral that works with modern and vintage décor alike. I hope this pattern inspires you to make a set for your table or give one as a thoughtful housewarming present. Happy stitching — enjoy the cozy tactile payoff! 🧶✨