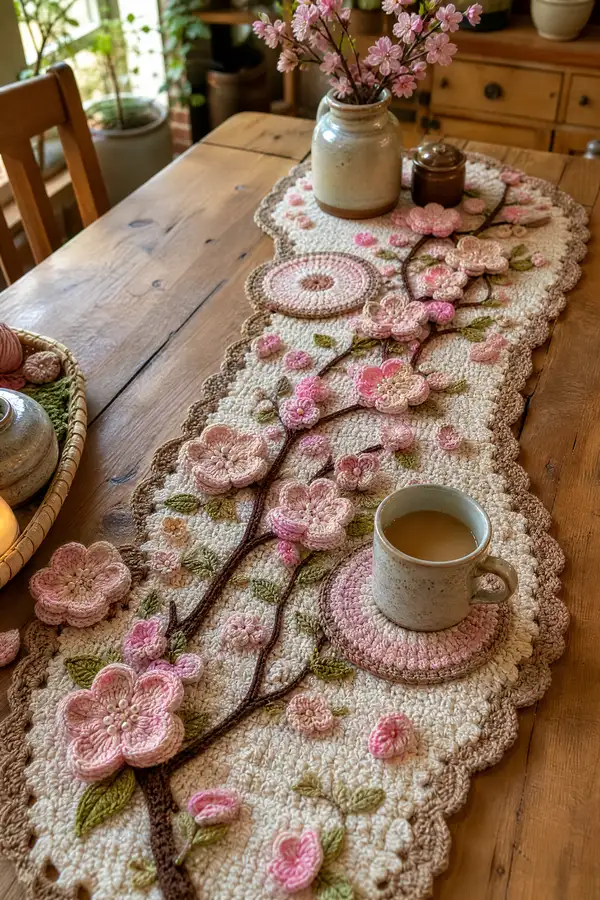
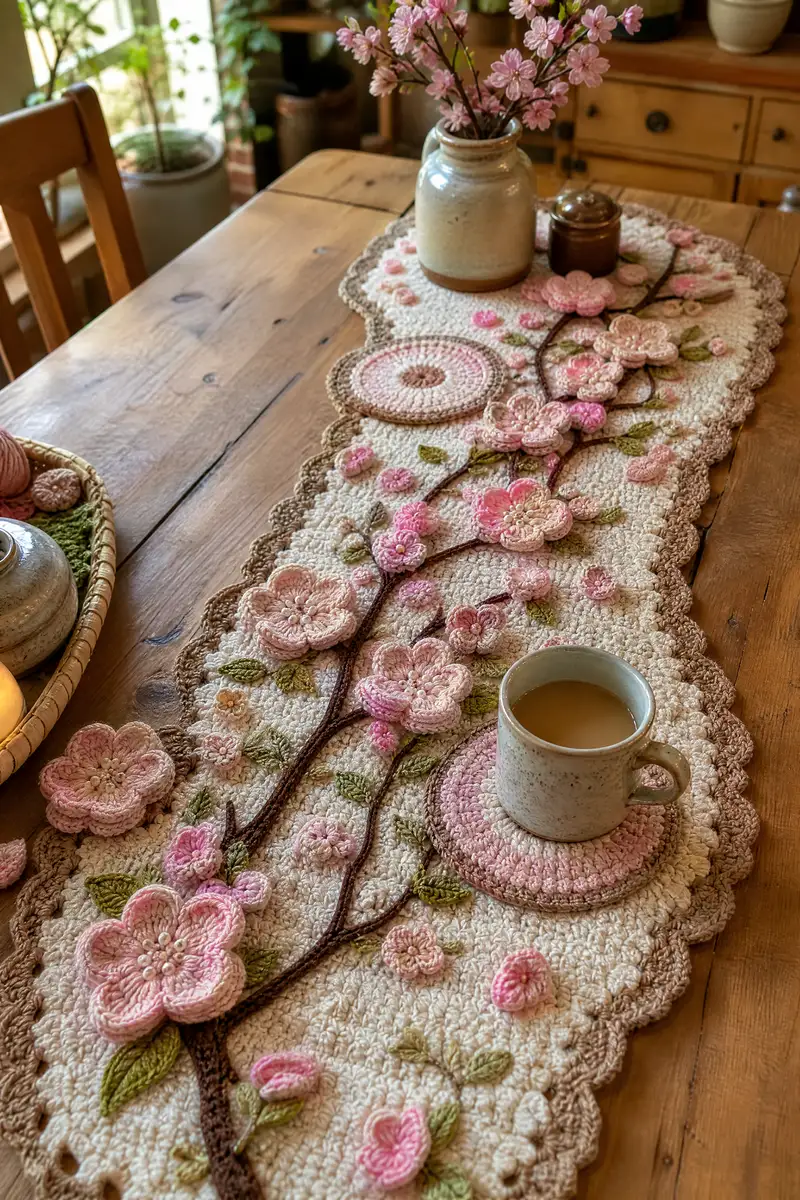
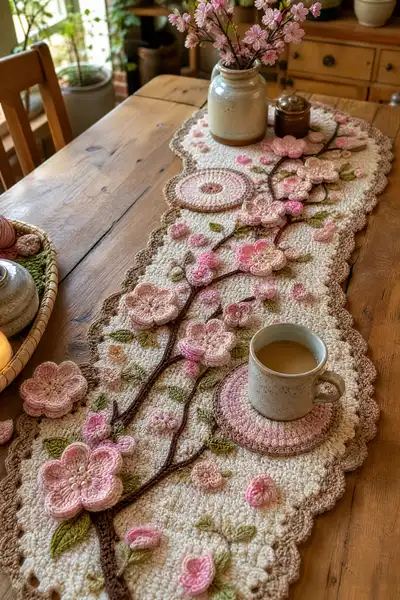
A delicate cherry blossom table runner featuring layered pink blossoms, textured cream background, scalloped edging and embroidered brown branches. The design uses layered applique9 flowers and leaves in soft pastels to create a romantic spring centerpiece. Perfect for dining tables, sideboards or as a seasonal accent to welcome spring. Detailed stitch-by-stitch instructions and assembly tips included for a polished finish.
Progress Tracker
0% Complete
— Base Oval Runner :
Round 1 :
Chain 40. Sc in 2nd ch from hook and across to last ch (38 sc). Work 3 sc in last ch to turn work to the opposite side. Working along the opposite side of foundation chain, sc 38 back along the chain, then 3 sc in the final chain (first chain) to close (82 sts). Join with sl st to first sc. (82)
Round 2 :
Ch1, 1 sc in each st around except add (2 sc) in each of the 4 corner groupings (the 3-sc groups from Round 1) to smooth the oval. (82+8=90)
Round 3 :
Ch1, 1 sc in each st around; at the 4 corner regions, work an extra sc in the first and last stitch of each 3-sc corner to maintain gentle oval growth. (90+4=94)
Round 4 :
Ch1, 1 sc in each st around, adding 1 sc in each designated corner increase stitch from previous round (increase 4 stitches total). (94+4=98)
Info :
Use stitch markers to mark the center stitch of each long side and the approximate center of each end to keep track of where to place texture clusters later. Maintain consistent tension; the base should be fairly dense to prevent lots of slack between applique9 pieces.
Round 5 :
Ch1, 1 sc in each st around. (98)
Round 6 :
Ch1, *1 sc in next 6 sts, 1 bobble in next st*; rep from * to * around. Place bobbles between the long-side center markers for a subtle vine texture. (98)
Info :
To make a bobble: (yo, insert, pull up a loop) x 5, yo and pull through all loops on hook, ch1 to secure the bobble. Place bobbles every 7th stitch as indicated; this creates a subtle raised texture across the field.
Round 7 :
Ch1, 1 sc in each st around except work a sc into the ch1 space of each bobble to anchor them (98)
Round 8 :
Ch1, *1 sc in next 9 sts, 1 bobble in next st*; rep from * to * around. (98)
Round 9 :
Ch1, 1 sc in each st around. (98)
Round 10 :
Ch1, *1 sc in next 11 sts, 1 bobble in next st*; rep around. (98)
Info :
At this stage the oval is reaching final width; if you prefer a wider runner, repeat a gentle increase round similar to Round 3 (add 4 stitches evenly) until you reach desired width. For the pictured proportions, keep at 98 sts for the next rounds.
Round 11-16 :
Work 6 rounds even: 1 sc in each st around (98). Maintain bobble pattern anchoring by sc into their ch1 spaces during even rounds.
Round 17 :
Ch1, 1 sc in each st around, placing a subtle increase of 4 stitches (one evenly spaced at each end) to allow scallop edging to sit flat. (98+4=102)
Info :
Begin visualizing scalloped edge placement: mark every 12th stitch along the long sides and each end center to divide the edge into equal scallops. These markers will guide scallop stitches and prevent ripple.
Round 18-22 :
Work 5 rounds even: 1 sc in each st around (102).
Round 23 :
Ch1, *sc in next 5 sts, hdc in next 2 sts, dc in next 3 sts, hdc in next 2 sts, sc in next 5 sts, sl st into next st to anchor scallop*; rep from * to * around to form a gentle scallop guide (work evenly across ends). The number of stitches used per scallop section should equal the spacing markers you placed earlier; adjust repeats to close evenly. (102)
Info :
If your scallops shift, remove last repeat and adjust distribution by moving 1-2 stitches from neighboring scallop repeats. Pin scallop points to blocking mat to shape while wet-blocking for crisp curves.
Round 24 :
Ch1, 1 sc in each st around to tidy the scallop base (102)
Round 25 :
Ch1, 1 sc in each st around; fasten off and weave ends if you will add a decorative taupe border next. Keep piece damp-blocked until fully shaped. (102)
Info :
At this point the main oval base is complete. We will add a scalloped taupe border and then applique9 motifs. Keep the base blocked and pinned to preserve shape while making motifs.
— Scalloped Taupe Border :
Round 1 :
Join taupe yarn to any outer loop of the runner edge. Ch1, *sk 2 sts, (5 dc) in next st (shell), sk 2 sts, sl st in next st*; rep around to create a classic scalloped shell. Adjust spacing to make shells fall centered on scallop markers from Base. (Shells equal approximately 1 per 12-14 sts)
Round 2 :
Ch1, sl st to the center dc of first shell, ch1, 1 sc around the center dc, *ch3, sl st into center dc of next shell, sc around center dc*; rep around to create an airy picot ridge (count shells for even closure).
Round 3 :
Ch1, *3 sc in the ch3 space (forming a small fan), sl st into next shell center*; rep around. Fasten off and weave in ends. This creates the clean taupe scalloped edging seen in the image.
Info :
Block scalloped edging gently so each shell lifts off the background slightly. This helps applique9 flowers float above the edge without being hidden.
— Large Round Motif / Coaster (Make 2) :
Round 1 :
With mid-pink, mr, 6 sc in mr. (6)
Round 3 :
(1 sc, inc) x 6 (18)
Round 4 :
(2 sc, inc) x 6 (24)
Round 5 :
(3 sc, inc) x 6 (30)
Round 6 :
(4 sc, inc) x 6 (36)
Round 7 :
1 sc BLO in each st around (36) - this creates a ridge for the layered coaster look
Round 8 :
Change to pale pink. 1 sc in each st around (36)
Round 9 :
*1 sc in next 4 sts, 3 dc in next st, 1 sc in next 4 sts*; rep around to create shallow scallops. (36)
Round 10 :
Change to cream; 1 sc in each st around to tidy edge (36)
Round 11 :
Switch to taupe and work sl st around outer loops to create a framed look (36). Finish and weave ends. Make 2 and block flat.
Info :
These circular motifs act as decorative 'coaster' islands in the runner. Place them symmetrically along the runner and sew down through outermost rounds so the middle rings remain slightly raised.
— Large Blossom (Make 6) :
Round 1 :
With pale pink, mr, 6 sc in mr (6)
Round 3 :
(1 sc, inc) x 6 (18)
Round 4 :
Change to mid-pink, (2 sc, inc) x 6 (24)
Round 5 :
1 sc in each st around (24)
Round 6 :
Create petals: *ch3, skip 1 st, sl st into next, (ch3, sl st) into same st to form a small loop*; rep 6 times around to mark petal base. Join and cut yarn, leaving tail for sewing.
Info :
Petals will be worked separately in rounds onto the petal base to create fullness. Use a slightly smaller hook (3.5mm) for tighter petals if you prefer more definition.
Round 7 :
Attach dark pink at the base of first petal loop. Work 1 sc, 1 hdc, 3 dc, 1 hdc, 1 sc into each petal loop (this creates scalloped petals). Fasten off and weave ends. Repeat for all petal loops to have 6 large petals. (Each petal uses 1 sc+1hdc+3dc+1hdc+1sc)
Round 8 :
Optional: For extra dimension, add a second row of petals behind the first: join pale pink behind each petal and work 1 sc, 2 hdc, 2 dc, 2 hdc, 1 sc into each petal base. Fasten off. This deepens the blossom. (6 petals)
Round 9 :
With pale yellow embroidery thread or very light cream yarn, attach small French knots or tiny beads into the center (6-9 small knots) to mimic pistils. Secure each bead with a short stitch through the center and knot on the back side. Block petals to fan outward.
Info :
Make 6 large blossoms and arrange them along the central branch lines. The layered petals give the three-dimensional look from the photo; be generous with the extra petal row if you want voluptuous flowers.
— Medium Blossom (Make 12) :
Round 1 :
With pale pink, mr, 6 sc in mr (6)
Round 3 :
1 sc in each st around (12)
Round 4 :
Create petals: *ch3, sl st in next st* repeat around to form 6 loops. Fasten off main color.
Round 5 :
Join mid-pink into each loop and work 1 sc, 2 hdc, 2 dc, 2 hdc, 1 sc in each loop to create slightly smaller petals than the large blossom. Fasten off and weave ends. Add 3-5 French knots to center.
Info :
Medium blossoms are the most numerous; use lighter and darker pinks interchangeably for a variegated, natural arrangement.
— Small Blossom / Rosette (Make 20) :
Round 1 :
With dark pink, mr, 6 sc in mr (6)
Round 3 :
Switch to pale pink, *1 sc, ch2, sl st into next st* around to create little rosette loops (12 loops). Fasten off and weave ends. Add a single bead or French knot to each center.
Info :
Small rosettes are great for filling gaps and mimicking baby buds. Make 20 or more depending on coverage preference.
— Bud (Make 16) :
Round 1 :
With dark pink, mr, 6 sc in mr (6)
Round 2 :
6 sc (6) - do not increase to keep bud small and round
Round 3 :
Work in BLO for a ridged look: 1 sc BLO in each st (6). Fasten off leaving tail for sewing. Stuff very lightly if you want the buds slightly raised.
Info :
Use buds to suggest clustered unopened flowers; place them near larger blossoms to create depth. A tiny dab of glue can keep them from rotating when sewn down, but secure with a few stitches through the base.
— Leaf (Make 30-40) :
Round 1 :
With olive green, ch8. In 2nd ch from hook: sc, hdc, 3 dc across center 3 ch, hdc, sc, sl st in last ch to form base (7 stitches worked along chain). (7)
Round 2 :
Turn and work along opposite side of chain: sc, hdc, 3 dc, hdc, sc (unworked chain side). Join to create a pointed leaf. Fasten off leaving tail for sewing. (14 total small stitches)
Info :
To create a more sculpted leaf, use BLO on Round 2 or work a small surface slip-stitch ridge down the center as vein. Make 30-40 leaves of varying sizes by chaining 6-10 for variation.
— Branch Tube (Make 4 length pieces) :
Round 1 :
With brown, mr, 6 sc in mr (6)
Round 2 :
1 sc in each st (6)
Round 3-30 :
1 sc in each st (6) for length. Work 28 additional rounds or until the tube reaches your desired branch length (approx 30 rounds for 12-16 inch runner segments). Stuff lightly with fiberfill as you go using a thin stuffing tool or blunt pencil to push fill in. (6)
Info :
Make 4 branch tubes: two longer central stems (approx 28-30 rounds) and two shorter curved offshoots (approx 16-20 rounds). Use a mix of taupe and dark brown for natural color variegation. Insert a length of floral wire inside for poseability if desired, but ensure ends are folded and covered by stuffing.
— Surface Chain Branch (Embroidered Accent) :
Round 1 :
With dark brown, attach yarn to the base where a tube will not be sewn. Using a sl st and long chains, work a surface-crochet vine: sl st 12, ch3, sl st in next targeted point to replicate small offshoots. Repeat across desired route.
Info :
These surface chains are useful to create tiny twigs and to anchor buds exactly where you want them. They can be stitched over the top of tubes for blended seams.
— Small Leaf with Vein (Make 20) :
Round 1 :
Ch6, sc in 2nd ch from hook, hdc, dc2, hdc, sc across. Rotate and sl st down opposite chain side to base. Fasten off. (approx 10-12 stitches total)
Round 2 :
Using a contrasting lighter green, embroider a center vein using surface slip stitches or a chain of sl sts along the leaf center to add realism. Secure ends on the back and hide tails within the leaf by stitching through.
Info :
Mix leaf sizes and shades for the most natural look. Flatten leaves lightly with steam or gentle blocking if you want them more sculpted.
— Extra Embellishment: Tiny Round Fillers (Make 24) :
Round 1 :
With cream or pale pink, mr, 6 sc in mr (6)
Round 2 :
6 sc (6). Fasten off. These small discs act as ground fill or extra tiny blossoms; sew down in clusters for organic spacing.
Info :
Make many of these tiny discs and scatter them in the background to mimic fallen petals and tiny floral clusters. They are quick and useful for balancing composition.
— Assembly & Placement Guide :
Info :
Before sewing any pieces, lay the blocked runner on a large flat surface and arrange all applique9 pieces as desired. Use pins or safety pins to hold placement. Photograph the placement for reference while sewing. Aim for asymmetrical but balanced placement: longer branch tubed stems run roughly down the center with clusters of large and medium flowers; small blossoms and buds fill the spaces between.
Round 1 :
Attach branch tubes first: position the longest branch tube along desired midline. Using yarn tail from the tube, mattress stitch through the tube base and runner base at rounds near the center of the tube to anchor; stitch every 6-8 rounds of tube to secure. Curve the tube and pin into shape while sewing, adding a few invisible ladder stitches under the tube to flatten seam.
Round 2 :
Sew the second tube as a slightly offset branch; tuck the end under a blossom cluster edge so joins are hidden. Use small stitches and try to pass the needle through two runner stitches and one tube stitch for stability.
Round 3 :
Place large blossoms first. Use the long tail left from the blossom center to sew through the runner using many small stitches across the lower circle/round 3 of the blossom base to secure fully. Add a dab of craft glue under each blossom if you like extra hold, then reinforce with yarn stitches.
Round 4 :
Sew medium blossoms next, grouping them near large flowers and along branches. Place small rosettes and buds last to fill gaps. For any circular coaster motifs, stitch only through the outermost rounds so their centers remain slightly padded.
Round 5 :
Sew leaves along branch edges: slip the leaf base under the branch tube, then run a few close whip-stitches through the runner and the leaf base to attach. Attach some leaves only by their tip for a lifted look (secure with a single discreet stitch at the tip and one at the base).
Round 6 :
Use embroidery thread and a narrow embroidery needle to add tiny pistils and French knots into flower centers. Add 6-9 small knots to large flower centers and 3-5 to medium centers. Secure knots by taking a small securing stitch on the underside and knotting securely.
Info :
Trim and weave all tails, and block the fully assembled runner one final time pinned to shape to flatten seams and ensure petals open as intended. Add small beads into large centers if desired, sewing each bead with three anchoring stitches for security.
— Final Finishing Rounds (Edge Tidying & Reinforcement) :
Round 1 :
With cream yarn, sc around entire outer edge (through both base and taupe scallop join) to tidy edge and secure all applique starting tails that may sit near the edge. Keep stitches even. (Work approx 102-110 sc depending on final stitch count)
Round 2 :
With taupe, work 1 round of crab stitch (reverse sc) around the outermost rim to create a neat, slightly raised border. This also anchors the scalloped shells and hides any join lines. Fasten off. Weave and trim ends.
Info :
Crab stitch is worked left-to-right: insert hook into next stitch from back to front and complete a sc. It creates a rope-like edge that provides a finished look and additional structural strength.
— Blocking & Care :
Info :
Gently steam or wet-block the finished runner pinned to measurements to prevent scallops from curling. Lay flat to dry. For cleaning, spot-wash gently with mild detergent, and avoid heavy agitation. If machine washing, place inside a laundry bag and use a delicate cycle with cold water.
Info :
Store flat or rolled to prevent creasing; do not hang as it may distort shape over time. Keep away from direct sunlight to minimize color fading of pink yarns.
This cherry blossom table runner pattern blends classic crochet stitches with layered applique9 to create a romantic centerpiece youe2ll be proud to display. Each petal and leaf is crafted with care and assembled to form a soft, three-dimensional floral scene perfect for spring. The detailed instructions guide you from base construction through final assembly so your finished runner looks polished and professional. 🧶🌸✨