🧶 Beautiful ✨ Detailed 💝 Adorable

Claude the Cloud Amigurumi Pattern

Claude the Cloud Amigurumi Pattern
4.4★ Rating
2-3 Hours Time Needed
2.3K Made This
✂️

Beginner Friendly Level

Perfect for those just starting their crochet journey, with clear instructions and simple techniques

⏱️

Bite-Sized Project

Finishes in 2-4 hours—perfect for an afternoon of creative relaxation.

🧸

Cute Companion

An adorable friend to cherish, handcrafted with love to bring comfort and joy for years to come.

About This Claude the Cloud Amigurumi Pattern

Claude the Cloud is a small, stuffed amigurumi cloud crocheted flat in rows and joined together to form a delightful three-dimensional shape. The pattern is designed to be no-sew: you crochet two identical pieces and join them with single crochet stitches while stuffing. It uses basic stitches—single crochet, increases and decreases—making it accessible and quick to finish.

Claude the Cloud Amigurumi Pattern crochet pattern - detailed view of completed project

You will add safety eyes and embroider the mouth and cheeks for personality, and the pattern includes full row-by-row instructions. The finished cloud measures approximately 7 cm x 13 cm using the recommended yarn and hook.

Why You'll Love This Claude the Cloud Amigurumi Pattern

I absolutely love this pattern because it turns simple stitches into an irresistibly cute character that brings a smile every time. I designed Claude to be quick to make and satisfying to finish, perfect for using up small amounts of DK yarn. The no-sew construction is one of my favorite features — it keeps the make tidy and beginner-friendly. Sharing little projects like this makes me excited to see your color choices and personal touches.

Claude the Cloud Amigurumi Pattern step 1 - construction progress Claude the Cloud Amigurumi Pattern step 2 - assembly progress Claude the Cloud Amigurumi Pattern step 3 - details and accessories Claude the Cloud Amigurumi Pattern step 4 - final assembly and finishing

Switch Things Up

I love how simple this pattern is to customize; swapping yarn colors instantly changes the mood—try pastel blues, greys or even rainbow stripes.

Want a mini keychain? Use fingering or sport weight yarn with a smaller hook and add a keyring loop before closing the piece.

Make it bigger by using bulky yarn and a larger hook for a squishier, more plush cloud perfect for cuddling.

I often add embroidered eyelashes or a tiny crocheted bow to give the cloud personality and make it gender-neutral or playful.

You can substitute safety eyes for embroidered eyes for a fully soft, baby-safe toy—just embroider two vertical ovals with black floss.

Try adding a hanging loop at the top center before closing to make Claude a nursery mobile ornament or hanging decoration.

I sometimes combine two colors using a gradient or color-blocking technique across the rows for a unique look.

Change the cheek color to mint, yellow or lavender for seasonal or themed versions—small changes make a big visual difference.

I recommend experimenting with surface embroidery like tiny stars or a smiley face to personalize each cloud even more.

Finally, you can assemble a set of three clouds in different sizes and colors to create a lovely mobile or shelf display—it's a great small gift set idea!

Common Mistakes & How to Fix Them

✗ Skipping stitch markers when working rows can cause you to lose track of the turning chain placement; use a marker on the last stitch of each row and move it up as you turn. ✗ Not stuffing the cloud evenly will result in a flat or lumpy shape; stuff gradually while you join the pieces and add extra stuffing to the three rounded corners for a nice three-dimensional look. ✗ Forgetting to align the safety eyes can make the face look uneven; place the eyes between the specified rows (11 and 12, and 17 and 18) and check vertical alignment before fastening. ✗ Pulling your tension too tight during joining can warp the edges and close the cloud shape incorrectly; crochet the joining single crochets with the same relaxed tension as your body rows to keep proportions accurate.

Claude the Cloud Amigurumi Pattern

Make a sweet, no-sew cloud amigurumi that is perfect for gifting or decorating your space. This easy pattern guides you step-by-step so you can crochet two identical pieces and join them together without sewing. With simple single crochet rows, increases and decreases, you will create a charming little cloud in no time. Follow the full material list and assembly notes to finish Claude with sewn-on cheeks and an embroidered mouth.

Beginner Friendly 2-3 Hours

Materials Needed for Claude the Cloud Amigurumi Pattern

— Main Fabric

  • 01
    Yarn in the colors: blue/white/rose or any other color you want your cloud to be
  • 02
    Yarn strength: DK, light worsted, number 3 yarn (approx. 120-150m/50g recommended)
  • 03
    Use small amounts of black yarn or embroidery floss for the mouth
  • 04
    Use small amounts of rose (pink) yarn or embroidery floss for cheeks

— Tools Required

  • 01
    Crochet hook size 3 mm
  • 02
    Stitch markers (use a stitch marker in the last stitch of each round/row)
  • 03
    Safety eyes 9 mm (2 pieces)
  • 04
    Black yarn or embroidery floss for mouth
  • 05
    Rose (pink) yarn or embroidery floss for cheeks
  • 06
    Embroidery needle
  • 07
    Yarn needle for sewing in ends
  • 08
    Scissors
  • 09
    Polyester stuffing

Progress Tracker

0% Complete

— Materials :

Infos :

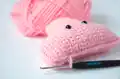
Yarn in the colors: blue/white/rose or any other color you want your cloud to be. Yarn strength: DK, light worsted, number 3 yarn. Stitch markers (use a stitch marker in the last stitch of each round/row, moving it up as you go). Safety eyes: 9 mm. Hook: 3 mm. Black and rose yarn or embroidery floss for mouth and cheeks. Embroidery needle. Yarn needle. Scissors. Stuffing.

— Abbreviations :

Infos :

ch - chain. st - stitch/es. sc - single crochet. inc - increase. dec - decrease. R number - row/s number. (number) - number of stitches of the row.

— Pattern Notes :

Info :

Difficulty: Easy

Info :

Size of finished cloud: approx. 7 cm x 13 cm

Info :

Claude the Cloud is crocheted in rows. The turning-chains are not counted as a stitch. We make two identical pieces and then crochet them together. No sewing is needed in this pattern! Feel free to use the yarn and matching crochet hook of your choice to make Claude the Cloud. The result will be bigger or smaller keeping the same proportions.

— Cloud Front-Piece :

Round 1 :

R1: Ch 9, turn (9)

Round 2 :

R2: Inc, 7 sc, turn (9)

Round 3 :

R3: Ch 1, 8 sc, inc, turn (10)

Round 4 :

R4: Ch 1, inc, 9 sc, turn (11)

Round 5 :

R5: Ch 1, 10 sc, inc, turn (12)

Round 6 :

R6: Ch 1, 12 sc, turn (12)

Round 7 :

R7: Ch 1, 12 sc, turn (12)

Round 8 :

R8: Ch 1, inc, 11 sc, turn (13)

Round 9 :

R9: Ch 1, 13 sc, ch 6, turn (19)

Round 10 :

R10: 1 sc, in second ch from hook, and next 17 sc (18)

Round 11 :

R11: Ch 1, 17 sc, inc, turn (19)

Round 12-18 :

R12-18 (7 rows): Ch 1, 19 sc, turn (19)

Round 19 :

R19: Ch 1, 17 sc, dec, turn (18)

Round 20 :

R20: Ch 1, dec, 16 sc (17)

Round 21 :

R21: Ch 1, 13 sc, keeping the last 4 stitches unstitched (13)

Round 22 :

R22: Ch 1, dec, 11 sc, turn (12)

Round 23 :

R23: Ch 1, 12 sc, turn (12)

Round 24 :

R24: Ch 1, dec, 10 sc, turn (11)

Round 25 :

R25: Ch 1, 9 sc, dec, turn (10)

Round 26 :

R26: Ch 1, dec, 8 sc, turn (9)

Round 27 :

R27: no chain, 7 sc, dec, turn (8)

Round 28 :

R28: no chain, dec, 6 sc (7)

Info :

Cut yarn. Hide yarn ends.

— Cloud Back-Piece :

Info :

Make the back-piece the same way as the front-piece, but don't cut the yarn.

Info :

Once the second piece is finished, hide the other yarn end.

Info :

Add the safety eyes in one of the pieces, between row 11 and 12 and 17 and 18. Check that the eyes are on the same height and vertically in the middle of the piece.

Info :

Lay the pieces flat onto each other. Now crochet them together with a sc. We begin where we made the last stitch. Continue to stuff the cloud while crocheting along.

Info :

Make sure, the cloud is very firmly stuffed, especially add stuffing at the three corners. This way the cloud gets the cute round three-dimensional shape that we want.

Info :

Cut a piece of black yarn or embroidery-floss and embroider on the mouth. Then embroider on the cheeks with a few stitches.

Assembly Instructions

  • Add the safety eyes in one of the pieces between row 11 and 12 and 17 and 18; check that the eyes are at the same height and vertically centered before securing them.
  • Lay the front and back pieces flat on top of each other, aligning the edges, then join them by crocheting single crochet stitches along the edge beginning where you made the last stitch.
  • Continue to stuff the cloud gradually while you crochet the pieces together to ensure an even shape and to avoid gaps.
  • Be sure to add extra stuffing at the three rounded corners so the cloud keeps a cute, rounded three-dimensional look.
  • Cut a length of black yarn or embroidery floss and embroider the mouth in the center below the eyes, then add small pink/rose stitches for cheeks using rose yarn or floss.

Important Notes

  • 💡Use stitch markers to keep track of the last stitch on each row; this makes turning and increases/decreases far easier to manage.
  • 💡Stuff firmly but in small increments while joining the pieces; overstuffing can distort the shape but under-stuffing will flatten the cloud.
  • 💡Place safety eyes before fully closing the pieces and double-check their alignment; reposition if necessary to keep the face symmetrical.

Claude the Cloud is a tiny handmade friend that's quick to crochet and full of charm. Whether you make one for a gift or a shelf display, this cloud adds instant sweetness to any space. Share your creations and brighten someone's day with a little fluffy love! ☁️🧶

You ask,

we answer.

FAQs

What size will the finished piece be?

The finished amigurumi measures approximately 7 cm x 13 cm when using the recommended DK yarn and a 3 mm hook.

Can I use different yarn weights for this pattern?

Yes, you can use different yarn weights, but this will affect the final size and texture; use an appropriate hook size for your chosen yarn to maintain stitch proportions.

Do I need prior crochet experience for this pattern?

This pattern is beginner friendly; familiarity with single crochet, increasing and decreasing is helpful for the best results.

How long does this project typically take to complete?

Most crocheters complete this project in 2-3 hours, though time may vary based on experience level and customizations.