About This Clutch The Best Amigurumi Pattern
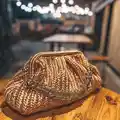
This pattern teaches you to crochet a raffia clutch called "Clutch The Best" using a herringbone single crochet technique. It includes full material and tool lists plus gauge and finished measurements to guide your project. You will work a rectangular canvas, fold and join it, then finish the edges and seams for a professional clutch.
The pattern is written for intermediate crocheters and includes steam and shaping tips specific to raffia yarn. Detailed photos and row-by-row instructions help you follow along and create a polished finished bag.
Why You'll Love This Clutch The Best Amigurumi Pattern
I absolutely love this pattern because it transforms simple raffia yarn into a chic, structured clutch with a beautiful herringbone texture. I enjoy how the techniques are practical yet creative — the herringbone SC creates a durable canvas perfect for bags. The pattern lets me apply shaping and finishing skills, like steaming and folding, which always make handmade pieces look professional. Every time I finish one I am proud of the clean seams and crisp edges this method produces.
Switch Things Up
I love how easy it is to customize this clutch with color and hardware choices — try two-tone raffia or alternate light and dark strands for a striped effect.
If you want a softer, larger version, use a bulkier raffia and a larger hook; the bag will grow in both width and height, giving a roomy tote feel.
I sometimes add a lining in cotton fabric for extra structure and to hide seams; cut a fabric rectangle to the inner measurements and hand-sew it in place before fitting the frame.
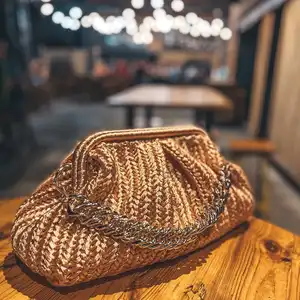
I also enjoy switching the hardware — a brass chain or a leather strap instantly changes the bag's vibe from casual to elegant.
To make a mini keychain clutch, use thinner raffia or crochet fewer foundation chains and reduce row counts proportionally for a tiny version.
Try embellishing with embroidery or a crocheted flower applied to the front for a unique focal point and extra texture.
I occasionally insert a thin strip of plastic or interfacing into the base before sewing a lining for sturdier bottoms that hold their shape better under weight.
For a beachy look, leave ends frayed at the trim and add wooden beads to the snap chain for an organic accent.
Want a more structured top? Steam and clamp longer and press firmly before attaching the frame so the fold holds a sharper ridge.
I often experiment with different closure frames — kiss-lock frames work beautifully with the same fold technique but require slightly different spacing for securing.
If you like pockets, crochet a small separate panel and sew it inside the lining before inserting the frame to keep items organized.
Finally, always test your gauge if you switch yarn or hook size and adjust counts for foundation chain and rows accordingly so the final clasp fits perfectly.
Common Mistakes & How to Fix Them
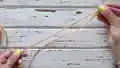
✗ Not straightening raffia before working causes uneven loops and stiffness; always fluff or steam your skein and straighten the yarn before crocheting.
✗ Crocheting too tightly with raffia squeezes the texture and makes the canvas stiff; keep your stitches loose and consistent to preserve flexibility and the herringbone look.
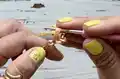
✗ Failing to join skeins correctly can lead to bulky joins and weak spots; overlap ends about 5 mm, glue with PVA, let dry, and wrap lightly to secure.
✗ Skipping steam shaping leaves the bag misshapen and wavy; steam both sides and clamp folds with a binder clip to set clean edges and folds.
✗ Not counting loops accurately when folding causes misaligned folds for the clasp; mark the middle and count the exact number of loops from markers before folding and clamping.