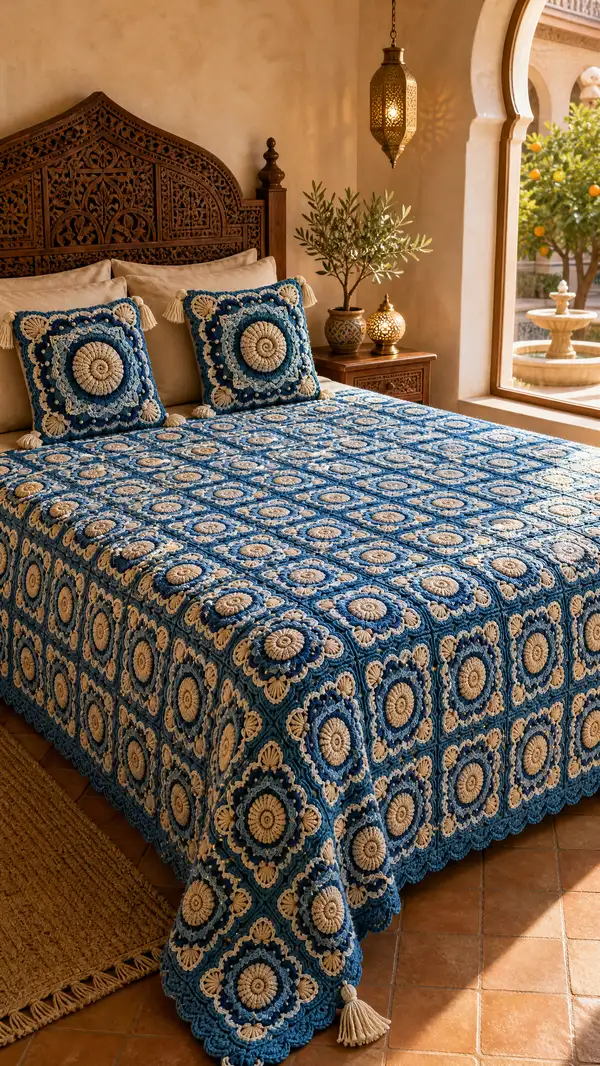
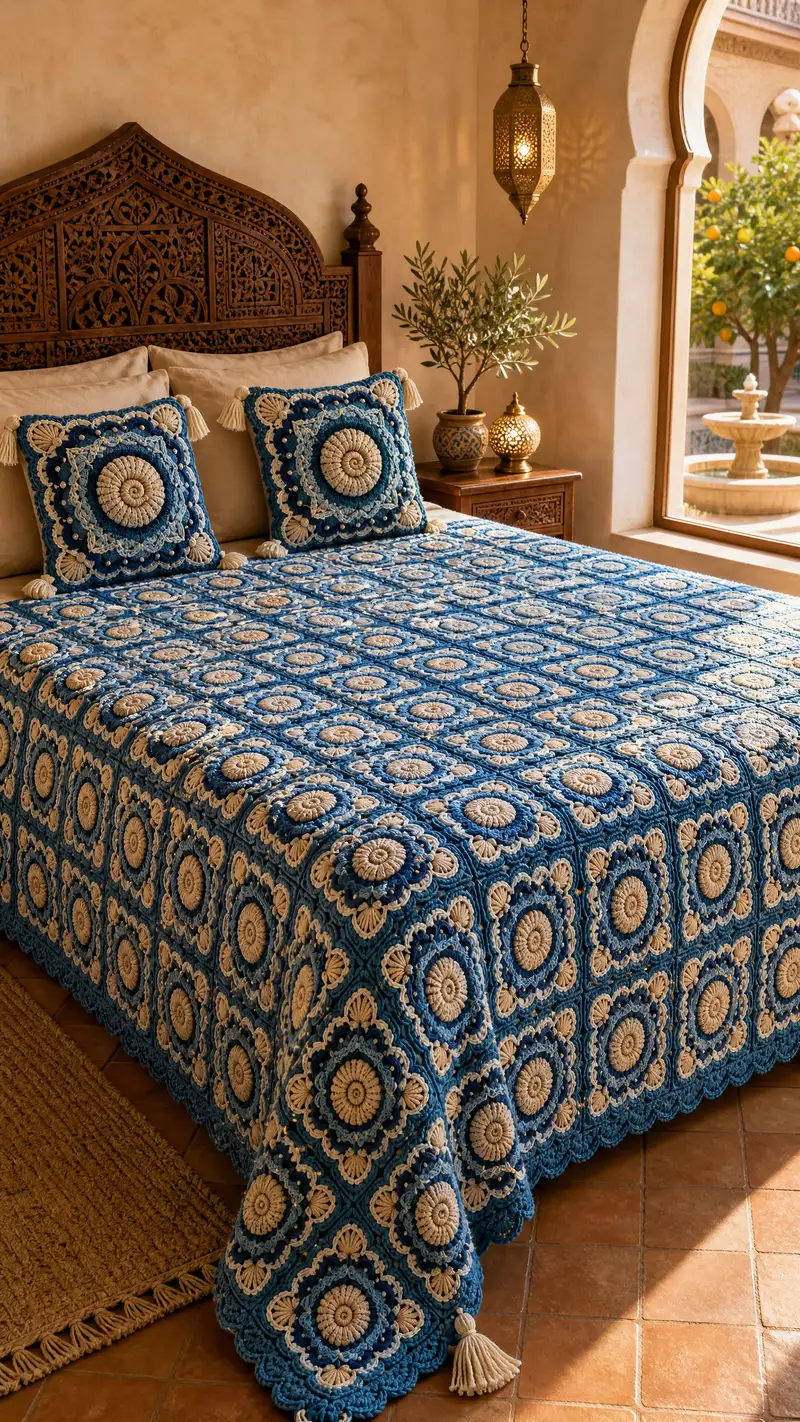
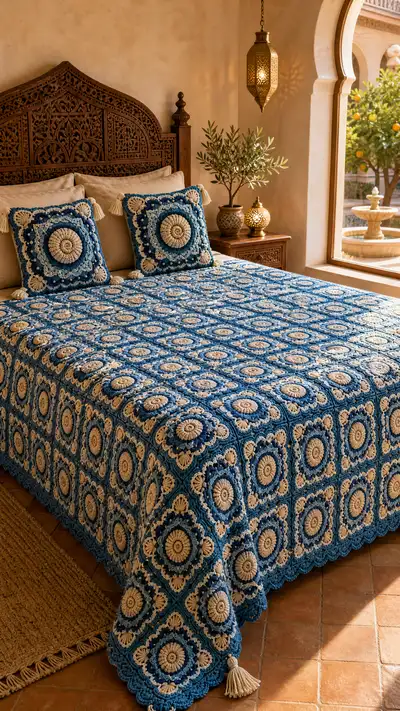
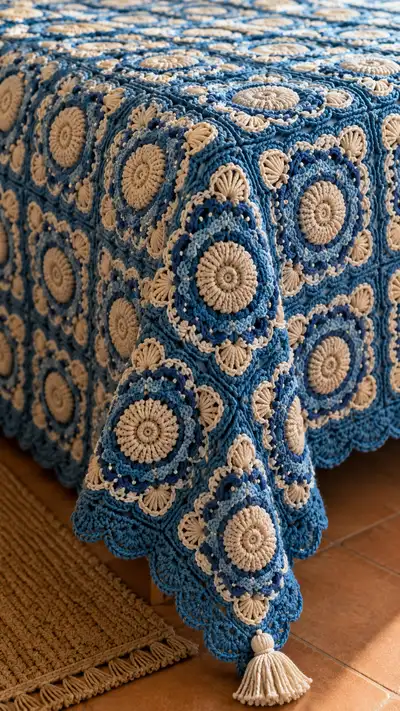
Create a stunning coastal-inspired bedspread made from layered medallion granny squares in deep navy, mid-blue and natural cream. This pattern shows how to crochet each textured circular medallion, add scalloped corners, join motif-to-motif and finish with a graceful scalloped border and tassel corners. The finished spread has a lush, raised texture from puff and cluster stitches, perfect for a statement bed or cozy throw.
Progress Tracker
0% Complete
— Motif (Make as many as needed) :
Info :
Each square motif is a layered medallion worked in three colors. Work tightly so textured stitches stay defined. Use stitch marker at start of every round.
Round 1 :
6 sc in magic ring, join with sl st to first sc (6)
Round 2 :
inc in each st around (12)
Round 3 :
(1 sc, inc) x 6 (18)
Round 4 :
(2 sc, inc) x 6 (24)
Round 5 :
(3 sc, inc) x 6 (30)
Info :
Change to Accent Color B (Natural Cream) now for the spiral/puff center. Carry main color up the side or fasten off and join new color.
Round 6 :
Ch2 (counts as hdc), hdc in same st and in each st around, join (30)
Round 7 :
To create spiral ridges: *hdc BLO in next 5 sts, hdc BLO in next st worked tightly; rep from * around (30)
Round 8 :
Change to Accent Color B if not already in use. Prepare for puff center: *ch1, insert hook in next st, yarn over pull up loop repeat 3 times (5 loops on hook), yarn over and pull through all loops, ch1 to close puff, sl st in next st; rep around to create 12 puffs evenly spaced. Aim for 12 puffs (12)
Info :
Spacing: to make 12 puffs over 30 sts, work a puff into every 2nd or 3rd stitch depending on density. Adjust so puffs are evenly distributed into a circle.
Round 9 :
Switch to Accent Color A (Mid Blue). Ch3 (counts as dc), *dc in top of next puff, ch1, skip next st; rep around, join with sl st (12 dc, 12 ch-1 sps)
Round 10 :
In same color, work (dc, ch1, dc) in each ch-1 space around to start feathered ring (12 clusters) — work clusters evenly so the ring sits flat
Round 11 :
Info :
Switch to Main Color (Deep Navy) to create defining ring and raised petals. Carry Accent A or fasten off.
Round 11 :
Ch2, in each ch-1 sp work: (hdc, puff, hdc) — a puff here is (yarn over, insert hook, pull up loop) x4 then close; create 12 textured petal units around. Join (12 petals)
Round 12 :
ch1, sc in same st, *ch3, skip next petal top stitch, sc in next; rep around to create open arches between petals (24 ch-3 sps counted as arches)
Info :
Use ch-3 arches as reference points for later shell rounds. Keep tension consistent to preserve rounded petal shape.
Round 13 :
Change to Accent Color B. In each ch-3 arch: (sc, 5 dc, sc) — this creates an outer ring of elongated arches; join (12 shells)
Round 14 :
Switch to Accent Color A. Ch1, sc in same st, *ch2, skip to center of next shell and sc; rep to make picot-like connectors (24 connectors)
Round 15 :
Info :
Prepare for corner-forming round. The next round converts the round medallion into a square motif by forming four corner clusters and side connectors to facilitate joining.
Round 15 :
Change to Main Color. Working around the ring, make 12 even groups that will be turned into corner sets: *(sc in next 4 sts, ch3), rep around — you will have 12 ch-3 spaces acting as junctions for forming square sides (48 sc total around)
Round 16 :
To create 4 corners, work grouping conversion: count 12 ch-3 sps; group them into 4 sets of 3 spaces. For each set work: [sc in first ch-3 sp, (3 dc, ch3, 3 dc) in second ch-3 sp (this is corner shell), sc in third ch-3 sp] — repeat for each corner set (4 corners formed)
Info :
This is a critical shaping round: be precise when grouping arches into corners. Use stitch markers to mark the three spaces that will form each corner set before working.
Round 17 :
Now work side connections between corners: in the chain spaces and single sc runs between corner shells work (sc, ch2, sc) into center points to form four flat sides. Aim for balanced sides so the motif sits square.
Round 18 :
Switch to Accent Color B. Work one round of lacy chain-work over the side runs: *ch4, sl st into mid-point of side sc; rep across each side and around corners to create a gentle lacy band
Round 19 :
Change to Accent Color A. Around the four corner shells, work (sc, ch1, puff, ch1, sc) into center of corner shell to create raised corner petals (4 raised corners)
Round 20 :
Info :
To stabilize the motif before the final scallop rounds, work a round of sc around entire motif: sc in each st and in each ch-space, placing 1 sc per open stitch; join (count will vary; expect ~96 sts). This even round readies for scalloped edging.
Round 20 :
1 sc in each st and ch space around, join (approx. 96)
Round 21 :
Switch to Main Color. Work scalloped row: *(skip 1 st, 5 dc in next st, skip 1 st, sl st) repeat around to form shells; place shells centered along each side and shell tips at corners for visual continuity.
Info :
Use FLO or BLO in scallop rounds if you want a ridge effect — example: work shells in FLO to give depth to the scallops.
Round 22 :
Ch1, sc in same st, *ch3, skip 3 dc of shell, sc between shells — creates a lightframe. Join (approx. 32 ch-3 sps)
Round 23 :
Change to Accent Color B. In each ch-3 space: (sc, 7 dc, sc) to build a pronounced scalloped square edge; join (32 shells)
Round 24 :
Info :
Final decorative round: add small popcorns between shell edges to produce the beaded look seen in the motif field. Popcorn: 5 dc in same st, remove hook, insert in top of first dc of the 5-dc group, reinsert hook and pull loop through, ch1 to secure.
Round 24 :
With Main Color, *sc in space between big shells, make popcorn in next space, sc in next space; rep around. Finish and fasten off leaving a 20-25cm tail for join (stitch count varies by motif size)
Info :
Weave in tails for now or leave long for join-as-you-go. Block motifs flat so scallops sit true before joining.
— Join-As-You-Go and Flat Join Rounds :
Info :
This method joins new motifs to previous assembled blocks so the seam is nearly invisible. Work joins on last round of a motif instead of fastening off, or use joining rounds described below once motifs are blocked.
Join Round 25 :
Place first motif on table RS up. Start second motif; when you reach the final shell round (Round 21-24 stage), position it RS to RS with the neighboring completed motif. For each sc between shells, sl st through corresponding st of the joined motif. Use alternating sl sts and scs so the join sits flat. Continue around the edge joining stitch-for-stitch where motifs meet.
Info :
When joining, keep tension slightly looser than motif rounds so motifs lie flat and do not pull in. Use the same color as the joined round (Main Color) for an invisible seam.
Join Round 26 :
For three or four-way joins (corners where 4 motifs meet) use a minijoin: sl st into corner shell of motif A, sl st into corner shell of motif B, sl st into corner of motif C, then into current motif corner and ch1 to lock — this creates stable 4-point intersections.
Info :
Pin motifs to maintain straight rows and even spacing. Make a test swatch of 4 motifs joined to confirm alignment before assembling entire bedspread.
— Field Assembly (working in rows) :
Round 27 :
Assemble motifs in horizontal rows: join motifs left-to-right using join method above. After completing row, join rows to each other by matching row seams and using the same join-as-you-go technique on corresponding motifs of previous row.
Round 28 :
Info :
When joining a motif to two neighbors (one to the left, one above), join the left side first, then align top edge and join to the top neighbor, finishing corner locks at the three-way intersections. Finish the unjoined sides for next motif in sequence.
Round 29 :
Repeat joining across the bedspread field until your piece reaches desired dimensions. For a queen-size spread arrange approx. 9 motifs across and 10 motifs down (approx. 90 motifs total) depending on your motif size. Adjust count to fit bed size and desired overhang.
Info :
Calculate required motifs: Measure your motif blocked size (for example, 12cm square after blocking). Divide bed width and length by motif measurement to estimate motifs across/down. Add motifs for desired overhang.
— Deep Scallop Border (Border rounds) :
Round 30 :
Once field is assembled, work a round of sc around the entire perimeter in Main Color to pick up edges and even the field (place 3 sc in each corner for turn). Count perimeter sts to determine scallop spacing (expect large number; approximately same as assembled outermost motif stitches).
Round 31 :
Work a round of hdc in each st around to build depth (BLO if you want a raised edge). Place 3 hdc in each corner to keep corners flat.
Info :
Block border lightly after the first two rounds to remove any unevenness from joining tension before working scallops.
Round 32 :
Switch to Accent Color A. Work scallop rhythm around edge: *skip 3 sts, 7 dc in next st, skip 3 sts, sl st in next st; rep around. Space so scallops line up with motif shells below.
Round 33 :
Switch to Accent Color B. In each scallop work (sc, ch3, sc) across the center of each 7-dc shell to add a delicate lacy filter between scallops.
Round 34 :
Change to Main Color. Work final scalloped edging: *(sc, picot, 5 dc, picot, sc) in each scallop tip to create pronounced edging; join, fasten off, weave ends.
Info :
Block entire bedspread to final measurements with pins and steam or wet blocking for cotton yarn. Allow to dry fully before removing pins.
— Corner Tassels :
Round 35 :
Make 4 large tassels in Accent Color B (Natural Cream) — wrap yarn around a 10cm cardboard 80-100 times, tie off at top, cut bottom edge, make a neck with a short yarn piece, then trim tassel evenly. Attach to corners by sewing looped top securely through corner shell.
Info :
For heavier tassels, double strands or use two skeins held together. Secure tassels with extra stitches to prevent pulling.
— Optional Decorative Pillow Covers (Make 2) :
Info :
Pillow fronts use single medallion motifs centered on a square back or paired motifs to make full front; use same motif pattern, slightly smaller yarn/hook if you want a tighter pillow scale.
Round 1 :
Work motif rounds 1-24 as above but stop when motif is the size desired for cushion front (approx. 1 medallion). Fasten off leaving long tails for sewing to backing.
Round 2 :
For pillow back, work a square of sc in Main Color to match motif size (approx. number of sts to equal motif width) for two identical panels. Join three sides and insert pillow form then close last side with mattress stitch.
Info :
Alternatively, work two motifs for front and back and join with sc around the edges leaving a gap or zipper insertion area. Attach tasseled corners as seen in the pictures.
— Alternative Join: Slip-Stitch Seam (neater ridge) :
Round 1 :
With RS of both motifs facing you and Main Color on the active motif, insert hook in edge st of motif A, sl st, then insert hook in corresponding st of motif B and sl st; repeat around perimeter of join. Fasten off and weave tail to hide.
Info :
This creates a visible raised ridge which can be decorative when contrasted in a second color. Use it for inner field joins if you want a grid-like look.
— Troubleshooting and Tension Rounds :
Round 1 :
If a motif is slightly smaller or larger than others, add or remove a small filler round (sc round) before the scallop rounds. For example, add a single round of (sc in each st, inc every 10th st) to gain a few stitches or work a tightening round of (sc dec at four points) to reduce size slightly.
Info :
Always block motifs after any size-adjustment rounds to ensure they match their neighbors. Consistency at this stage prevents ruffled joins later.
— Finishing Rounds and Weaving :
Round 1 :
Weave in all loose ends using a yarn needle; weave tails through several motif stitches and trim close. Tack any scallop tips that lift by adding a small sl st or sewing stitch from the underside.
Round 2 :
Final pressing: use steam or damp cloth press on cotton yarn, pin scallops to a blocking board to shape. Allow 24 hours to dry thoroughly for best shape retention.
Info :
For durability, especially on bedspread edges, reinforce corner joins with extra back-and-forth sewing with matching yarn from underside.
Assembly Instructions
- Attach motifs row-by-row using join-as-you-go: when working the final round of a motif, align it with the previously completed neighbor and join using sl sts into corresponding stitches; lock corner points with a three- or four-way sl st when motifs meet.
- For the first row, join motifs left-to-right. When starting a new row, join the bottom edge to the previous row as you work the right-side joins so joins accumulate as you build the field.
- Sew pillow fronts to backs with a mattress stitch or single crochet seam, matching scallop edges. Insert pillow form before final seam and finish securely to prevent gaps.
- Add tassels to four bedspread corners: tie and sew tassels through corner shell rings with reinforced stitches making sure tassel tops sit snugly under corner shell.
- Finish the border by working rounds evenly around the full perimeter; pin outer scallops during blocking so the border curves are uniform and smooth.
- Weave all tails through the underside of motifs, and secure at least 10 cm into the body of the motif with a yarn needle to avoid loosening with use.
- If seams feel loose at high-stress points (corners or top-of-bed), run an extra back-and-forth sewing line from underside through multiple motif layers for reinforcement.
- Block the entire assembled spread flat on a bed or large blocking surface, pinning scallops and edges square, and leave to dry fully to set the shape and even the joins.
Important Notes
- 💡Use stitch markers consistently at the beginning of each round to avoid counting errors and maintain proper shaping
- 💡Block individual motifs in small batches before joining so sizes match and scallops sit flat
- 💡When joining motifs, match shell tips to shell tips and use the same yarn color as the final round for an invisible seam
- 💡Stuffing is not used in this pattern, but allow for gentle tension so textured stitches do not trap fabric or pucker
- 💡For a drapier spread, use a lighter weight or larger hook; for a more structured result, use a slightly smaller hook than recommended
- 💡Work joins slightly looser than motif rounds so interconnected motifs can relax without distortion
- 💡Reinforce corner tassels with extra stitching; they bear the most handling stress when spreading or folding the bedspread
- 💡Always weave tails into the structure, not just surface stitches, to prevent them pulling out over time
Bringing together dozens of textured medallions into one grand bedspread is so satisfying — each square is a small celebration of crochet texture and color. The creamy tassels and scalloped border frame the bedspread beautifully and add movement and softness. Blocked and finished, this piece becomes a tactile centerpiece that elevates any bedroom 🌊🧶. Enjoy the slow, mindful process and treasure the finished work — it makes a spectacular heirloom or gift 🎁.
What is the finished size of this bedspread?
Using bulky cotton yarn and the motif dimensions described, a typical queen-size layout of 9 motifs x 10 motifs will finish approximately 220 x 240 cm (86 x 95 in) including border and overhang. Exact size depends on your motif blocking and yarn tension.
Can I use different yarn weights for this pattern?
Yes. You can substitute yarn weights, but adjust hook size accordingly. Using lighter yarn (worsted #4) will reduce motif size and require more motifs for the same coverage; heavier yarn increases size but also weight.
Do I need to block each motif before joining?
Blocking each motif before joining is highly recommended. Blocking evens stitch tension, opens scallops, and ensures motifs align neatly during join-as-you-go assembly.
Can I machine wash the finished bedspread?
Follow yarn manufacturer's care instructions. For cotton yarns, gentle machine wash in cool water and lay flat to dry is often safe; heavy agitation can distort textured stitches. Consider hand-washing or professional cleaning for best care.
How many motifs do I need for a custom size?
Measure your blocked motif width and divide your desired finished width and length by that number to determine motifs across and down. Add motifs for overhang and border. Example: 12 cm motif width -> ~18 motifs for 216 cm width.
Can motifs be joined with a visible seam?
Yes. Use slip-stitch seam with contrasting yarn for a neat raised grid; alternatively, use whip stitch or mattress stitch if you prefer a subtle ridge or sewn seam.
How do I make sure motifs stay square and aligned?
Use pins to align motifs on a flat surface during joining; check periodically that rows remain square and countersink small adjustments by adding a balancing sc round if necessary.
What if my motif sizes vary slightly?
Add an extra sc round to smaller motifs or a tightening dec round to larger motifs before working scallop rounds. Blocking after adjustments is essential to match neighbors.
Stay in the Loop!
Get notified when we release new free crochet patterns and join our crafting community!