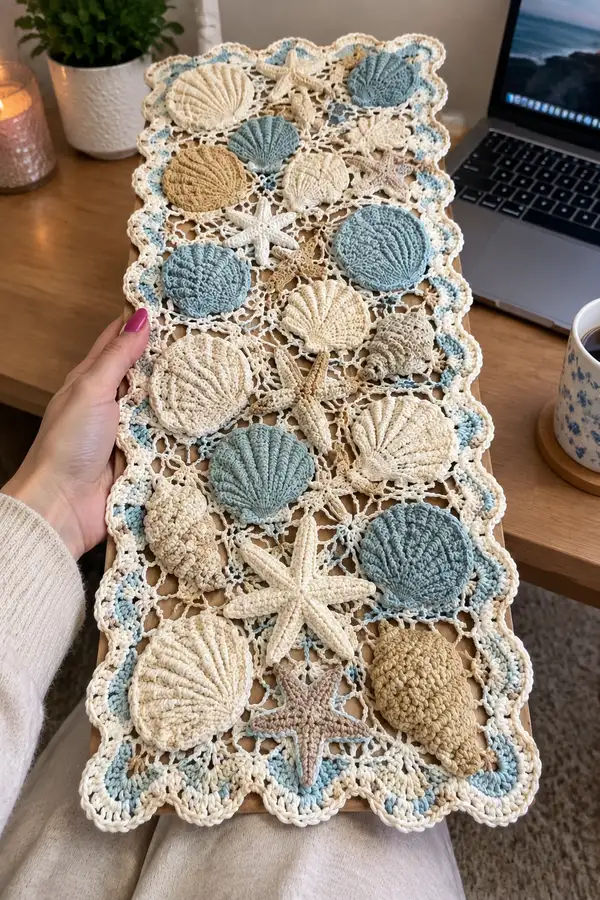
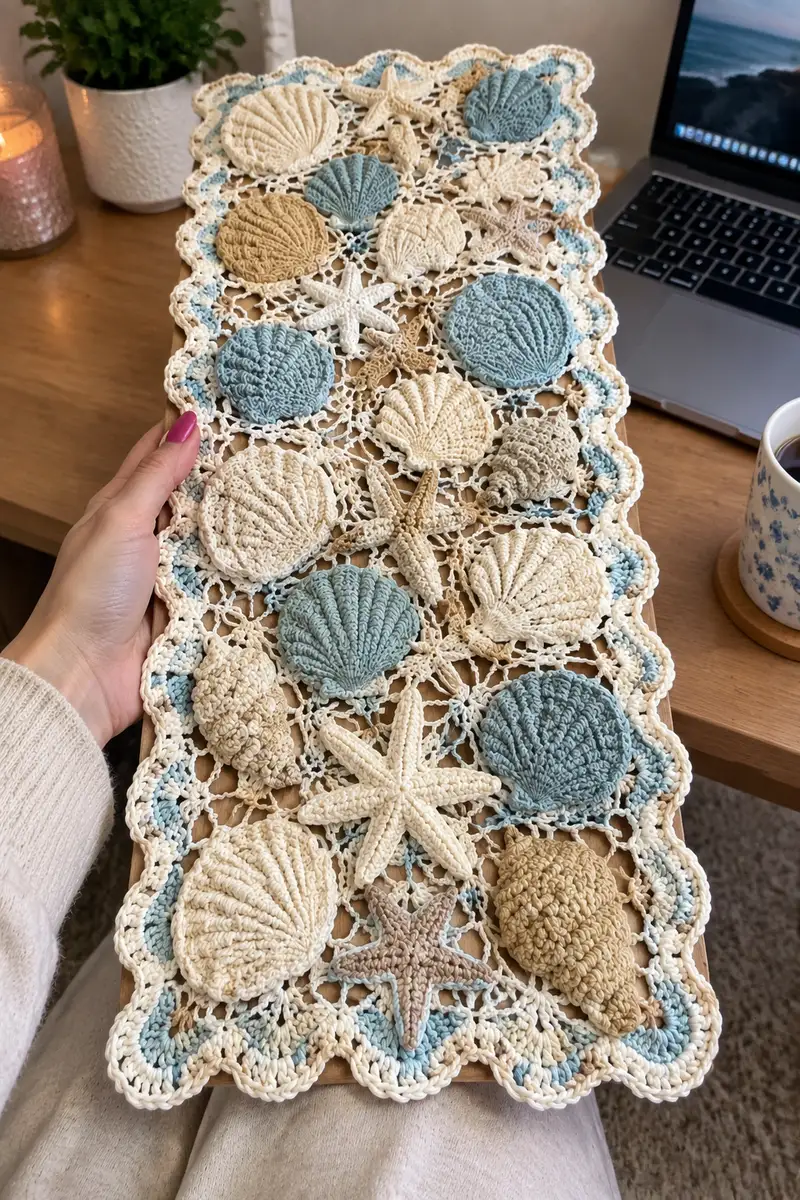
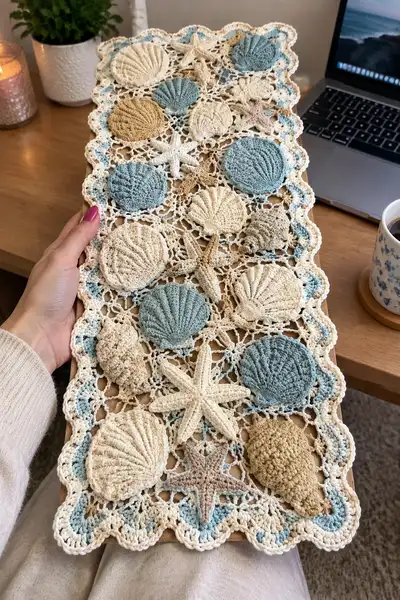
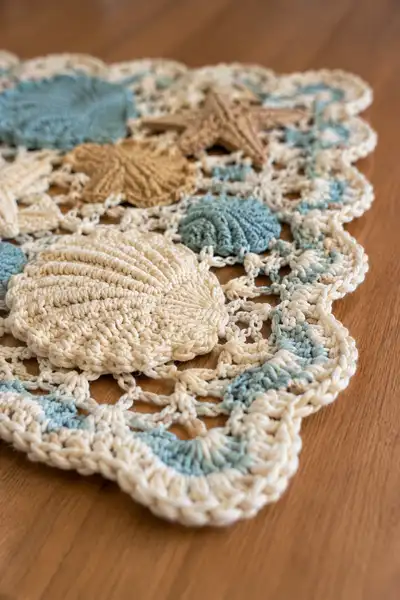
A delicate coastal-inspired table runner featuring raised 3D shells, starfish and conch motifs joined by an open lacy mesh and finished with a scalloped border. Soft cream, sand and sea-glass blues create a soothing palette perfect for seaside decor. Each shell is worked in rounds with textured ridges and joined into a lightweight lacy ground to form a long rectangular runner. Ideal for decorating a console, dresser or dining table.
Progress Tracker
0% Complete
— Notes and Gauge :
Info :
This table runner is constructed from multiple three-dimensional motifs (scallop shells, small round shells, conch shells and starfish) crocheted separately then joined by a lacy net. Gauge is not critical for pattern function but will affect final runner width. Using 3.5mm hook and worsted cotton yarn yields motifs approximately 6-7 cm across for large scallops and runner width about 25-30 cm depending on spacing and border. Work tightly on textured ridges for relief and a hook down size if your puff/post work looks loose.
— Large Scallop Shell (Make 6) :
Round 1 :
mr, ch1, 6 sc in ring (6)
Round 3 :
(1 sc, inc) x 6 (18)
Round 4 :
(2 sc, inc) x 6 (24)
Round 5 :
(3 sc, inc) x 6 (30)
Info :
These early increases create the flat base for the scallop shell. Keep rounds joined tightly so the shell cup is slightly domed. You may use 3.0mm hook for the first 5 rounds if you want a firmer center.
Round 6 :
1 sc in each st (30)
Round 7 :
1 sc BLO in each st (30)
Round 8 :
1 sc BLO in each st (30)
Info :
Working in BLO here begins to create a little ridge that will anchor the vertical ribs. Change to larger hook (3.5mm) if using smaller hook earlier for contrast in texture.
Round 9 :
Change to shell color if desired. *ch1, skip 1, 1 sc in next st; rep across to end* (creates slight scallop underside) (30)
Round 10 :
Ch1, *fpdc around next st (creating raised rib), ch1, sk 1* rep around to make 15 ribs (30 placeholder positions - you will place 15 ribs evenly)
Info :
We use fpdc ribs to create vertical ridges that radiate from the base to the edge. Space ribs evenly by placing them into every 2nd stitch across. Work gently but firmly with post stitches; this is the critical texture of the shell.
Round 11 :
*Working in front of the rib just made, (3 hdc in base of rib) to bulk the rib, sl st to next space* x15 (45) - note: counts changed because we added grouped hdc clusters around ribs
Round 12 :
Round of sc around base: 1 sc in each st around (45)
Round 13 :
(5 sc, inc) x 7 (56)
Info :
Begin shaping the scallop edge by adding increases. These increases create the shell flared rim. Keep an eye on counts; expand evenly.
Round 14 :
1 sc BLO in each st (56)
Round 15 :
(6 sc, inc) x 7 (63)
Round 16 :
*sc in next 3, 3 dc shell in next st, sc in next 3* around to create decorative scalloped rim (63)
Round 17 :
sl st into base of each shell, ch2, hdc in next st around to emphasize ridge. (63)
Round 18 :
Finish: sc around, dec evenly to tidy if needed to 60 sts. Fasten off leaving long tail for joining (60)
Info :
Block lightly with steam or wet blocking to flatten scallop slightly. Pin edges if necessary. Make 6 large scallops for the runner as pictured.
— Small Round Shell (Make 8) :
Round 1 :
mr, ch1, 6 sc in ring (6)
Round 3 :
(1 sc, inc) x 6 (18)
Round 4 :
(2 sc, inc) x 6 (24)
Round 5 :
1 sc around (24)
Round 6 :
1 sc BLO around to create shallow ridge (24)
Info :
For the smaller round shells we will create shallow ribs using FLO and tight stitches to keep the motif convex but flatter than the large scallop.
Round 7 :
*fpdc into next st, ch1, sk1* rep around making 12 ribs (24)
Round 8 :
In front of each fpdc, work 2 hdc clustered into the base to bulk ribs (24 clusters counted as 24 sts)
Round 9 :
sc around to tidy (24)
Round 10 :
Work small picot edge: *(sc, ch3, sl st into 3rd ch) across* to form decorative rim (24)
Info :
Fasten off leaving long tail for joining. These small round shells will be placed between larger scallops to create interest and rhythmic repetition.
— Small Scallop Shell (Make 6) :
Round 1 :
mr, ch1, 6 sc in ring (6)
Round 3 :
(1 sc, inc) x 6 (18)
Round 4 :
1 sc around (18)
Round 5 :
1 sc BLO around (18)
Round 6 :
Work fpdc ribs in every 2nd st to create 9 shallow ribs (18)
Round 7 :
sc around to finish (18)
Info :
These are slightly smaller than the large scallops but use similar shaping: ribs plus a little flared rim. Make 6 and alternate colors for contrast.
— Conch Shell (Make 3) :
Round 1 :
mr, ch1, 6 sc in ring (6)
Round 3 :
(1 sc, inc) x 6 (18)
Round 4 :
(2 sc, inc) x 6 (24)
Round 5 :
1 sc around (24)
Round 6 :
Working spirally, make 1 sc in next 6, 2 sc in next 2, *3 sc in next, 2 sc in next* repeat to create oval base (approx 30)
Info :
The conch is worked more as an elongated spiral rather than a flat disc. Do not join rounds; continue in continuous spiral for natural taper. Use stitch marker to track round beginnings every 6-8 rounds because counts will change with shaping.
Round 7 :
Work 2 rounds of sc increasing gently on one side only to form tapered spiral (approx 36)
Round 8 :
Start shaping ridge rows: *ch2, sk1, 1 fpdc into next st* across outer curve to form ridges (36)
Round 9 :
On the body, alternate 1 sc and 1 hdc in curve to produce texture; leave inner spiral slightly tighter (36)
Round 10 :
Decrease along the inner spiral side every 4th st to create tapered tip (reduce to approx 28)
Round 11 :
Work 2 more rounds of sc to firm shape, then create decorative shell lip by making small shell clusters (sc,row of 3 dc clusters) on outer edge (28)
Round 12 :
Finish with tight sc around and fasten off leaving long tail for sewing (28)
Info :
Conch shells will be three-dimensional; you may lightly stuff the wider portion for sturdiness with a small amount of fiberfill or simply leave unstuffed for a flatter look. Block carefully if stuffing to keep shape.
— Starfish (Make 4 Large, 4 Small) :
Round 1 :
With starfish color, ch5, sl st to form ring (or mr and 5 sc in ring), ch1 (5)
Round 2 :
Sc into ring: 5 sc to make small disc (5)
Round 3 :
*(ch5, sl st into next sc) x5* to form 5 arms scaffold - fasten off and join at next arm for working around arms
Info :
Starfish are worked flat then stuffed lightly if desired. Work each arm individually to shape and add texture using half double crochets and slip stitch ridges.
Round 4 :
Attach yarn at base of 1 arm, sc in base, hdc in next 2 sts along arm, 3 dc at tip, hdc down other side, sc in base. Fasten off and repeat for each arm (forms a plush 3D arm). After all 5, join center with a round of sc (approx 40 sts across all joins)
Round 5 :
Work a round of tiny picot edge around arms to mimic warty starfish surface: *(sc, ch3, sl st into 3rd ch) across edges* (40)
Round 6 :
Use surface slip stitch or small knots (sl st clusters) along arms to create raised bumps; place 3-4 bumps per arm (40)
Info :
For small starfish, reduce arm length by 30-40% and use fewer bumps. Fasten off leaving tails for sewing.
— Lacy Ground Motif (Make 18-24) :
Round 1 :
ch8, sl st to form ring (or mr, ch6 and 12 sc) - for openwork we prefer chain ring: mr, ch6, sl st to form small loop
Round 2 :
Into ring: *ch5, sl st* around 8 times to create 8 chain loops (8 loops)
Round 3 :
Join pairs of loops with sc bridging: *sc into loop, ch3, sc into next loop* repeat around to create small picot mesh (16 bridging points)
Round 4 :
Work a round of dc clusters into bridge points to stabilize (16)
Round 5 :
Create 8 larger open arches by chaining 7 and sl st into every other bridge point around (8 arches)
Info :
These lacy ground motifs are used as connectors between the 3D motifs. Their airy structure keeps overall runner weight light and allows scenery to peek through.
Round 6 :
Sc around and add small decorative 3-chain picots between arches for visual interest (approx 48 sts)
Round 7 :
Fasten off leaving long tail for joining with slip stitch; make enough motifs to fill between shells in the layout (18-24 motifs depending on spacing)
— Assembly Join Method :
Info :
Arrange your 3D motifs on a flat surface in the desired runner arrangement - alternate large scallops with small rounds, starfish at focal points and conch at ends. Pin motifs in place. Use the lacy ground motifs to bridge gaps. Join with single crochet or slip stitches so joins are neat on top and invisible on the underside. You may also use matching thread and whip-stitch to sew motifs together through the tails left earlier.
Round 1 (Join) :
With background cream, join at a lacy motif's joining point: sl st through edge of shell and into an arch of ground motif, ch3, sl st into next motif; continue joining around edges to connect three or four motifs into a panel strip
Info :
When joining, work onto the front right side to keep the join neat. Use single crochet join where you want sturdiness and slip stitch join for less bulk. Keep tension relaxed so the mesh remains airy.
Round 2 (Join) :
After several motifs are joined into a narrow strip, connect strips laterally with additional lacy motifs. Work uniform junctions by joining arch points to arch points, sc to sc, and anchors at shell rim points to chain spaces in the ground motifs.
Info :
Tip: Join one motif at a time into the runner, then pin the assembly to a blocking surface and steam-block gently to shape before doing the final scalloped border.
— Scalloped Border (Worked around assembled runner) :
Round 1 :
With cream yarn, working into outermost chain spaces around the whole runner, work 1 sc each 2 chain spaces to create a neat edge (work evenly across sides and ends). Count to keep even tension (this round will vary in stitch count depending on runner assembled shape)
Round 2 :
1 sc in each st around to build base (work a tidy round of sc across entire edge)
Round 3 :
*(ch3, 4 dc in next st, ch3, sl st into next)* repeat to form scallops. Adjust spacing so scallops align with shell positions and runner corners. Typical repeat: sc across 2 stitches then shell into next to keep rhythm.
Info :
For the photo look, the scalloped border uses alternate pale blue half-shells interspersed with cream scallops. To replicate, switch to blue yarn for every 3rd scallop on the perimeter, carrying cream inside if desired.
Round 4 :
Work one round of slip stitches to tidy scallops and stabilize edges. Fasten off and weave in ends. Block flat to set the final shape.
— Detailed Stitch and Texture Notes :
Info :
Use front post double crochets (fpdc) for ribs on all shells. Bulk ribs by making small clusters of hdc or sc at the base of each fpdc to thicken and create that raised rib look. For the round shells, consider working the ribs into FLO for a softer ridge, and for the large scallop work the ribs into full fpdc for pronounced texture.
Info :
Always mark the first stitch of rounds with a removable stitch marker; many ribs and increases change counts and a marker ensures consistent shaping. Use a smaller hook when working puff-like clusters to prevent gaps.
— Final Finishing Touches :
Info :
After joining, lightly steam-block on a towel or blocking board to flatten and even out the lacy mesh. Pin the scallops slightly curved to mimic the photo. If motifs shift, sew through the back loops only of motifs to stabilize positions invisibly. Trim and weave ends through several stitches and hide them on the underside.
Info :
Add optional embroidered lines using surface slip stitch or chain-stitched embroidery to emphasize ribs or to add small dots on starfish arms for more realism. Use contrasting sand tones or a slightly darker taupe for subtle shading.
Info :
If you want a longer runner, repeat the central rows of motifs until desired length. To make a table runner wider, add more lateral motif rows and adjust scalloped border to fit the new dimensions.
This coastal table runner brings seaside charm to any surface with sculptural shells and a lace-like net that lets woodgrain show through. Each textured shell and starfish is a small crochet sculpture—arranged together they form a relaxed, elegant accent for your home. Blocking and careful joining help the runner lie flat and look professional. 🧶🌊 Enjoy the soothing, hands-on process and treasure this piece for years to come. Share a photo when you're done — I'd love to see your version! ✨