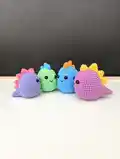
About This Colourful Mini Dino Amigurumi Pattern
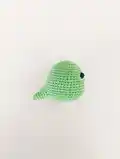
This pattern creates a delightful mini dino amigurumi worked primarily in DK (8 ply) cotton with a single-piece head and body construction. It features a crocheted tail and a series of small spikes for a playful silhouette. The finished dino is compact and perfect for keychains, gifts, or shelf decor.
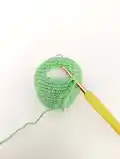
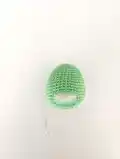
Detailed round-by-round instructions are provided along with placement notes for safety eyes and facial embroidery. No advanced techniques are required, making it a lovely quick-make project.
Why You'll Love This Colourful Mini Dino Amigurumi Pattern
I absolutely love this pattern because it turns simple stitches into a cheerful little character with minimal effort. I enjoy how versatile the design is — bright or pastel yarns both give fantastic results. The single-piece head and body construction keeps assembly simple, which I always appreciate for quick makes. Sewing the little spikes in a line feels so satisfying and instantly gives the dino personality. I also love that you can make several in different colours to create a tiny collection.
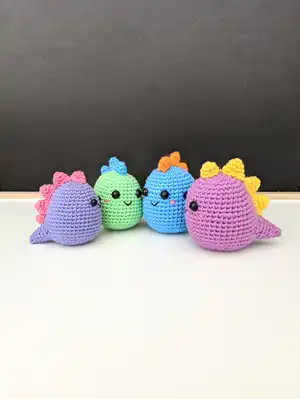
Switch Things Up
I love experimenting with colors on this mini dino — try pastel shades for a soft nursery set or neon brights for a playful look.
You can make the dino larger or smaller by switching yarn weight and hook size; bulkier yarn and a larger hook create a chunkier toy, while thinner yarn makes a tiny keychain-friendly version.
I often swap the safety eyes for embroidered eyes to make the toy safer for young children and to give it a hand-stitched charm.
Try adding tiny accessories like a crocheted bow, little scarf, or even a miniature hat to give each dino its own personality.
Change the spike color for contrast — a row of rainbow spikes or alternating colors gives a fun customized effect.
For a posable version, you can insert a light wire armature into the tail or body, but make sure to secure ends safely so they are not exposed.
If you prefer a flatter profile, reduce a round of increases early on to make the head slightly less rounded.
I sometimes embroider eyelashes or brows to change the expression from sweet to cheeky depending on where I place them.
Make a coordinating set in different colors and give them cute names — they make great party favors or little gifts.
Don't be afraid to mix yarn textures; a slightly fuzzy yarn for the spikes can add texture and make them stand out beautifully.
Common Mistakes & How to Fix Them
✗ Forgetting to use a stitch marker when working in continuous rounds causes you to lose track of round starts; mark the first stitch of each round with a stitch marker or scrap yarn to keep accurate counts.
✗ Placing safety eyes in the wrong rounds will misposition them relative to the face; place safety eyes between rounds 9 and 10 (st 12 and st 18) as instructed before crocheting the tail.
✗ Not stuffing gradually leads to lumps and misshapen sections; begin stuffing after the specified round and add small amounts at a time to maintain even shape.
✗ Pulling your yarn too tightly when closing the final stitches can distort the toy; keep even tension and weave the closing thread through the front loops gently before pulling to close.
✗ Skipping stitch counts during increases and decreases results in incorrect shaping; count your stitches after each round, especially after rounds with multiple increases or decreases.