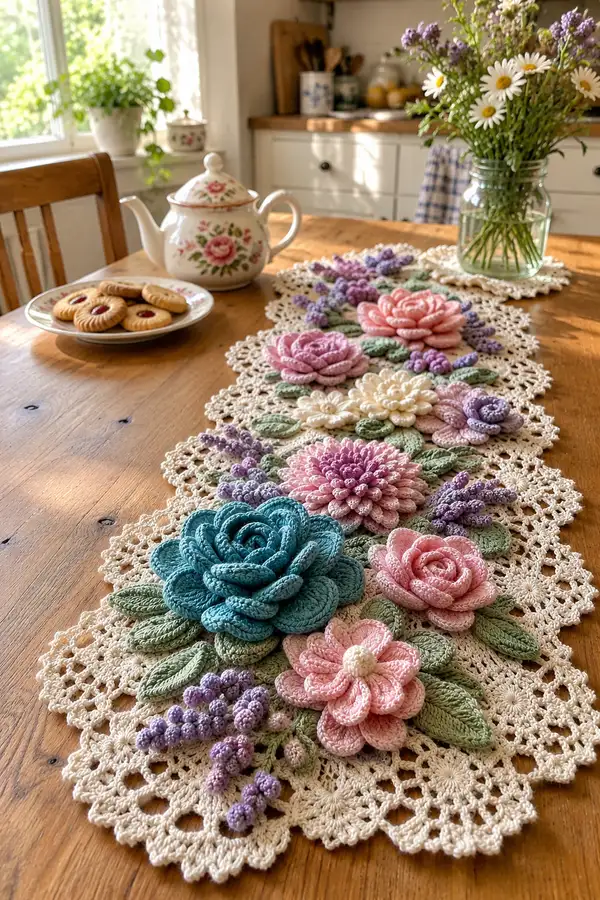
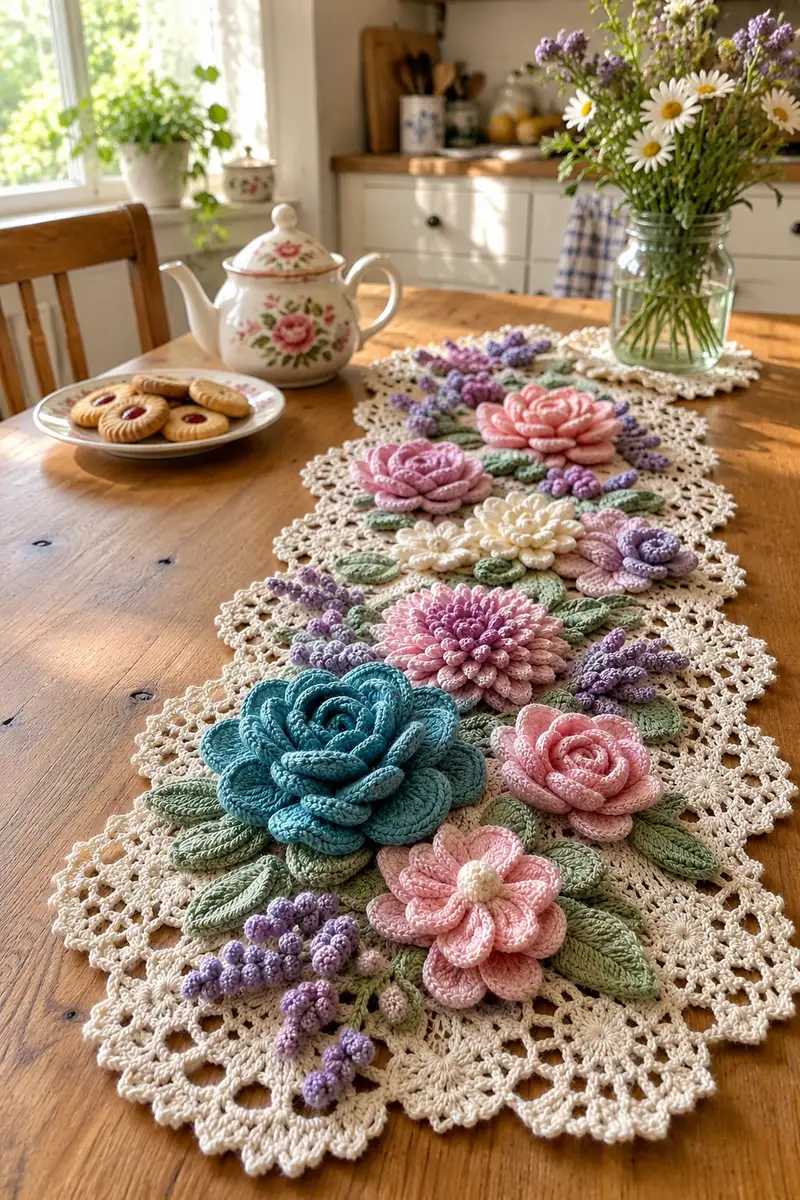
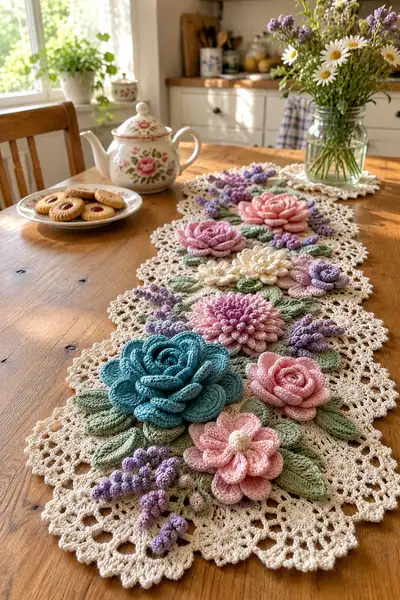
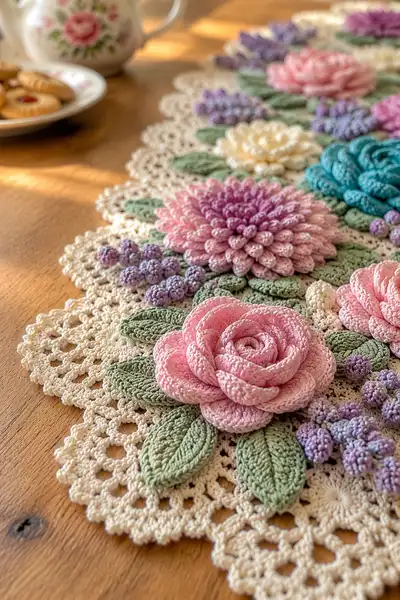
A romantic, vintage-inspired table runner featuring layered 3D roses, dahlias, lavender sprigs and textured leaves set on lacy doily motifs. This detailed pattern recreates the multi-motif runner shown — soft pastels, sculpted petals and a delicate scalloped edge for an heirloom centerpiece. Suitable for creating a statement dining table decoration or a long decorative shelf runner.
Progress Tracker
0% Complete
— Materials and Gauge :
Info :
Use worsted cotton yarn and a 2.5-3.0mm hook to achieve the crisp, sculpted look. Gauge is not critical for motif aesthetics but affects overall runner length. For reference, each base doily motif measures approximately 16-18cm across when blocked; adjust hook for desired sizing.
— Abbreviations & Techniques Reminder :
Info :
Read abbreviations carefully. Many flower petals are created using layered spirals, working into chains and into petal bases; leaves use BLO to create ridged veins. Work tightly for petals and bobbles; aim for consistent tension.
— Base Doily Motif (Make 7) :
Round 1 :
Make a magic ring, ch1, 8 sc into ring (8)
Round 2 :
Inc in each st around (16)
Round 3 :
(1 sc, inc) x 8 (24)
Round 4 :
(2 sc, inc) x 8 (32)
Round 5 :
(3 sc, inc) x 8 (40)
Info :
Keep the center rounds worked flat; if you see slight cupping, block while wet to flatten before continuing to shell rounds.
Round 6 :
1 sc in each st around (40)
Round 7 :
*Ch5, sk 2 sts, sl st in next st* around producing 8 ch-5 loops; sl st to first ch-5 to join (40 loops formed)
Round 8 :
Into each ch-5 loop: (sc, hdc, 3 dc, hdc, sc) — shell made in each loop (8 shells total). Fasten off and weave ends
Info :
Round 8 forms the first scalloped edge that will later be the joining edge for the next motif. Block doilies now to about 16-18cm across, pinning each scallop evenly.
Round 9 :
Rejoin at any shell point: ch1, sc in base of shell, ch3, sk 3 sts, sc in center of next shell base, repeat to create a chain-lace round around shells making 16 ch-3 spaces total; sl st to join
Round 10 :
Into each ch-3 space: (2 dc, ch2, 2 dc) forming 16 small arches. This expands the lace and gives a stable platform for assembling flowers
Round 11 :
1 sc in each stitch and in each dc across arches (count approx. 80 sc around depending on tension) (estimate 80)
Info :
If your stitch count differs by a few stitches, adjust by adding or skipping a sc in even intervals so the lace remains flat. Mark the topmost shell as the motif '12 o'clock' for placement consistency.
Round 12 :
*Ch4, sk 2 sts, sc in next* around creating decorative picot loops between stitches; sl st to join
Round 13 :
Work a round of (sc, ch2, sc) into every other ch-4 loop to create small raised loops for the outer scallop (approx 40 loops)
Round 14 :
Into each (sc, ch2, sc) loop: (3 dc, ch1, 3 dc) to form the large outer scallops; fasten off and weave ends
Round 15 :
Gently steam or wet-block, pin scallops evenly and allow to dry. Make 7 motifs for standard runner length; make extra for a longer runner.
Info :
Assembly uses seams along scallop edges; blocking ensures scallops match and reduces puckering when motifs are joined.
— Large Spiral Rose (Make 1 large teal rose) :
Round 1 :
With teal, ch36, join with sl st to form a ring without twisting (36 ch ring)
Round 2 :
Work a continuous spiraled petal strip into the ch ring: Row A: into each ch across work *(sc in next ch, hdc in next ch, dc in next ch, 2 dc in next ch) repeat across* ending with 54 sts approximately; do not join, continue spiraling
Round 3 :
Spiral Row B: *3 dc in next stitch, 2 dc in next stitch* across to create raised overlapping petals. Continue spiraling in same direction for shape — this creates the base petal spiral (approx 72 sts after second spiral row)
Info :
Work the spiral strip flat at first; when you have covered the ring twice, begin coiling the strip to form the rosette. Use a few sl sts through back of each coil to secure and maintain curvature.
Round 4 :
Roll the strip tightly from one end, pinning coils in place with sewing pins. As you coil, occasionally secure by inserting hook through coil edge and sl st through corresponding loops to keep the rose from unraveling.
Round 5 :
Sew the inner edge of the spiral to the base using whip stitch, catching several wraps of the spiral for security. Fasten off and weave ends. The assembled rose measures approx 7-8cm across depending on tension.
Info :
For extra volume, create two spiral strips and stack one offset on top of the other, sewing securely through the base; this produces the very full teal rose visible in the photo.
— Medium Rolled Roses (Make 4, pink shades) :
Round 1 :
Ch28, join to a ring (28 ch)
Round 2 :
Row: *sc in next, hdc in next, dc in next, 2 dc in next* repeat across making a graduated strip (approx 42 sts)
Round 3 :
Continue another spiral row of dc clusters: *3 dc in next, 2 dc in next* across. Finish strip and coil into a rose, sew base closed and weave ends.
Info :
Make two sizes by varying the initial ch length: 28 ch for medium, 22 ch for small. Tuck the centers by folding the first few coils inward when sewing to create a neat center bud.
— Large Dahlia (Make 1 big dahlia in pale pink / mauve) :
Round 1 :
Make a magic ring, ch1, 10 sc into ring (10)
Round 2 :
Inc in each st around (20)
Round 3 :
(1 sc, inc) x 10 (30)
Round 4 :
(2 sc, inc) x 10 (40)
Info :
This small disc forms the center hub. Dahlia petals will be applied in concentric rounds around it; estimate petals per round based on your stitch count (we used 40 petal bases).
Round 5 :
Petal Round 1: For each st around: *ch3, 3 tr in same st, sl st in next st* repeat 40 times to form 40 short petals; fasten off the round
Round 6 :
Petal Round 2: Rejoin at base between petals: *work into base sc: (ch4, 5 tr cluster, sl st) between each existing petal; stagger placement so petals sit between previous petals* (approx 40 petals)
Round 7 :
Petal Round 3: Add a larger petal set: rejoin and work *ch5, (7 tr cluster) sl st* between previous petals creating a third outer petal layer to form fullness; finish and fasten off
Info :
Use picots or small gathered stitches at petal tips for texture. Press petals inward slightly and tack each petal base to the central disc with a few secure stitches to prevent splaying.
— Small Round Flowers / Pom-Center (Make 3) :
Round 1 :
Make mr, 6 sc into ring (6)
Round 2 :
Inc in each st (12)
Round 3 :
(1 sc, inc) x 6 (18)
Round 4 :
Front-loop puff round: *fpdc cluster (yarn over, insert, pull up loop 3 times, close cluster) in next st, sl st in next* around to create textured centre bobble surface (9 puff clusters)
Info :
These small pom-centers are used as centers for other flowers or as tiny filler blooms; sew them flat against petals or leave slightly domed for dimension.
— Leaves (Make 20 large leaves and 30 small leaves) :
Round 1 :
Ch12, sc in 2nd ch from hook, hdc in next, dc in next 3, hdc in next, sc in next 3, sl st in last ch (leaf base completed, approx 11 sts)
Round 2 :
Working along opposite side of starting chain: sl st into next ch, sc, hdc, 3 dc, hdc, sc across to form symmetrical leaf (approx 22 sts total including both sides)
Round 3 :
Edge Ribbing: Working in BLO of most rounds, return along one side with sc in each st to create a ridge. For medium-large leaf: BLO sc along one side only to create a prominent vein. Fasten off and weave ends.
Info :
For a more pronounced rib, work an additional round of BPdc (back post double crochet) around the center vein and block leaves slightly cupped to match natural curvature. Make leaves in sage green and mix two shades for a vintage look.
— Lavender Sprigs and Bud Clusters (Make multiple clusters) :
Round 1 :
For each lavender stalk, ch10, sl st into second ch from hook to make a small tight chain curl if desired, or leave as plain ch for stem (10)
Round 2 :
Working along chain, make tiny bobbles: *(sl st, (yarn over, insert, pull up loop 3 times, pull through all) = small bobble) into alternate chs creating a row of 6-8 bobbles* fasten off leaving long tail for sewing (approx 6 bobbles)
Round 3 :
For a fuller sprig, make 3-4 such bobble chains of decreasing length and sew together side by side to replicate the clustered look (assemble into 1 sprig with approx 6-12 bobbles total)
Info :
Keep bobbles small and dense; use a slightly smaller hook for tight, grape-like buds. Sew sprigs in clusters of three to mimic the photo arrangement.
— Small Curled Blossoms (Make 6) :
Round 1 :
Ch14, join into a ring with sl st; Row: *sc in next ch, hdc in next, dc in next 2, tr in next 3, dc in next 2, hdc in next, sc in next* — finish strip and curl into small rosette. Tack centre with a few stitches (approx 14 sts)
Info :
These small curled blossoms add variety around larger blooms. Use gradient colors or ombre effects by joining yarns of slightly different tones.
— Petal Shaping & Stiffening Notes :
Info :
To keep petals sculpted, lightly dampen and pin into shape on foam and allow to dry, or use a light spray starch. For cotton yarn, starching gives long-lasting structure without making petals brittle.
— Edging and Motif Joining (Row-by-row join) :
Round 1 :
Lay motifs in desired order. Using cream yarn and whip stitch or sl st join, join adjacent scallops: align outer scallops and sew through both motif scallop bases with a ladder-like stitch to create a flat seam.
Round 2 :
Once all doilies are joined in a line (7 motifs), work an even sc round around the entire joined motifs to tidy connections and fill small gaps (approx 220 sc around runner depending on join tension)
Info :
When joining motifs, use small, even stitches and block again after joining to ensure the runner lies flat. Insert pins at 2-3cm intervals along each seam while stitching.
Round 3 :
Decorative scallop edging: *Into every other sc along outer edge work (sc, ch3, sc) to create small scallop spaces* continue along the whole runner edge
Round 4 :
Into each ch-3 space work (3 dc, ch1, 3 dc) for a large scallop border; repeat around entire runner; fasten off and weave ends
Info :
Adjust scallop frequency to fit the exact stitch count of your outer edge so scallops terminate neatly at runner ends. Add a final picot round (ch3, sl st) into each scallop peak for a crisp finish if desired.
— Positioning the Floral Appliques :
Info :
Arrange large rose, dahlia and medium roses along the center axis of the joined doilies, leaving about one scallop width at each short end for balance. Use pins to secure placement: largest rose offset slightly from center toward one end, dahlia opposite, medium roses interspersed.
Round 1 :
Place leaves around flower bases before final sewing to act as a foundation. Tuck small blossoms and lavender clusters between petals to mimic the layered, bouquet-like composition.
Info :
Take photographs of your pinned layout before sewing so you can refer back for consistent placement. Start by sewing down the heaviest pieces first (large rose and dahlia) and then fill gaps with leaves and small buds.
— Sewing Down Flowers and Leaves :
Round 1 :
Use a matching thread and yarn needle. For spiral roses: sew through the bottom-most wraps and into the doily base across 6-8 evenly spaced points to prevent the rose from flipping. For stacked spirals, sew through lower strip and base doily as well.
Round 2 :
Sew dahlia petals down by catching each petal base with a single invisible stitch into the doily base; take care to keep stitches small and hidden beneath petals (approx 40 stitches total distributed among petal bases)
Info :
When anchoring bobble clusters (lavender), use several stitches through the base chain and stem to secure each cluster against the doily, then add two or three stitches holding neighboring clusters together so they form a natural bundle.
Round 3 :
Attach leaves by sewing through their central vein into the doily; leave the leaf tips slightly free to create lift. Add 1-2 small whip stitches at the leaf tip and mid-rib for security without flattening the leaf.
Info :
Use a blunt needle for sewing through thick spiral bases to avoid splitting yarn fibers; if necessary, create a small pilot hole with a sharp darning needle first.
— Decorative Finishing Touches :
Round 1 :
Weave all loose ends on the underside of the runner into the adjacent stitches and trim close. If desired, use a few tiny anchored stitches to secure ends where the underside may be visible.
Round 2 :
Optional: add a light spray of starch to the entire runner and re-pin into shape to enhance texture and stability.
Info :
For longevity, wash gently by hand or spot clean as needed; avoid machine washing if petals are heavily starched or reinforced as they may lose shape.
— Care and Storage :
Info :
Store flat or rolled with tissue between layers to prevent crushing petals. Avoid compressing heavy items on top of the runner; if petals flatten, lightly mist and re-block to restore dimension.
— Final Notes and Tips :
Info :
Experiment with color placement before sewing. Swap the large rose for any color to create seasonal versions (spring pastels, autumn rusts). Make extra small petals and bobbles to fill gaps for a richer texture.
Completing this runner brings the cozy charm of a cottage garden right to your table! Each layered petal and tiny lavender bud is a stitch of care and patience, creating a centerpiece full of texture and vintage romance. Enjoy arranging and rearranging the florals until they're just right — it's a delightful slow craft. 🧶🌸🌿