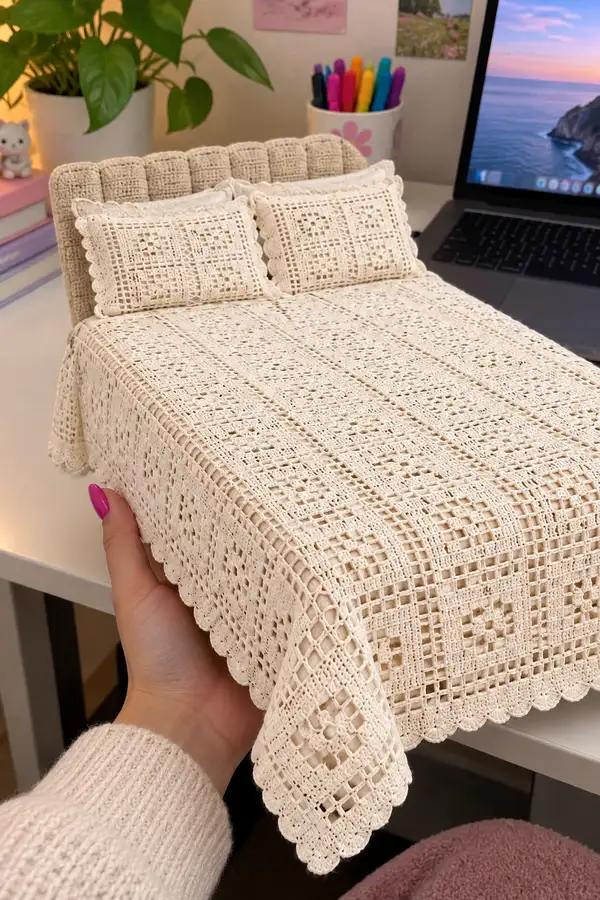
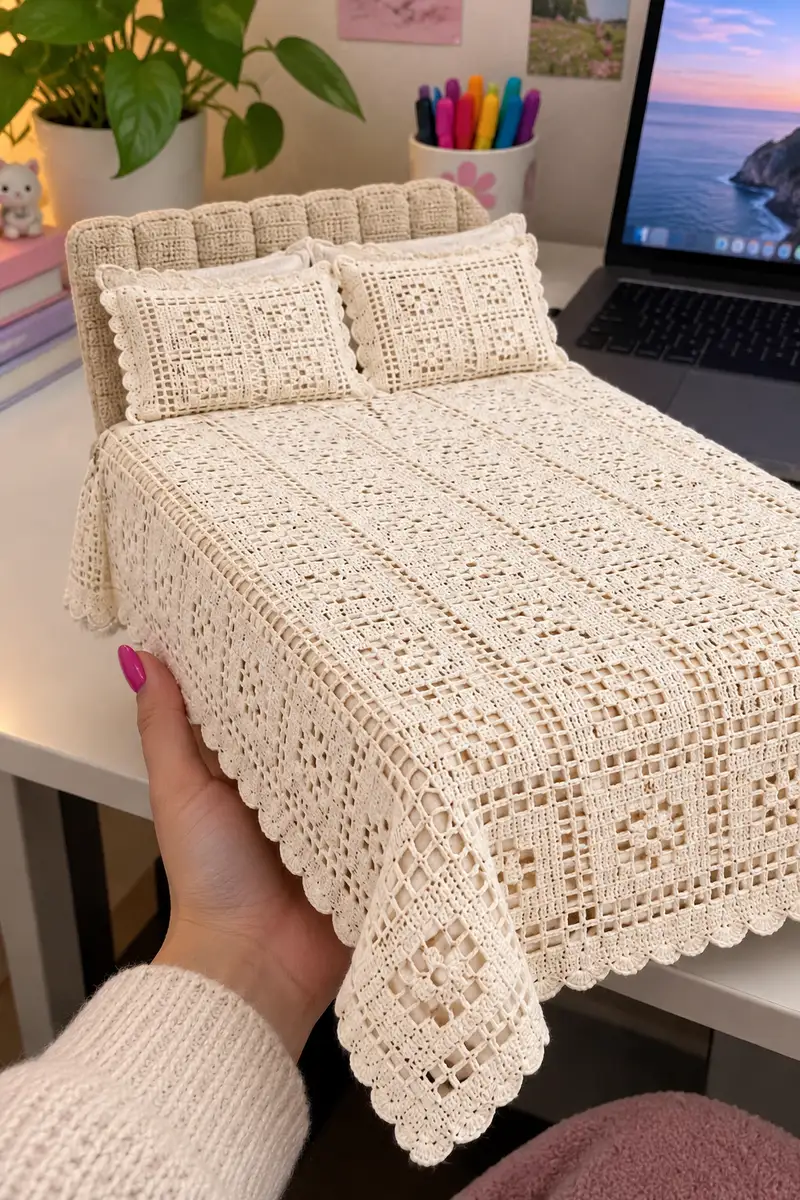
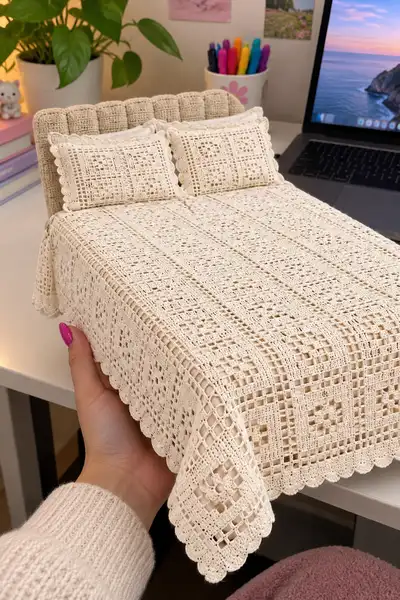
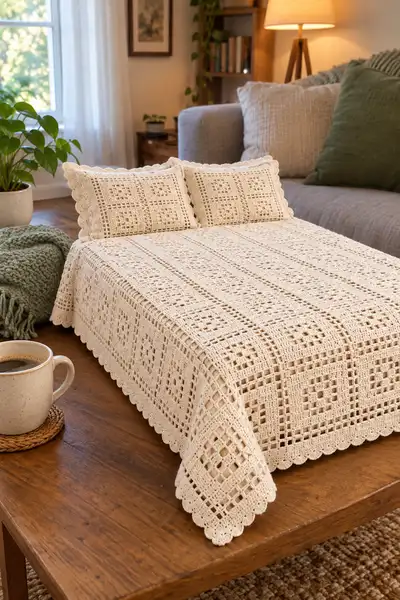
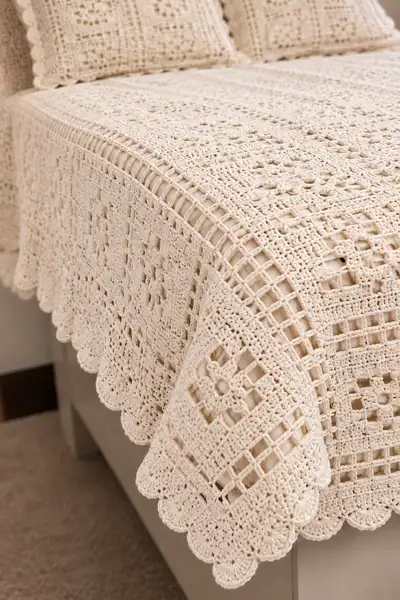
A warm, vintage-inspired farmhouse bedspread worked in delicate cream cotton with open filet-style squares and a scalloped edging. The pattern uses repeating square motifs joined into panels and finished with a ladder-like join and scallop border. The airy, lacy texture and subtle raised stitches give a timeless, handmade look that drapes beautifully over a bed. Perfect for a cozy neutral bedroom or a thoughtful gift for someone who loves classic crochet home decor.
Progress Tracker
0% Complete
— Motif (make multiple identical squares) :
Round 1 :
Ch6, sl st to first ch to make a ring. Ch3 (counts as first dc), 2 dc in ring, ch2, 3 dc in ring, ch2, 3 dc in ring, ch2, 3 dc in ring, sl st to top of beginning ch3. (4 clusters of 3 dc with ch2 corners; square formed)
Info :
Work right into the chain ring and keep your tension even. Use a stitch marker at the first dc to mark the start of each round. This motif is constructed as a classic 4-corner square with open f ilet rows forming a grid.
Round 2 :
Sl st into next 2 dc to reach corner ch space. Ch3, 2 dc, ch2, 3 dc in same ch2 corner, *ch1, sk next 3 dc cluster to next corner, in corner ch2 work 3 dc, ch2, 3 dc*; rep from * to * around, sl st to top ch3. (Corner clusters remain; ch1 spaces establish first row of mesh)
Round 3 :
Sl st to center of side. Ch3, 2 dc in same sp, ch1, *(3 dc in side sp), ch1* across side until corner, in corner work 3 dc, ch2, 3 dc; continue around and sl st to top ch3. (Side clusters with ch1 mesh between clusters)
Round 4 :
Sl st to corner space. Ch3, 2 dc, ch2, 3 dc in corner, *ch3, sk next side clusters to form open filet panel, work 3 dc, ch1 in the corner ch1 if present*; continue to next corner, sl st to beginning. (This round increases open filet spaces to create the lattice look)
Info :
Count your ch-spaces across each side to ensure symmetry. After Round 4 your motif should be square and laying flat — block now if you notice curling.
Round 5 :
Ch3, 2 dc in first corner, ch2, 3 dc in same corner, *(ch1, 3 dc in next ch-3 sp, ch1) across side until corner, in corner 3 dc, ch2, 3 dc*; sl st to top. (Begin defining the small floral center and the first full lattice)
Round 6 :
Ch3, 2 dc, ch2, 3 dc in corner; *work 3 dc in each ch-1 or ch-3 side space as established, ch1 between groups*; sl st to join. (Motif approx 6 clusters per side depending on gauge)
Round 7 :
Ch1, sc in base of ch3 to create a tidy edge, *ch3, sk 3 dc, sc in next ch1 space; rep across to corner; in corner sc into corner ch2*; continue around and sl st to first sc. (This sets a small sc grid along edges to prepare for later join rows)
Info :
If you prefer a slightly denser motif, change ch3 mesh spaces to ch2 mesh spaces for less openness. Keep notes of the mesh count so all motifs match.
Round 8 :
Ch3 (counts as dc), dc in same st, *(ch1, sk next ch3 sp, (dc, ch1, dc) in next sc space) across side until corner, in corner work dc,ch2,dc; rep around, sl st to top ch3. (Creates a framed look around the center with small open squares)
Round 9 :
Ch3, 2 dc in corner space, ch2, 3 dc in corner; *1 dc in each side dc group, ch1 between every two side dc to maintain filet grid, continue to corner and repeat*; sl st to join. (Motif widening; stitch counts per side increase by predictable groups)
Round 10 :
Ch1, sc across to create a tidy line: sc in each dc and ch1 across side, in corner sc in ch2; continue around and sl st. (This round flattens the motif and creates a consistent base for joining)
Info :
At this stage, each motif should measure consistently. Block a sample motif to the desired square size (for example 18x18 cm for a twin throw sample) — motif size will determine total number you need.
Round 11 :
Ch3, 2 dc, ch2, 3 dc in corner; *ch3, sk established groups to build wider filet rows, work 3 dc in the mid side space, ch1 between cluster groups; rep to corner*; join. (Expands mesh to create visible open squares that show bed linen beneath)
Round 12 :
Repeat Round 10 (sc tidy round) across the entire motif to square off edges and maintain consistent stitch counts. Sl st to join. (This gives a crisp border to the motif before joining)
Round 13 :
Ch3, 2 dc, ch2, 3 dc in corner; work (3 dc, ch1) groups across sides in same established pattern but shift placement by half-a-group to create an offset lattice; sl st to join. (Adds texture and a subtle raised line when worked consistently across motifs)
Round 14 :
Ch1, sc in each dc and ch1 around to tidy the square; sl st to join and fasten off leaving a 20cm tail for the join-as-you-go step. (Fasten off and block to exact square dimensions before assembly)
Info :
Make motifs as many as required for your bed size: for a twin bed approx 12 x 18 motifs (216 motifs) at 18cm each, for a double add columns/rows accordingly. For demonstration sample, this pattern will outline making panel sections and a full scallop border.
— Join-As-You-Go Strips (connecting motifs into rows) :
Round 15 :
Join first two motifs: With right sides facing, pick up the 20cm tail from motif B, join with a sl st into the corner sc on motif A corresponding to corner placement. Ch1, sc into each sc along the side of motif B working through back loop only of motif B and front loop of motif A to create a neat ladder join: sc through BLO of B and FLO of A for each sc across the edge until you reach the next corner; in corner make sc into corner on both motifs. (This join forms a tight ladder seam with visible vertical bars)
Info :
Work slowly for the first two joins to ensure corners align. Use pins to hold the motifs evenly while you pick up both loops and crochet through for the neatest ladder seam possible.
Round 16 :
Continue joining additional motifs to extend the strip: for each new motif align so that meshes line up and repeat the ladder join method across the side. After joining 6 motifs, fasten off and weave in ends. (Build long rows/panels this way)
Round 17 :
Info :
If you want a less visible join, use whip stitch through back loops of both motifs instead of the ladder sc. The ladder join is recommended as it creates the raised vertical ribs seen in the sample bedspread.
Round 18 :
After forming rows of motifs, join rows together: with two complete motif rows, align motifs so that vertical ladder seams fall in straight columns. Using join-as-you-go technique from motif B to motif A, sl st into corner and work sc across into paired loops as before, matching each motif-to-motif intersection carefully. (This creates a grid with raised join columns)
Info :
Keep a consistent tension during the row-to-row joins or the whole spread will ripple. Block each joined strip flat before joining strips to maintain straight edges.
Round 19 :
When three or more rows are joined, work a reinforcement ladder row along the long seams: attach yarn at one long side and work a round of 'hdc in each sc and ch1 pair' along the vertical seam to stabilize. Fasten off. (This creates the subtle raised bars seen between panels)
Round 20 :
Info :
Measure as you join: measure current assembled width and length every 4 rows to ensure you are matching your target bed dimensions. Adjust number of motifs per row if needed.
— Full Bedspread Assembly (panel joining and field rounds) :
Round 21 :
Lay out assembled rows into your full bed configuration on a blocking board or flat workspace. Use pins to match outer edge points and make sure corner motifs sit perfectly square. Join panels in the same ladder sc method at motif seams, ensuring vertical ribs line up. Continue until full field of motifs covers bed top with desired overhang.
Info :
If you plan to make a larger bedspread, add central panels and work outward symmetrically to keep joins balanced. Use removable stitch markers at intersections to mark matching points for precision.
Round 22 :
Once field is joined, work a tidy sc round around the entire assembled field: attach yarn at a corner, ch1, sc evenly around working 3 sc in each corner ch2 to maintain flat corners. Count sc across each side to make sure sides are consistent. (This round sets the base for the border)
Round 23 :
Work a mesh foundation round: ch4 (counts as tr+ch1), *sk next sc, tr in next sc, ch1* repeat around; in corner work (tr,ch2,tr) in corner space; join. (This establishes a laddered tr mesh that echoes the interior lattice)
Info :
Keep ch-1 spaces consistent; this round is the visual frame between the motif field and the outer border. If your spread is large, work two rounds of tr mesh for additional framing before beginning scallops.
Round 24 :
Ch3, dc into each tr and into each ch1 space across the foundation for a stable top-row; in corners work dc,ch2,dc. Join and fasten off. (This evens the edge and prepares for decorative border rounds)
Round 25 :
Info :
At this point you should find the whole assembly lying flat and square. If you notice any slight wave, pin and steam-block the entire spread to reset the fabric before continuing to edging rounds. Blocking here yields a much neater scallop finish.
— Border: Ladder Rim and Outer Scallops :
Round 26 :
Attach yarn at center of one side. Ch1, sc around working 1 sc in each dc and ch1 space from previous round. For very long sides, place a marker at the halfway point to keep scallops symmetrical. Join. (This is the working base for the ladder rim)
Round 27 :
Work ladder rim: ch6 (counts as tr + ch3), sk next sc, tr in next sc; *ch3, tr in next sc; rep across side; in corners work (tr,ch3,tr,ch3,tr) to wrap corner; continue around and join with sl st. (This produces tall ladder bars that echo vertical join columns)
Info :
Keep the ch-3 spaces even; if your spread is wider than sample, you can ch4 for deeper bars but keep consistent throughout. The ladder rim visually separates the motif field from the scalloped edge.
Round 28 :
Working into each ch-3 space, sc across: attach at first ch3, sc, ch3, sc into each ch3 space along side to create little arches; in corners maintain (sc,ch3,sc) to hold corner shape. Join. (This rounds the ladder into a series of even arches as base for scallops)
Round 29 :
Begin scallop foundation: *5 dc in next arch, sk next arch, sl st in next arch*; rep along side; in corners work 7 dc to accommodate turning. Join. (This gives the initial petal bump for scallops)
Info :
For neat scallops, work the first scallop round while the spread is flat and lightly pinned. This keeps scallops even and prevents distortion when later drying.
Round 30 :
Refine scallops: into each 5-dc shell work (sc, ch2, 5 dc, ch2, sc) to create a fuller scallop with a deep inner loop; in corners increase to (sc, ch2, 7 dc, ch2, sc). Join. (This is the decorative top of the scallop visible in photos)
Round 31 :
Top scallop picots: Into the center dc of each scallop work *(sc, ch3, sl st into third ch from hook) to create a small picot finish; continue along each scallop to add a delicate raised rim. Join and fasten off. (This finalizes the scallop edge)
Info :
If your yarn is softer and you prefer a less pronounced scallop, substitute the 5-dc shells with 3-dc shells and adjust corner increases to 5 dc. Always test-shell first on a sample edge.
— Decorative Raised Columns (optional reinforcement) :
Round 32 :
To create the raised column effect shown in the sample: work a round of front post dc (fpdc) along each ladder seam column. Attach yarn at top of a ladder seam, ch2, fpdc around the post of the corresponding dc from that seam down the full length, working evenly to the bottom, then join. (This gives the ribbed visual that divides larger panels)
Info :
Use fpdc to maintain a raised ridge without significantly adding weight. If using fine thread, use a slightly smaller hook to keep these posts tight and visible.
Round 33 :
Repeat fpdc column around all ladder seams where you want visible ribs. Fasten off and weave ends securely. (Work across entire bedspread so columns line up straight from top to bottom)
Info :
Check alignment by sighting down the length of the spread; if a column sits crooked, unpick and rework the post stitches to correct the line before blocking.
— Pillow Shams (make 2) :
Round 34 :
Make pillow motif: follow Motif Rounds 1-14 but stop at Round 12 for a slightly smaller square if desired. Block to size of pillow front (e.g., 18x28 cm for a small lumbar). Make two motifs for sham front and one large motif or even a plain sc rectangle for the back.
Round 35 :
Edge sham front with 1 round sc, then 1 round of ch3 arches (as per border Round 28), and finish with smaller scallops: in each arch work 3 dc shell, sc between shells. Fasten off. (This creates the tiny scalloped trim around pillows)
Info :
For pillow backs you can use a simple envelope closure: make a rectangle of sc rows sized to overlap the pillow insert by 3-4cm on each side and seam the sides leaving a 10cm overlap for insertion.
Round 36 :
Sewing pillow pieces: Place front and back right sides together, sew three sides with a slip-stitch seam or whip stitch, turn right side out and insert pillow form, then close remaining side using invisible ladder stitch. (Weave ends and block lightly.)
Info :
Pillows look especially charming with an extra layer of tiny picot edging along the sham to echo the bedspread scallops.
— Finishing Touches and Reinforcement Rounds :
Round 37 :
Inspect all joins and weave in any ends that protrude. For stability sew a line of invisible slip-stitch reinforcement along major seams on the wrong side, 3-4mm in from the seam, using matching yarn.
Info :
Reinforcement will prevent seam stretching over time, particularly useful if the bedspread will be laundered frequently.
Round 38 :
Blocking final spread: wet block or steam-block the entire bedspread pinned to square to the correct dimensions. Allow to dry completely before using or storing. (Proper blocking is the single biggest contributor to professional-looking results.)
Round 39 :
Care instructions: Hand wash gentle with mild detergent and reshape while damp. Air dry flat. Iron lightly with cloth cover on low heat if desired to re-flatten scallops after washing. (Always test a corner before machine washing.)
Info :
Store folded with acid-free tissue to protect cotton fibers and maintain scallop shape. Consider adding a light starch spray during blocking if you desire a stiffer, more vintage look.
— Alternate Option: Continuous Panel Method (for advanced crocheters) :
Round 40 :
Instead of making separate motifs, you can work continuous rows of filet squares using the same mesh pattern: ch (multiple of motif repeat)+foundation for width, then work back-and-forth rounds building corner and floral motifs into a continuous grid. This requires charting the motif in filet chart format and consistent counting.
Info :
Continuous panel construction eliminates seams but requires careful counting and measuring. It's an advanced technique recommended for experienced crocheters comfortable reading charts and maintaining straight edges over long rows.
Round 41 :
When using continuous panels, finish with the same ladder rim and scalloped border described above. Adjust the number of ladder chains to fit the spacing of your mesh rows.
Info :
Test a small swatch of continuous filet to determine the required multiple for correct motif repeats across your desired width. Keep notes for consistent replication.
— Measurements, Counts and Scaling Guidance :
Round 42 :
Sample gauge: If a single motif after rounds 1-14 measures approx 18cm square with a 3.5mm hook and sport cotton, a twin bed (approx 137x190cm) will need roughly 8 motifs across by 11 motifs down (88 motifs) to cover the top with minimal overhang. For a small double add 2 motifs to width or length. (Adjust according to your blocked motif size.)
Info :
Allow 10-20% extra yarn when planning; cotton behaves differently when blocked and seams use additional yarn. Keep a small reserve skein from the same dye lot for final repairs.
Round 43 :
Stitch math: If each motif side contains 6 cluster groups and each cluster group consumes approx 3 dc plus ch-1 spaces, estimate chain and stitch counts per motif side to ensure joins align—mark corners and midpoints prior to join. (Practical counting keeps your grid perfect.)
Info :
For large spreads work in sections that can be blocked and joined individually. This is easier on your shoulders and keeps motifs flat and manageable.
Round 44 :
Edge integrity: After completing border rounds and scallops, check for any loose shells. Reinforce by sewing through the internal base of the scallop with matching yarn to hold shape during use. (Discreet reinforcement is invisible when done carefully.)
Info :
Finish by trimming all tails close and weaving them into adjacent posts for invisibility. Use a little fabric glue at ends if you expect heavy washing, but test first on a scrap.
Completing this farmhouse bedspread is such a rewarding project — every square comes together into a timeless, lacy whole that feels like a treasured heirloom. The scalloped edges and raised join columns add a beautiful, hand-crafted finish that makes any bedroom feel cozy and intentional. Enjoy the soothing rhythm of repeating motifs and the satisfaction of blocking and joining a large, elegant piece. 🧶✨ Add a cup of tea and relax into the process — this is make-to-keep crochet joy! 🛏️