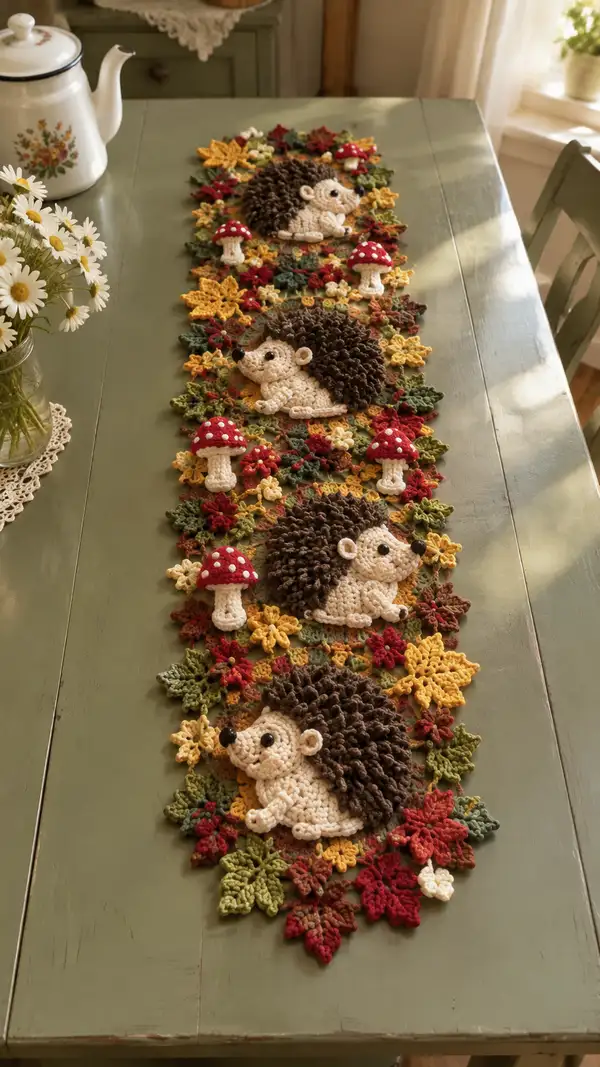
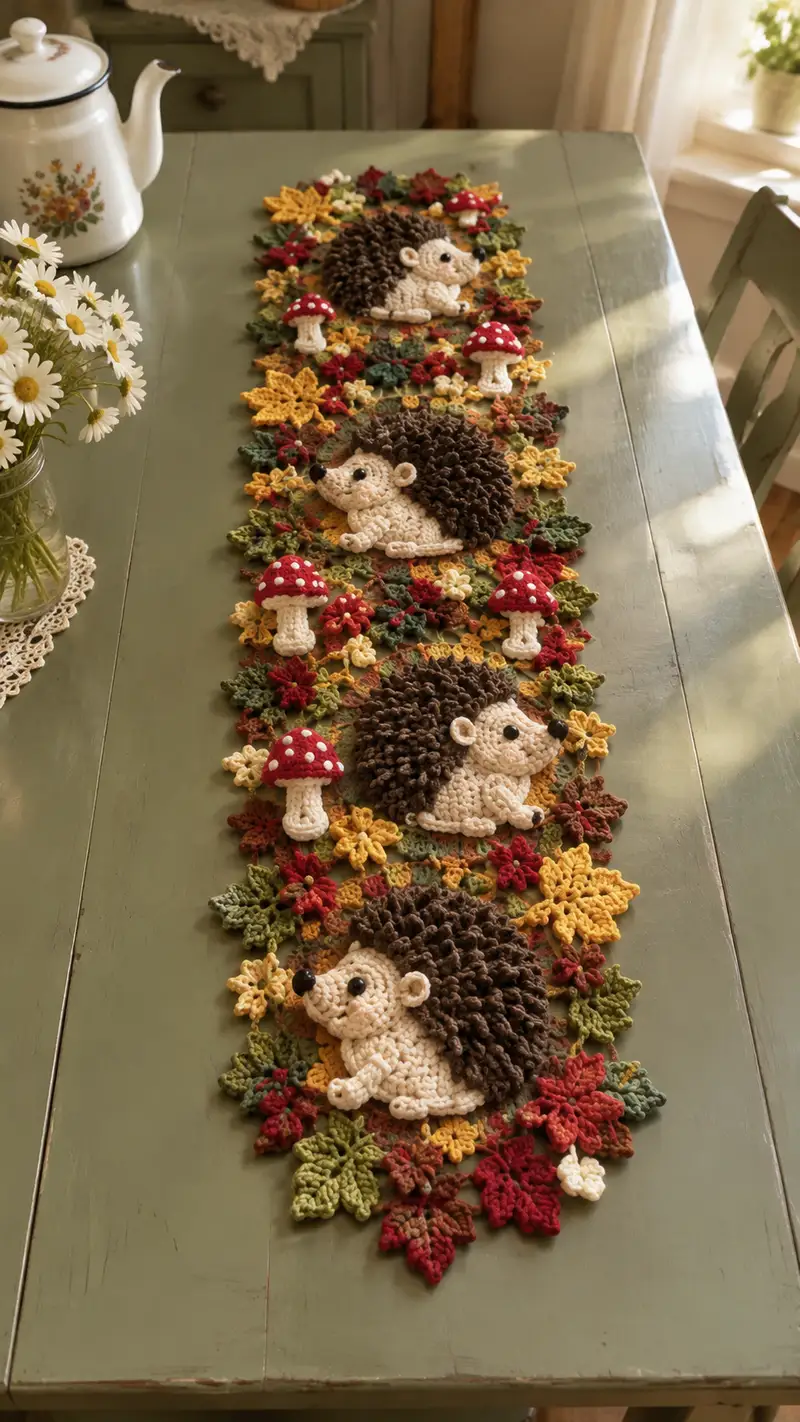
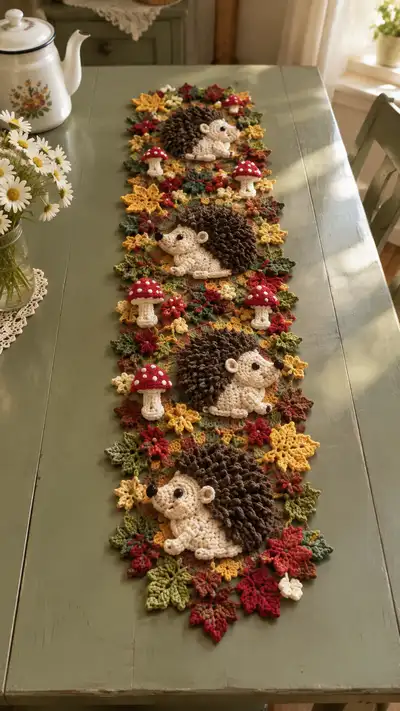
Bring autumn charm to your table with this Cream and Brown Hedgehog Table Runner. The design features three endearing hedgehog appliques with looped brown spines, scattered red-and-white toadstools, and a leafy mosaic of warm fall tones. Each hedgehog is crafted as a flat applique and joined into a floral-leaf background to form a long, elegant runner. Perfect for seasonal decor or a gift for nature lovers.
Progress Tracker
0% Complete
— Hedgehog Head / Face (Make 3)
Round 1 :
6 sc in magic ring (6)
Round 3 :
(1 sc, inc) x 6 (18)
Round 4 :
(2 sc, inc) x 6 (24)
Round 5 :
(3 sc, inc) x 6 (30)
Round 6 :
(4 sc, inc) x 6 (36)
Info :
Use cream/beige yarn for face. Place a stitch marker at round start. Keep tension slightly loose to allow the face to sit flat on the body applique later.
Round 7 :
1 sc in each st (36)
Round 8 :
1 sc in each st (36)
Round 9 :
(4 sc, dec) x 6 (30)
Round 10 :
(3 sc, dec) x 6 (24)
Info :
Position safety eyes between rounds 6-7, approximately 6-8 stitches apart (centered on the face) depending on desired expression. Eyes should be close to the front-facing side of the head where you will later form the snout.
Round 11 :
(2 sc, dec) x 6 (18)
Round 12 :
(1 sc, dec) x 6 (12)
Info :
Lightly stuff the head with a small amount of fiberfill just to give shape to the face. Do not overstuff; this is an applique and should remain fairly flat.
Round 14 :
Fasten off leaving a long tail. Use tail to whip stitch center closed if needed, then weave in end toward where head attaches to body (do not cut tail; use it for attachment).
Info :
For snout shaping, we will add a small separate snout piece and sew it to Rounds 5-8 area. See Snout section next.
— Snout (Make 3)
Round 1 :
6 sc in magic ring (6)
Round 3 :
1 sc in each st (12)
Round 4 :
(1 sc, dec) x 4, 1 sc x 4 (8)
Info :
Stuff snout lightly to give slight bulbous shape for nose placement. Use a small amount of fiberfill only enough to keep shape when sewn on.
Round 5 :
Fasten off leaving long tail for sewing. Sew snout to head so it slightly protrudes from the face and aligns with the safety eyes. Sew on black nose bead or embroider nose with black yarn at center front of snout.
— Facial Details and Ears (Make Ears x 6: 3 pairs)
Ear Round 1 :
5 sc in magic ring using cream yarn (5)
Ear Round 2 :
1 sc in each st (5)
Ear Round 3 :
(1 sc, inc) x 2, 1 sc (7)
Ear Round 4 :
1 sc in each st (7)
Info :
Sew ears to top side of head behind eyes at rounds 4-6. Slight fold at base makes them cupped. Use tail to sew and then weave ends securely into head.
Face Embroidery :
Using brown or dark brown yarn, stitch small eyebrows above eyes with 2-3 tiny stitches. Add a small curved line to create smile if desired. All embroidery should be secured with knots hidden in back and ends woven in.
— Hedgehog Base / Belly (Flat Applique Base) (Make 3)
Round 1 :
6 sc in magic ring using cream yarn (6)
Round 3 :
(1 sc, inc) x 6 (18)
Round 4 :
(2 sc, inc) x 6 (24)
Round 5 :
(3 sc, inc) x 6 (30)
Round 6 :
(4 sc, inc) x 6 (36)
Info :
This base will be a slightly flattened oval to which the head and spine are attached. Keep rounds even and do not overstuff; this remains a flat applique that lays on the leafy background.
Round 7 :
1 sc in each st (36)
Round 8 :
1 sc in each st (36)
Round 9 :
(5 sc, inc) x 6 (42)
Round 10 :
1 sc in each st (42)
Round 11 :
(6 sc, inc) x 6 (48)
Round 12 :
1 sc in each st (48)
Info :
If you prefer a slightly smaller body, stop at Round 10 (42 sts) and continue; the pictured hedgehogs are full and generous, so 48 sts gives a good size for the spine coverage.
Round 13 :
1 sc in each st (48)
Round 14 :
(6 sc, dec) x 6 (42)
Round 15 :
(5 sc, dec) x 6 (36)
Info :
Flatten body gently and use tail to sew on to leaf background later. Place the head so that the snout overlaps the front-most edge slightly; stitch head to body through the back loops for a neater seam if desired.
Round 16 :
(4 sc, dec) x 6 (30)
Round 17 :
1 sc in each st (30)
Round 18 :
Fasten off leaving long tail for attachment. Weave tail through rounds to stabilize shape then leave tail for sewing to leaf background. Do not stuff.
— Belly Ridge and Paws (Make 3 sets of 4 paws)
Belly Ridge Round 1 :
Attach cream yarn to front edge of base where belly sits. Ch1 and 1 sc in each st across front 12-14 stitches to create a gentle ridge. (12-14)
Belly Ridge Round 2 :
1 sc in each st back to starting point; sl st to join. Fasten off and weave in ends.
Paw Round 1 :
6 sc in magic ring (6)
Paw Round 3 :
1 sc in each st (12)
Paw Round 4 :
(1 sc, dec) x 4 (8)
Info :
Make four paws for each hedgehog (two front, two back). Stuff lightly only if you want a slightly raised paw; pictured paws are very flat and slightly stuffed optionally.
Paw Round 5 :
Fasten off leaving a long tail for sewing. Sew two front paws near the face edge and two back paws under the lower belly. Slight overlap with base for firm attachment.
— Looped Spine Section (Make 3)
Info :
Spines are created using loop stitches worked over several rounds on the back half of the hedgehog base. Use brown yarn and a slightly larger hook (3.5mm-4mm) if needed for pronounced loops. Keep loops uniform in height (~1.0-1.2 cm) and tight enough to hold their shape.
Round 1 :
Join brown yarn at the top-back edge of the hedgehog base (approx at Round 10 of base). Ch1. 1 sc in first st, then begin loop stitch sequence: *Yarn over, insert hook, pull up a loop about 1.0cm long and hold it on hook, yarn over and complete sc into same st*; repeat across back 24 sts (24 loops and sc base)
Round 2 :
Turn slightly overlapping into next round: 1 sc in each st across (24)
Round 3 :
Repeat loop stitch across same 24 sts (24 loops and sc base)
Round 4 :
1 sc in each st across (24)
Info :
Repeat loop/sc rounds alternating for a total of 10 loop rounds (5 loop rounds + 5 sc rounds alternating) to create a thick field of spines. Stop when the spine area visually matches the photo—dense and raised.
Round 5 :
Loop stitch across (24)
Round 6 :
1 sc in each st (24)
Round 7 :
Loop stitch across (24)
Round 8 :
1 sc in each st (24)
Round 9 :
Loop stitch across (24)
Round 10 :
1 sc in each st (24)
Round 11 :
Fasten off and weave in ends through the base to secure. Trim loops selectively to create a rounded silhouette if you prefer a cut-pile look; pictured runner features many intact loops for curly, tufted texture.
Info :
If you want a cut-pile (bristly) effect, use small scissors to cut selected loops evenly across rounds. Work slowly to maintain symmetry.
— Mushroom (Make 6)
Stem Round 1 :
Using cream/white yarn, 6 sc in magic ring (6)
Stem Round 3 :
1 sc in each st (12)
Stem Round 4 :
(1 sc, dec) x 4 (8)
Stem Round 5 :
1 sc in each st (8)
Info :
Fasten off stem leaving tail for sewing. Stuff lightly if you want a three-dimensional mushroom; the pictured mushrooms are lightly stuffed for a firm but slightly squishy stem.
Cap Round 1 :
Using red yarn, 6 sc in magic ring (6)
Cap Round 3 :
(1 sc, inc) x 6 (18)
Cap Round 4 :
(2 sc, inc) x 6 (24)
Cap Round 5 :
(3 sc, inc) x 6 (30)
Info :
Cap is slightly domed; if stuffing, add a small amount before closing. Pictured caps are sturdy and maintain dome shape with very little stuffing.
Cap Round 6 :
1 sc in each st (30)
Cap Round 7 :
(3 sc, dec) x 6 (24)
Cap Round 8 :
(2 sc, dec) x 6 (18)
Cap Round 9 :
Fasten off leaving a long tail for sewing. Sew cap to top of stem centering carefully. Add small white spots by embroidering small flat circles with white yarn in varying sizes and spacing.
Info :
For more pronounced spots, sew tiny white crocheted circles (ch 2, 6 sc in ring) and attach to cap. Secure all spots through cap fabric.
— Leaf/Flower Motif (Many Pieces to Make and Join)
Round 1 :
Using green or variegated yarn, ch 5, sl st to first ch to form ring. Ch2 (counts as first hdc), 11 hdc into ring, sl st to top of ch2 (12 hdc)
Round 2 :
Ch1, sc in same st. *Ch4, sl st into next st* around to create small picot loops between stitches. (12 ch-4 loops)
Round 3 :
Change to leaf color; into each ch-4 loop work: (sc, hdc, 3 dc, hdc, sc) to form each petal/leaf point. Repeat around for 12 petals.
Info :
This motif will be the basic unit of the leafy background. Vary colors (gold, rust, olive, burgundy) to create the pictured autumn mosaic. Make many motifs — the runner pictured uses approximately 60-70 motifs total depending on spacing; you will join them edge-to-edge.
Round 4 :
After final petal, sl st into base to secure. Fasten off leaving tail for join-as-you-go if desired.
Leaf Variant (Larger Maple Shape) Round 1 :
Ch 6, join to form ring. Ch3 (counts as first dc), work 11 dc in ring (12 dc)
Leaf Variant Round 2 :
Ch1, *sc in next dc, ch5, sl st in same dc* repeat to create deeper points across; finish and fasten off. Use a mix of these variants to mimic the runner texture.
Info :
Make motifs in several colorways. Layout the motifs on a large work surface in the runner shape and position hedgehogs and mushrooms on top to determine placement. Join motifs using slip stitch or single crochet join-as-you-go method for a lacy but stable fabric.
— Joining Motifs and Runner Assembly
Info :
Lay out the motifs in rows; this runner uses three hedgehog focal points evenly spaced with scattered mushrooms. Alternate leaf and flower motifs to create a flowing edge. Join motifs by working Round 4 of each new motif into adjacent motif edges with slip stitches to form secure joins.
Join Round 1 :
With motif A on table and motif B ready, align edges. Into motif B last round, when you reach a joining point, sl st into the corresponding stitch of motif A instead of chaining; continue around to join at several contact points (3-5 joins per motif). Fasten off when secure.
Info :
For stronger join and less visible seam, use matching yarn and small single crochet joins rather than slip stitch. Block motifs lightly if needed to flatten and even edges before joining.
Hedgehog Placement :
Position hedgehog body atop a cluster of motifs centered in three equidistant positions along the runner. Using the long tail from the hedgehog base, whip stitch through motifs beneath and around the base to secure. Ensure head, paws and snout are all sewn flat and stable.
Info :
When sewing hedgehogs, work from the inside out, securing the base first, then attach head and paws. Tuck the looped spines slightly into surrounding motifs for integrated look—catch loops gently with a couple of stitches to hold them in place.
— Border and Finishing Edging
Edging Round 1 :
Once all motifs are joined and hedgehogs are attached, work a round of single crochet around entire runner edge using a contrasting or matching variegated yarn to tidy edges. Work 1 sc in each exposed stitch and 3 sc in corner points to form slight scallops.
Edging Round 2 :
For decorative scallop, *skip 2 sts, 5 dc in next st, skip 2 sts, sl st in next st* around. This makes a festive leaf-like scallop that echoes motif shapes.
Info :
Weave in all tails on the back side into the joined seams. If desired, steam block lightly on low setting with cloth over runner to set shape—do not press directly on looped spines; reshape spines by hand if needed.
— Final Notes and Optional Variations
Info :
For a denser runner, reduce spacing between motifs and add more small 3-4 stitch filler motifs. To create a longer or shorter runner, add or remove full motif rows and adjust hedgehog placement proportionally.
Optional :
To make hedgehogs with trimmed cut-pile spines instead of loops, after completing loop rounds, carefully trim loops to desired length with scissors. For a curly look, leave loops intact.
Info :
Secure safety eyes with washers on back prior to final sewing. If the runner is intended for young children or will be laundered frequently, consider embroidering eyes and nose instead of using safety parts for longevity and safety.
This Cream and Brown Hedgehog Table Runner is a joyful blend of texture and autumn color—three charming hedgehogs, tufted spines, and cheerful mushrooms create a cozy focal point for any table. The join-as-you-go motif assembly makes it a satisfying project of many small, meditative pieces that come together beautifully. I hope you enjoy the playful details as much as I do—happy stitching and warm seasonal decor awaits! 🍂🧶