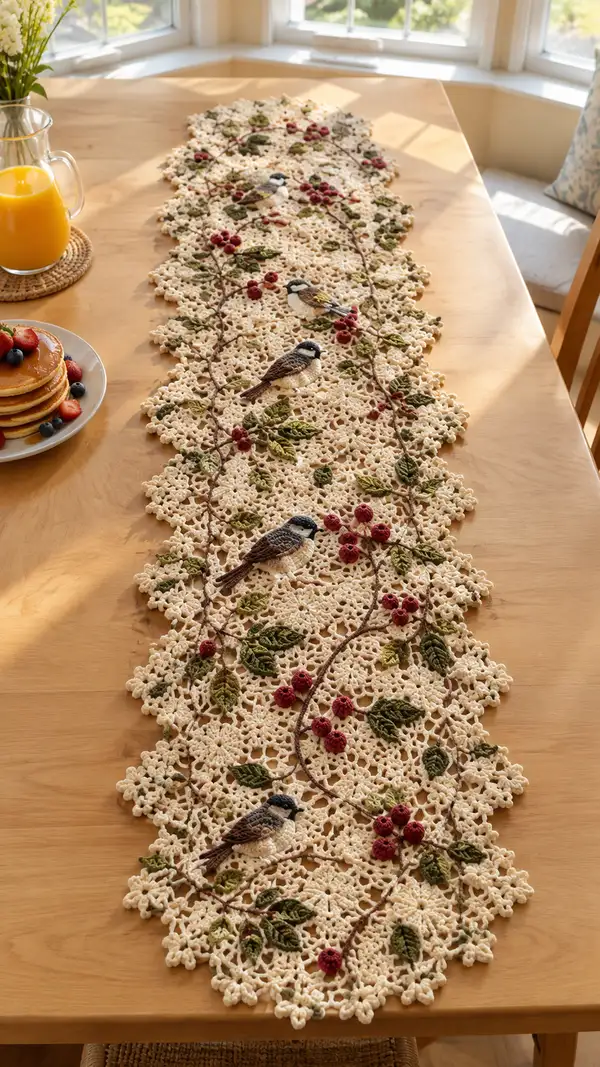
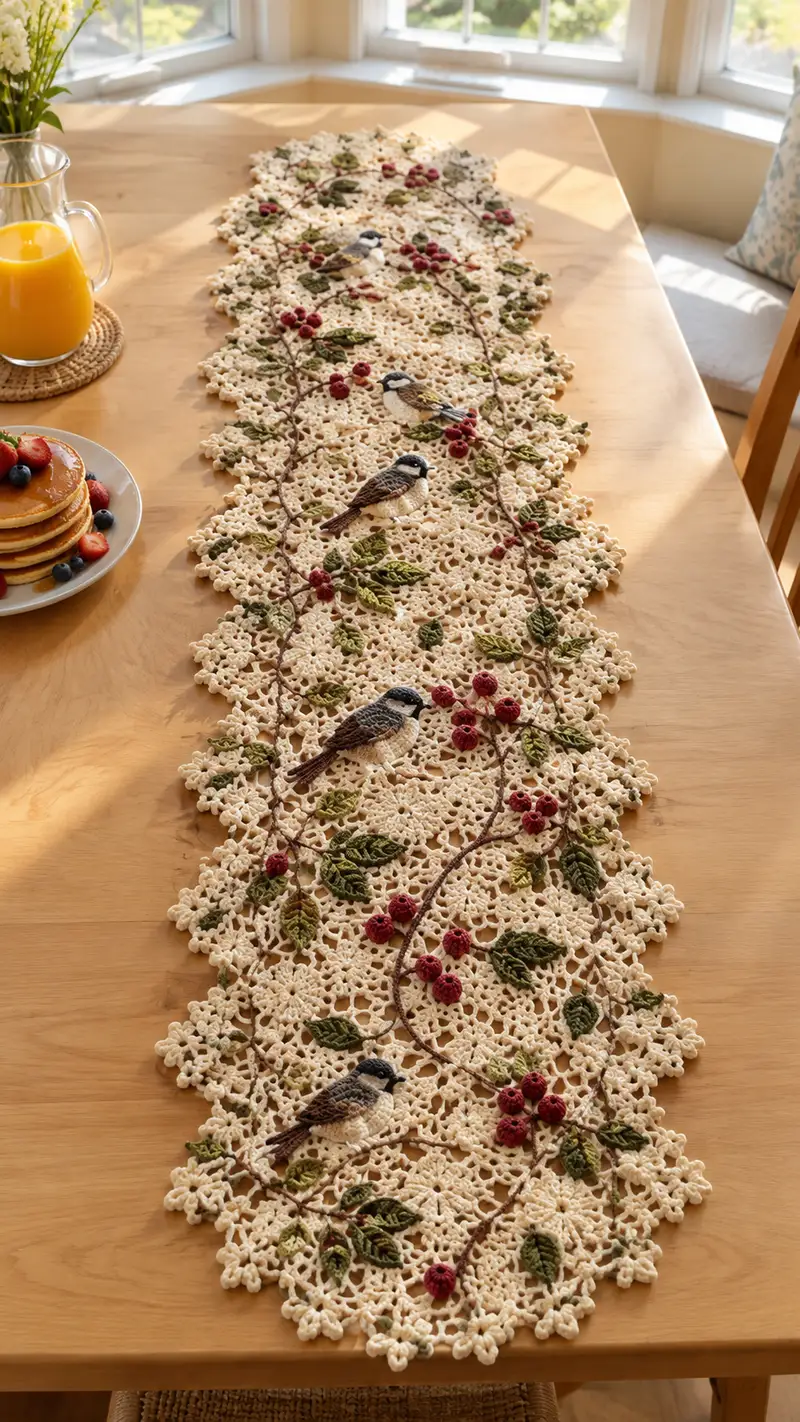
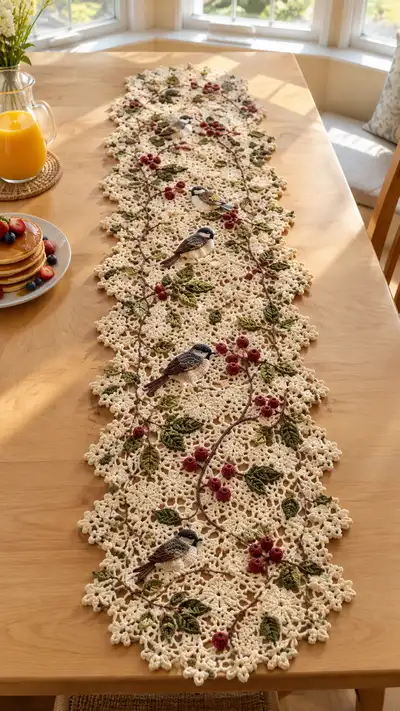
A delicate cream lace table runner embroidered with burgundy berries, olive-green leaves and three charming chickadee motifs. This runner features interconnected floral medallions with raised 3D berries and appliqued birds for a richly textured, vintage-inspired centerpiece. Perfect for seasonal tables or everyday charm, the design combines openwork crochet with surface embroidery and applique techniques.
Progress Tracker
0% Complete
— Overview :
Info :
This runner is constructed from repeating cream medallion motifs joined to form a long runner approximately 10 medallions across lengthwise (see finished size notes). Each medallion is embellished with appliqued leaves, berries and chickadee birds. Work motifs flat, block to shape, then join-as-you-go or sew together. Add surface vines and 3D berries last. Adjust number of medallions to desired length.
— Gauge & Finished Size :
Info :
Gauge: one finished medallion measures approximately 11cm (4.25in) across when worked in DK/ light worsted with 3.5mm hook and blocked. Runner shown composed of 10 motifs lengthwise x 3 motifs across center width for an oblong runner approx 32-36 inches by 90-100 cm. Change hook or yarn weight to modify size.
— Key Techniques :
Info :
Techniques used: lace medallion construction, cluster stitches, picot edging, join-as-you-go, appliqued motifs, surface chain embroidery, mini puff/popcorn/cluster for 3D berries, layered leaf shaping. Use stitch markers and wet blocking for best finish.
— Motif Medallion (Make many) :
Round 1 :
6 sc in magic ring, pull tight (6)
Round 2 :
6 inc around (12)
Round 3 :
(1 sc, inc) x 6 (18)
Round 4 :
(2 sc, inc) x 6 (24)
Round 5 :
(3 sc, inc) x 6 (30)
Info :
Work rounds 1-5 tightly and evenly to form a firm center. Keep tension consistent to avoid a domed medallion.
Round 6 :
*ch3 (counts as dc), 2 dc in next st, ch2, sc in next st, ch2, 3 dc in next st* repeat around joining with sl st to top of first ch3. This creates six petal clusters and results in a decorative round; stitch counts translate to 6 cluster groups with chain spaces.
Round 7 :
In each ch2 space: (ch1, sc, ch1, 3 dc, ch2, 3 dc, ch1, sc, ch1) across all six spaces; join with sl st. This creates a lacy petal framework.
Info :
Use contrasting stitch definition: if your yarn is soft, use a slightly smaller hook for these rounds to keep the joins defined.
Round 8 :
Work small picot edging at each petal point: *ch3, sl st in 3rd ch from hook (picot), sc in next 3 sts along petal point* repeat around creating a delicate scallop.
Round 9 :
*Into the top of each 3-dc group: (3 tr, ch3, 3 tr), sl st into next sc (corner)* repeat to form a lacy star overlay. Work evenly to keep six major points.
Round 10 :
In each ch3 corner space: ch1, 5 dc, ch3, 5 dc, sl st to next corner. This expands medallion to a fuller lace disc with defined corners for join-as-you-go points (6 main corners).
Info :
Block medallion flat while making multiples. Blocking opens lace and evens motif shape which is essential for join consistency later.
Round 11 :
*Between corner clusters: (ch2, sc, ch2, 3 dc cluster) in each side space* repeat around making 6 side clusters. This sets up the delicate grid scaffold for leaves and berries.
Round 12 :
Work decorative chain-loop round: *sl st, ch5, sk 3 sts, sl st in next sc* repeat around to form looped lace; use sl st joins to maintain tension and even loops.
Round 13 :
*In each ch5 loop: (sc, ch3, sc) making small decorative arches; sl st to next base stitch* repeat around. This gives the clustered floral-lace texture across motif.
Info :
At this point the medallion edge will be open. If you prefer a slightly denser medallion, work the following rounds with a 3.0mm hook to tighten the edge.
Round 14 :
*Working on edge points: (sc, picot, sc) in each small arch. Make 6 larger picot-edged points to add texture. Maintain symmetry around motif.*
Round 15 :
*Join two adjacent arch spaces with (ch3, sl st) to draw the lace slightly inward and create the scalloped outer silhouette. Repeat between every adjacent pair of arches.*
Round 16 :
Final outer fastening round: sc evenly around the entire motif, working 2 sc in larger outer points to maintain flat edge, finishing with sl st and fasten off. Expect approx 84-96 sc around depending on tension. (Estimate 90)
Info :
Make the desired number of medallions for your runner length. The sample runner uses 10 medallions end-to-end with staggered placement; you may adjust for table size.
— Joining Medallions (Join-as-you-go or sew) :
Info :
Lay motifs in final arrangement. You may join-as-you-go on round 16 by replacing fasten off sl st with sl st into adjacent motif's edge stitches to connect motifs. Alternatively block all motifs then whipstitch them together from the back for a flatter seam.
Round J1 :
If join-as-you-go: When working final sc round on motif, at join points replace sc with sl st into corresponding sc on adjacent motif, then continue sc on working motif. Join at 4-6 points per motif to secure flat joining.
Info :
Use stitch markers temporarily to match points on adjacent motifs. For seams, use the same cream yarn to keep joins invisible. Reinforce corners with extra stitches if runner will be handled frequently.
— Bird Applique Components (Make 3 birds) :
Overview :
Each bird is worked in separate pieces and appliqued to the runner: body base, breast (cream), wing (brown), tail (brown), head cap (charcoal/black), beak (tiny triangle), small embroidered eye. Use 3.0mm hook for defined shaping. Work pieces flat with shaping and layering for a sculpted look.
— Bird Body (Flat oval body) :
Round 3 :
(1 sc, inc) x 6 (18)
Round 4 :
(2 sc, inc) x 6 (24)
Round 5 :
(3 sc, inc) x 6 (30)
Info :
These first rounds create a compact oval center for the bird torso. Work tightly but not so tight that the piece curls.
Round 6 :
1 sc in each st around (30)
Round 7 :
1 sc in each st around (30)
Round 8 :
(3 sc, dec) x 6 (24)
Info :
Start to form the oval shape by decreasing on the underside. Place stitch marker at start of round to keep orientation for later wing placement.
Round 9 :
(2 sc, dec) x 6 (18)
Round 10 :
(1 sc, dec) x 6 (12)
Round 11 :
Fasten off leaving long tail for sewing. Slightly stuff the center very lightly with fiberfill to give a gentle dome under the wing area, do not overstuff as this is a flat applique.
Info :
Sew neck edge (short end of the oval) onto runner at desired position, leaving top free for layering a cream breast piece and wing.
— Bird Breast (Cream Overlay) :
Round 3 :
(1 sc, inc) x 6 (18)
Round 4 :
1 sc in each st around (18)
Round 5 :
1 sc in each st around (18) - shape into a teardrop slightly by working sl st at one point to bring it narrower.
Info :
Pin breast on top of body oval and baste with long running stitches before final sewing to ensure symmetrical placement. This overlay provides the light cream chest of the chickadee.
— Bird Wing (Make 3) :
Round 1 :
6 sc in mr with brown tonal yarn (6)
Round 3 :
(1 sc, inc) x 6 (18)
Round 4 :
(2 sc, inc) x 6 (24)
Round 5 :
1 sc in each st around (24)
Round 6 :
Shaping: (3 sc, dec) x 6 (18)
Round 7 :
(2 sc, dec) x 6 (12)
Round 8 :
Fasten off leaving tail for sewing; flatten wing and sew along center curve to create a folded layered effect. Add a few surface embroidered strokes with contrasting lighter brown for feather detail.
Info :
Sew wing onto body overlapping breast edge slightly to create a natural layered look. Use small invisible stitches to hold and orient wing tip diagonally downwards.
— Bird Tail :
Round 1 :
Ch6, sc in 2nd ch from hook and across to create a small strip of 5 sc; turn and work 2 rows total to create a flat tail strip.
Round 2 :
Fold and sc through both layers along one long edge to create a thicker tail; fasten off leaving tail for sewing. Trim ends to tapered shape with scissors and block slightly.
Info :
Sew tail to body underside aligning with back end of bird oval. Add a few surface embroidery lines to indicate tail feathers.
— Bird Head Cap (Charcoal) :
Round 3 :
1 sc in each st around (12)
Round 4 :
Fasten off leaving long tail to sew onto body near front top of oval. Position cap where the darker head of the chickadee sits, slightly overlapping the breast and just above the beak area.
Info :
Use small embroidery to add white cheek spot under the cap and a subtle eyebrow line. Embroider eye as small satin stitch dot in black yarn or attach tiny black seed bead if desired and secure thoroughly.
— Beak (Tiny Triangle) :
Round 1 :
In mustard/neutral color, ch3, sc in 2nd ch from hook and last ch (2 sts), turn, sc across (2), sl st to turn, sc2tog to form triangle and fasten off leaving tail for sewing. Approx 3 rows total create tiny triangular beak.
Info :
Sew beak centered under head cap. Use tiny stitches to angle the beak slightly downward for a natural pose.
— Bird Assembly Info :
Info :
Pin all bird pieces in final arrangement on medallion before sewing. Sew in this order: body base to runner, breast overlay, wing, head cap, tail and beak. Use small even stitches and weave tails into back of applique to hide ends. Add a tiny black French knot or embroidered satin eye for a soft, handmade look.
— Leaves (Make many) :
Leaf Type A - Layered Veined Leaf :
Round 1 :
Ch8, sc in 2nd ch from hook, hdc in next, dc in next 2, hdc next, sc next (approx 7 sts across chain), turn and work along opposite chain: sc, hdc, dc, dc, hdc, sc. Do not join; join at base with sl st to first sc to form oval leaf shape.
Round 2 :
Working around leaf edge: (sc, picot, sc) at tip and several times along edges to create serrated effect. Fasten off and weave tail to center base.
Leaf Type B - Veined Leaf with Raised Center :
Round 1 :
Ch10, sc in 2nd ch from hook, hdc, dc, tr, dc, hdc, sc across chain then return across opposite side similar shaping, sl st to join. This creates a longer leaf for variety.
Round 2 :
Embroider vein down center with 2 strands of same green: use surface chain or raised running stitch. For raised vein, work small fpdc posts along center line spaced evenly.
Info :
Mix two shades of olive: work a base leaf in lighter green and add darker green veins worked with embroidery. Sew leaves into clusters near medallion junctions to mimic natural layouts.
— 3D Berries (Raspberries) :
Berry Base (Make multiple clusters of 3) :
Round 3 :
Work small cluster stitch round: *(ch3, picot) in next sc, sl st in next* repeat around creating small bobble texture. This decorates outer surface for raspberry facets.
Round 4 :
Fasten off leaving a long tail for sewing. Slightly stuff the berry with a tiny pinch of fiberfill and close opening with yarn needle using tail. Make clusters of 3 berries and sew together at base to form a raspberry cluster.
Info :
Make berries using 2.5-3.0mm hook to achieve tight bobbles. Add 2-3 berries per cluster, anchor them to vine with small stitches so they sit slightly raised off medallion surface.
— Vines & Surface Embroidery :
Info :
Vines are worked after all medallions are joined and birds/appliques are secured. Use a contrasting brown yarn and an embroidery needle or crochet hook to surface chain along runner connecting berries and leaves. For a more dimensional vine, work a chain on top of the fabric and secure every 4-6 stitches with small sl st anchoring stitches through underlying lace.
Round V1 :
Attach brown yarn at desired start point: ch long vine length as needed, laying over medallions, then secure every 4th chain with sl st through medallion surface. Continue vine across runner length and anchor ends by weaving into back of lace.
Info :
When crossing medallion seams, slip vine under small joins to give the appearance of a continuous vine weaving across lace. Avoid pulling vine too tight to keep lace flat.
— Attaching Leaves & Berries :
Info :
Arrange leaves and berry clusters along vines in a natural staggered placement. Use small mattress stitches to attach leaves, sewing through base only so leaves maintain a slight lift. Sew berry clusters with a few hidden stitches at base and a stronger anchoring stitch through center of berry cluster into the underlying medallion to secure.
— Decorative Edge & Finishing Rounds :
Round E1 :
With cream yarn and 3.5mm hook, work one round of sc evenly around entire runner edge to unify medallion joins (approx 1 sc in each outer stitch; count varies with layout). This provides a consistent edge for final picot scallop.
Info :
Keep stitches in outer loops only to prevent blocking edge from pulling through the medallion structure. Use stitch markers every 10 cm to maintain even tension and shape.
Round E2 :
*ch3, sl st into same st (creates small picot), skip 2 sts, sc in next st* repeat around to make decorative picot scallop edge. Adjust spacing to keep scallop proportionate across runner corners and seam points.
Round E3 :
Finish with a final sl st in first picot and fasten off. Weave all yarn tails to the back of runner and trim. Steam or lightly wet block the entire runner laid flat, pinning scallops evenly until dry.
Info :
If any appliques released during blocking, tack them back in place after runner is dry with small invisible stitches. The runner may be lightly hand-washed and reshaped, but avoid machine washing to preserve 3D accents.
— Optional Variations & Tips :
Info :
Make fewer or more medallions to shorten or lengthen runner. Replace chickadee appliques with simple embroidered birds or leave plain for a subtler look. Use metallic thread sparingly in vine embroidery for a festive sheen.
Info :
To create a denser rug or placemat, make medallions with two rounds of sc in outer rounds and omit picots for a cleaner border. For a lighter look, use a thinner thread and 2.5mm hook for more delicate lacy medallions.
Assembly Instructions
- Block all medallions before assembly: pin each motif flat to measurements specified and steam or wet-block to open lace. Allow to dry completely to preserve shape before joining.
- Lay out medallions in final runner arrangement on a flat surface. Use pins to secure each motif at intended join points; check symmetry and pattern flow before permanent joining.
- Join motifs using join-as-you-go on final round by replacing sc with sl st into corresponding outer stitch of adjacent motif. For a firmer seam, reinforce on the back with small whipstitches using the same cream yarn.
- Applique birds after joining medallions. Pin bird body base to the medallion and baste with long running stitches. Sew overlay breast, wing, cap, tail and beak sequentially using small invisible stitches; weave ends through back of applique.
- Attach leaves and berries along vines: arrange clusters and pin. Sew leaf bases to runner with tiny mattress stitches, then stitch berry clusters at their bases with stronger anchoring stitches to prevent detachment.
- Create surface vines using a long chain of brown yarn laid across runner and anchored with sl st every 3-6 stitches. Secure vine ends by weaving yarn through back of medallion seams to hide tails.
- Work final edge rounds around the runner to tidy edges, then perform final blocking with scallops pinned evenly. Remove pins only when fully dry.
- Weave in and secure all ends through multiple stitches, trim close to fabric, and if desired lightly press with steam from the back to set shape (do not flatten berries or birds).
Important Notes
- 💡Use stitch markers consistently at the beginning of each round to avoid counting errors and maintain proper shaping across many repeated motifs.
- 💡Stuff small 3D berries very lightly with polyester fiberfill; overstuffing will distort berry shape and may show through lace.
- 💡Block each medallion before joining to ensure consistent shape and flatness; blocking is essential for lace projects.
- 💡When sewing appliques, use small, nearly invisible stitches and weave ends securely through multiple stitches to prevent unraveling.
- 💡Maintain even tension for join-as-you-go rounds; work slightly looser than normal to allow motifs to lie flat together.
- 💡For safety and longevity, reinforce berry clusters with extra anchor stitches when attaching in high-use areas of the runner.
- 💡If you change yarn weight, adjust hook size and expect medallion counts and finished runner dimensions to change proportionally.
- 💡Keep a spare medallion or two for practice joins and applique placement before committing to final assembly.
Completing this runner is such a satisfying journey—the lace medallions, layered leaves and plump burgundy berries come together to create a charming vintage-inspired centerpiece. Each stitch adds texture and personality, and the appliqued chickadees are the sweetest finishing touch. Display it proudly on your table or gift it to someone who loves handcrafted details. 🧶🌿💕
What is the finished size of this table runner?
With the sample layout (10 medallions lengthwise) the finished runner measures approximately 90-100 cm (35-39 in) long and 30-36 cm (12-14 in) wide. Actual size will vary with yarn, hook and blocking; each medallion measures about 11 cm (4.25 in) across when blocked.
Can I use different yarn weights for this pattern?
Yes. You can use thinner thread or lighter fingering for a more delicate lace effect or a heavier DK for more pronounced texture. Adjust hook size accordingly; expect finished dimensions to scale with yarn weight.
Do I need to block each medallion before joining?
Blocking is strongly recommended. Blocking evens motif shapes and opens the lace so joins lay flat and seam lines stay neat.
How do I attach the 3D berries securely?
Sew berry clusters using the long tail left when fastening off, anchoring through the berry base and into the medallion center with multiple passes. Use extra stitches if runner will be handled often.
Can I replace the chickadee appliques with other motifs?
Absolutely. The runner design is modular—replace birds with simple floral appliques, embroidered motifs, or leave plain for a subtler lace table runner.
How much yarn will I need overall?
Estimate about 300-350g cream yarn for the medallions and runner foundation, 70-90g green for leaves, 60-80g burgundy for berries, and 25-40g for bird accents. Exact amounts depend on layout and gauge.
Can this be machine washed?
Hand wash gently and lay flat to dry. Machine washing is not recommended because 3D appliques and delicate lace may be damaged.
How do I avoid holes around joined seams?
Join-as-you-go carefully using corresponding edge stitches. Work slightly looser tension on joining rounds and reinforce seam from the back with discreet whipstitches to close any gaps.
Stay in the Loop!
Get notified when we release new free crochet patterns and join our crafting community!