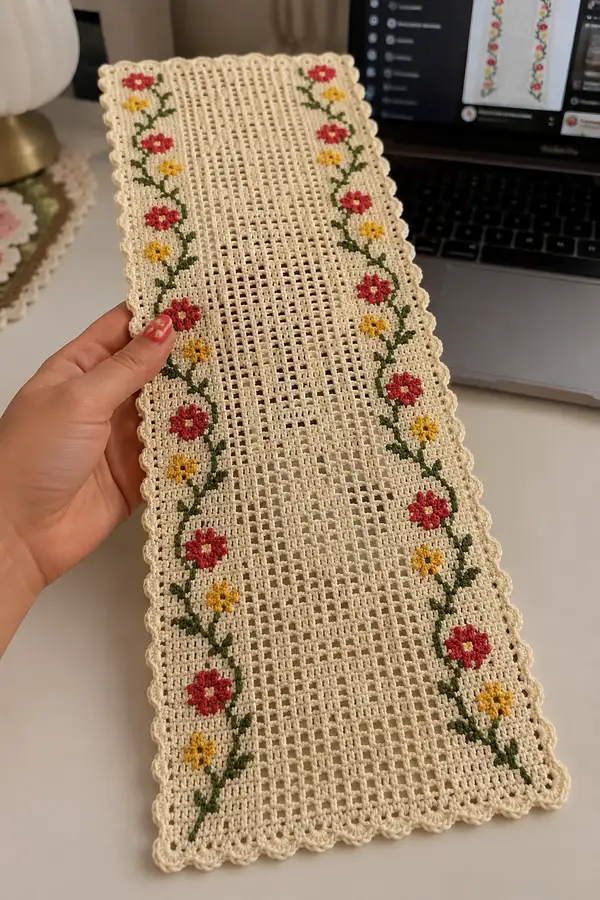
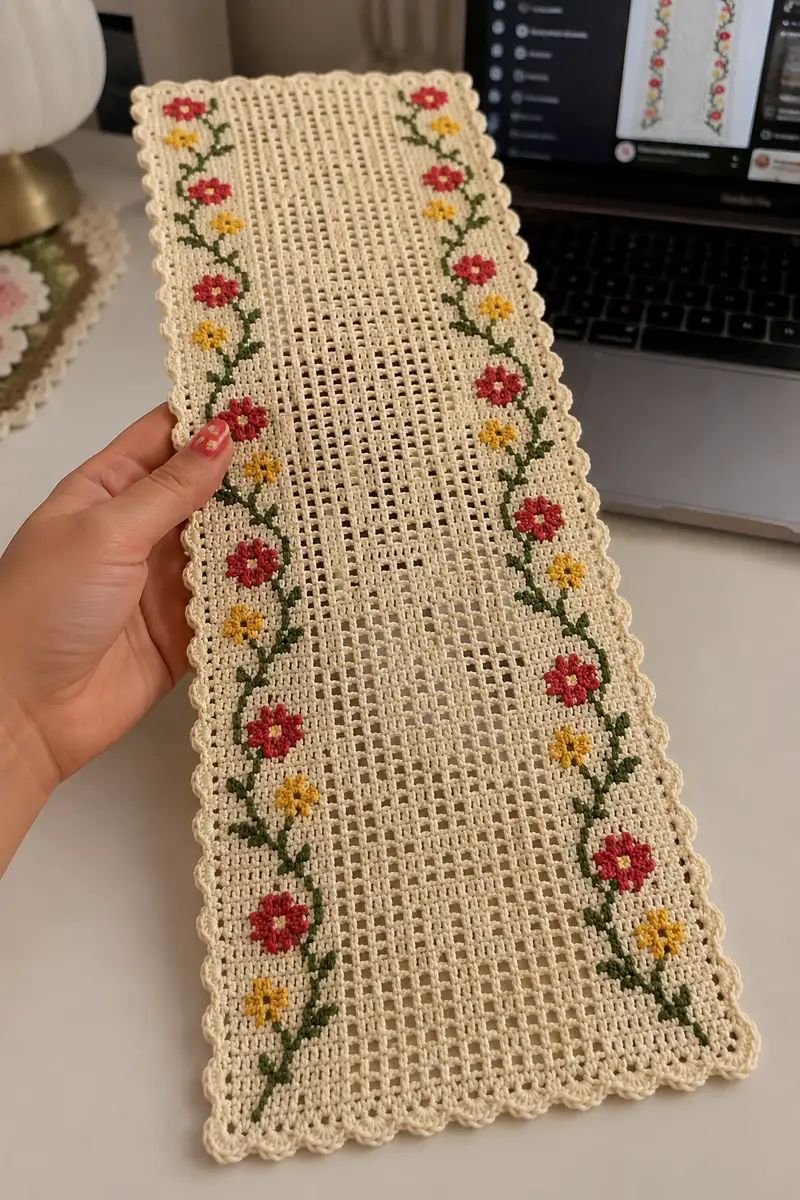
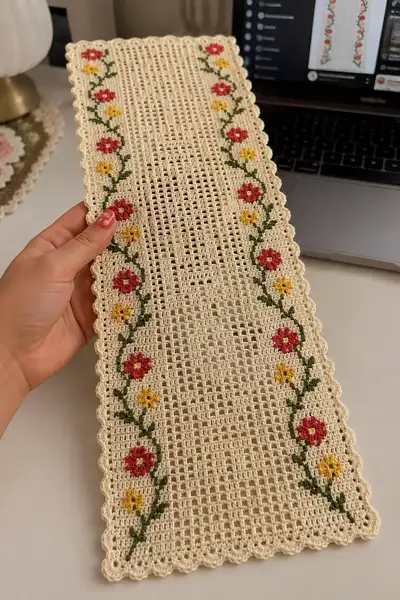
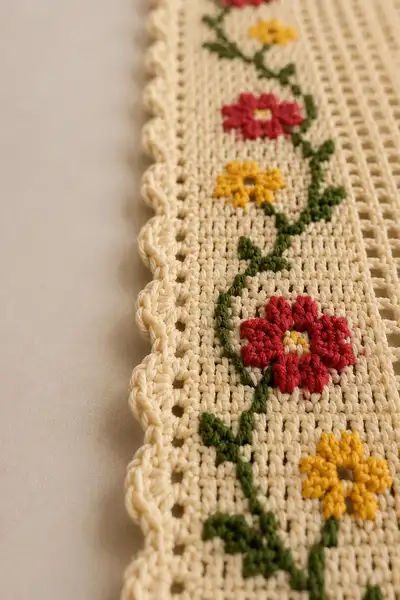
A delicate cream filet-lace table runner trimmed with a scalloped edge and two mirror flower vines in red and yellow. The central open mesh panel gives lace-like airiness while puff-petal flowers and green vines add vintage charm. Worked in cotton yarn with surface puff-stitch embroidery and a scalloped crochet border, this runner makes a lovely centerpiece or dresser accent.
Progress Tracker
0% Complete
— Gauge & Finished Size :
Info :
Gauge is not critical, but for reference: 10 meshes (open filet blocks) = approximately 2.5 cm / 1 in using DK cotton and 3.5 mm hook. Finished runner length in the sample is approx. 86 cm (34") and width approx. 20 cm (8") after blocking. You can change length by adding or subtracting mesh repeats in the center panel.
— Notes & Techniques :
Info :
This runner is worked flat in rows using classic filet crochet (dc and ch2 mesh spaces). Two parallel vine motifs are worked later as surface puff-stitch embroidery across designated columns of the mesh. The scalloped edge is crocheted around the entire rectangle after the central panel is complete. Use stitch markers to mark the vine columns before embroidering. Work with consistent tension so the mesh lays flat; block when finished.
— Materials & Starting Chain :
Round 1 :
Using cream yarn, make foundation chain of 100 ch. (This gives 33 full filet meshes across: (100-1)/3 = 33 meshes.)
Info :
Chain count rationale: each filet mesh uses 3 chains (ch2 + 1 dc), chain must be 3 x meshes + 1. This pattern uses 33 meshes across which makes a comfortable narrow runner. Adjust by multiples of 3 + 1 to change width.
— Base Row & Row 1 (Establishing Mesh) :
Round 2 :
Row 1 (RS): Dc in 4th ch from hook (counts as first dc), *ch2, skip 2 ch, dc in next ch*; repeat from * to * across until 1 ch remains; end with 1 dc in last ch. You will have 33 dc and 33 ch2 spaces arranged as 33 meshes across. Turn. (33 meshes)
Info :
The ch3 at the start counts as the first dc of the row; treat it as a dc for stitch count. Place a removable stitch marker in the first st of each row if it helps you track row starts.
— Mesh Panel Rows 2-120 :
Round 3-11 :
Row 2-10 (WS/RS alternating): Ch3 (counts as dc), *ch2, sk 2, dc in next dc* across to end; finish with last dc in top of ch3. (Maintain 33 meshes across each row.)
Info :
Work Rows 2-11 as even mesh rows to build height. Keep turning chain tall enough (3 ch) for an even edge. After Row 10, check width and align edges; correct tension if any ripple appears.
Round 12 :
Row 11: Ch3, *ch2, sk ch2 space from previous row and dc in next dc* across. This row begins the space where the vine motifs will be placed on later surface work; place removable markers in stitches at the 6th and 28th mesh columns counting from the right edge (these mark the center of each vine column). (33 meshes)
Info :
Marker placement: count meshes carefully and place thin removable markers or safety pins through the top loop of the dc that aligns with the center of each vine column. Mark both sides symmetrically—one vine column 6 meshes in from each outside edge so the vine hugs the border as in the sample.
Round 13-20 :
Rows 12-19: Continue filet mesh as Row 2: ch3, *ch2, sk 2, dc* across, keeping markers intact. Work 8 more mesh rows to reach a height that places flower motifs approximately every 8-10 rows vertically (this gives a balanced vine spacing). (33 meshes)
Info :
Check that markers remain aligned. The sample shows 5 flower clusters on each vine, spaced relatively evenly—this spacing equates to placing flowers on Rows 20, 28, 36, 44, and 52 (approx). These are approximate; confirm visually on your piece before embroidering.
Round 21 :
Row 20: Ch3, *ch2, sk2, dc* across (33 meshes). End and turn. Place lightweight paper or note to mark which mesh rows will host motif centers—suggested rows: 20, 28, 36, 44, 52 (RS rows).
Round 22-29 :
Rows 21-28: Continue mesh rows evenly. After Row 28, pause and compare your piece to the sample; adjust vertical spacing of subsequent motifs if your yarn/hook results in different row height.
Info :
When assessing placement for motifs, fold runner lengthwise and mark corresponding rows on both halves to make sure vines are symmetrical. Use pins or stitch markers to mark the exact mesh center for the flower petals to come later.
Round 30-37 :
Rows 29-36: Keep working even filet mesh rows as before. Confirm that the total mesh row count to this point allows for five flower placements per vine on each side. (33 meshes)
Round 38 :
Row 37: Ch3, *ch2, sk2, dc* across (33 meshes). This row lies approximately two rows above the first flower placement; place fine yarn markers at the exact mesh where the flower centers will be started on Rows 40 and continue marking for future flowers.
Info :
Tip: Use a contrasting length of scrap yarn looped into a mesh to mark the mesh where each flower center will be worked. These markers will be removed when doing surface stitches.
Round 39-48 :
Rows 38-47: Work even mesh rows. Keep careful count so motifs land on the marked meshes. If you prefer to work motifs as you go rather than after full panel is worked, you may carry the small color skeins and work puff stitches directly when you reach the motif row. Ensure you anchor color changes neatly and weave in ends later.
Round 49 :
Row 48: Ch3, *ch2, sk2, dc* across (33 meshes). At the end of this row you should be about halfway along the runner length in the sample. Continue the mesh until Row 120, following the same routine. Rows 49-120 are worked as even filet mesh rows unless you plan to add more decorative motifs. (33 meshes)
Info :
Keep working until you have completed 120 rows total (including initial rows). The sample runner uses 120 mesh rows before beginning the scalloped border. If you want a longer runner, continue additional pairs of mesh rows in multiples of 4 to keep motif spacing consistent.
Round 50-120 :
Rows 49-119: Continue repeating: ch3, *ch2, sk2, dc* across. Remove markers after finishing the panel but leave notes of the marked mesh columns for surface embroidery. Finish the final mesh row so the top edge matches the bottom edge. Fasten off, leaving a long tail for joining if you prefer to work the edging by joining as you go. (33 meshes)
Info :
Before starting the border, gently wet-block the rectangle and pin straight. Allow to dry completely. Blocking first will make the scallop edging stitch counts even and reduce puckering when you work shells along the perimeter.
— Scalloped Shell Border (work around whole runner) :
Round 121 :
With RS facing and cream yarn, begin at one short end: join with sl st into the top of the first ch-3 space at the corner. Ch1, sc evenly around the short edge into each stitch and ch-2 space for a tidy foundation—work approx 4 sc per 3-ch mesh depending on tension to create an even base. When you reach the long side, work sc into each dc and ch2 space around the length until the next short end. Continue around whole perimeter for a neat sc foundation. Join with sl st to first sc. (Work even sc around; stitch count will be approx. 360-400 depending on tension.)
Info :
Place 3 sc in each corner space (short ends) to help turning for the scallop rows. If you have a slight ripple, adjust the number of sc in turns to even out the scallops later.
Round 122 :
Ch1, *skip 2 sc, (5 dc in next sc) shell, skip 2 sc, sl st into next sc*; rep around creating shell scallops. Work 1 shell in the center of each short end as well to keep corner shells proportionate. Join with sl st to first shell. (Shells of 5 dc create the scalloped look.)
Info :
Adjust shell size if needed: 5 dc shells produce broad scallops; for a more delicate scallop use 4 dc shells. Keep shells evenly spaced by working sl st anchors between shells into single sc foundation stitches.
Round 123 :
Ch1, sl st into center dc of each shell, ch3 (counts as first dc), 2 dc into same space, *skip shell apex, sl st into next sl st anchor, in center dc of next shell work 3 dc (cluster into shell center)*; rep around so each shell center is accented with a 3-dc ridge. Join with sl st. Fasten off and weave ends into wrong side.
Info :
These two rounds give a soft scalloped border similar to the sample photos. Block gently after edging so shells relax and sit evenly. Trim stray ends.
— Surface Flower Vine Embroidery (both sides) :
Info :
Vines are worked as surface stitches over the completed mesh using a contrasting green for stems and red/yellow for flowers. Use a separate yarn strand and an embroidery needle or a yarn needle to work these decorative stitches across the front. The sample uses puff/petaled stitches for larger red flowers and small 5-dc puff motifs for yellow buds. Work in the RS only.
Round 124 :
Identify the vine column: working from the right edge count inward 6 meshes and mark the dc that sits in that mesh on the RS—this is the central column of your vine. Repeat symmetrically on the left. The vine will travel vertically by working surface slip-stitch stems and attaching leaves and flowers at marked rows.
Info :
Two methods: (A) Surface slip-stitch: with green yarn and a yarn needle, pick up the top loop of successive dc along the vine column and pull yarn across to create a raised line; (B) Stem stitch with yarn needle for a more embroidery-like look. I recommend surface slip-stitch for a crochet-only approach and stem stitch for embroidery-quality vines.
Round 125 :
Stem (Surface Slip-Stitch) method: With green yarn and a yarn needle, come up through the top center of the dc at the first flower row (Row 20 marker) and insert needle into the top center of the dc at the next mesh above, pulling the yarn snug to create a small slanted stitch; repeat moving upward in a gentle zig-zag or curve to suggest a vine. Work both vine columns simultaneously so vines mirror. Tie off and weave ends on WS as needed.
Info :
Keep vine stitches slightly raised but not bulky—pull gently to shape the line. Work leaves as small surface slip-stitches that branch off one or two meshes from the vine column by anchoring at the vine and fanning 1-2 short stitches into adjacent mesh spaces.
Round 126 :
Large red flower (puff petals) — placement: work at the marked mesh center (for example, the mesh centered on Row 20). Using red yarn, with a short length held on a tapestry needle or with hook: Insert hook from RS through the center mesh (through the top loops of the dc and the ch2 space), yo and pull up a loop approx 1.0–1.5 cm tall; repeat 4 more times in the same center to make 5 tall loops on the hook (5 loops total). Yo and pull through all loops, ch1 to secure the puff. Fasten yarn and anchor through the center with a small yellow French knot or single crochet center to form the flower eye. (One 5-loop puff forms a 5-petal flower.)
Info :
Puff stitch notes: Keep loops consistent in height. If using a yarn needle method: you can pull loops through with a tapestry needle and secure with a small anchoring stitch in the center using yellow yarn for the core. Make five red puff flowers on each vine at the marked rows for the sample look.
Round 127 :
Small yellow flower (bud) — placement: in the mesh between red flowers slightly offset on the vine. Using yellow yarn, make 5 single dc stitches in-place around the central mesh to produce a tiny 5-stitch star, or use 5 short puff loops (3 loops) to give a little rounded shape. Anchor center with 1-2 yellow single crochets to make the eye denser. Repeat for each small yellow flower along the vine.
Info :
Alternate red large puffs and yellow small buds for a charming vine rhythm. Keep the flowers leaning slightly away from the edge so the scallops frame them as in the sample photo.
Round 128 :
Leaves: Use green yarn and work small 2-3 stitch surface slip-stitches or tiny raised sc clusters off the vine column to form leaves between flowers. Anchor securely. Repeat for all leaf positions on each vine. Weave ends to the WS after completing embroidery. (Both vine columns completed)
Info :
Work one vine top-to-bottom then repeat on the opposite side for symmetry. Keep stitch tension similar on both sides. If working directly with a crochet hook for puffs, alternate colors by fastening off or working with short tails and weaving in neatly to avoid fuzz on the RS.
— Finishing Touches & Blocking :
Round 129 :
Weave in all tails on WS using a yarn needle. Trim ends close to the work but not too short to slip. Inspect scallops and embroidery; reinforce any puffs that feel loose by sewing through the center a couple times with matching yarn.
Info :
Blocking: Spray lightly or dampen runner and pin flat on blocking board to square edges. Pin scallops into rounded shapes and allow to dry completely. This final step gives the runner the crisp, finished look seen in the photos.
Round 130 :
Optional: Make a reversible version by working floral motifs with tapestry-style color changes while crocheting mesh rows rather than surface stitching—this requires graphing the motif ahead of time and carrying yarn inside meshes. Use tapestry technique if you want flowers visible on both sides.
Info :
Care: Hand-wash in cool water and reshape while damp. Avoid machine drying which can distort scallops and puff stitches.
Completing this elegant filet lace runner is such a satisfying finish—every scallop and puff stitch adds personality and vintage charm. The creamy base and bright red and golden flowers pop beautifully against the mesh, creating a piece that feels handmade and heirloom-ready. Share it as a thoughtful gift or enjoy it on a dresser, bookshelf, or kitchen table. 🧶🌼✨