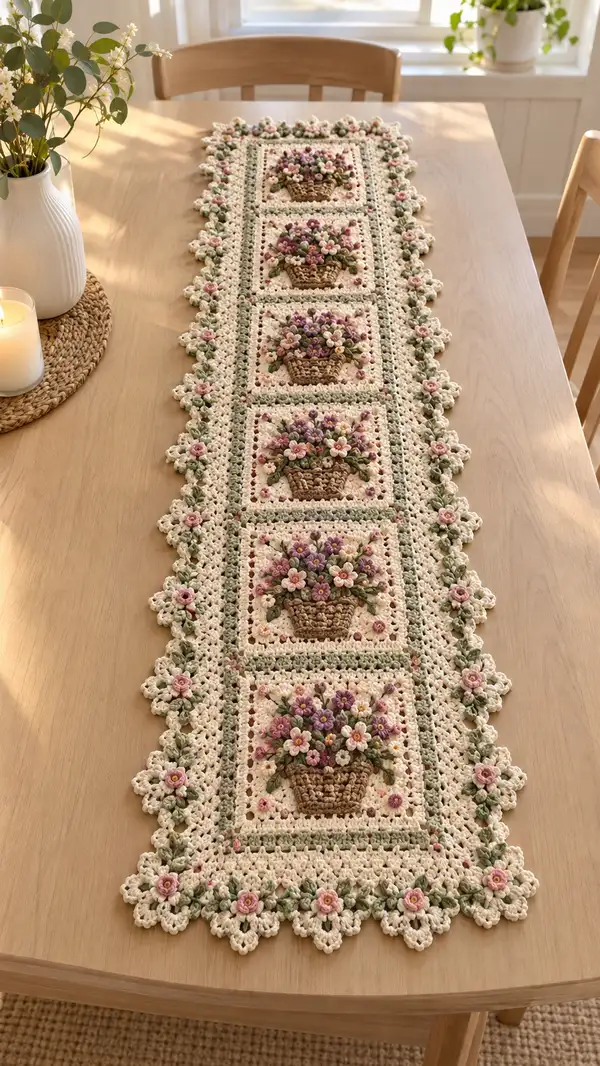
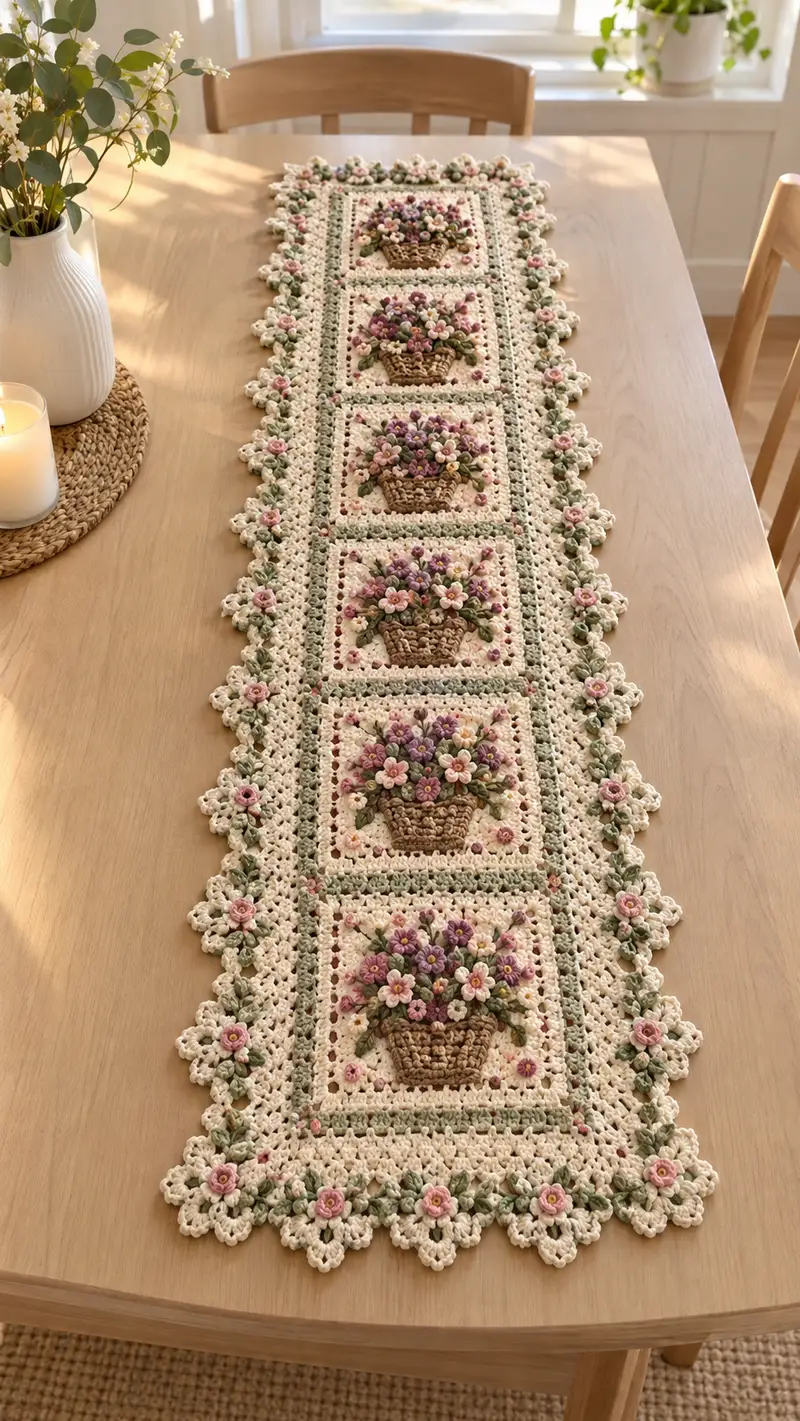
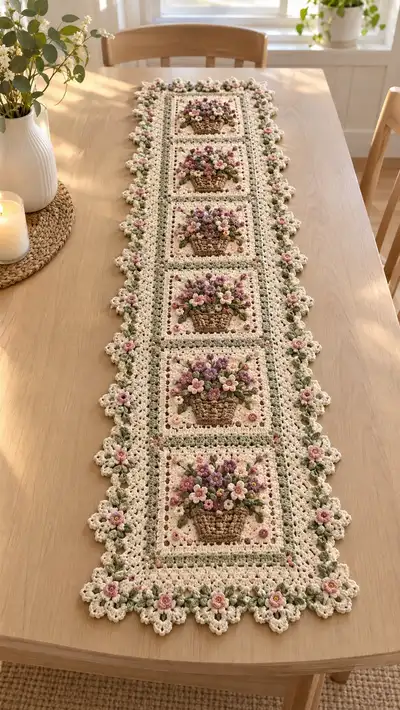
A delicate, vintage-inspired table runner featuring five square panels, each with a raised woven basket overflowing with cream, pink and mauve 3D flowers and green leaves. The runner is edged with a scalloped floral lace border and soft pastel accents for a romantic farmhouse table centerpiece. This pattern includes detailed instructions for squares, basket appliques, multiple 3D flower types, leaves and an elegant joined scalloped border.
Progress Tracker
0% Complete
— Pattern Notes :
Info :
This tutorial builds the runner from five identical floral squares joined together, with separate basket appliques, small 3D flowers, roses and leaves sewn on. Work each square flat and block lightly. Use stitch markers to mark corner spaces; counts and rounds below are precise for each part. Colors referenced: Cream (C), Brown (B), Sage (S), Pink (P), Mauve (M), Blush (BL).
Info :
Gauge is not critical for a runner but maintain consistent tension for even squares. Block each square to the same dimensions (approx 9.5"/24cm square unblocked depends on yarn/hook). All rounds are worked in continuous rounds unless stated otherwise; join rounds with sl st only when indicated.
— Square Base (Make 5) :
Round 1 :
With Cream (C), ch4, join with sl st to form loop. Ch3 (counts as first dc), work 2 dc into ring, ch2 (corner made), *3 dc into ring, ch2; rep from * two more times, join with sl st to top of ch3. (4 clusters of 3 dc, 4 ch-2 corners)
Round 2 :
Sl st into next 2 dc and into corner ch-2 space. Ch3, (2 dc, ch2, 3 dc) in same corner. *In next ch-2 corner work (3 dc, ch2, 3 dc). Rep around. Join with sl st to top of ch3. (4 corners of 3-dc clusters)
Round 3 :
Ch1, sc in same st, ch1, *in corner ch-2: (sc, ch1, sc), ch1; along side between corners: work (hdc, ch1, hdc) into the space between corner clusters—this creates a mesh for basket placement. Rep around, finishing with corner sc; join with sl st. (creates foundation mesh and increases side spacing)
Round 4 :
Change to Sage (S). Ch1, sc in same stitch, ch3, *sk to next corner ch-2, (sc, ch3) into corner, rep around. Join with sl st. (creates even airy rows for inner sage trim)
Info :
We work the inner space larger than the basket so the basket sits comfortably with room for flowers. Use stitch markers at the center of each side to help keep basket centered later.
Round 5 :
With Sage (S) continue: ch3, dc in same st, *work 1 dc in each ch-3 space across side (usually 7 dc per side depending on chain tension), at corner work (dc, ch2, dc). Join with sl st. (established a neat sage inner frame)
Round 6 :
Change to Cream (C). Ch2 (counts as hdc), hdc in same st, *hdc in each dc across side; in corner work (hdc, ch2, hdc). Join. (Smooth transition back to cream body of square)
Round 7 :
1 sc in each st and space around including corners (count depends on previous counts; expect approx 54 sc at this round). Join with sl st.
Round 8 :
Ch3, dc in same st, *dc in next 2 sts, ch1, sk 1 st, dc in next 3 sts; at corner work (dc, ch2, dc). This round creates a small lattice texture to echo the basket. Join.
Info :
Place a removable stitch marker at the center of the square (RS). This will help when placing the basket applique precisely in subsequent steps. If your square feels small, increase number of dc between lattice segments evenly each side on rounds 8-9.
Round 9 :
With Cream (C) work 1 sc in each st and space for even surface (expect approx 60 sc across full round). Join. This stabilizes the face for sewn appliques.
Round 10 :
Change to Cream (C) still: ch5 (counts as tr + ch2), *sk 2 sts, (tr, ch2) into next st; rep to each corner and in corner work (tr, ch2, tr). Join. This forms a decorative square lattice for the bouquet to peek through.
Round 11 :
With Cream (C), ch1, sc in same st, *in each corner ch-2 space work (sc, ch1, sc) to make small decorative picots in the corner; along sides work sc in each tr and chain space. Join. (This readies corners for later floral join-in points)
Round 12 :
Switch to a cream slightly heathered tone if available for subtle depth; ch3, dc in same st, dc around evenly maintaining corners as (dc, ch2, dc). Join. (Square face completed; center region large and stable for basket)
Round 13 :
With Cream (C) sc evenly around the square working 1 sc in each visible stitch and space. At corners work (2 sc, ch2, 2 sc). Join. This forms even base edge approximately 9-10 cm inside outer border for the basket and flower placement.
Round 14 :
Ch1, *sc2tog over next two stitches where you want to tighten slight portions under basket, otherwise 1 sc in each st. At corner keep (2 sc, ch2, 2 sc). Join. (This subtle shaping helps the basket sit slightly recessed)
Round 15 :
1 sc in each st for evenness (approx 60 sc). Join. After this round, square base is ready for basket applique attachment points—mark center-bottom area of the square where basket base will sit.
Info :
Block this square lightly to flatten lattice rows. Place pins gently around outer edge to square up corners. Allow to dry before moving to basket applique. Make 5 identical squares for runner.
— Woven Basket Applique (Make 5) :
Round 1 :
With Brown (B), ch6, turn, 2 sc in 2nd ch from hook, sc in next 3 ch, 3 sc in last ch; working on opposite side of chain: sc in next 3 ch, 2 sc in final ch; join with sl st to first sc. (Oval base: 14 sc)
Round 2 :
Ch1, 2 sc in first st, sc in next 4 sts, (2 sc, ch1, 2 sc) in each end to create short corners, sc in next 4 sts across; join. (Oval expanded to approx 20 sc and ch-1 corners)
Round 3 :
Ch1, sc in same st, *sc in next 2 sts, inc in next st; rep across oval; distribute increases evenly across both curved ends so oval widens to approx 26 sc. Join.
Round 4 :
Ch2 (counts as hdc), hdc in each st around to maintain height (approx 26 hdc). Join. This builds the short basket wall.
Info :
To simulate a woven-look texture, we will alternate surface slip stitch 'rungs' and front-post stitches in the next rounds. Work tightly but not so tight that the basket warps.
Round 5 :
Switch to front post/back post technique: *fpdc around next st, bpdc around next st; rep to end. Join. (Creates alternating rib that resembles horizontal weave)
Round 6 :
Ch1, sc in each st around keeping posts visible. Join. (Secures ribs)
Round 7 :
Change to Brown (lighter shade if available) and work one round of 'raised band' using (ch1, sc in BLO) around to create a visible top rim. Join. (Top rim prepares for basket lip)
Round 8 :
With same brown, ch3, dc around the edge of rim making 2 dc in each rim stitch for a trimmed top (approx 52 dc depending on counts). Join and fasten off leaving long tail for sewing.
Round 9 :
Optional handle: with B, join at left-top of rim, ch12, sc back along chain to rim, fasten off. This creates a low handle or decorative tuft if desired—most photos show a shallow rim only, so handle is optional.
Info :
Weave a thin strip of yarn across inside of basket base (surface slip stitches) to anchor flowers later. Block basket flat slightly to keep shape. Basket should measure approx 5.5 - 6 cm wide across at widest point depending on yarn.
— Basket Texture & Attachment :
Round 1 :
Using brown long tail, position basket on square so top rim aligns about 1.75"/4.5cm from top of square center (measured from center of square). Pin carefully at multiple points: both rim ends and middle of base.
Round 2 :
Sew basket onto square through the back loops of rim and cream fabric using mattress stitch, placing stitches every 3-4 mm. Secure both corners and center firmly. Do not fully flatten the basket; you want a slight cup for flowers.
Info :
When sewing the basket, use a tail of yarn long enough to run a hidden running stitch behind the basket to secure bottom and sides. Make neat, small stitches on the wrong side to prevent lumps on the front.
— Small Five-Petal Flower (Make 12 per square) :
Round 1 :
With Pink (P), make magic ring, ch1, 6 sc into ring (6). Pull tight and join with sl st to first sc.
Round 2 :
*Ch2, in next st work (2 dc, ch1, sl st) to create a petal. Rep from * around until you have made 6 petals. Fasten off leaving tail for sewing. (6 petals)
Round 3 :
With Yellow/Blush (BL) embroider a tiny french knot or use a small bead at center. Sew flower into basket cluster using several small securing stitches through ring base. Repeat to make 12 small flowers for each square, mixing Pink and Mauve for variety.
Info :
Make petals slightly loose (don’t pull too tight) to keep petals open. Use a small crochet hook (3.5mm) for these to keep flowers small and neat. Place them in clusters above and slightly inside the basket rim.
— Layered Rose (Make 4 per square) :
Round 1 :
With Pale Pink (P), ch12, turn, sc in 2nd ch from hook and each across (11 sc). Do not join; you will form a spiral.
Round 2 :
Ch1, *in first sc work (sc, hdc, 2 dc, hdc, sc) to form the first petal; in next sc work (sc, hdc, 2 dc, hdc, sc); continue across creating a line of petals. Fasten off leaving long tail for coiling.
Round 3 :
Coil the petal strip from one end into a spiral to form the rose. Using the long tail, sew through the base of the spiral as you coil to secure each layer. Shape petals outward slightly as you secure. Finish with a few anchoring stitches through base and weave in end. Very lightly stuff center with tiny fluff if you want fuller rose.
Info :
Make 4 roses for each square and vary sizes by changing starting chain length slightly (ch10 for smaller, ch14 for larger). Use matching shades or gentle gradients of pink for a natural look.
— Leaf (Make 10 per square) :
Round 1 :
With Sage (S), ch8, sc in 2nd ch from hook, hdc in next, dc in next 2, hdc in next, sc in next, sl st in last. Fasten off leaving tail.
Round 2 :
Use tail to shape leaf by sewing a central vein: with small running stitch from tip to base and back, pulling gently to create a slight V fold. Place leaves around basket rim, tucking under flowers and sew with small stitches at base.
Info :
Slightly block leaves by dampening and pinning flat to shape. Leaves can be attached singly or doubled overlapping to create fuller foliage.
— Tiny Berry Bud (Make 8 per square) :
Round 1 :
With Mauve (M) or Deep Rose, make magic ring, ch1, 5 sc into ring (5). Pull tight and sl st to close. Fasten off leaving tail for sewing. Add a small French knot or tiny bead in a contrasting shade for center if desired.
Info :
Tuck these tiny buds between flowers to mimic small filler blooms; they are quick to make and add excellent textural contrast.
— Floral Cluster Assembly (Per Square) :
Round 1 :
Place basket on square where previously pinned. Arrange 4 layered roses at staggered heights just above basket rim (two central rear, two front sides). Position 12 small 5-petal flowers filling gaps. Add 10 leaves around perimeter, and 8 berry buds tucked between petals. Once satisfied with layout, pin each piece securely.
Round 2 :
Sew each piece carefully: start by anchoring the base of each rose with several tiny whip stitches through basket rim and square fabric. Sew small flowers by stitching the ring base to the square fabric. Avoid catching petals in stitches to keep 3D shape free.
Info :
Place a tiny dab of fabric glue under rose base if extra hold is desired but do not glue over petals. Use matching thread for invisible seams and secure all tails by weaving deep into the wrong side of the square.
— Center Embroidery & Dots :
Round 1 :
With blush or deep pink, add small French knots around the bouquet to simulate tiny buds in the cluster. Work 6-8 knots per square in varied sizes for depth.
Round 2 :
Using sage embroidery, stitch a few short back-stitch lines to echo stems from basket into bouquet. Keep lines light and short—do not overpower 3D work.
Info :
Plan embroidery placement before permanent stitches. Use reference photo and pin fabrics to keep tension even while stitching.
— Join Squares (Make 4 joins for 5 squares) :
Round 1 :
Lay out 5 completed squares in runner order. Block and pin all squares to measurements to ensure straight edges. We will join squares long edge to long edge using join-as-you-go or mattress stitch; here we describe a whip-join for a delicate seam.
Round 2 :
With Cream (C), align two squares RS together, or RS up if using whip stitch on RS for decorative seam. Using a yarn needle and a length of C, start at top corner and work neat whip stitches through outermost sc stitches approximately every 3-4 mm. Pull gently to flatten join but do not pucker. Continue across full side and knot securely. Repeat for each adjacent pair so all 5 squares are joined in a single straight column.
Round 3 :
Alternatively, for a cleaner join: use a single crochet join on RS. Hold squares RS together, insert hook through both layers at corner, join with sl st, ch1, and sc evenly across both sets of stitches, making 2 sc in corner ch-2 spaces. This yields a neat ridge along seam. Expect approximately 10-14 sc per side depending on your square counts.
Info :
Pin squares carefully and check alignment after the first 5-6 joins before continuing. If the runner is slightly off, adjust seam tension rather than ripping out entire seam.
— Inner Continuous Trim Between Squares :
Round 1 :
With Sage (S), work an even round around the entire joined panel: attach yarn at one seam, ch1, sc evenly around square edges and seams, at square-to-square seams work sc into seam (approx 2 sc over seam area) to create continuous green line that frames each square. Join at the end with sl st.
Round 2 :
Change to Cream (C), ch3, dc around each side, with (dc, ch2, dc) at outermost corners of runner. Work even round to create a smooth cream field to which the outer lacy border will attach. Join with sl st.
Info :
Ensure corners are squared and that the green frame lines up across each seam—this gives the runner its distinct, framed look between panels.
— Outer Lace Border Preparation :
Round 1 :
With Cream (C), work 1 sc evenly around the full outer edge of runner, placing (2 sc, ch2, 2 sc) in each corner to maintain square corners. Join. This evens out any irregular edges at the joins.
Round 2 :
Ch3, dc in same st, *ch2, skip 2, dc in next; along long edges create scallop spacing by working dc groups spaced evenly; in each corner work (dc, ch3, dc). This round establishes spacing for decorative floral scallops.
Info :
At this stage you can choose to edge the runner with a single wide scallop or with recurring rose clusters—photos show a repeated small scallop motif with a rose at each scallop point. We will create a 6-round border that builds scallops and adds rose motifs.
— Scallop Border (Rounds 1-6) :
Round 1 :
With Cream (C), ch1, sc in same st, *skip 2 sts, in next st work (5 dc) to form a shell; skip 2 sts, sc in next; rep across long edges and around shorter edges. At corners work (sc, ch2, 5 dc, ch2, sc) to keep corner elegant. Join. (Creates repeated shells approx every 8-10 sts)
Round 2 :
Ch1, sc in each sc and in center of each shell work (sc, ch1, sc) to form small raised picot; this creates small support points for rose embellishments. Join.
Round 3 :
With Sage (S) pick up yarn and work an accent round: ch1, *sc in center of shell, ch3, sc in next sc between shells; rep around to produce green leaf bed above each scallop. Join. (This green accent bed is where the rose base sits)
Info :
Mark the center of each shell with a stitch marker if you plan to place a rose motif there. The photo shows small pink roses centered along scalloped edge approximately every 3-4 inches.
Round 4 :
With Cream (C), work into each shell center: slip stitch to center, ch6, sl st in same place to create small loop, sl st into next stitch to secure; repeat for each shell. These loops will serve as bases for the small edge roses.
Round 5 :
With Pink (P), make tiny rolled roses as per Layered Rose (use ch8 coil for very small rose). Sew each small rose into the center of loop bases along scalloped edge. Space evenly—about 12-16 small roses per long side depending on scallop count.
Round 6 :
Secure roses with 2-3 small stitches at base; add 1-2 tiny sage leaves beside each rose with small whip stitches. For added detail, embroider a tiny french knot in deep rose at the point between shells like pictured. Fasten off.
Info :
Edge roses should be smaller than square roses—maintain proportion. Make all edge roses consistent in size by using identical chain length when making coils.
— Final Edge Detailing and Stabilizing Round :
Round 1 :
With Cream (C), work a final round of sc around entire outer edge, placing 3 sc inside each shell base to secure the scallops and roses. In corner shells place 4 sc for strength. Join and fasten off. Weave in all ends neatly to the wrong side of the runner.
Round 2 :
Inspect the runner for any loose appliques. Add additional securing stitches where basket meets square and along rose bases. Trim excess tails and weave in ends at least 4 cm deep into the wrong side of fabric for a neat finish.
Info :
Block runner flat and pin scallops carefully so each scallop and rose sits evenly. Light steam blocking will set the shapes. Allow to dry completely before photographing or gifting.
— Finishing Touches :
Round 1 :
Optional: Add a thin spray of fabric-safe stiffener under the outer scallop border to give it a slightly raised, crisp look for table presentation. Apply sparingly and allow to dry.
Round 2 :
Optional: Sew a felt backing to each square before joining if you plan to use the runner on rough surfaces to protect embroidery and to add extra stability. Use a neutral felt and stitch around the perimeter of each square before joining to the next.
Info :
Care: Hand wash gently in cool water or spot-clean. Lay flat to dry; avoid heavy wringing. Store flat or rolled to prevent scallop flattening.
This cream and pink floral basket table runner is a labor of love that brings vintage charm to any table. The layered baskets and 3D roses make every square feel like a tiny embroidered painting. Put it on a dining table or sideboard and enjoy the delicate texture and color—it's a perfect gift or heirloom piece. 🧶🌸✨