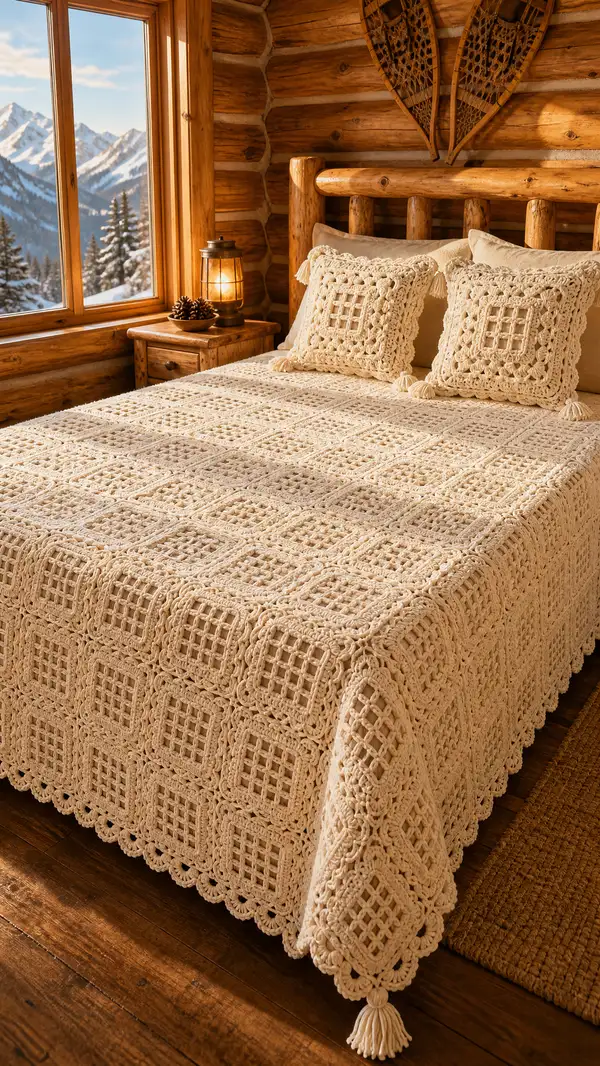
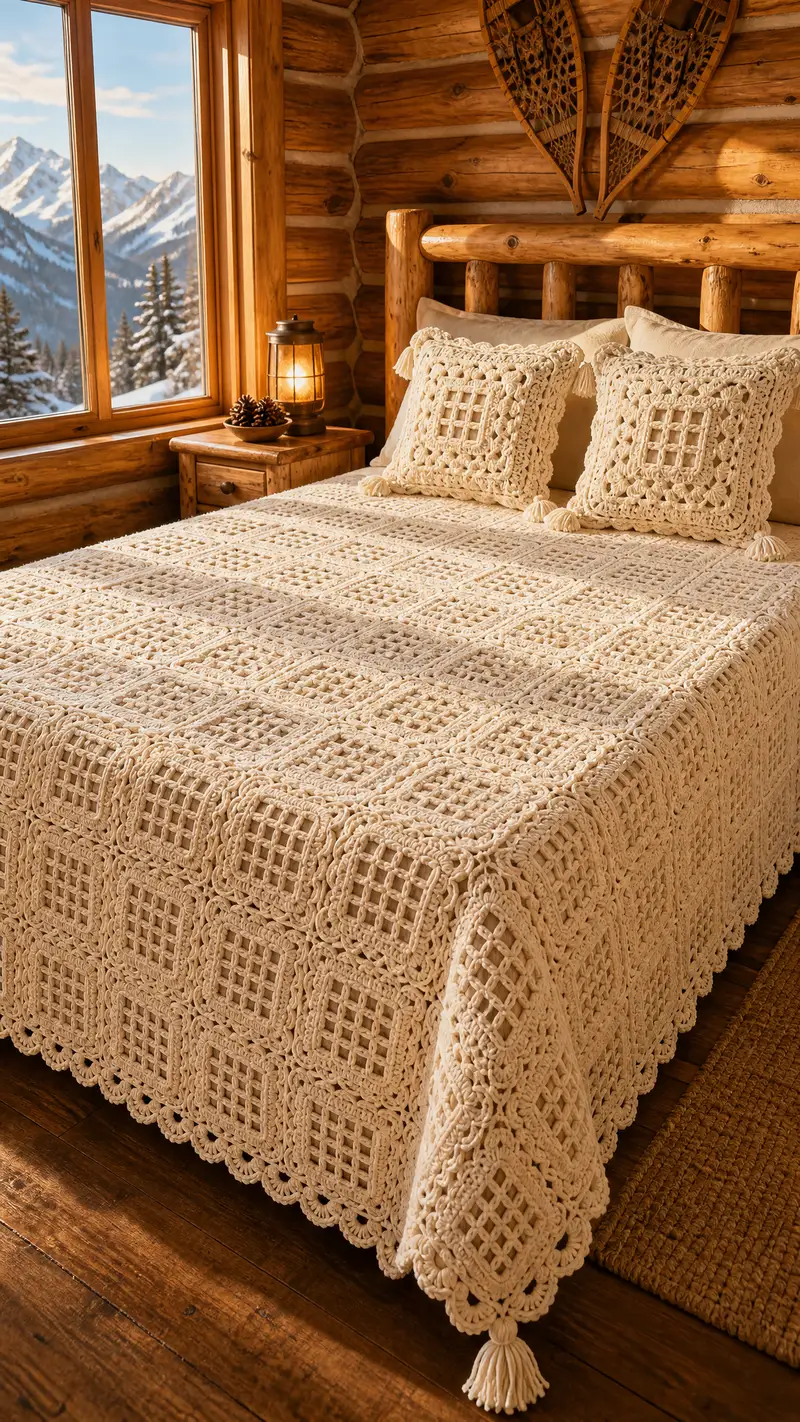
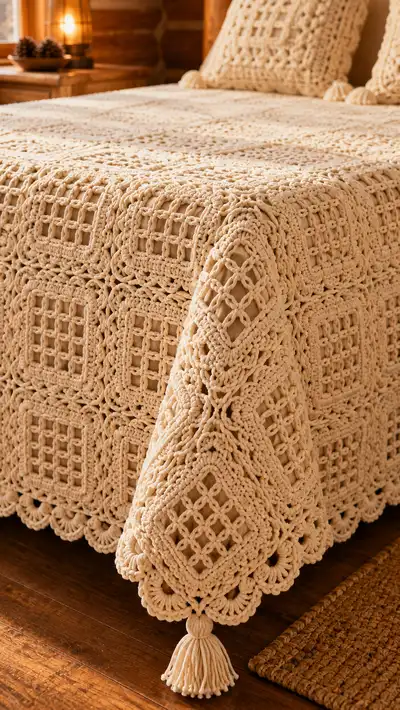
A luxurious, vintage-inspired bedspread worked in a soft cream bulky-weight cotton rope to create an airy window-lace granny motif. The finished spread is made from joined square motifs with a textured scalloped border and optional tasselled corners — perfect for a cozy cabin or farmhouse bedroom. Detailed step-by-step instructions guide you through making motifs, joining, edging, and pillow covers to match. Suitable for crocheters who love slow, decorative projects with lots of texture.
Progress Tracker
0% Complete
— Overview & Gauge :
Info :
This bedspread is constructed from 18 cm (approx) square window-lace motifs using bulky cotton rope yarn and an 8.0 mm hook. Gauge for one finished square after blocking: approximately 18 cm (7") across with loose blocking. Final bedspread size depends on number of motifs joined; sample shown is approximately queen size made of 11 x 10 motifs (110 motifs total). Adjust motif count to change finished dimensions.
Info :
Abbreviations: ch, sl st, sc, hdc, dc, tr, puff, sp, st, rep, RS, WS, BLO, FLO. Work tightly enough that stuffing or backing will not show through the mesh; use slightly smaller hook for edging if needed.
— Materials & Preparation :
Info :
Before making motifs: wind yarn into manageable balls, decide on motif layout and count total motifs. Pin a swatch of one motif and block lightly to measure true size. Pre-cut tassel wraps if you plan to add tassels as in sample.
— Window-Lace Granny Square Motif (Make 110 motifs for queen size; adjust count to fit bed) :
Round 1 :
Ch 6, join with sl st to form ring. Ch 3 (counts as dc), (2 dc, ch 2, 3 dc) into ring - repeat 3 more times; join with sl st to top of ch3. (12 dc, 4 ch-2 corner sps)
Round 2 :
Sl st into next 2 dc to sit in corner ch-2 sp, ch 1, sc in same ch-2 sp, ch 3, sc in same ch-2 sp (forms corner base), *sk next 3 dc, (sc, ch 3, sc) in next ch-2 corner sp; rep from * around; join with sl st. (Corner units: 4 corners of sc,ch3,sc; side chain-3 spaces between corners)
Info :
Round 2 creates the first set of chain-3 spaces along each side which will be used to create the open window mesh grid. Keep tension even to maintain square geometry.
Round 3 :
Working in each side ch-3 sp: *(ch 1, dc) into side ch-3 sp, ch 1, sk to next ch-3 sp; in each corner (sc, ch 3, sc) - rep around; join. This begins a lattice of single dc separated by chains. Count: each side has 1 dc & ch1 per side segment; overall square work is symmetrical.
Round 4 :
Ch 1, sc into same st, *ch 3, sk 2 sts (creating an extended mesh), sc into next st; rep across side to corner; in corner sc, ch3, sc; join with sl st. This opens the grid into larger windows for the lattice center.
Info :
Check that each side has equal number of ch-3 loops. If your initial counts create more or fewer loops, adjust round 3 to add or subtract one dc + ch space per side so that corners align properly at subsequent rounds.
Round 5 :
Ch 1, sc in same st, *[ch 5, sc in top of next ch-3 space] across side to corner; in corner sc, ch5, sc; join. (This round creates longer chain-5 windows across each side and begins the decorative open grid.)
Round 6 :
Ch 3 (counts dc), 2 dc in same st, ch 2, *(3 dc, ch 2) in corner to form corner cluster; then along each side work: 1 dc in each chain-5 space separated by ch-1, giving a line of dc that frames the windows; complete corner clusters on all corners; join with sl st. (Each corner cluster contains 3 dc; side dc counts will equal number of chain-5 windows.)
Info :
Round 6 bridges the open grid into a structural frame. Counting: after round 6 your motif should read as a grid of framed windows; ensure corner ch-2 spaces align directly above previous corner ch-3 spaces.
Round 7 :
Ch 1, sc in same st, *ch 4, sc into next side dc (creating vertical supports), repeat across side; corner (sc, ch 4, sc) into corner ch-2 sp; join. This starts the tall lattice look characteristic of the window-lace square.
Round 8 :
Ch 3 (counts dc), 2 dc in same st, ch 2, 3 dc in same corner sp (corner cluster), then along side: (skip 1 st, (dc, ch 1, dc) in next st) repeat to create mini-split columns; join. This round thickens the side frames and sets spacing for the decorative outer clusters.
Info :
At this stage the motif should measure about 10-11 cm before blocking. If your mesh looks too tight, block gently to open the windows; this will square the motif and make joining easier.
Round 9 :
Change to smaller hook if desired for crisp cluster definition. Ch 1, sc in same st, *ch 3, sc in top of next ch-4 loop along side; rep; corner sc, ch 3, sc; join. This creates smaller chain loops around the side frame ready for the puff/cluster rounds.
Round 10 :
Info :
Optional color change: change to the same cream or subtle contrasting natural now if using two-tone. Carry yarn inside loops when changing colors to keep back neat.
Round 10 :
Ch 3 (counts as dc), 2 dc in same st, ch 2, 3 dc in same corner; then along each side work: *(dc in next ch-3 loop, ch 1) across; complete corner clusters; join. This frames the side windows in double crochet for a sturdy border.
Round 11 :
Ch 1, sc in same st, *[ch 5, sc in next dc] repeat across each side; corners sc, ch 5, sc; join. This adds an airy chain arch around each side and prepares the motif for the raised cluster rounds.
Info :
Count side shell arches: you should have 3 or 4 chain-5 arches per side depending on your chain spacing; this variation is fine as long as you keep corners consistent.
Round 12 :
Cluster round: Ch 3 (counts dc), 2 dc in same st, ch 2, 3 dc in same corner; then along each side work: into each ch-5 arch work (dc, ch 1, dc) to create small framed arches; join. This begins to produce the thick textured surround you see in the sample bedspread.
Round 13 :
Ch 1, sc in same st, *ch 3, sc in center of side dc pair to form lattice nodes; rep across side; corners sc, ch 3, sc; join. This tightens the lattice and readies the motif for a puff round.
Round 14 :
Puff round - stable cluster detail: Ch 1, sc in same st, *[yarn over, insert hook in next ch-3 space, draw up a loop, yarn over, insert in same space, draw up a loop] repeat 3 times (you will have 7 loops on hook), yarn over and draw through all loops, ch 1 to close puff, ch 1, sc into next anchor st; repeat puff across each side spacing puffs evenly; corners sc, ch1, sc; join. (This round adds the chunky textured detail seen around the motif frames.)
Info :
Puff stitch tension: keep the puff slightly loose on the hook so it sits up; if too tight the motif will pucker. After making 2-3 motifs practice placement so puffs align when joined.
Round 15 :
Ch 3 (counts as dc), 2 dc in same st, ch 2, 3 dc in corner; then along each side work: (dc in next st, ch 1) across; join. This re-frames the puffs and squares the motif edges.
Round 16 :
Ch 1, sc in same st, *ch 4, sc into next side dc to create small arches; rep; corner sc, ch4, sc; join. This softens the edge and prepares for the final framing rounds which define the visible grid in the finished bedspread.
Round 17 :
Edge frame round: Ch 2 (counts hdc), work 1 hdc in each st and into each ch loop across side, but in corners work (hdc, ch 2, hdc) into corner to maintain square shape; join with sl st. (Count will equal number of stitches across previous round; this creates a continuous frame.)
Info :
Check final motif measurement now — after blocking it should be approximately 18 cm square. If your motif is 1-2 cm off, adjust tension slightly for remaining motifs by working a touch tighter or looser in the next motifs.
Round 18 :
Ch 1, sc in same st, *ch 3, sk 1 st, sc in next st across; corners sc, ch3, sc; join. This defines the little grid holes and reduces bulk at joining edges.
Round 19 :
Ch 3 (counts as dc), *(2 dc, ch 2, 2 dc) into corner ch-3 loop to create small corner shells; then along each side work 2 dc in each side loop separated by ch 1 - repeat across side; join. (This round thickens outer frame preparing the motif for final decorative edging.)
Round 20 :
Ch 1, sc in same st, *ch 5, sc into next side group to make open arches; corners sc, ch5, sc; join. This is the final open arch round that gives the motif the lattice window look when many motifs are joined.
Info :
Weave in ends now or leave 15 cm tails for joining-as-you-go. If using join-as-you-go, leave tails; otherwise weave in and join later. Make motifs in batches to maintain color and tension consistency.
Round 21 :
Final motif frame - decorative scallop base: Change to 6.5 mm hook if desired. Ch 3 (counts dc), 2 dc in same st, *[ch 1, sk next ch-5 loop, 5 dc in next st] repeat to form small shells spaced evenly along side; on corners work (5 dc, ch 2, 5 dc) into corner ch-2 to create a defined corner fan; join. This produces the deeper texture used to join motifs together invisibly later on.
Round 22 :
Ch 1, sc in same st, *ch 3, sc into center of each 5-dc shell to anchor shells; rep around; corners sc, ch3, sc; join. This anchors the scallops and stabilizes each motif for blocking.
Round 23 :
Blocking ridge round: Ch 1, sc in same st, 1 sc into each st across including shell centers and chain spaces to form a neat finishing ridge; join. Fasten off and weave in any remaining ends. Block motif to finish square.
Info :
Blocking: Pin to square dimensions on blocking mat, stretch gently so that side frames and corner fans align. Spray with warm water and allow to dry fully. Blocking is essential so that join-as-you-go seams match precisely.
— Join-As-You-Go (JAYG) Method & Full Bed Assembly :
Info :
Layout: Arrange motifs in a grid—sample layout: 11 motifs across x 10 motifs deep for queen size. Join motifs by working into the final round shell bases of a completed motif and the adjacent finished motifs using a slip-stitch or single crochet join to keep grid openings uninterrupted.
Round 24 :
First join step (when adding motif to a completed row): With RS of new motif facing you and adjacent motif next to it, join new motif by working into edge shells: sl st through back loop of shell st on new motif and through corresponding back loop on assembled motif for each shell across one side. Continue across full side; when you reach the corner join to both adjacent sides by working (sl st through both adjacent corner fans) ensuring corner sits flat. Fasten off. Repeat for second side when joining in second axis. (This method produces an almost invisible seam across the framed windows.)
Info :
Joining order tip: Join motifs horizontally first to build rows, then join rows vertically to keep alignment easier. Pin motifs in place before final joins and check corner alignment carefully.
Round 25 :
After joining one full row: For every motif joined on two sides, add reinforcement: work 1 sc in each ch-3 anchor along seams from RS, slipping through both motifs' back loops only to create a neat seam ridge. This reduces gaping in the open window mesh and strengthens seams.
Info :
If you prefer visible join, use the opposite side for join and carry color across join for contrast. For invisible join use same yarn and sl st as above with careful tension matching motif edges.
Round 26 :
Continue joining until the entire bedspread is assembled into the required motif grid. At the end of each completed row, weave in tails from joins and block the assembled section to keep rows square.
Info :
Check that grid windows line up both vertically and horizontally; if a seam looks twisted, unpick 2-3 joins and re-pin then rejoin to correct alignment.
— Inner Frame & Deep Border Build (After all motifs joined) :
Round 27 :
With right side facing, attach yarn at any motif seam on border edge. Ch 1, sc across seam lines around entire bedspread working 1 sc into each top of shell or frame stitch around edge to create a continuous base (count will vary depending on motif count; work evenly). Join with sl st to first sc.
Round 28 :
Ch 3 (counts dc), work 2 dc in same st, *ch 2, sk 1 st, 3 dc in next st; rep around to form a chain of corner clusters and side 3-dc groups, maintaining square corners by working 3 dc, ch2, 3 dc at each outer corner; join. This round begins the deep border that frames the whole bedspread.
Info :
Work evenly on the long edges. If your number of stitches around an edge does not divide into the pattern evenly, add or subtract a single ch-2 space between clusters to distribute a small adjustment; keep corner clusters consistent at four corners.
Round 29 :
Ch 1, sc in same st, *ch 5, sc in the center of each 3-dc group; rep; corners sc, ch5, sc; join. These elongated arches echo the motif arches and add depth to the border.
Round 30 :
Ch 3 (counts dc), 2 dc in same st, ch 2, 3 dc in same corner; then along each side work (dc, ch 1, dc) into each ch-5 arch; join. This frames the arches and readies the bedspread for a multi-layer scallop.
Info :
At this stage periodically drape the bedspread over the mattress to check drape and overhang; you may prefer an additional border round to increase drop if your bedspread looks too short.
Round 31 :
Ch 1, sc in same st, *ch 3, sc in next anchor between arch groups; rep across; corners sc, ch3, sc; join. This solidifies the border before final decorative shells.
Round 32 :
Decorative shell formation: Ch 3 (counts dc), in first shell space work (2 dc, ch 1, 2 dc) for small shell; skip next space and anchor into next; repeat to form shell pattern along full border, working (2 dc, ch 2, 2 dc) at outer corners; join. The shells begin to form the scalloped effect visible on the bedspread edge.
Info :
Keep shells evenly spaced. If working on a very large bedspread the shells will consume quite a bit of yarn — keep extra yarn stocked to match dye lots.
Round 33 :
Ch 1, sc in same st, *ch 3, sc into center of each shell to anchor; rep around; corners sc, ch3, sc; join. This anchors shell centers and tightens scallop formation.
Round 34 :
Ch 1, sc in same st then 1 sc in each st around to smooth any irregularities, but in each shell center work (sc, ch 3, sc) to emphasize scallop points; join. Fasten off and weave in ends. Border should now be substantial and consistent.
Info :
If you desire a deeper scallop, repeat rounds 32-34 with increased shell size (e.g., 3 dc, ch 1, 3 dc shells) to deepen scallops — be mindful of added yarn and changed drape.
— Final Scallop & Tassel Corners :
Round 35 :
Scallop finish: Using 6.5-8 mm hook, work across border edge: *into each anchored ch-3 shell work (sl st, ch 5, sl st) to form a picot loop, then in next shell work 7 dc into picot loop to form a dramatic fan; rep around. Corner fans: work 10 dc in corner ch-2, ch 3, 10 dc to maintain large corner curvature. Join and fasten off.
Info :
Scallop size determines the droop of the final edge. Pin scallops large and evenly spaced during blocking to give a neat wave. If scallops are too large for your taste, substitute 5 dc fans instead of 7.
Round 36 :
Optional micro-border: With smaller hook (6.5 mm) and same yarn, add one round of reverse single crochet (crab stitch) along the very edge to create a tidy whipped edge. Work in each scallop and in between shells to follow the swirl of the scallop for a finished look. Fasten off and weave ends deep into border to secure.
Info :
Reverse single crochet is worked left-to-right; it creates a rope-like edge that resists curling — perfect for heavy bedspreads that need a stable rim.
Round 37 :
Tassel placement: At each corner and at additional spaced points along long edges if desired, attach tassels. Make tassels to 12-14 cm length (measured folded) using the same yarn. Make 4 tassels for corners in sample queen size; optional extra tassels can be added every second scallop for a decorative fringe.
Info :
Attach tassels by threading the loop through the edge, pulling tails through loop and cinching; wrap head neat with spare yarn and secure with yarn needle. Trim ends evenly. Tassel heads may be reinforced with glue for durability if used in heavy-duty bedspread.
— Optional: Matching Pillow Covers (Make 2) :
Info :
Each cover is made of 9 motifs (3 x 3) joined as described earlier. Use two motifs for back flap closure or make full 6 x 6 inches back if you prefer an envelope closure.
Round 1 :
Make 9 motifs per pillow using the motif instructions Rounds 1-23. Block motifs and join to form 3 x 3 square for front. Back can be 1 piece of fabric or 3 motifs joined and overlapped for an envelope closure.
Round 2 :
To join cushion motifs, use sl st join through both motif edges, then add a 2-round finishing border: Round A: 1 sc in each st around; Round B: (ch 3, skip 2, sc) across to make a decorative lacy edge. Add tassels to corners if desired matching bedspread.
Info :
Insert pillow form before final seam closing. Ensure motif back is lined if pillow will be used frequently to protect yarn from wear.
— Finishing Touches & Care :
Info :
Final blocking: Block entire assembled bedspread wide onto large mats, pinning scallops to even out drape and ensure edges are square. Allow to dry fully. Care: Hand wash or machine wash on delicate in a large capacity washer inside a pillowcase bag; lay flat to dry to protect shape. Re-block if necessary.
Info :
Trim: Use sharp scissors to neaten tassel ends. Store bedspread flat or rolled to prevent stretching of scallops. For heavy usage, add a backing fabric sewn to the inside of the bedspread to protect the open lace from snagging.
Making this window-lace granny bedspread is a truly rewarding slow-craft project — each square is a small work of art that comes together into a stunning, tactile whole. The cream rope yarn and layered scallop border create a vintage, cozy look that looks beautiful draped over a bed or folded at the end of a sofa. The process of motif-making, joining, and finishing is meditative and satisfying; the tassels are the cherry on top that make the bedspread feel hand-heirloom-worthy. 🧶💛