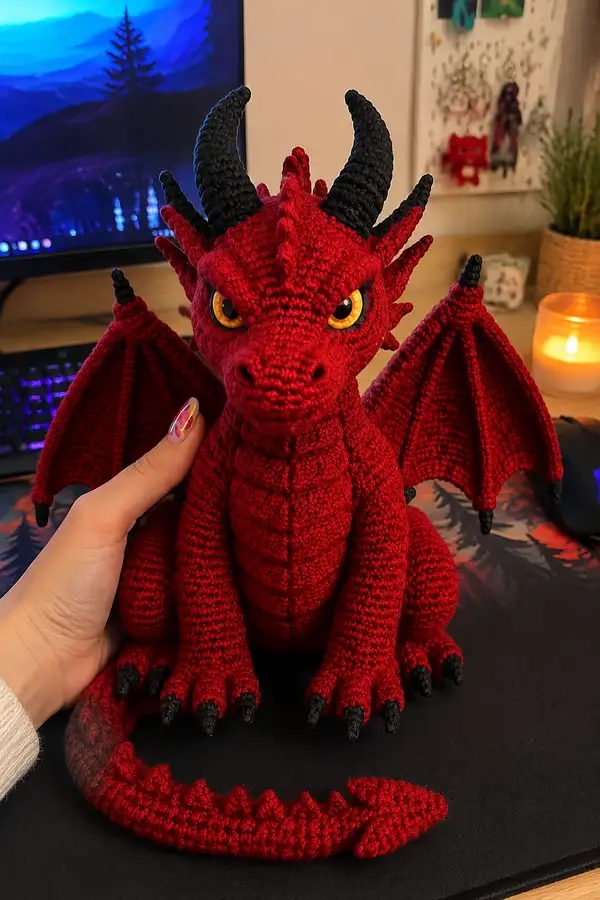
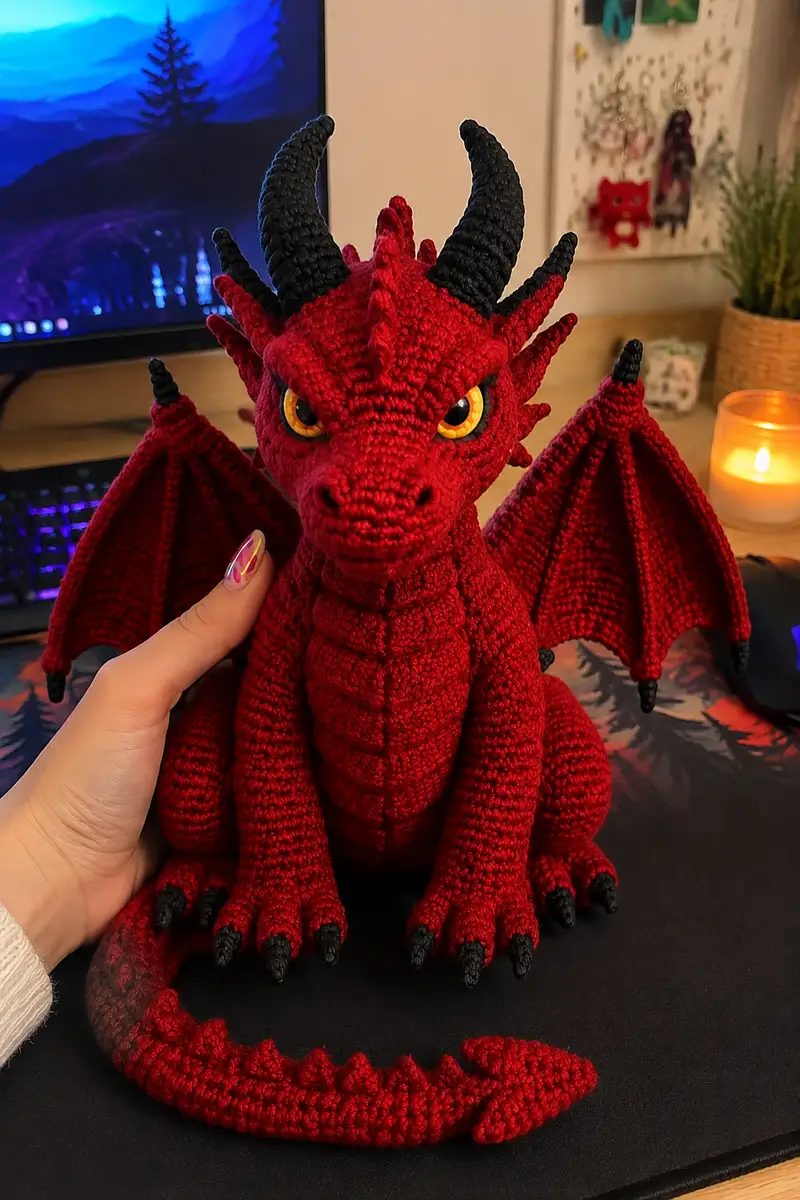
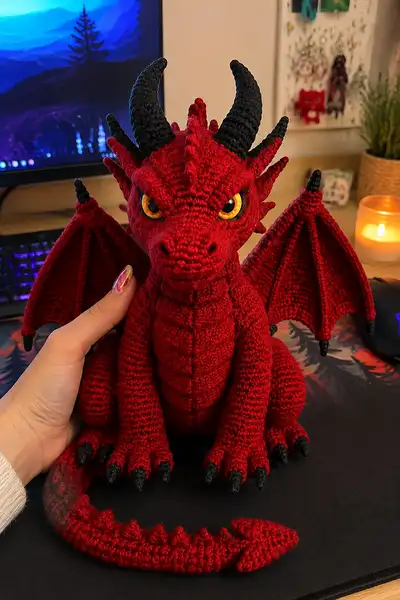
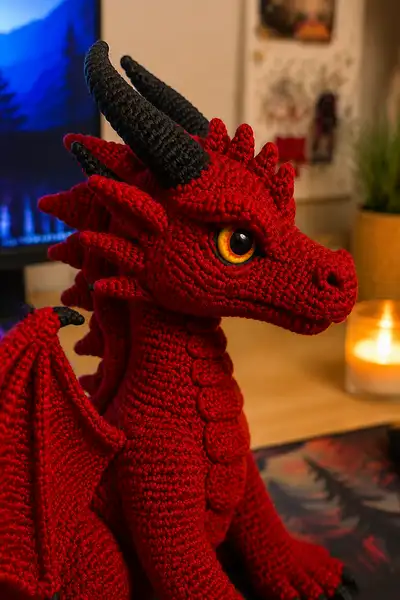
This detailed pattern teaches you how to crochet a fierce but cuddly crimson dragon with dramatic horns, expressive amber eyes, articulated wings, and a row of sculpted dorsal spikes. The finished dragon features textured belly scales, black clawed feet and tail fin, and a sculpted snout for a lifelike poseable head. Perfect as a dramatic display piece or a unique handmade gift for fantasy fans.
Progress Tracker
0% Complete
— Head :
Round 1 :
6 sc in magic ring (6)
Round 3 :
(1 sc, inc) x 6 (18)
Round 4 :
(2 sc, inc) x 6 (24)
Round 5 :
(3 sc, inc) x 6 (30)
Round 6 :
(4 sc, inc) x 6 (36)
Round 7 :
(5 sc, inc) x 6 (42)
Round 8 :
(6 sc, inc) x 6 (48)
Round 9 :
(7 sc, inc) x 6 (54)
Round 10-14 :
1 sc in each st (54)
Info :
Place safety eyes between rounds 12 and 13, spacing approximately 10-12 stitches apart depending on desired expression (for 18-20mm eyes, aim for 11-12 sts; for 16mm eyes, 9-10 sts). Mark the row start carefully so both eyes sit level. Use pins to test placement before securing.
Round 15 :
(7 sc, dec) x 6 (48)
Round 16 :
(6 sc, dec) x 6 (42)
Round 17 :
(5 sc, dec) x 6 (36)
Info :
Begin stuffing the head firmly but not rock-hard. Use small amounts of fiberfill at a time to avoid lumps. Focus extra stuffing under the brow line to create a pronounced forehead and under the snout to keep the nose sculpted.
Round 18 :
(4 sc, dec) x 6 (30)
Round 19 :
(3 sc, dec) x 6 (24)
Round 20 :
(2 sc, dec) x 6 (18)
Round 21 :
(1 sc, dec) x 6 (12)
Info :
Fasten off leaving a 30-40cm tail for sewing the head to the neck later. Finish stuffing through the opening, ensuring symmetrical shaping. Close opening with your yarn needle using a strong ladder stitch to form a smooth top of the head before attaching horns and spikes.
Info :
Sculpting the muzzle: After closing the top, embroider two short nostril lines by weaving a small length of yarn in and out to define the nose tip. If desired, add light surface stitches to deepen the brow.
— Snout / Muzzle shaping (worked in rounds attached to head) :
Round 1 :
Join yarn to lower front of head where you want the snout to begin. Ch1, 6 sc evenly across to form a short tube (6)
Round 2 :
Inc in each st around (12)
Round 3 :
(1 sc, inc) x 6 (18)
Round 4-6 :
1 sc in each st (18)
Round 7 :
(1 sc, dec) x 6 (12)
Info :
Stuff the snout lightly as you finish. Leave the last 6 sts open and sew them to the lower front of the head for a seamless muzzle. Reinforce the seam so the nose remains rounded.
— Head Details: Brow ridges and spikes :
Info :
These are small sculpted spikes worked in black or same red. Make 10-14 spikes total for top and back of head. Place symmetrically down center back of skull and around brow. Work small cones and sew in place.
Spike (make 14) - Round 1 :
6 sc in magic ring (6)
Spike - Round 2 :
(1 sc, inc) x 3 (9)
Spike - Round 3 :
1 sc in each st (9)
Spike - Round 4 :
(1 sc, dec) x 3 (6)
Spike - Round 5 :
6 sc (6)
Info :
Fasten off leaving a long tail for sewing. Stuff lightly; spikes should be firm but small. Sew along centerline of skull and around brows, staggering left and right for natural effect. Use smaller stitches to anchor securely.
— Horns (Make 2) :
Info :
Horns are sculpted cones worked in black using smaller hook to tighten fabric. Work flat spiral in continuous rounds to create natural curve. Optionally insert thin wire for stiffness and shaping; wrap wire in yarn before stuffing to avoid poke-through.
Round 1 :
6 sc in magic ring (6)
Round 3 :
(1 sc, inc) x 6 (18)
Round 4 :
(2 sc, inc) x 6 (24)
Round 5-6 :
1 sc in each st (24)
Round 7 :
(4 sc, dec) x 4 (20)
Round 8 :
1 sc in each st (20)
Round 9 :
(3 sc, dec) x 4 (16)
Round 10-12 :
1 sc in each st (16)
Round 13 :
(2 sc, dec) x 4 (12)
Round 14 :
1 sc in each st (12)
Round 15 :
(1 sc, dec) x 4 (8)
Round 16 :
1 sc in each st (8)
Info :
Stuff lightly and shape into a curve before closing. If adding internal wire, slide wire now, leaving ends wrapped and secured well inside the horn and fasten off leaving long tail for sewing. Sew base of horn along the top of the skull where marked, angling slightly back for a menacing look.
— Neck (joins head to body) :
Round 1 :
6 sc in magic ring (6)
Round 3 :
(1 sc, inc) x 6 (18)
Round 4 :
(2 sc, inc) x 6 (24)
Round 5-8 :
1 sc in each st (24)
Info :
Attach neck to base of head using mattress stitch: align 24-st opening of neck with lower neck opening of head and sew around evenly. Stuff neck moderately — enough to maintain shape but still flexible so the head can tilt slightly.
Round 9 :
(3 sc, dec) x 6 (18)
Round 10-14 :
1 sc in each st (18)
Info :
If you plan to make the neck poseable, insert a short piece of stiff wire or dowel inside the neck before final stuffing. Wrap wire ends with yarn to prevent poking through stitches.
— Body :
Round 1 :
6 sc in magic ring (6)
Round 3 :
(1 sc, inc) x 6 (18)
Round 4 :
(2 sc, inc) x 6 (24)
Round 5 :
(3 sc, inc) x 6 (30)
Round 6 :
(4 sc, inc) x 6 (36)
Round 7 :
(5 sc, inc) x 6 (42)
Round 8 :
(6 sc, inc) x 6 (48)
Round 9-12 :
1 sc in each st (48)
Info :
If using a two-tone belly or adding a belly plate later, this is a good place to change to a darker red for the underside. Work the next round in BLO to create a ridge where the belly plates will sit. Keep fabric tight for a snug stuffing hold.
Round 13 :
1 sc in each st BLO (48)
Round 14-20 :
1 sc in each st (48)
Info :
Begin stuffing the body firmly from the bottom up. Add a bit more stuffing behind the shoulders to support the head and at the base for the seated posture. Leave the top opening ready for neck insertion and final shaping.
Round 21 :
(6 sc, dec) x 6 (42)
Round 22 :
(5 sc, dec) x 6 (36)
Round 23 :
(4 sc, dec) x 6 (30)
Round 24 :
(3 sc, dec) x 6 (24)
Round 25 :
(2 sc, dec) x 6 (18)
Round 26 :
1 sc in each st (18)
Info :
Stop stuffing when the body reaches desired firmness; keep the top opening large enough to attach the neck. Use a stuffing tool to push fiberfill into the lower curves and between leg attachment points for a compact seat.
Round 27 :
(1 sc, dec) x 6 (12)
Info :
Fasten off leaving a long tail for sewing. When joining neck and body, align center front lines: mark front center on both pieces and stitch together using a mattress stitch for an invisible join. Reinforce by stitching through several rounds to secure the head and neck to the torso for a stable connection.
— Belly Plates / Overlapping Scales (Make 6-8) :
Info :
These oval plates are sewn down the centerline of the chest to create the armored look. Make 6 large plates and 2-3 smaller plates for the upper chest. Sew overlapping from bottom to top.
Plate - Round 1 :
6 sc in magic ring (6)
Plate - Round 2 :
6 inc (12)
Plate - Round 3 :
(1 sc, inc) x 6 (18)
Plate - Round 4 :
1 sc in each st (18)
Plate - Round 5 :
SL ST around to form a smooth edge and fasten off leaving long tail for sewing
Info :
Stack plates on the body centerline from bottom to top, overlapping slightly. Sew the bottom-most plate first, then tack each higher plate so they overlap by about 30% to create a natural scale effect. Use matching yarn to keep stitches invisible.
— Front Legs (Make 2) :
Round 1 :
6 sc in magic ring (6)
Round 3 :
(1 sc, inc) x 6 (18)
Round 4 :
(2 sc, inc) x 6 (24)
Round 5-9 :
1 sc in each st (24)
Info :
These rounds form the front paw/foot. Keep tension slightly tighter for a firmer foot. Mark the first stitch of each round and count carefully so claws line up later.
Round 10 :
(3 sc, dec) x 6 (18)
Round 11-16 :
1 sc in each st (18)
Round 17 :
(2 sc, dec) x 6 (12)
Round 18-22 :
1 sc in each st (12)
Info :
Stuff feet firmly, especially at the toes, to allow the dragon to sit. Before finishing, use a scrap of cardboard or felt insole if you want a flat base; insert it at round 11-12 and continue stuffing around it for stability.
Round 23 :
(1 sc, dec) x 4 (8)
Round 24 :
1 sc in each st (8)
Claw (Make 5 per foot) - Round 1 :
4 sc in magic ring (4)
Claw - Round 2 :
(1 sc, inc) x 2 (6)
Claw - Round 3 :
1 sc in each st (6)
Claw - Round 4 :
(1 sc, dec) x 2 (4)
Info :
Make claws in black. Leave long tails to sew three claws at the front of the foot and two at the back (placement as visible). Sew claws securely and reinforce with extra stitches through the foot if needed.
— Hind Legs (Make 2) :
Round 1 :
6 sc in magic ring (6)
Round 3 :
(1 sc, inc) x 6 (18)
Round 4 :
(2 sc, inc) x 6 (24)
Round 5 :
(3 sc, inc) x 6 (30)
Round 6-10 :
1 sc in each st (30)
Info :
Hind legs are larger because they support the sitting posture. Stuff the toes very firmly as you shape. Consider a small internal disc or felt pad in the foot sole for flatness.
Round 11 :
(4 sc, dec) x 6 (24)
Round 12-18 :
1 sc in each st (24)
Round 19 :
(3 sc, dec) x 6 (18)
Round 20-26 :
1 sc in each st (18)
Round 27 :
(2 sc, dec) x 6 (12)
Round 28 :
1 sc in each st (12)
Info :
Button the hind legs to the body at rounds 8-12 of the body to get a stable seated look. Pin placement and check symmetry before sewing. Reinforce by stitching through the body twice for durability.
— Tail :
Round 1 :
6 sc in magic ring (6)
Round 3 :
(1 sc, inc) x 6 (18)
Round 4-10 :
1 sc in each st (18)
Round 11 :
(2 sc, dec) x 4 (12)
Round 12-18 :
1 sc in each st (12)
Round 19 :
(1 sc, dec) x 4 (8)
Round 20-26 :
1 sc in each st (8)
Tail Fin (top) - Round 1 :
6 sc in magic ring (6)
Tail Fin - Round 2 :
6 inc (12)
Tail Fin - Round 3 :
1 sc in each st (12)
Tail Fin - Round 4 :
SL ST to shape a pointed fin and fasten off leaving a long tail for sewing
Info :
Sew tail to back-bottom center of body at the marked round (usually around body round 6-8). Pin in a gentle curve around the side so the tail rests naturally. Add a few exterior running stitches along the join to help the tail curve organically.
— Wings (Make 2 - Membrane & Arm) :
Info :
Wings are worked as a curved membrane with an inner arm 'finger' structure. Work in rounds to create a sturdy membrane and then add ridged wing finger edges in BLO to mimic bone structure. Optional internal wire or pipe for poseable wings inserted along the inner fingers before final stuffing/sewing.
Wing Membrane - Round 1 :
Ch 30, join with sl st to form a loop carefully (30)
Wing Membrane - Round 2 :
1 sc in each ch around (30)
Wing Membrane - Round 3 :
(3 sc, inc) x 6 (36)
Wing Membrane - Round 4-7 :
1 sc in each st (36)
Info :
Switch to BLO on round 8 to create a ridged joint where the wing will fold. Working in BLO will make a natural crease. If you prefer a softer wing, continue in regular sc instead.
Wing Membrane - Round 8 :
1 sc in each st BLO (36)
Wing Membrane - Round 9-14 :
1 sc in each st (36)
Wing Finger (make 3 for each wing) - Round 1 :
5 sc in magic ring (5)
Wing Finger - Round 2 :
(1 sc, inc) x 2, 1 sc (7)
Wing Finger - Round 3-7 :
1 sc in each st (7)
Wing Finger - Round 8 :
(1 sc, dec) x 2, 1 sc (5)
Wing Finger - Round 9 :
1 sc in each st (5)
Info :
Sew three wing fingers to the membrane spaced evenly along the top edge. Use small whip stitches through both layers of membrane and finger to secure. If adding wire, insert it into each finger before closing and route it into the wing base for poseability.
Wing Edge - Round 1 :
Join yarn at wing tip and work 1 sc evenly along outer edge to create a reinforced rim (approx 60 sc around depending on shaping)
Wing Edge - Round 2 :
In black, 1 sc in each st (60)
Info :
Work the wing edge in black to match horn/claw color. This provides a crisp silhouette and hides minor finishing imperfections. Sew wings to upper-back area between body rounds 10-14, aligning inner joint with shoulder seam.
— Neck Spines / Dorsal Spikes (Make 10-12) :
Round 1 :
6 sc in magic ring (6)
Round 2 :
(1 sc, inc) x 3 (9)
Round 3 :
1 sc in each st (9)
Round 4 :
(1 sc, dec) x 3 (6)
Info :
Vary the size slightly between bigger spikes for the upper back and smaller ones for the tail base. Sew spikes in a single row down the spine, starting from the back of the skull to the tail root. Angle them slightly outward for a dynamic profile.
— Assembly Instructions :
Info :
Assemble pieces on a flat surface or pinboard. Arrange parts in the intended final position and lightly block wings or horns if needed to hold shape before sewing.
This dragon is a celebration of detail — from the layered belly plates to the curled horns and sculpted wings. You will feel proud as each section comes together, transforming yarn into a dramatic, personality-rich creature. The finishing touches — bright amber eyes, black claws, and carefully placed spikes — make this piece stand out on any shelf. Happy crocheting and enjoy bringing this crimson guardian to life! 🐉🧶✨