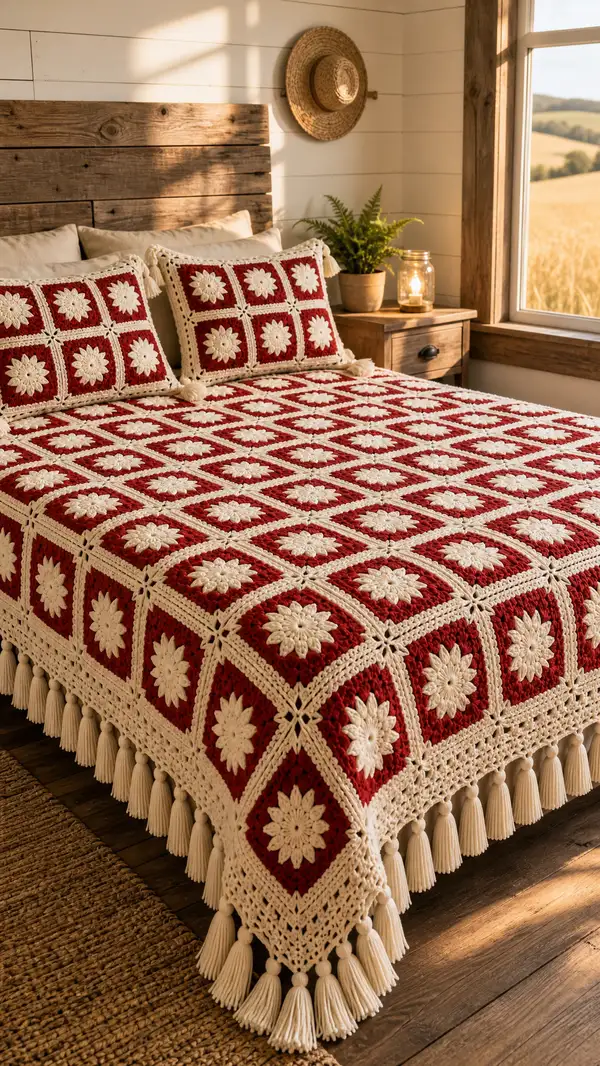
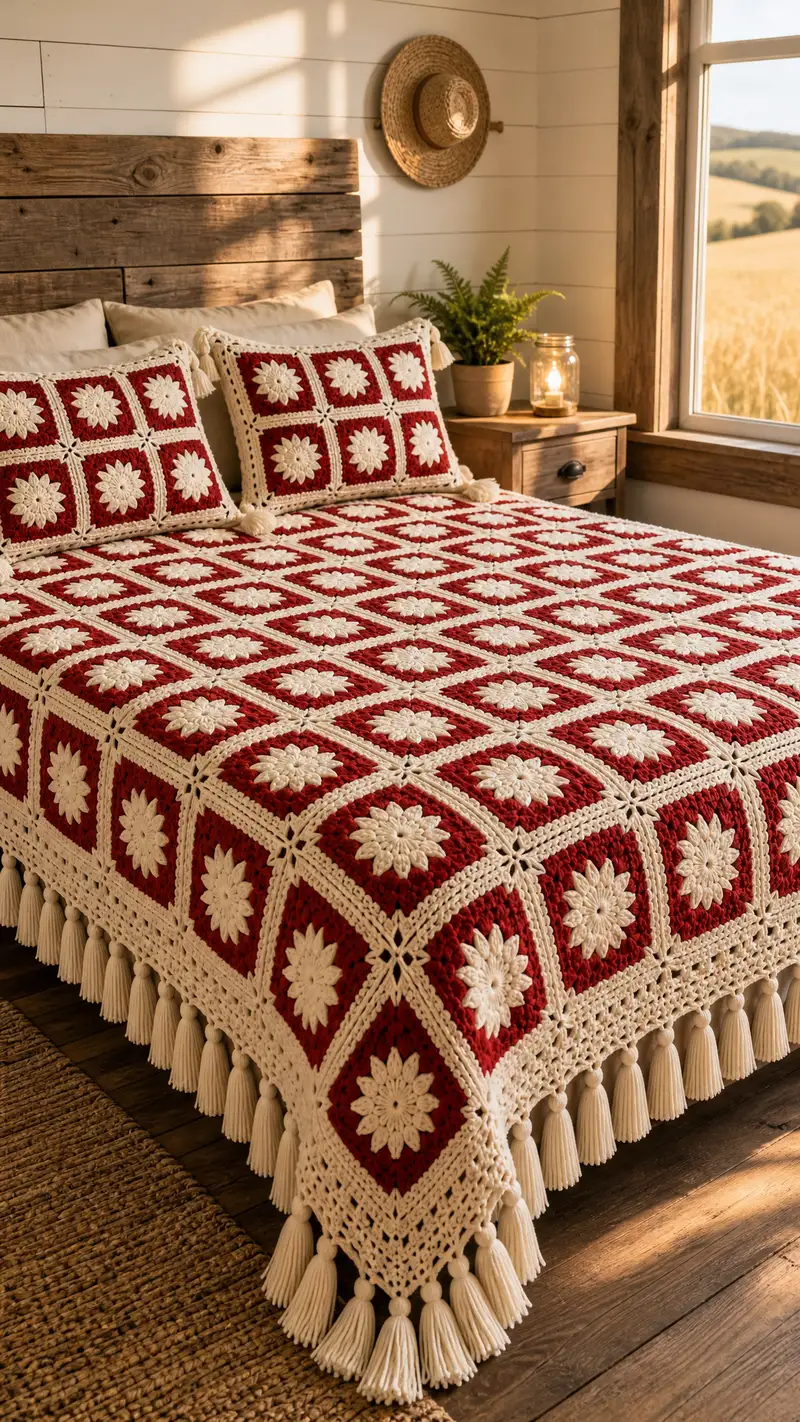
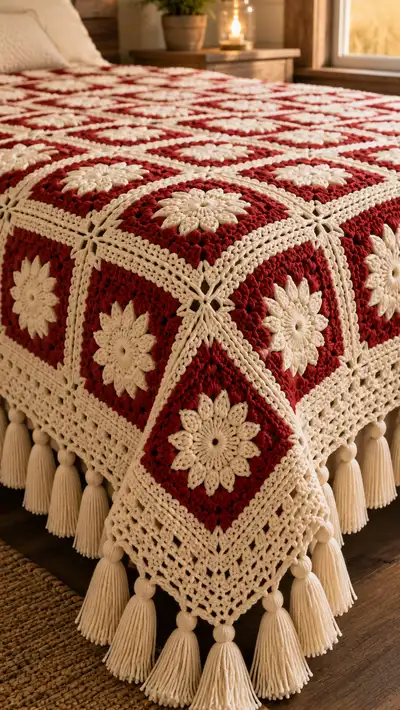
A warm, vintage-inspired bedspread made from sunburst granny squares in rich crimson and creamy off-white. This pattern uses textured puff petals at the center of each square, joined with a lacy cream border and finished with chunky cream tassels for a cozy, farmhouse look. Step-by-step instructions guide you through motif construction, join-as-you-go techniques, an elegant lacy edging and matching pillow shams.
Progress Tracker
0% Complete
— Overview :
Info :
This pattern constructs a modular bedspread from 12-petal sunburst granny squares worked in two colors: cream for the raised petal round and final trim, and crimson for the square backgrounds. Each square is made individually, blocked to identical dimensions, then joined using a decorative join-as-you-go that creates the cream cross at each corner. The full spread as pictured measures approximately 86" x 92" (queen/oversized throw) when arranged as 9 squares wide by 10 squares long; adjust the number of squares for a smaller or larger size. Use bulky (#5) yarn with a 6.5–8mm hook to achieve the pictured texture. Gauge will vary with tension; sample a single motif and block to determine final motif size before committing to the full spread.
Info :
Recommended finished motif size after blocking is approximately 9" square. If your motifs are larger or smaller, adjust the number of motifs across and down to achieve your desired finished blanket size. The instructions below break the work into motif construction (Rounds 1-20), square framing (Rounds 21-34), join-as-you-go and assembly (Rounds 35-84), bedspread outer border (Rounds 85-130), tassel fringe (Rounds 131-140) and matching pillow shams (Rounds 141-186).
— Sunburst Motif (Make 90-100 motifs depending on desired bed size) :
Round 1 :
With Cream (Color A). Make a magic ring. Ch3 (counts as first dc), work 11 dc into ring. Join with sl st to top of ch3. (12 dc)
Round 2 :
Ch1, *puff stitch in next dc, ch1* repeat around (puff = yarn over, insert hook, pull up loop; repeat 3 times total per puff then yarn over and pull through all loops). There will be 12 puff clusters separated by ch1 spaces. Join with sl st to first puff. (12 puffs, 12 ch-1 spaces)
Info :
Puff cluster tension: keep puffs slightly loose so the petals sit proud of the background but not too gappy. Use a consistent number of loops per puff (3 loops typical for bulky yarn) so all petals are uniform.
Round 3 :
Change to Crimson (Color B). Join in any ch-1 space between puffs with sl st, ch2 (counts as hdc here as a base), work (2 dc) in same ch-1 space; *in next ch-1 space work 3 dc* repeat around, ending with 3 dc in final ch-1 space. Join with sl st to top of ch2. (12 groups of 3 dc = 36 dc-equivalents)
Round 4 :
Ch1, sc in same st, *ch2, skip next dc, sc in top of next puff (work into the top of the puff cluster). Repeat around placing sc in top of each puff and ch2 between. Join with sl st to first sc. (12 sc, 12 ch2 spaces)
Info :
Inserting into the top of the puff: split the puff cluster slightly and insert the hook under the top loops to anchor the sc; this secures petals before the background rounds and keeps the puff from pulling outwards.
Round 5 :
Ch3 (counts as dc), (2 dc) in same st, *3 dc in each ch-2 space around*. Join with sl st to top of ch3. (12 clusters of 3 dc = 36 dc; this round creates a continuous circular band filling space between petals)
Round 6 :
Ch1, sc in each st around working evenly to maintain circle. Join with sl st. (36 sc)
Round 7 :
Ch3, (1 dc in next 2 sts, inc) repeat around to begin forming a gentle square curve; pattern: (2 dc, inc) x12. Join. (36 + 12 inc = 48 dc)
Info :
Begin converting the round into a square by introducing increases at evenly-spaced points. We will create corners in later rounds. Take care to space the increases evenly so the square grows symmetrically.
Round 8 :
Ch1, sc in each st around. Join. (48 sc)
Round 9 :
Change to Cream (Color A). Ch3, *skip 2 sts, (3 dc, ch2, 3 dc) in next st (corner shell), skip 2 sts, dc in each of next 3 sts*. Repeat around placing 4 corner shells evenly spaced to start squaring up. Join. (This round produces 4 corner shells spaced approximately evenly; total dc count will vary around 48–52 depending on spacing)
Info :
When working corner shells (3 dc, ch2, 3 dc) treat each corner as one distinct unit. To maintain symmetry, count across the round and adjust small dc blocks between corners to land corners roughly at quarter points.
Round 10 :
Ch1, sc in each dc and sc in ch-2 corner spaces, sc in each st around to flatten the shells. Join. (Even stitch count matching previous round)
Round 11 :
Ch3, (2 dc in each of next 4 sts), *(3 dc, ch2, 3 dc) in each corner ch-2 space, then 2 dc in each of next set of sts between corners* repeat around to expand the square. Join. (Stitch count increases by sets of dc added between corners; typically this round will bring count to approximately 68–72 dc)
Info :
At this stage, measure each motif: after blocking motifs should be ~9" square. If your motifs are significantly larger, use a smaller hook or lighter yarn. If smaller, consider a larger hook or bulky yarn.
Round 12 :
Ch1, sc around working 2 sc in each corner space and 1 sc in each dc across. Join. (Even sc count as per previous round)
Round 13 :
Ch2, hdc in same st, *hdc in next X sts (work evenly across until corner), (hdc, ch1, hdc) in corner space* continue around. Join. (This softens the edge and prepares for the classic granny shell rows in the next rounds)
Info :
Adjust the number of hdc between corners to keep square sides even. The pattern here is intentionally adjustable: ensure each of the four sides has roughly the same number of stitches to keep the square straight when blocked.
Round 14 :
Change to Crimson (Color B). Ch3, *skip next 2 sts, (3 dc) in next st (granny cluster), ch1, skip next 2 sts, dc in each of the next set of sts*. Repeat across each side placing granny clusters in the same positions you chose on round 11. Join. (Creates the textured red field)
Round 15 :
Ch1, sc across each dc and in ch-1 spaces. Join. (Even stitch count)
Round 16 :
Ch2, (3 hdc) in each ch-1 space between clusters to add a subtle raised band around the square. Join. (Count will vary; this round adds height and a neat textured ridge)
Info :
At this point your motif should read as a cream petal center sitting on a solid crimson square with cream accents at the corners. Block one motif now to establish final size and shape—blocking will open the petals and square equally for even joining.
Round 17 :
Change to Cream (Color A). Ch1, sl st into the space at the midpoint of a chosen side to begin the join-as-you-go technique for the first border round (this is used later when attaching motifs together). Sc across sides, working 2 sc in each corner space (or sc into the corner shell apex). Join. (Creates a thin cream frame)
Round 18 :
Ch3, *dc in each stitch across until you reach a corner, (3 dc, ch2, 3 dc) in corner*, continue around. Join. (This sets a clear cream frame to align squares when joining)
Round 19 :
Ch1, sc in each st around. Join. (Even sc count matching round 18)
Round 20 :
Fasten off leaving a 10–12" tail for weaving or joining. Block motif flat and square using pins. Make required number of motifs to cover desired bed size: pictured arrangement uses 9 x 10 (90 motifs). Adjust counts to fit mattress dimensions after blocking.
Info :
Make all motifs first or work in batches — some crocheters prefer to complete and block motifs in lots of 10–20 to maintain consistent blocking and ease joining. Label rows/columns to plan motif placement and color distribution if you alternate colors.
— Square Frame & Final Motif Preparation :
Round 21 :
With Cream. Rejoin at any mid-side point for a decorative frame: ch1, sc in same st, *ch3, skip next 2 sts, sc in next* repeat around to produce a lacy chain space every few stitches. Join. (Even sc and ch-3 spaces)
Round 22 :
Ch3, dc in each sc and in each ch-3 space work (dc, ch1, dc) to make small lacy arches across each side. Join. (Even count; this subtle lace prepares for the large outer border)
Info :
These small lacy rounds are optional but recommended: they add a crisp cream line between squares when joined and also supply the points where join-as-you-go stitches will be anchored to create the neat crosses at square corners.
Round 23 :
Ch1, sc in each st around. Join and fasten off leaving long tail for final blocking and sewing if you prefer to seam rather than JAYGO. (Even stitch count)
Info :
If you plan to seam with yarn needle rather than join-as-you-go, use the long tail now to whip or mattress stitch motifs together after blocking. For a seamless look, join-as-you-go is recommended and described next.
— Join-As-You-Go (JAYGO) Decorative Join (Begin joining motifs in rows) :
Info :
The join-as-you-go explained here uses the cream frame on round 22/23 as the joining row. Each motif will be joined to adjacent motifs along side edges and at corners creating the small cream crosses seen where four motifs meet. Work JAYGO when you have two motifs ready to join: place them right sides up, align, and work the joining round through both motifs as you go.
Round 24 :
With cream on a completed motif: rejoin at a corner ch-1 or ch-2 space, ch1, *sc in next st until you reach the midpoint join point; at each location where the square will meet a neighboring motif: insert hook under corresponding stitch of the neighbor motif and sl st to join, ch1 and continue across*. Continue around joining any already-placed neighbors. Fasten off when the motif has been joined on all available sides. (Join stitches equal to the sc count across joined sides)
Info :
When you are joining the second motif to the first, work half of the side normally and perform a slip stitch join into the corresponding st of the adjacent motif at each joining point (usually at chain arch apexes). For the center cross (where four motifs meet), the pattern uses a small 4-loop closure: insert hook through both motifs and draw up a loop then ch1 and sl st to form an X-like cross. Keep tension looser when joining to prevent puckering.
Round 25 :
Repeat Round 24 for each adjacent motif, always placing new motifs to the right and bottom of an existing joined block in order to work systematically across your bedspread. Work full rows then attach next row beneath using same join technique. Keep motifs oriented identically (petal directions all pointing same way if desired).
Info :
Tip: join motifs into strips first (e.g., make 9-motif wide strips), then join strips together. This reduces moving heavy work around and helps keep edges straight. Use pins to align motifs and a ruler to keep rows straight as you join.
Round 26 :
After joining adjacent motifs in a strip, you may reinforce seams by working a sc seam along the wrong side joining edges: fold motifs to expose wrong sides and sc through both front loops or back loops for a subtle ridge. This step is optional but increases durability for a bedspread that will be used often.
Info :
Count joints as you go. For a 9 x 10 arrangement you'll perform 8 joins across each of the 10 rows and 9 joins down between rows; plan yarn usage accordingly and keep enough cream for extensive joining rounds.
— Assembly: Layout and Joining Strategy :
Info :
Lay out all motifs on the floor or large table in your planned arrangement before joining. This is essential because the visual distribution of petals and subtle variations may look different once joined. Mark the top edge and choose whether to rotate motifs for alternating patterns or keep them all aligned. Photograph or sketch the layout for reference.
Info :
When joining, keep the joining row tension slightly looser than motif rounds so the spread will lay flat across wide areas. If seams are too tight the fabric will pucker and the blanket will not drape nicely.
Info :
After completing all joins, block the entire spread for final evenness — pin gently at the edges and allow to dry fully. Blocking evens little differences in motif dimensions and opens the lace border later more evenly.
— Outer Border Setup (Begin working around entire joined spread) :
Round 30 :
With motifs joined and the assembly blocked, rejoin Cream at any outer corner. Ch1, sc evenly around the entire blanket working 2 sc into every corner space. Work across the seam lines catching both joined motif edges to ensure a smooth transition. Join. (Count equals perimeter sc count)
Info :
This first round around the full spread creates a uniform anchor for the larger lacy border. Work slowly along seams to make sure you insert your hook through both layers where the motifs meet to create a consistent edge.
Round 31 :
Ch3, *skip next sc, (3 dc, ch2, 3 dc) in anchor stitch at each corner point to define corner shells, then dc in each sc across side*. Work corners at each blanket corner, distributing dc across sides to avoid bunching. Join. (Corner shells at four blanket corners only)
Round 32 :
Ch1, sc in each st around and 2 sc in each corner ch-2 space. Join. (Even sc count)
Info :
From here we will build a deep lacy border in several graduated rounds. The pictured border consists of 12 rounds of alternating tall double/triple crochet arches and open mesh to create the elegant clipped look with the tassels attached at the last triangular points.
Round 33 :
Ch2, *dc in next 3 sts, ch2, skip next 2 sts* repeat around to begin larger mesh; place (3 dc, ch2, 3 dc) in every corner ch-2. Join. (Creates a airy foundation)
Round 34 :
Ch1, sc in each st and in each ch-2 space. Join. (Even sc count)
Round 35 :
Ch3, dc in next 2 sts, *(2 dc, ch1, 2 dc) in next ch-2 space, dc in next 6 sts* continue around. Join. (This round forms the first wide shell sections of the border)
Info :
Make sure shell placement aligns across long sides; the long outer border benefits from symmetric placement of shells to make corner shaping even.
Round 36 :
Ch1, sc across shells and spaces, placing 3 sc in the ch-1 space at shell apexes to anchor. Join. (Even sc count)
Round 37 :
Ch3, dc in next 4 sts, *ch2, skip 2 sts, (5 dc) in next st (large shell)* repeat around with shells centered along sides and a (5 dc, ch2, 5 dc) in corner spaces. Join. (Wide shells are formed: count will expand based on shells per side)
Info :
To create an open, lacy border that drapes well, stagger larger shells every third or fourth repeat so the lace has movement. The pictured bedspread uses alternating rows of large and smaller shells to create visual depth.
Round 38 :
Ch1, sc in each st and sc in each ch-2 corner space. Join. (Even sc count)
Round 39 :
Ch5 (counts as tr + ch2), tr in next 2 sts, *ch2, skip 2 sts, (tr in next 5 sts) repeat around placing (tr x5, ch2, tr x5) in corners.* Join. (This is a tall treble row for an open ladder effect)
Round 40 :
Ch1, sc in each st across, placing extra sc in corner ch-2 spaces. Join. (Even sc count)
Info :
Repeat rounds 35–40 as desired to build the border depth. The sample in the photos has a deep border of approximately 12 rounds beyond the motif perimeter composed of shells and open ladder rows. For the pictured depth, repeat the shell-tr-ladder sequence two to three times total to reach visual depth before starting the closed triangular last border where tassels attach.
Round 41 :
Ch3, dc in each st across building the final even band; place 3 dc in corner spaces to maintain shape. Join. (Even dc count)
Round 42 :
Ch1, sc in each st around. Join. (Even sc count)
Round 43 :
Ch4 (counts as tr + ch1), *skip 2 sts, (tr, ch1, tr) in next st for small pointed arches*. Repeat around to create the scalloped triangular points that will receive tassels beneath. Join. (Number of points equals perimeter repeats)
Info :
The final triangular points are where tassels attach. Space your points by counting carefully so points are evenly spaced around the perimeter; this will create a balanced tassel placement matching the photos.
Round 44 :
Ch1, sc in each st and sc around each ch-1 space to tidy the points. Join and fasten off leaving long tail for decorative finishing if needed. (Even sc count)
Info :
Optional bead or knot: if you want a bead at the top of each tassel like a large button head, secure a small wooden bead on the tassel loop before finishing the knotted head.
— Tassel Fringe (Make tassels to attach at each point) :
Info :
Tassel size in the pictures is generous: approximately 5" long with a round wrapped head. Each tassel is made from 18–24 strands of cream bulky yarn folded in half. Prepare a tassel template (a 5" length of cardboard) for uniformity and wrap yarn 18–22 times depending on yarn thickness.
Round 46 :
To assemble tassel: fold bundle in half, tie a 6" scrap tightly around top of folded loop to create the neck, wrap a separate strand multiple times around the neck area to form the wrapped head about 10–12 times, knot and trim tail ends evenly. Leave a short tail from the neck wrap to stitch the tassel in place.
Round 47 :
Attach tassels: at each triangular point from Round 43, use the knot tail to sew through the apex and anchor tassel securely with multiple passes. Space tassels evenly and trim bottoms straight for a neat finish. Repeat around entire perimeter. (Number of tassels equals number of triangular points — typical spacing yields 18–28 tassels per long side depending on motif count)
Info :
For extra fullness match the number of strands per tassel consistently. If you want a bobble above each tassel like the pictured rounded head, use an extra small wrapped loop or a wooden bead under the wrapped head for that shape.
— Pillow Shams (Make 2 matching) :
Round 48 :
Make 9 motifs for each pillow sham (arranged 3 x 3) following Rounds 1–23 above. Block motifs to match bedspread motif size.
Round 49 :
Join-as-you-go two short rows of three motifs as above (Rounds 24–26). Join strips to make 3 x 3 panels. Fasten off and weave ends.
Round 50 :
With Cream, rejoin at outer edge and work the border rounds 30–44 but reduce overall border depth to 6–8 rounds to keep pillow light. Attach small tassels at each corner if desired (4 tassels per sham) or smaller tassels to match bedspread style.
Info :
To make pillow cases, construct a rectangular backing in plain single crochet in cream using the measured size of the front panel and seam the sides leaving a small opening for the pillow form. Alternatively work two sham panels and sew three sides then insert pillow and close the last side with an invisible seam.
Round 51 :
Optional closure: add a button flap or zipper to the back if you prefer a removable cover for washing. Use heavy-duty thread and stitch buttons through multiple loops for strength.
Info :
When making shams for display, use slightly tighter tension around edges for a crisp rectangular shape. Pad the pillow with a plump insert to show off the puff petal texture on the front panel.
— Final Finishing & Care :
Round 52 :
Weave in all ends with yarn needle. For longer tails from join-as-you-go, weave back into join seams catching multiple joined motifs to secure and hide ends. Trim any stray fibers.
Round 53 :
Steam or wet block the entire bedspread gently: pin out to square dimensions and allow to dry completely before removing pins. Tassels can be trimmed and lightly steamed or misted and shaped with a comb to keep strands aligned.
Info :
Care: spot clean as needed; hand wash cold or machine wash delicate in cold on a gentle cycle inside a large mesh laundry bag and lay flat to dry. Avoid heavy agitation in machine washing to preserve tassel heads and join integrity.
Round 54 :
Final inspection: check seams and tassel attachments periodically. If the spread will be used daily, consider reinforcing tassel knots with a few invisible whip stitches and a small drop of textile glue inside the top wrap for added security (optional).
Info :
Congratulations — your Crimson Sunburst Granny Bedspread is complete. Admire the dimensional sunflower-like petals, lush crimson grounds and elegant cream lace with trailing tassels. This heirloom piece will warm any bedroom with handmade charm.
This crimson sunburst bedspread is a true labor of love — each textured petal and cream frame adds timeless character to your bedroom. The rich red squares paired with soft cream lace and generous tassels create a warm, heirloom look that’s perfect for cozy nights and farmhouse decor. As you complete each motif and see the blanket take shape, you’ll feel proud of the handmade charm you created stitch by stitch. 🧶✨ Your finished bedspread will be a treasured piece that invites warmth and comfort. Happy stitching! 🛏️