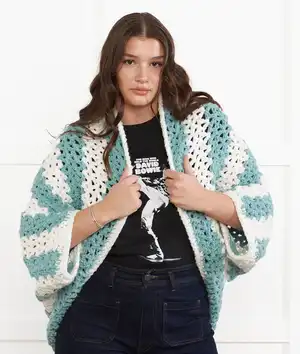
About This Crochet Cocoon Cardigan Pattern
This pattern creates a relaxed cocoon-style cardigan worked in a striped pattern using Bernat Forever Fleece. You will crochet a large square and fold it to form armholes for an effortless cozy shape. The design uses a simple repeat of double crochet clusters and chain spaces, making it an ideal beginner project.
Includes full instructions for chain foundation, row repeats, color changes, and finishing edges. Simple assembly and clear diagrams help you fold and seam the piece into a wearable cardigan.
Why You'll Love This Crochet Cocoon Cardigan Pattern
I absolutely love this pattern because it transforms a simple square into a wearable, cozy cardigan with very little sewing. I enjoy how quickly the super-bulky Bernat Forever Fleece works up, making it satisfying to see progress fast. The stripe pattern is easy to follow and lets you customize color placement for a personal touch. I also appreciate that the construction is beginner-friendly—no complex shaping—so I can relax while crocheting and still end up with a stylish result.
Switch Things Up
I love customizing this cocoon cardigan by changing the stripe colors; try a bold contrast or soft pastels for a different vibe.
I often switch to a variegated yarn for one of the stripe colors to get an interesting, subtle color shift across the piece.
To make a longer cardigan, I simply add more repeats to the length until I reach my desired measurement before folding and seaming.
Want a cropped cocoon? I make fewer stripe repeats and stop when the piece measures shorter for a modern cropped look.
I sometimes add fringe to the bottom edge for a boho finish; secure fringe pieces evenly along the hem for a balanced effect.
If I want fitted sleeves, I create separate sleeve panels and sew them into the armholes instead of leaving the open cocoon style.
I like to experiment with edgings—switching the body edging to a picot or reverse single crochet gives a different finished edge.
For a more polished look, I block the square lightly before seaming to even out stitches and make seaming easier.
I also swap the yarn weight and use a smaller hook for a more delicate version; be sure to rework the gauge sample first to adjust stitch counts.
I sometimes add pockets by crocheting small rectangles and sewing them to the inside before weaving in ends.
I recommend trying embroidered motifs or small appliques on one front panel for a personal touch that stands out.
If you want a hooded version, I design a simple hood separately and seam it along the neckline for a cozy upgrade.
Common Mistakes & How to Fix Them
✗ Not checking gauge before starting; make a 4" x 4" sample (10 sts and 4.5 rows) to adjust hook size and ensure correct finished dimensions.
✗ Using inconsistent tension can cause uneven stripes and seam misalignment; maintain steady tension and check width periodically while working.
✗ Skipping the placement of markers when folding and seaming can make armholes uneven; place markers 8" [20.5 cm] down from the fold on each side before seaming.
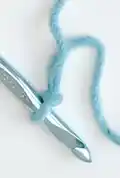
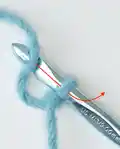
✗ Changing color incorrectly by fastening off creates loose ends; to change colors, work to last 2 loops of old color, yarn over with new color and complete stitch to secure a neat join.