🧢 Beautiful ✨ Detailed πŸ’ Adorable

Crossbody with ruffles Pattern

Crossbody with ruffles Pattern
4.0β˜… Rating
5-7 Hours Time Needed
1.4K Made This
βœ‚οΈ

Intermediate Level

Ideal for those with basic crochet experience, featuring slightly more advanced stitches and techniques to expand your skills.

⏱️

Weekend Treat

Takes 5-7 hours, making it an enjoyable project to finish over a couple of days.

✨

Stylish Touch ✨

An elegant detail to elevate any look, combining traditional techniques with contemporary design sensibilities.

About This Crossbody with ruffles Pattern

This pattern teaches you how to crochet a structured crossbody bag with decorative ruffles using 4mm cord. You will work a rectangular canvas, two shaped side panels, and assemble them into a finished bag with a lock and rings. Step-by-step photos and clear row instructions guide you through shaping, joining, and finishing.

Crossbody with ruffles Pattern crochet pattern - detailed view of completed project

Techniques include single crochet, working in back loops/front loops, slip stitches for finishing, and attaching hardware. The pattern includes measurements and tips to help you achieve a neat professional finish.

Why You'll Love This Crossbody with ruffles Pattern

I absolutely love this pattern because it turns simple single crochet rows into a beautifully structured bag with charming ruffle details. I enjoy how the project uses cord for a durable, textured result that holds its shape without heavy reinforcement. The step-by-step photos and clearly numbered rows make assembly satisfying and approachable. Creating the lock and ring details is one of my favorite parts β€” they transform the bag into a polished accessory I love to wear and gift.

Crossbody with ruffles Pattern step 1 - construction progress Crossbody with ruffles Pattern step 2 - assembly progress Crossbody with ruffles Pattern step 3 - details and accessories Crossbody with ruffles Pattern step 4 - final assembly and finishing

Switch Things Up

I love how easy it is to customize this bag by changing the cord color β€” try muted neutrals for a classic look, or bright contrasts for a statement piece.

I often swap the cord thickness and hook size to create a smaller clutch or an oversized tote; adjusting yarn weight and hook directly changes the finished size.

I sometimes skip the lurex or metallic thread for a matte finish, or add a metallic cord for a festive, evening-ready bag.

I like adding a fabric lining for extra structure and to hide ends neatly; pick a lightweight cotton and sew it in before finishing the top edge.

I recommend experimenting with different locks or closures β€” magnetic snaps for easy access, or a decorative toggle for vintage flair.

I sometimes embroider initials or add a small pocket inside the lining for cards and keys to increase functionality.

I enjoy swapping the strap: you can use a crocheted strap for a cohesive look or add a chain strap for a dressier feel.

I experiment with ruffle placement by adding a second small ruffle under the flap or trimming the flap edge with a tiny picot for extra detail.

I also try bead accents or small tassels at the D-rings for boho styling and playful movement.

I encourage you to try mixing textures β€” pairing smooth cord with a boucle accent or leather trims can create a unique, elevated bag.

Common Mistakes & How to Fix Them

βœ— Skipping stitch markers during the sewing of sides can lead to uneven corners; place five markers in each side part corner and check placement before stitching. βœ— Cutting the thread too early when finishing a panel can make securing edges difficult; always follow the instruction 'Don't cut the thread' when specified and finish with slip stitches as directed. βœ— Not capturing the correct loops while sewing the side to the canvas causes gaps; try to catch two loops of the canvas in each side stitch for a tight seam. βœ— Pulling the cord too tightly on the trim or lock attachments distorts the shape; maintain even tension and tighten ends gently before hiding them on the wrong side. βœ— Forgetting to mirror the second side part will create an asymmetric bag; crochet the second side part as a mirror image and make increases at the beginning of rows as instructed.

Crossbody with ruffles Pattern

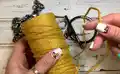
Make a stylish crocheted crossbody bag with playful ruffles using sturdy 4mm cord. This pattern guides you step-by-step through the canvas, side panels, assembly, and lock installation so you can create a polished, wearable accessory. Perfect for gifting or adding a handmade touch to your wardrobe, the finished bag is compact and durable.

Intermediate 5-7 Hours

Materials Needed for Crossbody with ruffles Pattern

β€” Main Fabric

  • 01
    Cord 4 mm (polyester or cotton), approximately 330 yards (300 meters); example uses cotton cord with lurex, Maccaroni Star, mustard color
  • 02
    Additional small length of cord for trim and lock details (approximately 27 inches / 70 cm reserved for lock top)
  • 03
    Leftover cord for finishing, hiding ends, and small trims (approx 1-2 meters)

β€” Tools Required

  • 01
    Crochet hook size 4 mm (N/4)
  • 02
    Chain with 2 snap hooks, 39-43 inches (1-1.1 meters) for strap
  • 03
    2 D-rings, 1 inch (2 cm)
  • 04
    Big lock 'toggle' or any other briefcase-style lock
  • 05
    Scissors
  • 06
    5 stitch markers
  • 07
    Sewing needle and thread for finishing and attaching lining or hardware
  • 08
    Cable or sturdy cord for strap (if not crocheting the strap)

Progress Tracker

0% Complete

β€” Crochet the canvas :

Info :

Crochet the chain with 31 CH.

Round 1 :

1 row. 30 SC from the 2nd loop from the hook, CH.

Info :

Insert the hook in the last SC and pull out the end of the thread. Turn.

Info :

Crochet in the end of the thread in the next row.

Round 2 :

2 row. 30 SC on the back loop only, CH. Turn.

Round 3 :

3 row. 30 SC on the back loop and the front loop of the previous row only, CH. Turn.

Info :

! Next, crochet SC on the back loop and the front loop of the previous row only.

Round 4 :

4 row. 30 SC, CH. Turn.

Round 5 :

5 row. 30 SC, CH. Turn.

Round 6 :

6 row. 30 SC, CH. Turn.
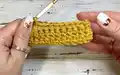
Round 7-100 :

7 - 100 rows. 30 SC, CH. Turn.

Round 101 :

101 row. 30 SC. Don’t cut the thread.

Info :

Don’t turn the canvas. Insert the hook under the last SC, pull the loop, crochet 29 SlSt from left to right to the end of the row.

Info :

Cut the thread. Pull out the end through the last SC. Strengthen and hide the end on the wrong side.

β€” Crochet the side part (*2) :

Info :

Crochet the chain with 9 CH.

Round 1 :

1 row. 8 SC from the 2nd loop from the hook, CH.

Info :

Insert the hook in the last SC and pull out the end of the thread. Turn.

Info :

Crochet in the end of the thread in the next row.

Round 2 :

2 row. 7 SC on the back loop only, 1 Inc, CH (=9). Turn.

Round 3 :

3 row. 9 SC on the back loop and the front loop of the previous row only, CH. Turn.

Round 4 :

4 row. 8 SC, 1 Inc, CH (=10). Turn.

Round 5 :

5 row. 10 SC, CH. Turn.

Round 6 :

6 row. 9 SC, 1 Inc, CH (=11). Turn.

Round 7 :

7 row. 11 SC, CH. Turn.

Round 8 :

8 row. 10 SC, 1 Inc, CH (=12).

Round 9 :

9 row. 12 SC, CH. Turn.

Round 10 :

10 row. 12 SC, CH. Turn.

Round 11 :

11 row. 12 SC, CH. Turn.

Round 12 :

12 row. 10 SC, 1 Dec, CH (=11).

Round 13 :

13 row. 11 SC, CH. Turn.

Round 14 :

14 row. 11 SC, CH. Turn.

Round 15 :

15 row. 11 SC, CH. Turn.

Round 16 :

16 row. 9 SC, 1 Dec, CH (=10). Turn.

Round 17 :

17 row. 10 SC, CH. Turn.

Round 18 :

18 row. 10 SC, CH. Turn.

Round 19 :

19 row. 10 SC, CH. Turn.

Round 20 :

20 row. 8 SC, 1 Dec, CH (=9). Turn.

Round 21 :

21 row. 9 SC, CH. Turn.

Round 22 :

22 row. 9 SC, CH. Turn.

Round 23 :

23 row. 9 SC, CH. Turn.

Round 24 :

24 row. 7 SC, 1 Dec, CH (=8). Turn.

Round 25 :

25 row. 8 SC, CH. Turn.

Round 26 :

26 row. 8 CH, CH. Turn.

Round 27 :

27 row. 2 CH; take the D-ring, crochet 4 SC through D-ring; 2 SC, CH. Turn.

Round 28 :

28 row. 8 SC, CH. Turn.

Round 29 :

29 row. 8 SC, CH. Don’t cut the thread.

Info :

Don’t turn the canvas. Insert the hook under the last SC, pull the loop, crochet 7 SlSt from left to right to the end of the row. Cut the thread. Pull out the end through the last SC. Strengthen and hide the end on the wrong side.

Info :

Crochet the second side part in a mirror of the first. Increases in each row are made at the beginning of the row. The number of loops in each row is the same.

β€” Assembly :

Info :

Take the piece of yarn 39 inches (1 m) long. Join the right side part and the canvas with the wrong sides. Place five markers in all corners of the side part.

Info :

Insert the hook on both sides, over and pull out the thread. At the very beginning, make two stitches to secure the end of the thread. At the top of the canvas, the beginning of crocheting.

Info :

Next, make one stitch in each row. Try to capture two loops in each side.

Info :

In the corners make three stitches in one place of the side part, and along the canvas move one row.

Info :

At the down of the side part capture loops of the chain.

Info :

At the end make two securing stitches. Pull out the ends to the wrong side, strengthen and hide both ends.

Info :

Next sew in the left side part. Take the piece of yarn 51 inches (1.3 meters) long. Join the left side part and the canvas with the wrong sides at the level of the right. Place five markers in all corners of the side part. Start sew in from the middle of the canvas.

Info :

Make two stitches to secure the end of the thread. Next, sew in the same way as the right side. At the end make two securing stitches. Don’t cut the thread.

Info :

Insert the hook under the 1st loop of the canvas. Pull the loop.

Info :

Crochet 29 SlSt under loops of the chain to the right side part. Pull out the end, strengthen and hide on the wrong side.

β€” The lock :

Info :

You can put any lock on this bag - toggle, briefcase or β€œfurla”. How to install a briefcase lock you can seen here: https://youtu.be/1Jui8ZbGBPg

Info :

1.Top part. Insert the hook in the ring, over, twist clockwise, crochet CH.

Info :

Crochet 8 SC through ring. Cut the thread, leaving the end 27 inches (70 cm) long. Pull out the end.

Info :

Join the top of the lock with valve of the bag in the middle. Tighten the ends of the threads to the wrong side.

Info :

Insert the hook in the last SC of the trim. Pull the loop, crochet 7 SlSt. Pull out the end in the last stitch. Tighten the end back to the wrong side. Tie the knot. Strengthen and hide both ends.

Info :

2.Down part. Crochet 17 SC through ring.

Info :

Close the valve and try on where the lower part of the lock should be.

Info :

Tighten the ends to the wrong side. Pull the loop and crochet 16 SlSt. Pull out the end in the last stitch. Tighten the end back to the wrong side. Strengthen and hide both ends. In my example, the down part of the lock is located 5 rows from the top and 10 SC from each side.

Assembly Instructions

  • Join the right side part to the canvas using a 39 inch (1 m) piece of yarn; place five markers at the corners and sew from the top, making two securing stitches at the beginning.
  • While sewing sides to the canvas, make one stitch in each canvas row and try to capture two loops of the canvas in each side stitch; make three stitches in corner places to shape corners.
  • Sew the left side part in the same way using a 51 inch (1.3 m) yarn, starting from the middle of the canvas and placing five markers in the corners.
  • Work slip stitch finishing under the chain loops: insert hook under the first loop of the canvas and crochet 29 SlSt under chain loops to join the side; pull ends to the wrong side and hide securely.
  • Attach lock top and bottom: crochet 8 SC through the top ring leaving a 27 inch (70 cm) tail to sew to the valve, and crochet the down part and position it 5 rows from the top and 10 SC from each side before securing.

Important Notes

  • πŸ’‘Place five markers in all corners of the side part to ensure accurate alignment when sewing the side to the canvas.
  • πŸ’‘Do not cut the thread when instructed (for example after finishing the side panel); finish with slip stitches before cutting to secure the edge.
  • πŸ’‘When sewing, try to capture two loops of the canvas in each side stitch for a neat, gap-free seam.
  • πŸ’‘Tighten and hide ends on the wrong side after finishing each section to secure your work and give a clean professional look.

This crossbody with ruffles pattern helps you craft a durable, stylish bag using 4mm cord and simple stitches. The bag comes together with clear photos, row-by-row instructions, and helpful assembly notes to guide you through every step. Whether you make it for yourself or a thoughtful gift, it’s a joyful weekend project that looks and feels boutique-made. 🧢✨

You ask,

we answer.

FAQs

What size will the finished piece be?

The finished bag measures approximately length - 9 5/8 inches (24.5 cm); width - 4 inches (10 cm); height - 8 inches (20 cm) when using the recommended cord and hook.

Can I use a different cord or yarn weight for this pattern?

Yes, you can substitute different cord or yarn, but the finished size and structure will change; use an appropriate hook and be prepared to adjust stitch counts to maintain shape.

Do I need advanced crochet skills to complete this bag?

This pattern is rated intermediate; you should be comfortable with single crochet, working in back/front loops, slip stitches, increases and decreases, and basic sewing for assembly.

How long does this project typically take?

Most crocheters complete this bag in about 5-7 hours over a weekend, though time can vary based on experience and familiarity with assembly.