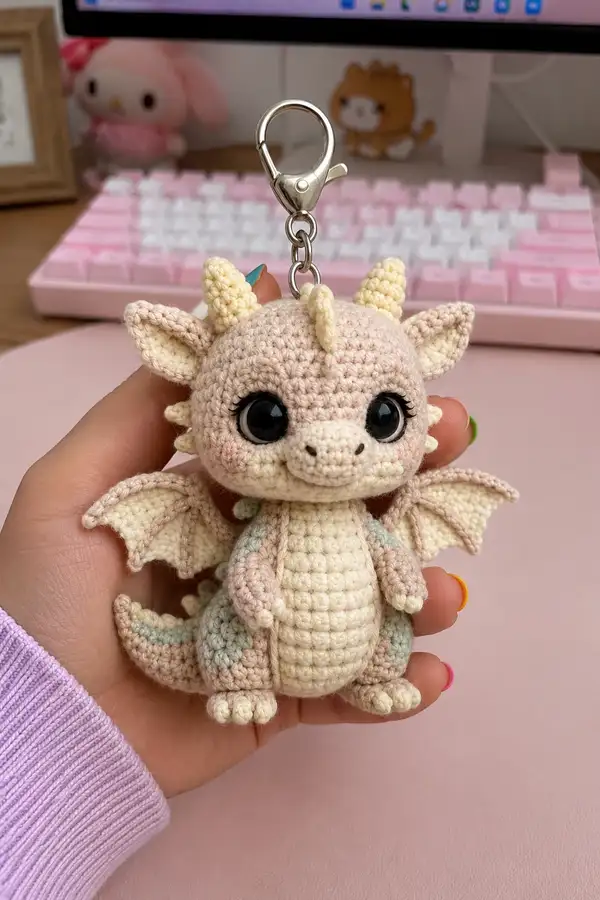
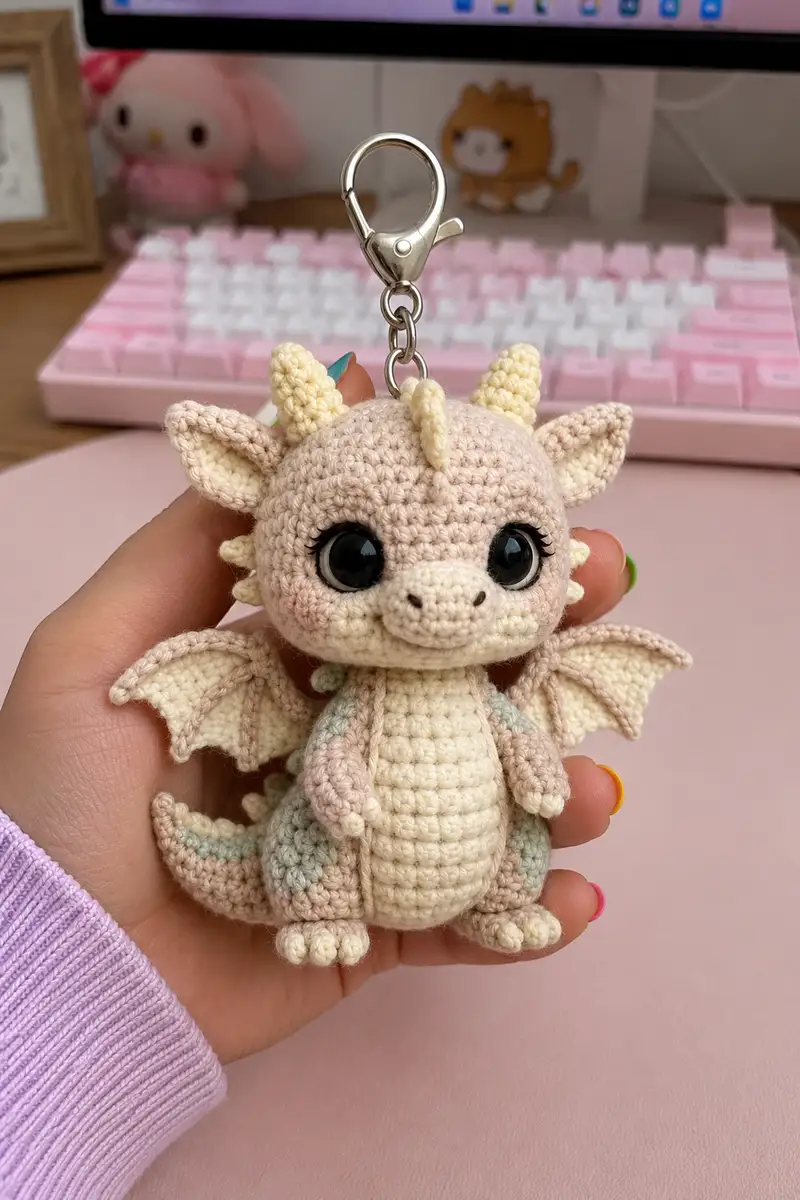
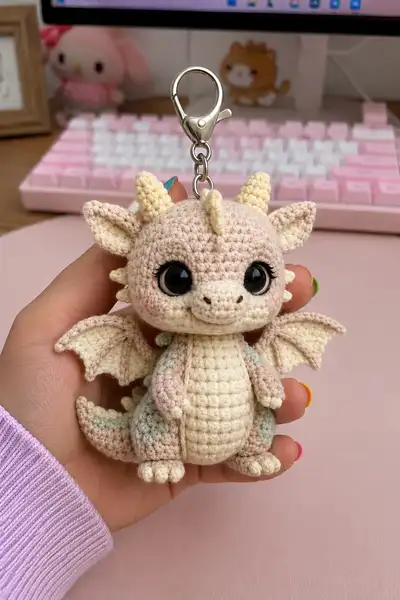
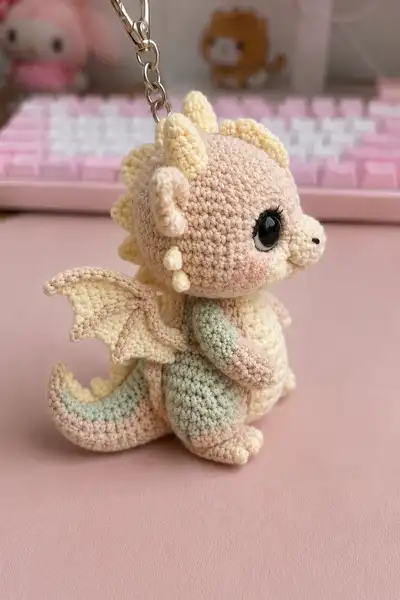
Sweet pastel baby dragon keychain worked in soft worsted cotton with tiny horns, spikes, wings and an adorable snub snout. This palm-sized amigurumi features large safety eyes, a cream belly panel, and subtle color pooling on the back and limbs to create a gentle, hand-painted look. Perfect as a gift tag, bag charm, or small keepsake, this pattern includes step-by-step round counts and careful assembly notes to recreate every cute detail.
Progress Tracker
0% Complete
— Head :
Round 1 :
6 sc in magic ring (6)
Round 3 :
(1 sc, inc) x 6 (18)
Round 4 :
(2 sc, inc) x 6 (24)
Round 5 :
(3 sc, inc) x 6 (30)
Round 6 :
(4 sc, inc) x 6 (36)
Round 7 :
(5 sc, inc) x 6 (42)
Round 8 :
(6 sc, inc) x 6 (48)
Round 9 :
1 sc in each st (48)
Round 10 :
1 sc in each st (48)
Info :
Mark round starts with a stitch marker. Work tight stitches to avoid stuffing showing. Plan eye placement now — eyes will be placed between rounds 12-13.
Round 11 :
1 sc in each st (48)
Round 12 :
1 sc in each st (48)
Info :
Eye placement: place 8-9 stitches between centers of the 2 safety eyes (approx). For 8mm eyes aim for 7-9 sts gap; insert eyes between rounds 12 and 13, counting from the nose down. Mark where eyes will sit with pins before firmly inserting safety eyes.
Round 13 :
1 sc in each st (48)
Round 14 :
1 sc in each st (48)
Info :
If you prefer embroidered eyes, embroider after stuffing. If using eyelashes, tack them now under the eyes with tiny stitches to hold them in place. Begin light stuffing at round 14 to support eyes.
Round 15 :
(6 sc, dec) x 6 (42)
Round 16 :
(5 sc, dec) x 6 (36)
Round 17 :
(4 sc, dec) x 6 (30)
Info :
Begin stuffing head more firmly now. Use small amounts of fiberfill to shape the forehead and eye sockets to create a round, slightly chubby face. Continue stuffing as you decrease to avoid lumps.
Round 18 :
(3 sc, dec) x 6 (24)
Round 19 :
(2 sc, dec) x 6 (18)
Round 20 :
(1 sc, dec) x 6 (12)
Round 21 :
1 sc in each st (12)
Info :
Rounds 21-24 form the neck join area; keep these stitches unstuffed or lightly stuffed so the head will sit flush on the body. Leave a long tail for sewing the head to the body after finishing the body.
Round 22 :
1 sc in each st (12)
Round 23 :
1 sc in each st (12)
Round 24 :
1 sc in each st (12)
Round 25 :
(1 sc, inc) x 6 (18)
Round 26 :
(2 sc, inc) x 6 (24)
Info :
Round 25-26 create a small collar-like ridge before adding the muzzle and horns. If you prefer a recessed neck, omit these increases and keep the neck rounds even.
Round 27 :
1 sc in each st (24)
Round 28 :
1 sc in each st (24)
Round 29 :
1 sc in each st (24)
Info :
At this stage we will attach small decorations to the head: the horns (3 medium horns on top: two near the sides and one center) and small cheek spikes (3 pairs of tiny teardrop spikes along jawline). Prepare small horns and spikes; leave long tails for sewing.
Round 30 :
1 sc in each st (24)
Round 31 :
1 sc in each st (24)
Info :
Fasten off head if you created separate horns and spikes. Keep the round counts and placement notes for attachment. We will finish stuffing and close any final openings after body assembly to ensure proportion before final sewing.
— Muzzle (Make 1) :
Round 1 :
6 sc in magic ring using cream yarn (6)
Round 3 :
(1 sc, inc) x 6 (18)
Round 4 :
1 sc in each st (18)
Round 5 :
(2 sc, dec) x 4 + 2 sc (14)
Round 6 :
1 sc in each st (14)
Info :
Stuff muzzle lightly to keep it rounded but avoid overstuffing, flatten slightly where it will meet the head to make sewing easier. Embroider nostrils with dark yarn: two small straight stitches on Round 3 area after attaching.
Round 7 :
Fasten off leaving long tail for sewing. Position muzzle centered beneath eyes about 3-4 rounds down from eye row. Sew on firmly with matching cream yarn.
— Head Spikes & Horns :
Horn (Make 3) :
Round 1: 6 sc in mr (6)
Round 2 :
(1 sc, inc) x 3 (9)
Round 3 :
1 sc in each st (9)
Round 4 :
(2 sc, inc) x 3 (12)
Round 5 :
1 sc in each st (12)
Round 6 :
(3 sc, inc) x 3 (15)
Round 7 :
1 sc in each st (15)
Round 8 :
Decrease rounds to shape cone: (3 sc, dec) x 3 (12)
Round 9 :
(2 sc, dec) x 3 (9)
Round 10 :
(1 sc, dec) x 3 (6)
Round 11 :
Fasten off leaving tail for sewing. Sew two horns to either side-top and one to center-back top of head. Use placement guide: center horn sits 2-3 stitches behind the center of the forehead; side horns sit 6-8 stitches from center on each side.
Small spike (Make 6) :
Round 1: 4 sc in mr (4)
Round 4 :
Fasten off leaving tail for sewing. Attach three small spike pairs along jawline and three along back of head near neck as shown in photo.
— Body :
Round 1 :
6 sc in magic ring (6)
Round 3 :
(1 sc, inc) x 6 (18)
Round 4 :
(2 sc, inc) x 6 (24)
Round 5 :
(3 sc, inc) x 6 (30)
Round 6 :
(4 sc, inc) x 6 (36)
Round 7-9 :
1 sc in each st (36)
Info :
If using variegated yarn the color pooling typically falls on rounds 4-10; change yarn location if you desire a specific color patch. At round 9 verify where you will join head — the body top opening should align with head neck (round 21 on head).
Round 10 :
(5 sc, dec) x 6 (30)
Round 11 :
1 sc in each st (30)
Round 12 :
1 sc in each st (30)
Info :
Begin belly panel: attach cream yarn at the front center of the body where the belly will be. The belly panel will be worked in rows then joined to body rounds along edges to create a neat panel look.
Belly Panel Rows :
Row 1: ch 12, starting in 2nd ch from hook sc 11 (11)
Row 2 :
ch 1, turn, sc in each st across (11)
Row 3-10 :
ch 1, turn, sc in each st across (11) - work 8 rows total (11)
Info :
After finishing belly panel, align it vertically on the front of the body and sew down both long sides using mattress or whip stitch. The belly panel will add 8 rounds worth of height visually — place it centered between rounds 5-14 of the body for a plump look.
Round 13 :
(4 sc, dec) x 6 (24)
Round 14 :
(3 sc, dec) x 6 (18)
Info :
Stuff body moderately at this stage. The body should be firm but slightly yielding so the dragon looks cuddly. Keep the top opening wide enough to attach head before final decreases.
Round 15 :
(2 sc, dec) x 6 (12)
Round 16 :
1 sc in each st (12)
Round 17 :
1 sc in each st (12)
Round 18 :
Fasten off leaving long tail for sewing head to body. Finish stuffing body firmly now so shape matches head size. Use a stuffing stick to push fiber evenly to edges.
— Arms (Make 2) :
Round 1 :
6 sc in magic ring (6)
Round 3 :
(1 sc, inc) x 6 (18)
Round 4 :
1 sc in each st (18)
Info :
These arms are short and rounded. Stuff the hand portion firmly with small amounts of fiberfill to keep fingers plump. If you want articulated arms, insert thin wire reaching two thirds up the arm before stuffing.
Round 5 :
(2 sc, dec) x 4 + 6 sc (14) - shape wrist
Round 6-10 :
1 sc in each st (14)
Round 11 :
(1 sc, dec) x 4 + 6 sc (10)
Round 12 :
1 sc in each st (10)
Round 13 :
1 sc in each st (10) - leave opening to sew to body
Round 14 :
Fasten off leaving long tail for sewing. Sew arms to sides of body at approximately round 7-9 of body for a natural placement (just below belly panel). Position so palms face slightly inwards.
— Legs (Make 2) :
Round 1 :
6 sc in magic ring (6)
Round 3 :
(1 sc, inc) x 6 (18)
Round 4 :
(2 sc, inc) x 6 (24)
Round 5 :
1 sc in each st (24)
Round 6 :
(3 sc, dec) x 6 (18)
Info :
Shape the foot so it is slightly flattened on the bottom: after Round 6, when stuffing, press the bottom with your finger and add extra stuffing to the toe area. This yields a standing surface when attached to body.
Round 7 :
1 sc in each st (18)
Round 8 :
(2 sc, dec) x 4 + 2 sc (14)
Round 9-12 :
1 sc in each st (14)
Round 13 :
(1 sc, dec) x 4 + 6 sc (10)
Round 14 :
1 sc in each st (10)
Round 15 :
Fasten off leaving long tail for sewing. Sew legs to bottom of body at the front edge so dragon can sit slightly upright. Space legs about 6-8 sts apart depending on body width.
— Tail :
Round 1 :
6 sc in magic ring (6)
Round 3 :
(1 sc, inc) x 6 (18)
Round 4-6 :
1 sc in each st (18)
Round 7 :
(2 sc, dec) x 4 + 2 sc (14)
Round 8-10 :
1 sc in each st (14)
Round 11 :
(1 sc, dec) x 4 + 6 sc (10)
Round 12-14 :
1 sc in each st (10)
Round 15 :
Decrease gradually to taper: (1 sc, dec) x 2 + 4 sc (8)
Round 16 :
1 sc in each st (8)
Round 17 :
Fasten off leaving long tail for sewing. Attach tail to back lower center of body around round 14-16 depending on how high you want it; sew securely and add small decorative spikes along tail made from tiny spike pieces (3-4) sewn spaced evenly.
— Wing (Make 2) :
Wing base (foundation) :
ch 9, sc in 2nd ch from hook and across to end (8)
Row 1 :
ch 1 turn sc 8 (8)
Row 2 :
ch 1 turn (sc, inc) across to shape a point: (1 sc, inc) x4 (12)
Row 3 :
ch 1 turn 1 sc in each st (12)
Row 4 :
ch 1 turn (2 sc, inc) x 3 + 2 sc (15)
Info :
These rows create a single-layer wing membrane. To create the structured webbing seen in the photo, join a contrast cream yarn and work a decorative ridge that outlines webbing sections with slip stitches and single crochet in FLO to create raised seams.
Row 5 :
ch 1 turn 1 sc in each st (15)
Row 6 :
Work along one long edge now: sc 15 along edge to create a fuller wing curve, then sl st to base to form wing shape. Fasten off leaving tail for sewing. Repeat to make the second wing.
Wing webbing detail :
Use cream yarn and 1 sc in FLO along center lines to create two curved ridges from base to tip. Sew a thin wire into the lower ridge if you want poseable wings.
Info :
Sew wings to body at upper back area between rounds 8-12, slightly angled outward. Position them so the bottom edge overlaps the tail base slightly for visual balance.
— Ears (Make 2) :
Round 1 :
6 sc in magic ring (6)
Round 2 :
(1 sc, inc) x 3 (9)
Round 3 :
1 sc in each st (9)
Round 4 :
(2 sc, inc) x 3 (12)
Round 5 :
1 sc in each st (12) - fold slightly and sl st at base to create ear cup shape
Round 6 :
Fasten off leaving long tail for sewing. Attach ears to upper sides of head between rounds 10-14, tilting slightly forward to mimic the pictured pose.
— Small Decorative Spikes for Back (Make 6) :
Round 1 :
4 sc in magic ring (4)
Round 4 :
Fasten off leaving long tail for sewing. Space spikes evenly from head down tail (6 total) and sew using long tails so the spikes stand upright.
— Feet Toes Detail :
Toe (Make 6 small toes) :
Round 1: 4 sc in mr (4)
Round 3 :
Fasten off leaving tails to sew three toes on each foot. Sew toes to front of foot with slight overlap and add tiny embroidery lines to separate toes if desired.
— Finishing & Embellishments :
Info :
After all components are made and stuffed, start assembly. Attach head to body by sewing the neck rounds (head rounds 21-24) to the top body rounds (body rounds 10-12 area). Use a whip stitch and evenly space your stitches around the neck. Hide the knot inside the body for a tidy finish.
Info :
Embroider eyelash or nostril details using a short length of dark yarn and a yarn needle. For blush, use a tiny amount of pastel chalk or fabric-safe blush dabbed lightly with Q-tip; test on scrap yarn first.
Info :
Attach keychain hardware by threading a short jump ring through the topmost central stitch of the head (center-back between the horns). Reinforce by sewing through a few stitches and applying a small dot of fabric glue if desired.
Info :
Weave all yarn tails into nearby stitches at least 3 rounds deep. Trim close to the work. Inspect for any gaps showing stuffing and add small bits of fiberfill if needed.
Info :
Optional: Add a thin coating of clear-drying glue along the inner ring of the safety eye washer for extra security if the keychain will be handled by children. Always follow safety recommendations for small parts if gifting to young children.
Info :
Final shaping: pinch and massage the stuffed parts to round edges, and mold the wings and tail to the desired silhouette. Slight steam blocking (very light and careful) can relax stitches and refine curves — keep steam away from safety eyes.
Finishing this tiny dragon is pure joy — every stitched ridge, tiny spike and neatly sewn seam brings personality to life. The pastel hues, chubby belly and expressive eyes create a charm that’s impossible not to love. Give it as a loving handmade gift or keep it as your own pocket pal. 🐉🧶✨