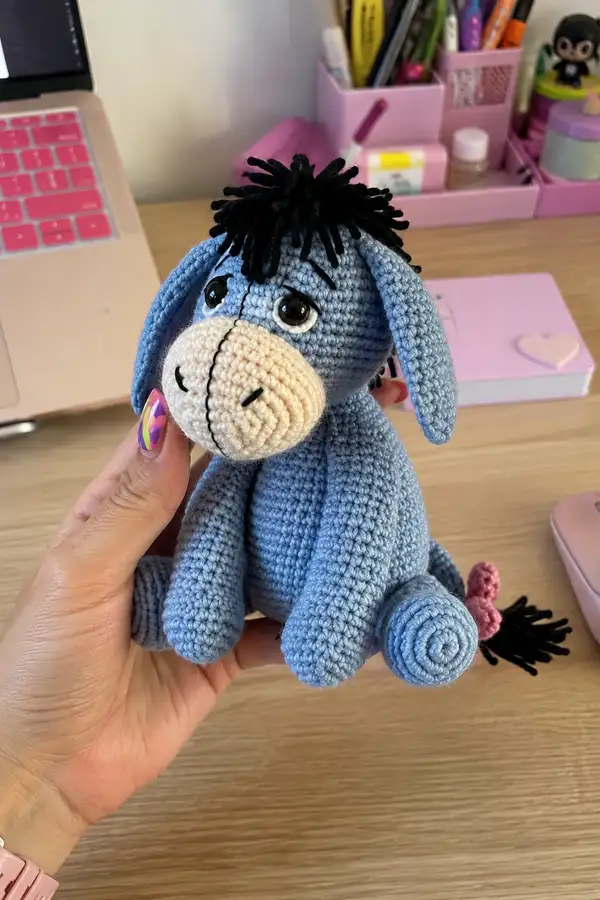
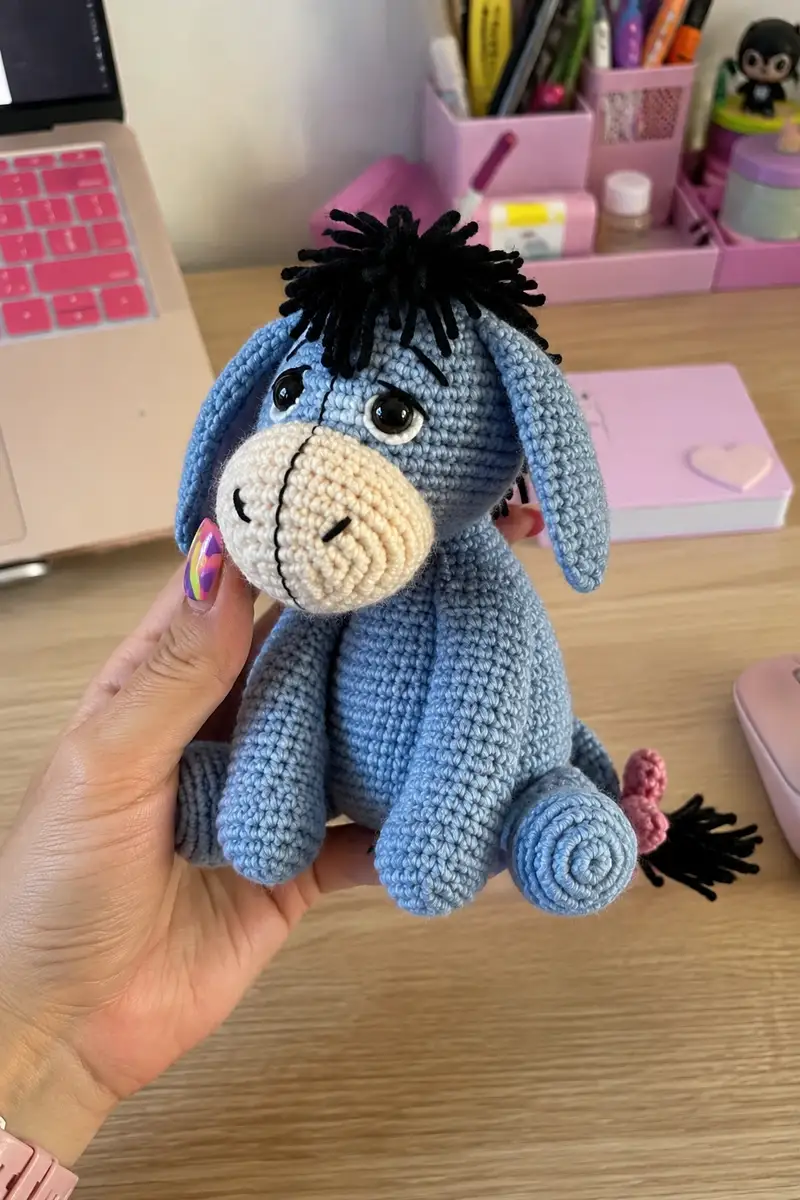
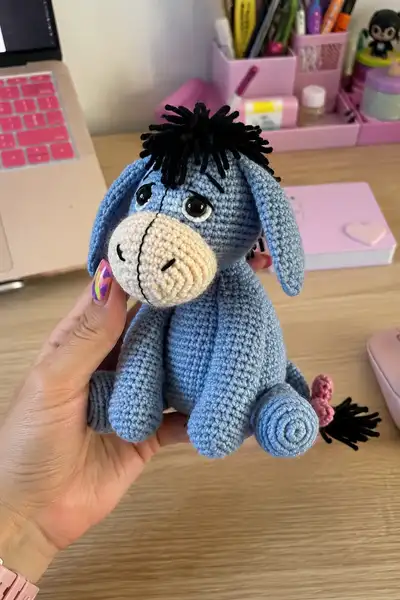
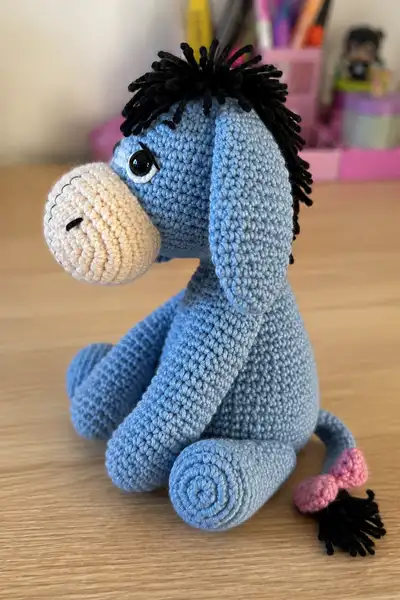
Make an irresistibly sweet Eeyore-inspired donkey amigurumi using this step-by-step pattern. This design features a rounded body, long droopy ears, a pronounced cream muzzle, a tufted black mane and tail, and a tiny pink bow on the tail. Detailed round-by-round instructions with tips on stuffing, stitch counts, and assembly make it easy to recreate this cuddly character.
Progress Tracker
0% Complete
— Head :
Round 1 :
6 sc in magic ring (6)
Round 3 :
(1 sc, 1 inc) x 6 (18)
Round 4 :
(2 sc, 1 inc) x 6 (24)
Round 5 :
(3 sc, 1 inc) x 6 (30)
Round 6 :
(4 sc, 1 inc) x 6 (36)
Round 7 :
(5 sc, 1 inc) x 6 (42)
Round 8 :
(6 sc, 1 inc) x 6 (48)
Round 9 :
(7 sc, 1 inc) x 6 (54)
Round 10 :
(8 sc, 1 inc) x 6 (60)
Round 11-18 :
1 sc in each st (60)
Info :
Place safety eyes between rounds 14-15, about 9-11 stitches apart depending on desired expression. Mark the positions with pins before inserting safety eyes. If you plan to crochet a white eye rim, stitch small white circles and sew them under the eyes before final stuffing.
Round 19 :
(8 sc, 1 dec) x 6 (54)
Round 20 :
(7 sc, 1 dec) x 6 (48)
Info :
Start stuffing lightly but firmly at this point, focusing behind the eyes to give a nice round forehead. Use small amounts of fiberfill and shape with your fingers for a smooth surface.
Round 21 :
(6 sc, 1 dec) x 6 (42)
Round 22 :
(5 sc, 1 dec) x 6 (36)
Round 23 :
(4 sc, 1 dec) x 6 (30)
Round 24 :
(3 sc, 1 dec) x 6 (24)
Info :
For added facial shaping, slightly stuff less in the very front where the muzzle will attach so the muzzle sits forward and distinct from the face instead of bulging smoothly into the head.
Round 25 :
(2 sc, 1 dec) x 6 (18)
Round 26 :
(1 sc, 1 dec) x 6 (12)
Info :
Fasten off leaving a long tail for sewing. Finish stuffing the head firmly and shape the crown with your hands. We will leave the neck opening small; later we will sew the head onto the body creating a secure seam around the neck stitches.
— Muzzle :
Round 1 :
6 sc in magic ring (6)
Round 3 :
(1 sc, 1 inc) x 6 (18)
Round 4 :
(2 sc, 1 inc) x 6 (24)
Round 5 :
(3 sc, 1 inc) x 6 (30)
Round 6-10 :
1 sc in each st (30)
Info :
The muzzle in the photo is gently oval and sits slightly forward. To create the flattening and forward curve, add a little less stuffing in the last rounds and pinch the bottom slightly when sewing to the head. The muzzle color is cream/beige for contrast.
Round 11 :
(3 sc, 1 dec) x 6 (24)
Round 12 :
(2 sc, 1 dec) x 6 (18)
Round 13 :
(1 sc, 1 dec) x 6 (12)
Info :
Stuff the muzzle fairly firmly so it keeps its shape when sewn. Use the long tail to whip stitch to the front of the head across rounds 14-16 of the head, centering muzzle so the vertical seam lines up with the head midline. Embroider the vertical seam and nostrils using black yarn after attaching.
— Body :
Round 1 :
6 sc in magic ring (6)
Round 3 :
(1 sc, 1 inc) x 6 (18)
Round 4 :
(2 sc, 1 inc) x 6 (24)
Round 5 :
(3 sc, 1 inc) x 6 (30)
Round 6 :
(4 sc, 1 inc) x 6 (36)
Round 7 :
(5 sc, 1 inc) x 6 (42)
Round 8 :
(6 sc, 1 inc) x 6 (48)
Round 9-14 :
1 sc in each st (48)
Info :
If you'd like a slightly indented waist or clothing line, work rounds 13-15 in BLO to create a subtle ridge. The body in the picture is smooth with a gentle taper toward the neck and a round base for sitting.
Round 15 :
1 sc in each st BLO (48)
Round 16-18 :
1 sc in each st (48)
Round 19 :
(6 sc, 1 dec) x 6 (42)
Round 20 :
(5 sc, 1 dec) x 6 (36)
Info :
Begin stuffing the body at round 18-20 gradually. The body should be firm enough to sit but still squeezable. Add stuffing in small handfuls and shape as you go to avoid lumps.
Round 21 :
1 sc in each st (36)
Round 22 :
(3 sc, 1 dec) x 6 (30)
Round 23 :
(2 sc, 1 dec) x 6 (24)
Round 24-25 :
1 sc in each st (24)
Round 26 :
(1 sc, 1 dec) x 6 (12)
Info :
Leave a long tail to sew the head securely to the body. Alternatively, do not close the top completely; pin the head in place and sew around, matching head rounds 25-28 to the body top opening for a neat join. Ensure the body base is stuffed firmly to sit upright.
— Arm (make 2) :
Round 1 :
6 sc in magic ring (6)
Round 3 :
(1 sc, 1 inc) x 6 (18)
Round 4-12 :
1 sc in each st (18)
Info :
Stuff the hand/paw area fairly firmly to create a rounded end that looks like a small hoof. Keep the arm tubular and slightly tapered. Use a chopstick or stuffing tool to push extra fiberfill into the tip.
Round 13 :
(4 sc, 1 dec) x 3 (15)
Round 14 :
1 sc in each st (15)
Round 15 :
(1 sc, 1 dec) x 5 (10)
Round 16-18 :
1 sc in each st (10)
Info :
For a slightly bendable arm, insert a short piece of floral wire or pipe cleaner before finishing stuffing. Fold the wire ends back into the stuffing so they do not poke through stitches. This is optional.
Round 19 :
Flatten opening slightly, sc around to close as desired and fasten off leaving a long tail for sewing (10)
Info :
Sew the arms to the sides of the body between body rounds 10-16 for the balanced look. Pin and adjust before sewing so the arms sit slightly forward as in the reference photo.
— Leg (make 2) :
Round 1 :
6 sc in magic ring (6)
Round 3 :
(1 sc, 1 inc) x 6 (18)
Round 4 :
(2 sc, 1 inc) x 6 (24)
Round 5 :
(3 sc, 1 inc) x 6 (30)
Round 6 :
(4 sc, 1 inc) x 6 (36)
Round 7-14 :
1 sc in each st (36)
Info :
The legs in the photo are somewhat cylindrical with a distinct spiral-look at the foot ends created by sewing the base or by finishing the foot with a tight spiral. Stuff the foot firmly to create a flat bottom and firm shape for sitting stability.
Round 15 :
(4 sc, 1 dec) x 6 (30)
Round 16 :
(3 sc, 1 dec) x 6 (24)
Round 17-20 :
1 sc in each st (24)
Round 21 :
(1 sc, 1 dec) x 6 (18)
Round 22-24 :
1 sc in each st (18)
Info :
To create the spiral foot look seen in the images, you can sew the circular base in a tight spiral by whip-stitching through the center and outwards into the foot after finishing, which creates visible concentric rings. Alternatively, crochet a small flat spiral disk for the foot and sew it to the leg end.
Round 25 :
Fasten off leaving long tail for sewing. Stuff legs firmly, especially near feet, to allow the finished toy to sit upright.
— Ear (make 2) :
Round 1 :
Ch 8, sc in second ch from hook and across (7), rotate to work on other side of chain and sc in each ch back to start, join (14)
Round 2 :
Inc in first st, 6 sc, inc, 6 sc, inc in last (17)
Round 3 :
1 sc in each st around (17)
Round 4 :
(3 sc, 1 dec, 3 sc) across to shape tip (15)
Round 5-8 :
1 sc in each st (15) - shape and flatten slightly as you go
Info :
Long droopy ears are created by making the ear slightly longer and working fewer decreases so the ear remains elongated. Slightly curve or fold the ear when sewing to the head so it hangs naturally down the side of the head.
Round 9 :
Decrease 2 evenly spaced decreases to taper the top (13)
Round 10-12 :
1 sc in each st (13). Fasten off leaving long tail for sewing.
— Tail :
Round 1 :
6 sc in magic ring (6)
Round 3-6 :
1 sc in each st (12) - this creates the small rounded tail base
Info :
Continue to crochet a thin tube for the tail by working spirally in the round: attach yarn to one stitch of the base and work sc around the chain to form a tube length of approximately 18-24 rounds depending on desired tail length.
Round 7-24 :
Sc in each st around the tube (12) - continue until tail reaches desired length (approx 18 rounds tube after base)
Round 25 :
Fasten off leaving long tail for sewing. Attach many short strands of black yarn to the tail tip to create a tuft. Knot and trim tuft to desired fullness.
Info :
In the photo the tail ends in a black tuft with a pink bow tied right above it. To make the bow, crochet a small rectangle and cinch the middle, then sew it around the tail just above the tuft. Secure threads well.
— Bow (tail accessory) :
Round 1 :
Ch 6, sc in 2nd ch from hook and across (5)
Round 2-3 :
Ch 1, turn, sc across (5)
Round 4 :
Fold rectangle lengthwise and whip stitch edges to close a small tube; pull center tight to form bow, wrap a small strand of yarn around center and secure (forms bow)
Info :
Sew the bow onto the tail about 6-8 rounds above the tuft, covering the yarn-wrapped center with a few securing stitches. Use a contrasting pink as shown for a sweet detail.
— Mane (hair tuft) :
Info :
Cut many short lengths of black yarn (approx 3-4 cm each) and attach them using a latch hook method by pulling midpoint of strand through stitch and pulling ends through loop. Place a dense cluster along the crown and center back of the head to create a full mane. In the photo, the mane is a heavy central tuft with shorter hair toward ears.
Round 1 :
Attach strands to 20-28 stitches across the crown to create a thick tufted mane. Adjust number of strands for desired density.
Info :
Trim the ends of the yarn tufts to even length and shape with scissors. If you want a curved fringe across the face, attach a few front-facing strands trimmed shorter to create eyebrows and a short fringe.
— Eyes and Facial Embroidery :
Info :
Use 8mm or 10mm safety eyes. For the white rim seen in the photo, crochet two small white circles (6 sc in magic ring, 2 rounds) and sew them under the eyes before locking them. If using embroidered eyes, use satin stitch with black embroidery floss and back the area with felt for stability.
Round 1 :
After eyes are in place and muzzle sewn on, embroider a central vertical seam down the muzzle using black yarn. Use two small short slanted stitches on either side for nostrils as shown in the image.
Info :
Add a small curved mouth stitch under the muzzle if desired using black thread. Slight eyebrow stitches above the eyes add the signature gentle expression.
— Finishing Touches :
Info :
Weave in all ends neatly inside the stuffing. Use safety eyes carefully and consider adding a tad of fabric glue on the underside of the washer for extra security for gifted toys. Trim and style mane and tail tuft as desired.
Info :
Block or steam lightly if your yarn blend allows, to even stitches and shape ears slightly. Always test on a small scrap to be sure the yarn tolerates steam without damage.
This adorable amigurumi pattern combines timeless crochet techniques with charming details to create a truly special handmade friend. Each section — head, muzzle, body, limbs, ears, mane, and tail — comes together to form a character full of personality and charm. The careful instructions and Info notes make assembly clear and approachable, ensuring a polished, cuddly finished toy. 🧶 Make one for yourself or as a heartwarming gift and enjoy every stitch! 🎀