🧢 Beautiful ✨ Detailed πŸ’ Adorable

Dave The Duck Amigurumi Pattern

Dave The Duck Amigurumi Pattern
4.8β˜… Rating
2-3 Hours Time Needed
2.3K Made This
βœ‚οΈ

Beginner Friendly Level

Perfect for those just starting their crochet journey, with clear instructions and simple techniques

⏱️

Bite-Sized Project

Finishes in 2-4 hoursβ€”perfect for an afternoon of creative relaxation.

🧸

Cute Companion

An adorable friend to cherish, handcrafted with love to bring comfort and joy for years to come.

About This Dave The Duck Amigurumi Pattern

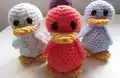
This pattern makes a small, 10cm tall amigurumi duck named Dave using DK yarn and simple shaping. It uses continuous spiral rounds and basic UK stitches that are easy to follow. The design includes head, body, wings, beak and feet with clear assembly instructions. A fun, quick project that is ideal for gifting or making a trio of colorful ducks.

Dave The Duck Amigurumi Pattern crochet pattern - detailed view of completed project

Worked in DK yarn with a 3.5mm hook, this pattern is compact and beginner-friendly. You can customize colors and embroider the eyes for a unique finish.

Why You'll Love This Dave The Duck Amigurumi Pattern

I absolutely love this pattern because it turns basic stitches into a delightfully cute character with very little effort. I enjoy how quickly one duck comes together, making it perfect for last-minute handmade gifts. The pattern is forgiving and simple, so I can relax and crochet without too much counting. I also love that the little details β€” the beak, feet and wings β€” let me add personality with color and placement.

Dave The Duck Amigurumi Pattern step 1 - construction progress Dave The Duck Amigurumi Pattern step 2 - assembly progress Dave The Duck Amigurumi Pattern step 3 - details and accessories Dave The Duck Amigurumi Pattern step 4 - final assembly and finishing

Switch Things Up

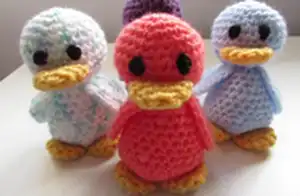
I love how easy it is to customize Dave by changing colours; try soft pastels for nursery friends or bold brights for playful toys.

I often make a tiny trio in different shades to give as a set β€” each duck looks great with a different beak or wing colour.

You can alter size by changing yarn weight and hook; a bulkier yarn and larger hook gives a chunky, cuddly duck while finer yarn makes keychain-sized minis.

I sometimes add little embroidered eyelashes or a tiny bow to change the personality of the duck.

Try using small safety eyes instead of embroidered eyes for a glossier look, but be sure to secure them well for toys intended for children.

I also experiment with textured yarns to give a fuzzy, feathery effect that looks charming on the body and head.

If you want a posable toy, consider inserting a small length of wire into the wings before sewing them on so they hold a shape.

Swap the beak and feet colour for contrast β€” for example, a dark beak with light feet can give a modern look.

For a seasonal touch, embroider a tiny scarf or crochet a miniature hat to dress up your duck for gifts and displays.

I recommend trying different stitch tensions to see how they affect final size and firmness β€” tighter tension gives a neat, firm body while looser tension creates a softer, squishier toy.

Common Mistakes & How to Fix Them

βœ— Skipping the magic ring and starting with a chain loop can leave a hole in the center; always start with a magic ring and pull it closed tightly. βœ— Not working in continuous spirals will create visible joins and uneven shaping; do not join rounds with a slip stitch unless the pattern specifically tells you to. βœ— Forgetting to stuff as you go can make it hard to shape the body and head correctly; stuff gradually and check shaping frequently before closing. βœ— Miscounting increases or decreases will lead to wrong stitch counts later in the pattern; count stitches at the end of each round to ensure accuracy. βœ— Using the wrong UK/US conversion for stitches will change the whole size and texture; note that Dc in UK = Sc in US and Htr in UK = Hdc in US and convert if needed.

Dave The Duck Amigurumi Pattern

Make a charming little duck named Dave with this friendly amigurumi pattern. You will love how quickly the simple rounds come together and how customizable the tiny toy is. Clear instructions guide you through head, body, wings, beak and feet so you can finish a cute gift in an afternoon. Perfect for handmade presents or a quick decorative project.

Beginner Friendly 2-3 Hours

Materials Needed for Dave The Duck Amigurumi Pattern

β€” Main Fabric

  • 01
    DK wool of any colour (1 ball) - I like to use Robin DK (my personal preference)
  • 02
    Small amount of orange or yellow yarn for the beak and feet (approx. 10-20g)
  • 03
    Small amount of black yarn for embroidered eyes (approx. 5g)
  • 04
    Non-toxic toy stuffing (polyester filling), small amount

β€” Tools Required

  • 01
    3.5mm crochet hook
  • 02
    Sewing needle
  • 03
    Scissors
  • 04
    Yarn needle for sewing pieces together
  • 05
    Non-toxic toy stuffing
  • 06
    Black wool or yarn for embroidering eyes
  • 07
    Small amount of orange or yellow yarn for beak and feet

Progress Tracker

0% Complete

β€” Materials :

Info :

DK wool of any colour (1 ball) - I like to use Robin DK (my personal preference). Small amount of orange or yellow for the beak and feet. Non-toxic toy stuffing. Sewing needle. 3.5mm crochet hook. Small amount of black for the eyes. Toy is approx. 10cm in height.

Infos :

This design is made using continuous spirals. Do not join rounds with a slip stitch unless specified in the pattern. The pattern is made UK terms. However, the US terms are as follows: Dc = Sc. Htr = hdc. Tr = dc.

β€” Head :

Instruction :

Make a magic ring, 6dc into the ring and pull the ring closed.

Round 1 :

2dc in each stitch

Round 2 :

(dc, 2dc in next stitch) to end

Round 3 :

(2dc, 2dc in next stitch) to end

Round 4 :

(3dc, 2dc in next stitch) to end

Round 5 to 8 :

dc in each stitch

Round 9 :

(3dc, dc2together) to end

Round 10 :

(2dc, dc2together) to end

Round 11 :

(dc, dc2together) to end

Info :

Stuff the head

Round 12 :

dc2together to end

Info :

Fasten off and sew up the gap.

β€” Beak :

Instruction :

In orange make a magic ring, 6dc into the ring and pull the ring closed.

Round 1 :

2dc in each stitch

Round 2 to 3 :

dc in each stitch

Info :

Fasten off. Leaving a long tail for sewing to head.

β€” Wings :

Wings (make 2) :

Make a magic ring, 5dc into the ring and pull the ring closed.

Row 1 :

turn, chain 1, 2dc in next st, 2htr in next st, 2tr in next st, 2htr in next st, 2dc in next st.

Row 2 :

turn, chain 1, dc, 2dc in next st, htr, 2htr in next st, tr, 2tr in next st, htr, 2htr in next st, dc, 2dc in next st.

Row 3 :

turn, chain 1, 2dc, 2dc in next st, 2htr, 2htr in next st, 2tr, 2tr in next st, 2htr, 2htr in next st, 2dc, 2dc in next st.

Info :

Fasten off. Leaving a long tail for sewing to the body.

β€” Feet :

Feet (make 2) :

In orange make a magic ring, 6dc into the ring and pull the ring closed.

Round 1 :

2dc in each stitch

Round 2 to 3 :

dc in each stitch

Info :

Fasten off. Leaving a long tail for sewing to the body.

β€” Body :

Instruction :

Make a magic ring, 6dc into the ring and pull the ring closed.

Round 1 :

2dc in each stitch

Round 2 :

(dc, 2dc in next stitch) to end

Round 3 :

(2dc, 2dc in next stitch) to end

Round 4 :

(3dc, 2dc in next stitch) to end

Round 5 to 6 :

dc in each stitch

Round 7 :

(3dc, dc2together) to end

Round 8 to 11 :

dc in each stitch

Round 12 :

(2dc, dc2together) to end

Round 13 to 14 :

dc in each stitch

Round 15 :

(dc, dc2together) to end

Info :

Stuff body

Round 16 :

dc2together to end

Info :

Fasten off leaving a long tail to sew.

β€” Assembly :

Info :

Sew the head so that it sits level on the top of the body (the fastened off part of the head joining with the fastened off part of the body.)

Info :

Sew the two wings to either side of the body making sure they sit to the sides and are level in height. (The point of the wings should be facing downwards.)

Info :

Sew the orange beak to the front of the head making sure it is central and level. The beak should sit in the middle but lower part of the head.

Info :

Sew the two orange feet to the bottom of the body so that the feet stick out slightly at the front.

Info :

With black wool embroider the eyes so that they sit central above the beak. Leaving and approx. finger width space between the two eyes.

Assembly Instructions

  • Sew the head so that it sits level on the top of the body (the fastened off part of the head joining with the fastened off part of the body).
  • Sew the two wings to either side of the body making sure they sit to the sides and are level in height with the point of the wings facing downwards.
  • Sew the orange beak to the front of the head making sure it is central and level; position it in the middle-lower part of the head.
  • Sew the two orange feet to the bottom of the body so that the feet stick out slightly at the front for stability.
  • Embroider the eyes with black wool so they sit central above the beak with about a finger-width space between them.

Important Notes

  • πŸ’‘This design is made using continuous spirals; do not join rounds with a slip stitch unless the pattern specifically instructs you to.
  • πŸ’‘The pattern is written in UK terms; refer to the provided conversion (UK Dc = US Sc) if you use US terminology.
  • πŸ’‘Stuff the head and body as instructed (stuff head before final decreases and stuff body before final decreases) for correct shaping.
  • πŸ’‘Leave long tails when fastening off beak, feet and wings to make sewing them to the body easier and neater.
  • πŸ’‘Count your stitches at the end of each round to keep the shaping accurate and avoid mistakes later in the pattern.

This adorable Dave The Duck pattern is a quick and rewarding amigurumi project you can make in an afternoon. Perfect for gifting, playtime, or as a cheerful handmade decoration. Choose bright or pastel DK yarn and give each duck its own personality. 🧢🐀

You ask,

we answer.

FAQs

What size will the finished piece be?

The finished amigurumi measures approximately 10 cm in height when using DK yarn and a 3.5mm hook as recommended.

Can I use different yarn weights for this pattern?

Yes, you can use different yarn weights but the final size and look will change; use an appropriate hook for your chosen yarn and expect a different finished measurement.

Do I need prior crochet experience for this pattern?

This pattern is beginner friendly, but basic knowledge of working in rounds, increases and decreases is helpful for best results.

How long does this project typically take to complete?

Most crocheters complete one duck in about 2-3 hours, though time may vary depending on experience and speed.