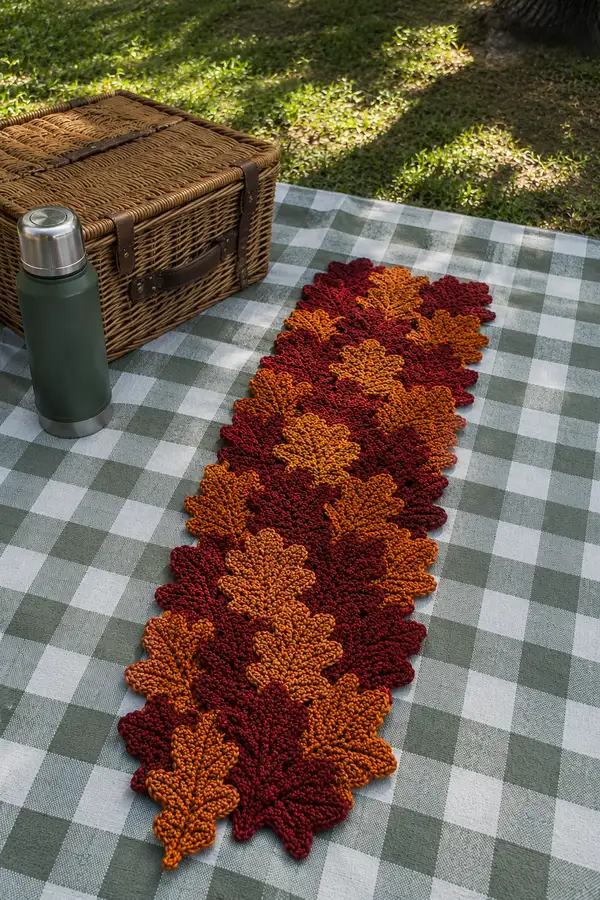
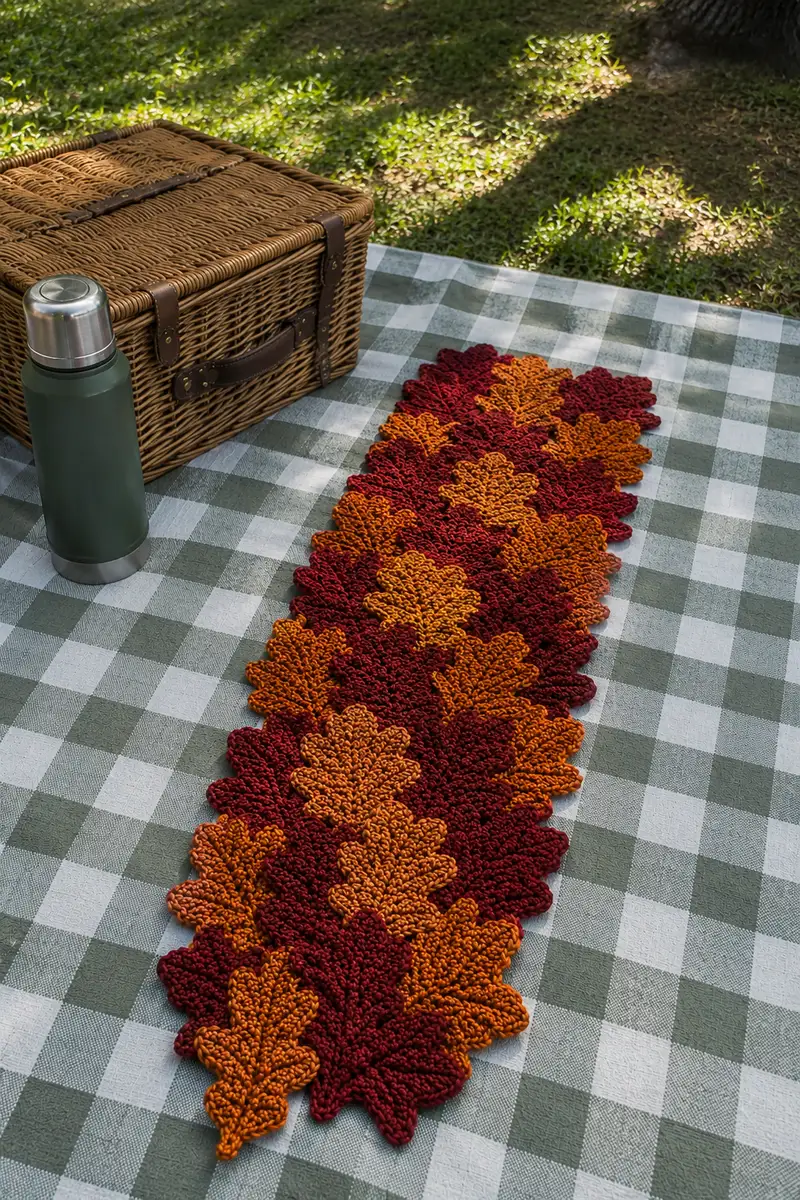
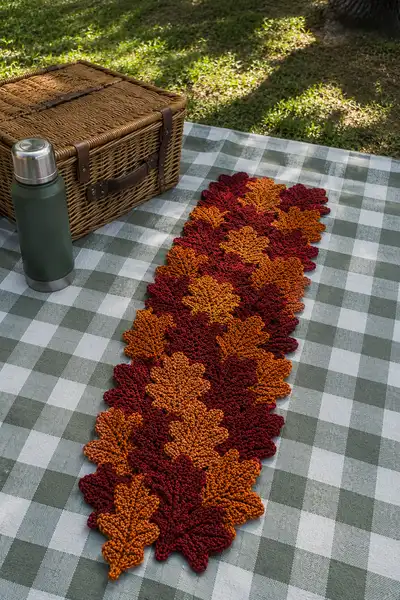
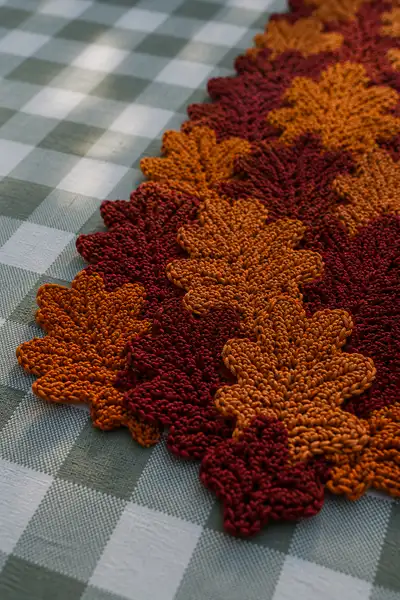
A warm, autumnal table runner made of interlocking detached oak leaf motifs in rich amber and burgundy. This long strip features layered leaves worked in a textured flat crochet stitch, creating a dimensional runner perfect for seasonal tables. The pattern uses repeating leaf units and simple joining techniques—great for crafters who love rhythmic stitching and color play.
Progress Tracker
0% Complete
— Overview :
Info :
This pattern builds a table runner from identical detached oak leaf motifs worked flat and joined in a staggered strip. You will work one leaf motif at a time and optionally create a small connector petal to smooth joins. The sample runner uses 18 full leaves alternating amber and burgundy along a single center column with offset halves on either side for a layered look. Gauge is not critical but consistent tension ensures even joining; refer to the yarn quantities to plan colors.
Info :
Throughout the pattern I list 'Round' to indicate a working pass even though leaves are largely worked flat in joined rounds. Count stitches at the end of each round to ensure math accuracy. Use stitch markers on every 8th round to keep track of the right side and start points.
— Leaf Motif (Make multiple) :
Round 1 :
6 sc in magic ring (6)
Round 3 :
(1 sc, 1 inc) x 6 (18)
Round 4 :
(2 sc, 1 inc) x 6 (24)
Round 5 :
(3 sc, 1 inc) x 6 (30)
Round 6 :
(4 sc, 1 inc) x 6 (36)
Round 7 :
(5 sc, 1 inc) x 6 (42)
Round 8 :
(6 sc, 1 inc) x 6 (48)
Info :
These first 8 rounds create a small, round center that becomes the leaf's heart. Use the same color for the full leaf or change here if adding a contrasting center. Keep tension slightly firm to allow the post rows to define lobes well.
Round 9 :
1 sc in each st around (48)
Round 10 :
(6 sc, 1 dec) x 6 (42)
Round 11 :
1 sc in each st around (42)
Round 12 :
(5 sc, 1 dec) x 6 (36)
Info :
At Round 12 you have reduced back to a smaller oval shape. This is the transition point before we begin leaf lobes and the central vein. Keep a marker at the start of this round to orient the long axis of the leaf consistently for every motif.
Round 13 :
1 sc in each st around (36)
Round 14 :
*Ch1, sc in next 3 sts, hdc in next 2 sts, dc in next 2 sts, tr in next 2 sts, dc in next 2 sts, hdc in next 2 sts, sc in next 3 sts, sl st in next 1 st; rep from * once to create both halves of the leaf (36)
Info :
Round 14 starts sculpting lobes: we move from single crochet rounds into taller stitches to create a raised outer lobe. Work evenly and count groups as indicated: this pattern places clusters symmetrically around the existing oval.
Round 15 :
Turn work. Working back along the tall stitches: ch1, sc in sl st, sc in next 3 sts, fpdc around first tr (this pulls tr forward to act as central ridge), sc in next 3 sts, sl st to join; continue across to mirror the other side (36)
Round 16 :
Ch2, *2 dc in next st, dc dec across the next 2 sts, 1 dc in next 3 sts, 2 dc in next st; rep from * around (42)
Info :
Round 16 adds width using double crochet groups; counts rise to form fuller lobes. The central front post double crochet on Round 15 should form a subtle ridge—this will be reinforced in later rounds with a back-and-forth post stitch ridge for the leaf 'vein'.
Round 17 :
1 sc in each st around (42)
Round 18 :
(6 sc, 1 inc) x 6 (48)
Round 19 :
1 sc in each st (48)
Round 20 :
Begin outer lobe sculpting: *ch3, skip 1, (5 dc shell) in next st, ch2, sl st in next st; rep from * across to form scalloped edges. Count will vary depending on shell spacing; aim for 12 shells around both sides combined (approx 48)
Info :
Round 20 forms the distinct oak-lobed outline by adding shells and picot-like joins. Keep shells evenly spaced. If your stitch count differs slightly, adjust the number of shells to maintain symmetry (matching shells on each side of the central ridge).
Round 21 :
Work back along shells to anchor them: *sc in shell base, hdc in shell peak, sc in shell base; rep across (48)
Round 22 :
Vein ridge: with RS facing, fpdc around the sts that form the central column across the leaf from tip to base (count approximately 8-10 fpdc depending on size) to create a raised vein. 1 sc in remaining sts (48)
Info :
The vein is worked as front post double crochets to lift the center ridge visually. Count fpdc stitches and ensure the same number appears when you mirror the motif; this creates consistent joins later.
Round 23 :
Edge tidy: 1 sc in each st BLO around to create a defined edge and slightly curl the leaf for natural shape (48)
Round 24 :
Picot and point shaping: *sc in next 2 sts, ch3, sl st in top of ch3 to create a tiny picot at the tip of each lobe; rep around. Fasten off and weave in ends.
Info :
After Round 24 your leaf should be clearly lobed with a raised central vein and a scalloped edge. Block lightly if needed: pin to shape on a mat, spritz with water, and allow to dry to set the lobes. Make as many leaves as you want for your runner — alternate colors as in the photo for the amber/burgundy effect.
— Alternate Mirror Leaf (Make matching opposite halves) :
Round 25 :
Repeat Rounds 1-8 from Leaf Motif to form center (use opposite orientation when placing stitch marker to mirror)
Round 26 :
Repeat Rounds 9-13 from Leaf Motif (36)
Round 27 :
Work Round 14 mirror: ch1, sc in next 3 sts, hdc in next 2 sts, dc in next 2 sts, tr in next 2 sts making sure the tr stitches face inward for mirror curvature, dc in next 2 sts, hdc in next 2 sts, sc in next 3 sts, sl st in next 1 st; rep once (36)
Round 28 :
Mirror Round 15: turn and work the ridging fpdc on the opposite side first to create a mirrored vein. Continue with sc groups to complete round (36)
Round 29 :
Work Round 16 mirrored: ch2, *2 dc in next st, dc dec across the next 2 sts, 1 dc in next 3 sts, 2 dc in next st; rep from * around (42)
Round 30 :
Follow Rounds 17-24 mirrored exactly to finish leaf (fasten off and weave ends)
Info :
Mirror leaves will stack neatly when alternated across the runner, producing the look of overlapping leaves. Make equal numbers of standard and mirror leaves if you are assembling a symmetrical runner, or offset them for staggered layering like the sample.
— Small Connector Petal (Optional) :
Round 31 :
6 sc in magic ring (6)
Round 33 :
(1 sc, 1 inc) x 6 (18)
Round 34 :
Ch1, sc in next 4 sts, hdc in next 4 sts, sc in last 10 sts creating a small elongated petal (18)
Round 35 :
Edge: 1 sc in each st BLO to create a thin connector (18)
Info :
These petal connectors are useful to soften gaps between leaves when joining. Make a supply equal to number of joins you plan to make in the runner layout.
— Joining Leaves into a Strip :
Round 36 :
Layout: On a flat surface, arrange your leaves alternating color and orientation. For the sample runner layout, place one full leaf down the center, then overlap half-leaves on each side to create a compact stacked column. Pin leaves in place.
Round 37 :
Joining method A (Whip stitch): With RS facing, hold two adjacent leaves so their edges overlap approximately 8-12 sts. Using matching color yarn and a tapestry needle, whip stitch through both layers every 2-3 sts along the overlap for secure but discreet joins.
Round 38 :
Joining method B (Join-as-you-go crochet): Where two leaf edges touch, align edges and working with the working leaf, sl st into edge st of joining leaf, ch1, sc into next st of working leaf, sl st into next st of joining leaf; continue around overlap zone until secure.
Info :
Pin leaves before joining to preview the final look. If you prefer a more visible decorative join, use a contrasting yarn and visible running stitch. For the sample look, matches were sewn with matching color for near-invisible joins.
Round 39 :
Build the central column: Join leaves atop one another along a single seam down the runner's long axis. Sew through the centers of leaves (near rounds 6-10 area) to anchor them so edges remain free and layered.
Round 40 :
Attach connector petals where three leaves meet to fill small gaps: place the petal with its short end toward the join and tack it with two or three stitches so it nests between leaf lobes.
Round 41 :
Once all leaves are joined in a single long strip, flip the runner and stitch a central backing seam along the underside at the midline (optional) to provide stability for use on a table.
Info :
When joining many motifs, stagger joins every 2-3 leaves so the runner remains flexible and doesn't pucker. Alternate join methods to suit the look you want: visible rustic stitches or invisible mattress/whip stitches.
— Alternating Band Method (for longer runners) :
Round 42 :
Create a second column of leaves if your runner will be wider: make identical leaves and join them to the first column by sewing through alternating lobes so a woven stacked look forms (use the same join methods as Rounds 37-40).
Round 43 :
Sew across at 3-4 equidistant points to keep two columns aligned, leaving the mid-section free to give the impression of layered leaves rather than a stiff sheet.
Info :
If you plan to make a very long runner, work sections of 6-8 leaves and join sections together so you can handle the project comfortably. Block and join each section before combining to keep edges even.
— Edge Finishing and Border :
Round 44 :
Pick up along one long edge with burgundy yarn: attach with sl st to starting point, ch1, sc evenly spaced along exposed edge (approx 1 sc per 6 mm of edge), keeping count consistent. Aim for a multiple of 4 around the entire runner edge for symmetric corners (st count will depend on runner length).
Round 45 :
Work a decorative ridge: *ch2, sk 1, sc in next st; rep across to create a small scalloped secondary edge to contrast the lobes (st count matches Round 44)
Round 46 :
Picot round for final detail: *sc in next 2 sts, ch3, sl st into top of ch3 to form picot; rep evenly around. Fasten off and weave in ends neatly on underside.
Info :
Edge rounds will use more yarn for longer runners; gauge your stitch spacing on a sample edge to ensure neat scallops. If you want a cleaner modern look, skip Rounds 45-46 and instead do a single sc round in BLO for a flat edge.
— Blocking, Pressing and Final Shaping :
Round 47 :
Light blocking: lay runner on blocking mat, pin lobes outward to achieve even symmetry. Lightly spritz with water and allow to dry overnight. For cotton blend yarn, you can use a warm steam iron held above the fabric—do not press directly to avoid flattening texture.
Round 48 :
Check joins and tidy: inspect the underside for any loose threads. Re-stitch any gaps and trim extra yarn tails after weaving them securely at least 6-8 sts into the fabric.
Info :
Blocking is optional but recommended for a polished finish; it also helps the scalloped edges sit evenly so the runner looks hand-crafted but refined on a table setting.
— Sizing and Repeating Guide :
Round 49 :
One leaf motif finished width across the lobes (unstretched) should measure approximately 10-12 cm (4-4.75 in). To create an approximate 90 cm (36 in) runner, make 8–10 full leaves and join as shown. For a table centerpiece 120 cm long, increase leaves proportionally.
Info :
To lengthen runner by one leaf, add two matching leaves (one mirror and one standard) and join at the center axis. Repeat border rounds after final length achieved so edge remains even.
— Decorative Variations & Textural Enhancements :
Round 50 :
Ridge contrast: use a thin contrasting yarn to embroidered-stitch a central line following the vein to emphasize it. Use backstitch with tapestry needle and 1-2 strands for subtle look.
Round 51 :
Beaded edge (optional): before final picot round, attach small glass beads to edges with thread for a sparkling accent on holiday tables. Secure beads by passing thread through twice and knotting on underside.
Info :
Customizing contrast and texture is easy — try a variegated yarn for individual leaves for a natural gradient. For sturdier runners, consider a cotton-blend yarn with some drape rather than pure acrylic.
— Troubleshooting Common Issues :
Round 52 :
Uneven lobes: when you spot a lobe that sticks out, unpick the last 1-2 rounds only of that motif, rework the shell spacing and re-block. Often a single miscount in one shell creates disproportion.
Round 53 :
Pucker at joins: if joining creates pull, add 1-2 extra whip stitches a little further from the seam to spread tension or use a smaller needle/tighter stitch to secure without pulling.
Info :
Keep spare yarn tails when finishing motifs until final assembly — you may need them to stitch joins more securely or to add reinforcing stitches after blocking.
— Finishing Touches :
Round 54 :
Final weave: once runner is fully assembled, run a length of matching yarn on underside along the central seam with small anchoring stitches every 3-4 cm to increase stability for heavy tableware.
Round 55 :
Steam-final: with runner on mat, use a short burst of steam and re-pin any lobes needing slight reshaping. Let dry fully before storage.
Info :
Store flat when not in use to preserve shape. If folding is necessary, place tissue between folds to minimize creasing in the lobes.
Finishing this oak leaf runner brings such cozy satisfaction — the layered leaves and rich amber-to-burgundy colors create an instant autumn centerpiece. Each motif is a little win, and the joining process is rhythmical and meditative. Display it on a farmhouse table for a warm, handmade touch this season. 🍁🧶