🧢 Beautiful ✨ Detailed πŸ’ Adorable

EZ Diamond Lattice Blanket Pattern

EZ Diamond Lattice Blanket Pattern
3.9β˜… Rating
12-15 Hours Time Needed
1.5K Made This
βœ‚οΈ

Advanced Level

Designed for experienced crocheters, these patterns involve intricate designs and complex techniques to challenge and inspire.

⏱️

Multi-Day Project

A rewarding 12+ hour journeyβ€”perfect for dedicated crafters who love detailed work.

πŸ€—

Soft Hug

Gentle, plush, and full of warmth, creating a sense of comfort and coziness wherever they find a home.

About This EZ Diamond Lattice Blanket Pattern

This pattern creates a lush, diamond-lattice throw worked using Bernat Alize Blanket-EZ yarn to produce large soft loops and a sculpted texture. The design relies on a repeating 5th-to-10th-row sequence to build the lattice across a 68-loop foundation. It features detailed step-by-step row instructions and a clear bind-off method to preserve the textured loops.

EZ Diamond Lattice Blanket Pattern crochet pattern - detailed view of completed project

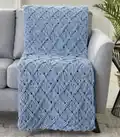
Finished blanket measures approximately 56" x 60" using 7 balls of Bernat Alize Blanket-EZ in Country Blue. Right side of the project faces at all times and the working yarn is held behind the stitches throughout.

Why You'll Love This EZ Diamond Lattice Blanket Pattern

I absolutely love this pattern because the diamond lattice texture looks far more complex than it actually is, making it a joy to make and to display. The oversized loop details create a tactile, cozy surface that feels luxurious and inviting. I enjoy how the repeatable rows let you settle into a rhythmic flow while crocheting, which is wonderfully meditative. The finished blanket adds instant handmade charm to any space and makes a thoughtful, enduring gift.

EZ Diamond Lattice Blanket Pattern step 1 - construction progress EZ Diamond Lattice Blanket Pattern step 2 - assembly progress EZ Diamond Lattice Blanket Pattern step 3 - details and accessories EZ Diamond Lattice Blanket Pattern step 4 - final assembly and finishing

Switch Things Up

I love experimenting with color when making this blanket; try alternating two or three colors every few pattern repeats to create striped diamonds for a bold look.

You can change the finished size by adding or subtracting foundation loops in multiples as needed; test a small swatch to estimate how many additional loops you need for your desired width.

I sometimes use a chunky neutral for a modern, minimalist throw or a bright accent color for a statement piece to match my decor.

To make a baby blanket, I use the same pattern but with fewer foundation loops and lighter yarn to create a softer, smaller version that is quicker to finish.

I also add a simple single crochet border in a contrasting color to frame the lattice and give the blanket a neat, finished edge.

For a luxury feel, I like to trim the edges with a fringe or pompom border in a coordinating shade for extra texture and playful movement.

If you prefer a denser finish, work the same repeat but pull loops slightly smaller and use a tighter tension to reduce drape and increase warmth.

I sometimes incorporate metallic or speckled yarn held together with the main yarn to add subtle shimmer and visual interest to the lattice.

To create a reversible look, consider working a matching lattice on both sides by practicing loop placement and maintaining consistent loop heights throughout the project.

When gifting, I add a crocheted tie or small crocheted label with initials to personalize the blanket and make it extra special.

Common Mistakes & How to Fix Them

βœ— Not counting foundation loops accurately results in wrong stitch multiples; recount and confirm you have 68 loops before starting the 1st row. βœ— Turning the work when instructed 'Do not turn' disrupts the lattice orientation; always keep the right side facing and work back and forth over the loops as described. βœ— Pulling loops inconsistently creates uneven texture across the blanket; pull each loop to a consistent height and tension for uniform diamonds. βœ— Failing to weave in loop-base tails will allow stitches to loosen later; after bind off cut threads at the loop base, tie securely and weave in ends immediately.

EZ Diamond Lattice Blanket Pattern

Create a beautifully textured diamond lattice blanket with this experienced-level crochet pattern. You will work oversized loop stitches to form a cozy, sculptural throw that measures approximately 56" x 60". The pattern uses a simple repeating row sequence to build the lattice and includes full bind-off instructions for finishing. Perfect for gifting or adding a handmade accent to your living room.

Advanced 12-15 Hours

Materials Needed for EZ Diamond Lattice Blanket Pattern

β€” Main Fabric

  • 01
    Bernat Alize Blanket-EZ (6.4 oz/180 g; 18 yds/16 m) Country Blue (37018) - 7 balls

β€” Tools Required

  • 01
    Crochet hook (size as recommended on yarn label; check Bernat Alize Blanket-EZ label for exact size)
  • 02
    Scissors
  • 03
    Yarn needle for weaving in ends
  • 04
    Tape measure
  • 05
    Stitch markers (optional for keeping track of repeats)

Progress Tracker

0% Complete

β€” Measurements :

Info :

Approximately 56" [142 cm] wide x 60" [152.5 cm] long.

β€” Instructions :

Infos :

Notes: Right side of project is facing at all times. 'Working yarn' is held behind stitches throughout work.

Info :

Count 68 loops for foundation row.

1st row :

Working from right to left, pull the 69th loop (from 'working yarn') up through 68th loop (last loop of foundation row) from behind to create a knit stitch. Pull next loop from working yarn up through next loop of foundation row. *Cross second loop of foundation row in front of first loop of foundation row (to the right). Pull next loop from working yarn up from behind next loop. Pull next loop from working yarn up from behind next loop. Cross next loop of foundation row in front of 2nd loop (to the left). Pull next loop from working yarn up from behind 1st loop. (Pull next loop from working yarn up from behind next loop) over next 4 stitches. Cross 2nd stitch in front of next stitch (to the right). Pull next loop from working yarn up from behind 2nd stitch. Pull next loop from working yarn up from behind 1st stitch. Rep from * to last 6 stitches. *(Pull next loop from working yarn up from behind next loop) over next 4 stitches. Cross next stitch in front of 2nd stitch (to the left). Pull next loop from working yarn up from behind 2nd loop. Pull next loop from working yarn up from behind 1st loop. Do not turn. (68 stitches in row)

2nd row :

Working from left to right, pull next loop from working yarn up from behind last stitch worked on previous row. *Cross 2nd stitch over next stitch (to the left). Pull next loop from working yarn up from behind 2nd stitch. Pull next loop from working yarn up from behind 1st stitch. (Pull next loop from working yarn up from behind next loop) twice. Cross next stitch in front of 2nd stitch (to the right). Pull next loop from working yarn up from behind 1st stitch. Pull next loop from working yarn up from behind 2nd stitch. Rep from * to last stitch. Pull loop from working yarn up from behind next loop. Do not turn.

3rd row :

Working from right to left, cross 2nd stitch of previous row over 1st stitch (to the right). Pull loop from working yarn up from behind 2nd stitch. Pull next loop from working yarn up from behind 1st stitch. *(Pull next loop from working yarn up from behind next loop) over next 4 stitches. Cross 2nd stitch in front of next stitch (to the right). Pull next loop from working yarn up from behind 2nd stitch. Pull next loop from working yarn up from behind 1st stitch. Rep from * to last 6 stitches. *(Pull next loop from working yarn up from behind next loop) over next 4 stitches. Cross next stitch in front of 2nd stitch (to the left). Pull next loop from working yarn up from behind 2nd loop. Pull next loop from working yarn up from behind 1st loop. Do not turn.

4th row :

Working from left to right, pull next loop from working yarn up from behind through last stitch worked on previous row. *Cross next stitch in front of 2nd stitch (to the right). Pull next loop from working yarn up from behind 2nd loop. Pull next loop from working yarn up from behind 1st stitch. Pull next loop from working yarn up from behind 1st loop. (Pull next loop from working yarn up from behind next loop) twice. Cross 2nd stitch over next stitch (to the left). Pull next loop from working yarn up from behind 2nd stitch. Pull next loop from working yarn up from behind 1st loop. Do not turn.

5th row :

Working from right to left, (pull next loop from working yarn up from behind last stitch worked on previous row) twice. *Cross next stitch in front of 2nd stitch (to the left). Pull next loop from working yarn up from behind 2nd stitch. Pull next loop from working yarn up from behind 1st stitch. Cross 2nd stitch in front of next stitch (to the right). Pull next loop from working yarn up from behind 2nd stitch. Pull next loop from working yarn up from behind 1st stitch. Rep from * to last stitch. Pull next loop from working yarn up from behind next stitch. Do not turn.

6th row :

Working from left to right, (pull next loop from working yarn up from behind last stitch worked on previous row) over next 4 stitches. Rep from * to end of row. Do not turn. 68 stitches in row.

7th row :

Working from right to left, (pull next loop from working yarn up from behind last stitch worked on previous row) twice. *Cross 2nd stitch in front of next stitch (to the right). Pull next loop from working yarn up from behind 2nd stitch. Pull next loop from working yarn up from behind 1st stitch. Cross next stitch in front of 2nd stitch (to the left). Pull next loop from working yarn up from behind 2nd stitch. Pull next loop from working yarn up from behind 1st stitch. Rep from * to last stitch. Pull next loop from working yarn up from behind next loop. Do not turn.

8th row :

Working from left to right, pull next loop from working yarn up from behind through last stitch worked on previous row. *Cross 2nd stitch in front of next stitch (to the left). Pull next loop from working yarn up from behind 2nd stitch. Pull next loop from working yarn up from behind 1st stitch. Pull next loop from working yarn up from behind last stitch worked on previous row three times. Rep from * to last 5 stitches. Cross 2nd stitch in front of 1st stitch (to the left). Pull next loop from working yarn up from behind 2nd stitch. Pull next loop from working yarn up from behind 1st stitch. Do not turn.

9th row :

Working from right to left, cross 1st stitch over 2nd stitch (to the left). Pull next loop from working yarn up from behind 2nd loop. *Pull next loop from working yarn up from behind 1st loop. (Pull next loop from working yarn up from behind next loop) over next 4 stitches. Cross 2nd stitch in front of next stitch (to the right). Pull next loop from working yarn up from behind 2nd stitch. Pull next loop from working yarn up from behind 1st stitch. Rep from * to last stitch. Do not turn.

10th row :

Working from left to right, pull next loop from working yarn up from behind last stitch worked on previous row. Cross next stitch in front of 2nd stitch (to the right). Pull next loop from working yarn up from behind 2nd stitch. Pull next loop from working yarn up from behind 1st stitch. (Pull next loop from working yarn up from behind next loop) twice. Cross 2nd stitch over next stitch (to the left). Pull next loop from working yarn up from behind 2nd stitch. Pull next loop from working yarn up from behind 1st stitch. Do not turn.

Info :

Repeat 5th to 10th rows for pattern. Work in pattern until Blanket measures approximately 60" [152.5 cm], ending on a 5th row.

Bind off row :

Working in same direction as last row, pull 2nd stitch through 1st stitch. Pull 3rd stitch through 2nd stitch. Pull 4th stitch through 3rd stitch. Continue in this manner to end of row. Cut thread at base of loop (thread used to create the loop) to create a yarn 'tail'. Tie to secure and weave in end.

Assembly Instructions

  • Work bind off row in the same direction as the last row, pulling each subsequent stitch through the previous stitch until the row is completed, then cut the loop thread at its base and tie to secure.
  • Weave in all yarn tails and secure the loop 'tails' created when cutting the loop base so loops do not unravel over time.
  • Block the blanket gently if desired to even out the lattice and relax the stitches, laying flat to dry while preserving loop height.
  • Trim any excess loop threads carefully after securing to shape the blanket edge uniformly.
  • Pin any uneven edges and adjust by hand-sewing a few stitches if necessary to create a straight border.

Important Notes

  • πŸ’‘Keep the right side of the project facing you at all times and do not turn your work unless specifically instructed to do so.
  • πŸ’‘Hold the working yarn behind the stitches throughout the pattern to maintain the correct loop orientation for the lattice.
  • πŸ’‘Count 68 loops for the foundation row before beginning to ensure the correct stitch multiple and finished width.
  • πŸ’‘Do not pull loops inconsistently; keep loop height and tension uniform to achieve consistent diamonds across the blanket.

This Diamond Lattice Blanket pattern transforms plush loop yarn into a stunning textured throw that's both cozy and sculptural. Whether you drape it over your sofa or gift it to a loved one, it adds handmade warmth and charm to any space. Enjoy the rhythmic, meditative stitching as the lattice unfolds across your blanket. 🧢✨

You ask,

we answer.

FAQs

What size will the finished piece be?

The finished blanket measures approximately 56" [142 cm] wide x 60" [152.5 cm] long when using the recommended yarn and following the pattern exactly.

Can I use different yarn weights for this pattern?

You can substitute yarns, but changing yarn weight and hook size will alter the final size and texture significantly; test a swatch to check gauge and loop size.

Do I need prior crochet experience for this pattern?

This pattern is rated advanced (experienced); familiarity with working loop yarn techniques, consistent tension, and following multi-row repeats is recommended for best results.

How long does this project typically take to complete?

Most crocheters complete this project in about 12-15 hours, though time may vary with experience level and stitch speed.

How do I finish the loops at the end of the blanket?

Work the bind off row in the same direction as the last row, then cut the thread at the base of each loop to create a tail; tie securely and weave in each end to finish.