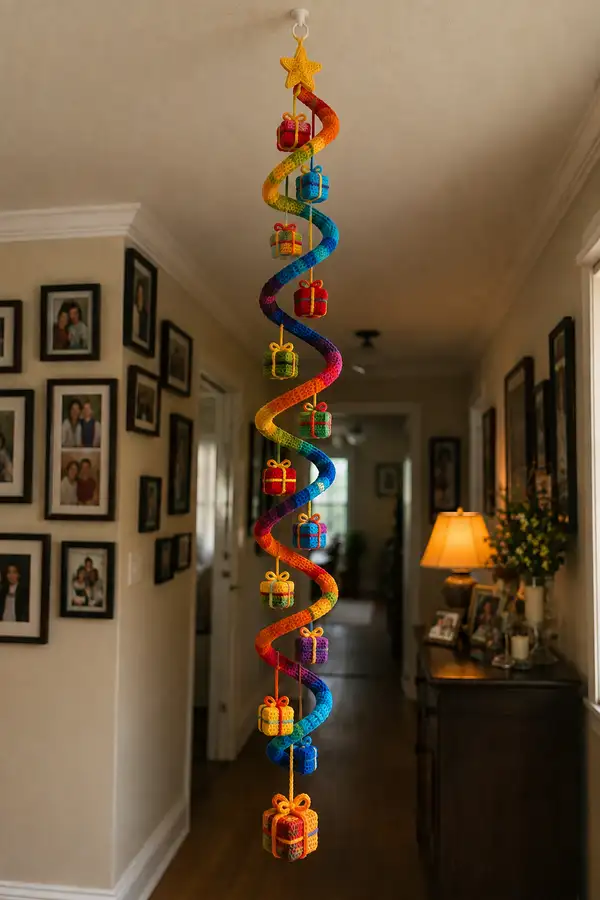
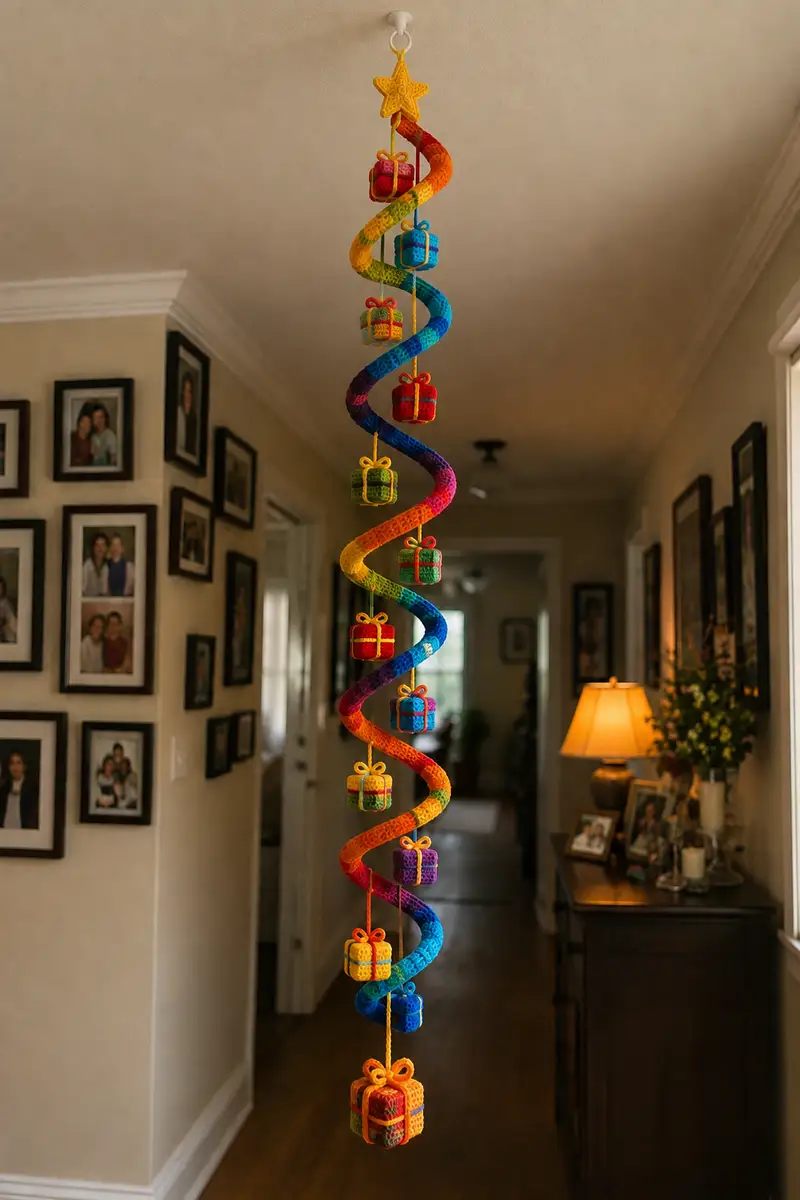
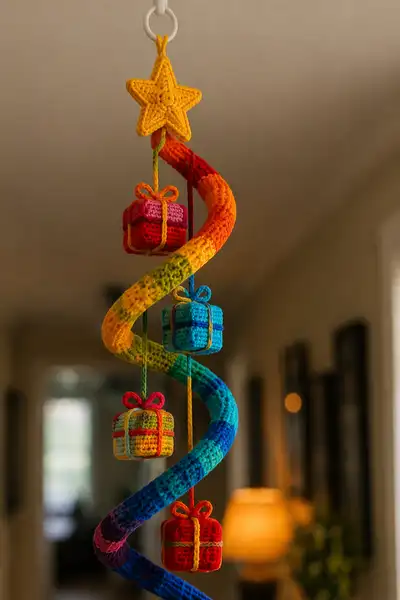
A joyful hanging spiral garland in a full rainbow gradient, dotted with tiny crocheted wrapped gift boxes and finished with a sunny star topper. This decorative mobile coils into a perfect spiral and features multiple small, stuffed gift cubes with embroidered ribbons and bows. Perfect for a festive doorway, nursery, or over a table—bright, playful, and handmade.
Progress Tracker
0% Complete
— Materials & Notes :
Info :
This pattern uses continuous rounds (spiral) for the main tube to avoid visible seams. Keep a stitch marker at the first stitch of each round and move marker after every round when needed for counting. Use worsted weight yarn and a 3.5mm hook for a firm fabric. If you prefer a slightly smaller tube, use 3.25mm hook; slightly larger, use 4.0mm. The spiral is shaped by coiling the finished, lightly stuffed tube around floral wire or a wrapped pipe to set the curve.
— Spiral Tube (Make 1 long tube) :
Round 1 :
6 sc in magic ring (6)
Round 3 :
(1 sc, 1 inc) x 6 (18)
Round 4 :
(2 sc, 1 inc) x 6 (24)
Round 5 :
(3 sc, 1 inc) x 6 (30)
Round 6 :
(4 sc, 1 inc) x 6 (36)
Round 7 :
(5 sc, 1 inc) x 6 (42)
Round 8 :
(6 sc, 1 inc) x 6 (48)
Info :
You now have a round tube circumference of 48 stitches. This is the standard diameter for the spiral. If you prefer a narrower spiral, stop increases one round earlier (42 sts). If you want a chunkier tube, add one more increase round: (7 sc, inc) x6 to make 54 sts.
Round 9-16 :
1 sc in each st (48)
Info :
Start your first color section here. Use variegated gradient yarn or change color to red/orange section now. Carry unused yarn inside tube or fasten off and join new color with invisible join to avoid bulk.
Round 17-24 :
1 sc in each st (48)
Round 25 :
1 sc in each st BLO (48)
Info :
Technique :
Working Round 25 in BLO creates a subtle ridge; use this occasionally as a color boundary or to add texture. If using a single skein gradient cake, you may not need many joins; otherwise change color every 8 rounds for regular rainbow bands.
Round 26-32 :
1 sc in each st (48)
Info :
Change color now to orange/yellow if you are hand-coloring bands. Carry the tail inside the tube for a clean finish. Keep rounds even; do not increase or decrease as the tube needs to maintain constant circumference for a clean spiral.
Round 33-40 :
1 sc in each st (48)
Round 41 :
1 sc in each st BLO (48)
Round 42-48 :
1 sc in each st (48)
Info :
At this stage, check the length against your hanging space and the planned number of gifts. The finished sample spiral uses about 96 rounds for a long vertical hanging. If you need a shorter garland, plan to stop earlier. Continue color transitions through green, teal, blue, purple sections every 6-10 rounds.
Round 49-56 :
1 sc in each st (48)
Round 57 :
1 sc in each st BLO (48)
Round 58-64 :
1 sc in each st (48)
Info :
Begin stuffing the tube lightly as you continue to work. Use small amounts of polyfill every 8-12 rounds — avoid overstuffing which makes the spiral stiff and difficult to coil. The tube should be firm but flexible.
Round 65-72 :
1 sc in each st (48)
Round 73 :
1 sc in each st BLO (48)
Round 74-80 :
1 sc in each st (48)
Info :
At round 80 check the length. The sample uses 96 rounds total for approximately a 3.5-4 ft uncoiled length. If you plan more gifts or a longer descent, continue to round 96; if not, aim for 72-84 rounds. Plan to leave both ends open for inserting wire and for final closure around star and bottom gift.
Round 81-88 :
1 sc in each st (48)
Round 89-96 :
1 sc in each st (48)
Info :
Fasten off leaving a long tail (approx 30-40 cm) at both ends for assembly. Do NOT close the tube; leave a small gap at each end large enough to insert the floral wire and to tuck the cord for the top ring. If you used multiple color changes, weave ends neatly inside the tube now.
— Internal Wire & Shaping :
Info :
Cut a length of floral wire or craft wire about 1.5 times the straight length of the uncoiled tube. If you want a tight spiral, cut 2x length. Fold or coil this wire gently to follow the planned spiral pitch. Insert the wire through the tube from the top opening, pushing all the way to sit near the lower opening.
Info :
Option A: Coil wire before inserting and then slide tube over coil. Option B (recommended): Insert a straight wire then coil the finished tube around a cylindrical object (dowel) and secure wire into a clipped spiral. Both methods work; secure wire ends inside a tight knot of yarn or with hot glue so wire won't poke out.
— Gift Panels (Make 6 panels per small gift; you will make 8 small gifts for this project) :
Info :
Each small gift is made from 6 identical square panels crocheted flat and then sewn into a cube. You will make 6 panels per gift, 8 gifts = 48 panels. Use various bright colors to alternate gift colors like in the photo. Panel dimensions: the sample panels finish around 16 stitches across in Round 4, yielding a gift of approximately 3.5-4 cm per side depending on tension.
Panel Round 1 :
ch 4, join with sl st to form a loop; 8 sc in loop (8)
Panel Round 2 :
(1 sc, 1 inc) x 4 (12)
Panel Round 3 :
(2 sc, 1 inc) x 4 (16)
Panel Round 4 :
1 sc in each st (16)
Info :
Fasten off and leave a 20 cm tail for sewing. Make 6 identical panels for one gift. For a variety of textures, you can work Round 4 in BLO to create a subtle ridge that will sit on the outside of the cube as a seam accent.
Repeat :
Make 6 panels total for each small gift. Use alternating colors for adjacent panels to get the multicolor patchwork gifts seen in the inspiration photo. Make eight small gifts for the sample garland.
— Assemble Small Gift (Each gift) :
Info :
Arrange panels as a net: a line of 4 panels for sides and attach top and bottom to this tube of sides. Visually place side panels in order, then whip stitch edges together using mattress or whip stitch for a neat seam. Leave one top edge partially open to insert stuffing before closing.
Assembly Step 1 :
Sew four square panels in a row by joining the edge stitches (16 sts per edge). Each seam will require about 16 small whip stitches; ensure corners match up. After joining the row of four sides, sew the remaining two panels as the top and bottom to form a box shape, leaving a small opening for stuffing.
Info :
Stuff the cube moderately — firm but not rock-hard. For the tiny gifts in the photo, use small bits of polyfill and press with a stuffing tool into corners so the cube holds shape. For a crisp edge, insert a tiny piece of cardboard inside the bottom before closing, if desired.
Assembly Step 2 :
Sew the final opening closed with ladder stitch or whip stitch. Weave in all ends through multiple stitches and hide them inside the box. Repeat to make the remaining seven small gifts.
Info :
For ribbon stripes across the cube, embroider thin lines across the finished assembled cube using a contrasting color. Use surface slip stitch or thin yarn sewn on top. Add a tiny crocheted bow (instructions below) and stitch it to the top center.
— Large Bottom Gift (Make 1) :
Large Panel Round 1 :
ch 4, join with sl st to form a loop; 10 sc in loop (10)
Large Panel Round 2 :
(1 sc, 1 inc) x 5 (15)
Large Panel Round 3 :
(2 sc, 1 inc) x 5 (20)
Large Panel Round 4 :
(3 sc, 1 inc) x 5 (25)
Large Panel Round 5 :
1 sc in each st (25)
Info :
Make 6 of these larger panels and assemble like the small boxes. This bottom box provides visual weight and anchors the spiral. Stuff firmly for a chunky final look; you may optionally run a small length of wire down the center of the cord through the box to help keep it hanging straight.
Large Assembly :
Sew panels together exactly as above, leaving an opening to stuff, then close. Embroider ribbon lines across the faces and attach a larger crocheted bow on top.
— Crocheted Bow (Make 9 small bows and 1 large bow) :
Bow Round 1 :
Using small contrast yarn with 2.75-3.25mm hook, ch 8 (8)
Bow Round 2 :
Row: sc in 2nd ch from hook and across (7)
Bow Round 3 :
ch1, turn, sc across (7)
Bow Round 4 :
ch1, turn, sc across (7)
Info :
Fold the rectangle you made into a bow shape by pinching the middle. Wrap a 10-12 cm length of the same or contrasting yarn tightly around the center several times and knot on the back. Sew the bow to the top center of each small gift. For the large bow, work ch 12 and repeat rows to make a larger rectangle and wrap for a chunkier bow.
— Small Gift Ribbon (Surface Embroidery) :
Info :
Cut a length of yarn in a contrast color. Use a yarn needle to stitch two perpendicular lines around the cube (one horizontal band and one vertical band). Start from the bottom inside seam, bring yarn to the outside and stitch across the center of each face, traveling inside the seams when possible to hide tails. Tie ends securely and weave into seams.
— Star Topper :
Star Round 1 :
Using sunny yellow, mr, 6 sc in mr (6)
Star Round 2 :
inc x 6 (12)
Star Round 3 :
(1 sc, inc) x 6 (18)
Star Round 4 :
1 sc in each st (18)
Star Rounds 5-8 (Point formation) :
Work five points around the center: *ch 3, in next st: (sl st, sc, hdc, dc, hdc, sc, sl st) - join back at center; rep from * x4 to make 5 points (star shape)
Star Round 9 :
Round to reinforce center: 1 sc in each central st and single slip stitch between points (18)
Info :
Create a small hanging loop by ch 12 from top center and slip stitch back into center. Use the long tail from the top of the spiral tube to sew the star ring to your mounting ring or plastic hook. Stuff star lightly before closing if you want it slightly padded.
— Hanging Cords (Make one for each gift plus top and bottom) :
Info :
Use bright yellow cord for the vertical hanger and different colored cords for individual gift hangers or make them match the gift color. Each gift cord is approximately 15-25 cm long (depending on spacing). You will make eight cords for the small gifts, one long cord for the large bottom gift (about 30-40 cm), and two short cords to anchor star and top ring.
Cord Method A :
Chain the desired length with a matching or contrast color, then sc back along chains for a reinforced cord. Fasten off and weave in ends.
Cord Method B (I-Cord) :
Using a smaller hook (2.75mm), make an i-cord by crocheting a tube of 6-8 rounds of 6 sc in a magic ring then sl st into each round to form a narrow cord. Pull tail to close one end and use remaining tail to stitch the cord into the tube and into the gift top center.
— Placement & Spacing :
Info :
Mark positions on the inner seam of the spiral where gifts will hang. A visually pleasing spacing is roughly every 8-10 spiral rounds. For a 96-round tube, that yields about 9-11 hanging positions. Pin the cords in place temporarily, then hang and adjust spacing before final sewing. Make sure the small gifts alternate color and position for balance.
— Final Assembly :
Assembly Step 1 :
Insert the wire into the tube and arrange the tube around it in the spiral shape you prefer. If wire is longer than tube, trim safely and secure ends inside the star top and bottom gift. Use hot glue or extra yarn stitches to anchor wire ends to internal seams so it cannot slip.
Assembly Step 2 :
From inside the tube, bring each hanging cord out through the inner seam at the pre-marked positions. Push a small tapestry needle through the tube to the inner space and pull the cord end to the outside. Tie or secure the cord top to the inside seam so the gift hangs on the center loop, not off the outer spiral surface.
Assembly Step 3 :
Sew the star topper to the top opening by passing the long tail from the spiral tube through the star loop and securing with tight stitches into the star center. Make sure the star hangs flat when the garland is suspended.
Assembly Step 4 :
Attach the smallest gifts first, then the larger bottom gift. Check the balance by hanging the garland temporarily from a ceiling hook. Adjust cord lengths and distances between gifts so they dangle within the inner space of the spiral without bumping the outer coil.
Assembly Step 5 :
Sew all cord knots and cord ends securely into inner seams of the tube and inside gift tops to hide ends. Weave every tail through four or five stitches before trimming to secure it thoroughly. If desired, add a dab of fabric glue inside seams for extra hold.
Info :
For a polished look, embroider or surface-slip-stitch thin ribbon lines on each gift face just before final assembly. Place bows last and secure them with a few small stitches so they always face outward.
— Optional Wire-Free Spiral (Alternative method) :
Info :
If you prefer not to use wire, crochet a slightly shorter tube and insert a coiled foam craft tube or tightly rolled fabric strip inside to hold shape. Another option is to wrap the finished spiral around a dowel while still slightly damp and allow to dry with clothespins to set the curve.
— Care & Display :
Info :
Spot clean with mild soap and a damp cloth. If the garland becomes flattened, gently reshape over a dowel and allow to air dry. Keep away from small children if you used wire or small decorative items like glued beads. The finished garland makes a wonderful seasonal display in a hallway, doorway, or over a bed.
This colorful spiral garland combines simple crochet building blocks into a magical, hanging decoration that brightens any doorway. The long tube coiled into a perfect spiral, dotted with tiny wrapped gifts and topped by a cheerful star, creates a handmade focal point that feels festive and playful ☀️🎁. Each module is satisfying to stitch, and seeing them come together into a tall, living-mobile is so rewarding. Enjoy assembling this rainbow cascade and sharing it with loved ones during the season! 🎄✨