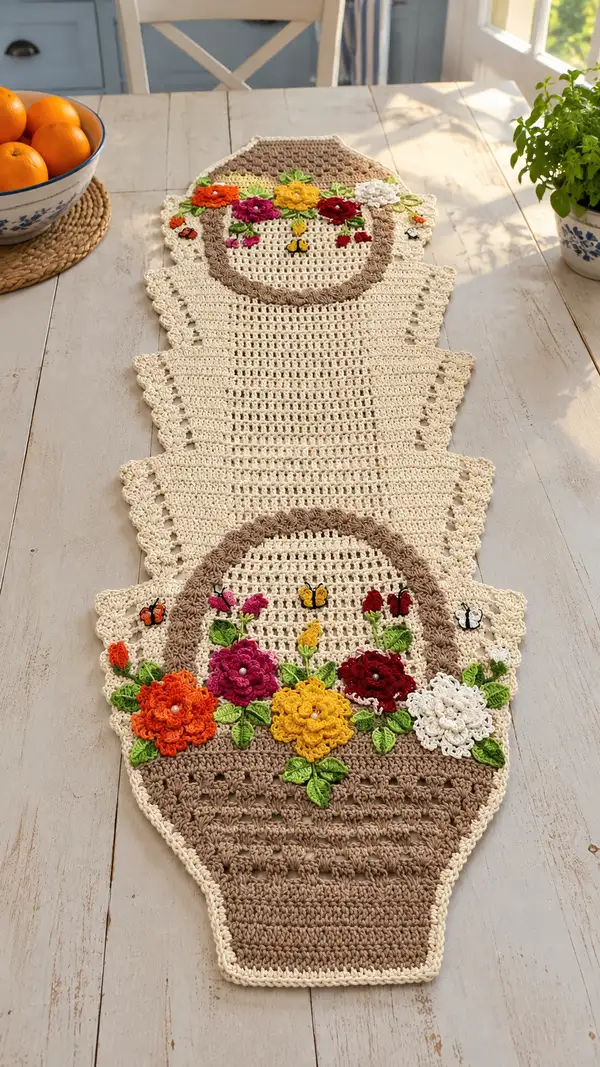
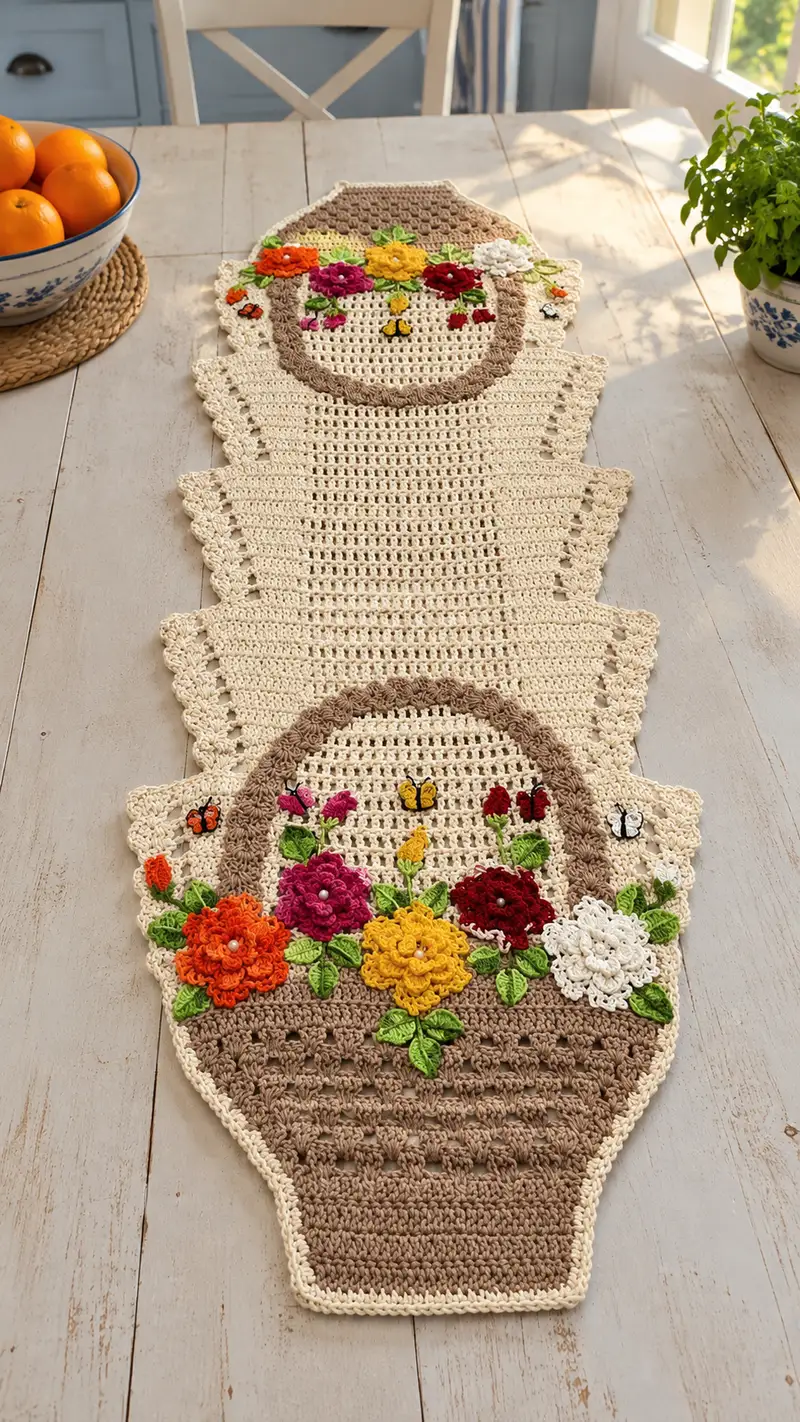
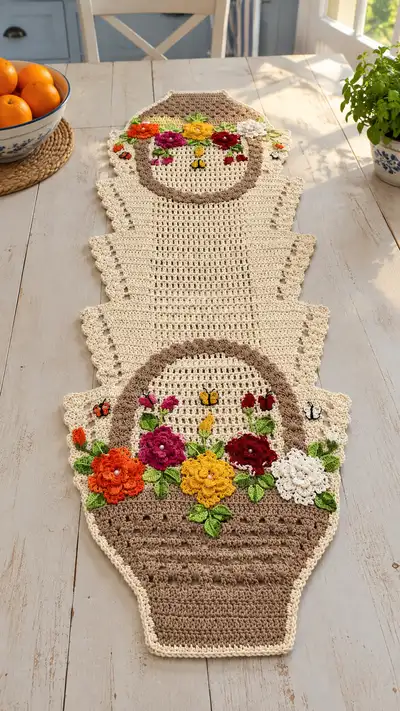
This charming crochet table runner features three basket motifs connected by a textured mesh panel, scalloped edges and colorful 3D floral appliques. Worked in creamy neutral tones with warm tan baskets and bright embroidered flowers, it adds handmade cottage charm to any table. The pattern includes full instructions for baskets, petals, leaves, butterflies, scalloped edging and joining techniques for a polished finish.
Progress Tracker
0% Complete
— Abbreviations & Notes :
Info :
This pattern uses US terms. Work tightly enough that the stuffing or backing will not show through small mesh areas. Gauge is not critical for look but will affect final length—aim for approx. 3 dc x 2 rows = 1 inch in the mesh panel using a 4.0mm hook and worsted cotton. Use stitch markers to mark the start of rounds/rows and where motifs will join.
— Basket Motif (Make 3 identical motifs) :
Round 1 :
Work in Light Tan. 6 sc in magic ring (6)
Round 2 :
Inc in each st around (12)
Round 3 :
(1 sc, inc) x 6 (18)
Round 4 :
(2 sc, inc) x 6 (24)
Round 5 :
(3 sc, inc) x 6 (30)
Round 6 :
(4 sc, inc) x 6 (36)
Info :
By round 6 you have a flat circle. We will begin shaping an oval to give the basket a slightly elongated base. Place stitch markers at 12-st intervals to help count increases later.
Round 7 :
(5 sc, inc) x 6 (42)
Round 8 :
(6 sc, inc) x 6 (48)
Round 9 :
1 sc in each st (48)
Round 10 :
1 sc in each st (48)
Info :
To elongate the circle into an oval shape for the basket bottom, we will work 2 extra increase rounds focused on the two long sides: mark opposite segments of 12 sts to treat as 'ends'.
Round 11 :
*In next 6 sts: (1 sc, inc) three times across marked segment, 1 sc in next 12 sts, repeat for opposite segment, then sc remaining sts*—total should become (54)
Round 12 :
1 sc in each st (54)
Round 13 :
Change to a textured 'basket stitch' set-up: switch to pattern using alternating dc and fpdc rows to create a woven look. ch2 (counts as first hdc), then work 1 hdc in same st, *skip next st, 3 dc cluster around next st (work 3 dc in same st), skip next st, 2 hdc over next 2 sts*, rep around to make a dense textured band. (54)
Round 14 :
Repeat Round 13 pattern maintaining basket texture (54)
Info :
Work two or three rounds of the basket texture to create the woven area of the basket base. Count carefully: texture clusters still use only one stitch base so the stitch count remains constant.
Round 15 :
Switch to dc rounds to begin shaping the basket sides: ch2 (counts as first dc), 1 dc in each st around (54)
Round 16 :
1 dc in each st (54)
Round 17 :
(6 dc, dec) x 6 (48)
Info :
Begin lifting up the sides with steady dc rounds. The decrease in Round 17 brings the stitch count back narrower to create a slight curvature for the basket lip.
Round 18 :
1 dc in each st (48)
Round 19 :
1 dc in each st (48)
Round 20 :
Change to Bloom Rim color if desired (Light Tan continues). Start Round 20 with BLO dc to create a defined rim ridge: 1 dc in each st BLO (48)
Info :
Working in the BLO for one round creates a visible inner ridge. If you want a thicker rim, work two rounds in BLO and then one round in FLO for contrast.
Round 21 :
1 dc in each st (48)
Round 22 :
(5 dc, dec) x 6 (42)
Round 23 :
(4 dc, dec) x 6 (36)
Info :
At this stage the basket rim is formed. Fasten off the basket motif if you plan to join later, leaving a long tail for seaming. Repeat motif 3 times for the runner (bottom, middle, top positions).
— Basket Decorative Rim & Inner Ring :
Round 1 :
Attach Cream/Ivory yarn at inner rim. ch1, sc evenly around the inside circumference to create a contrasting inner ring (36)
Round 2 :
Work (2 sc, ch1, skip next st) around to create a tiny picot-like loop inner edge (36)
Info :
This inner ring frames the floral area and gives an attachment point for flowers and leaves. Make sure stitches are neat and evenly spaced.
Round 3 :
1 sc in each st (36)
Round 4 :
Fasten off leaving long tail for sewing appliques around the rim
— Center Mesh Panel (Make 2 panels to connect the 3 baskets) :
Round 1 :
Using Cream, ch58 (foundation chain). Turn — this will form the width of the runner between baskets (adjust chain to desired width, multiples of 2 plus 2)
Round 2 :
DC into 4th ch from hook (counts as first dc), 1 dc in each ch across, turn (56 dc)
Round 3 :
Ch3 (counts as dc), skip first st, *ch1, skip next st, dc in next st* across to create a filet/mesh effect. End with dc in last st (approx. 56 mesh openings)
Round 4-8 :
Repeat Round 3 for a total of 6 rows of mesh (creates airy look). Maintain count ~56 dc posts across each mesh row.
Info :
Work mesh rows longer (10-18 rows) depending on the desired runner length. For this runner, make 14 rows of mesh between each basket motif to give an elongated look. Add stitch markers at the ends to ensure straight edges.
Round 9-22 :
Continue mesh repeat (ch3, *ch1, skip, dc*), working 14 total mesh rows (56 dc posts across) to create a rectangular section about 9-11 inches long depending on gauge
Round 23 :
To prepare for scalloped edge, ch1, sc evenly across to compress mesh edge into a solid border (56)
Info :
Make two identical mesh panels to join three basket motifs. If you want a longer runner, increase the number of mesh rows proportionally while keeping the width constant.
— Scalloped Side Edging (Work along both long edges of combined runner) :
Round 1 :
Attach Cream yarn at corner, ch1, sc evenly along the long edge of runner or panel to create a sturdy base for scallops (approx. 56 sc)
Round 2 :
*Skip 2 sc, 5 dc in next sc, skip 2 sc, sc in next sc* repeat along edge to create scallops, ending with sc in last st. (Approx. 9-10 scallops depending on length)
Round 3 :
Work 1 sc in base of each scallop and 1 sl st in middle dc to flatten and stabilize (same count as scallops)
Round 4 :
Fasten off and repeat along the opposite long edge and the short ends of runner. For corners, work 3 sc into corner stitch to turn smoothly
Info :
Blocking after scallops will open and shape scallop curves. Pin each scallop uniformly when wet-blocking to get symmetrical edges.
— Large Flower A (Make 1 - Orange) :
Round 1 :
Using Bright Orange with 3.5mm hook: ch5, join with sl st to form ring, ch1 (5 ch-sp ring)
Round 2 :
*(sc, ch3, sc) in each ch-sp around* — creates 5 petals base (5 petals)
Round 3 :
In each ch3 sp: work (sl st, hdc, dc, tr, dc, hdc, sl st) to form full petals — finish round (5 petals)
Round 4 :
Join a second layer: ch1, in between each large petal work (sc, ch4, sc) to mark 5 spaces (5)
Round 5 :
Work 7-tr loop in each ch4 space for a ruffled second layer: (sl st, 2 dc, tr, 2 dc, sl st) in each space (5 ruffles)
Round 6 :
Fasten off and sew a small pearl bead or French knot center using embroidery thread. Leave long tail for sewing to basket rim
Info :
For extra depth, work a third small inner petal layer using a contrasting color (e.g., deeper orange) of 3-4 tiny picot petals. Use short stitches and 3.5mm hook.
— Large Flower B (Make 1 - Deep Pink) :
Round 1 :
Using Deep Pink: ch6, sl st to form ring, ch1 (6 ch-sp)
Round 2 :
*(sc, ch3, sc) in each ch-sp* to create 6 base petals (6)
Round 3 :
In each ch3 sp: (sl st, hdc, dc, tr, dc, hdc, sl st) for fuller petals (6)
Round 4 :
In each gap between petals: ch2, 3 dc in same sp, ch2, sl st to form frilly scallops (6)
Round 5 :
Fasten off and add a small bead or contrasting french knot center
Info :
Vary petal sizes by using different ch lengths or adding extra rows of shell stitches to create multi-layered flowers as in the picture.
— Medium Flower C (Make 1 - Yellow) :
Round 1 :
Using Sunshine Yellow: ch5, sl st to ring, ch1 (5)
Round 2 :
*(sc, ch2, sc)* repeat around (5)
Round 3 :
In each ch2: (sl st, dc, tr, dc, sl st) to form pointed petals (5)
Round 4 :
ch1, 1 sc around base to gather petals and create cup shape, fasten off (5)
Info :
Stitch this yellow blossom slightly forward on basket rim to mimic the photo's central arrangement; use a few hidden stitches under petals to anchor firmly.
— Small Accent Flower D (Make 1 - Deep Red) :
Round 1 :
Using Deep Red: ch4, sl st to ring, ch1 (4)
Round 2 :
*(sc, ch3, sc)* x4 (4)
Round 3 :
Work clusters into each ch3: (sl st, hdc, dc, hdc, sl st) (4)
Round 4 :
Fasten off, press petals slightly and sew to rim with long tail
Info :
For the white flower on the opposite side, repeat Flower D using white yarn and add a small bead center for contrast.
— Leaves (Make 8-12 assorted) :
Round 1 :
Using Green with 3.5mm hook: ch8 (or desired leaf length), sc in 2nd ch from hook, hdc in next, dc in next 2, hdc next, sc next, sl st last—turn to work other side of chain mirroring stitches to the base—fasten off (leaf formed)
Round 2 :
For a raised central vein: with contrasting lighter green, embroider a running stitch down the center of the leaf or use stem stitch for texture
Info :
Pierce the leaf base with a yarn needle and tack to basket rim and underside of flowers. Vary leaf sizes (6-10 ch for small, 10-14 for large) to create a natural cluster look.
— Embroidered Butterflies and Tiny Buds :
Round 1 :
Use small scraps of orange, pink, white and black. For each tiny butterfly: ch4, sl st to form small loop, then embroider two wing shapes by couching strands across the loop with surface stitches; add a tiny black body with a backstitched line and French knot head
Round 2 :
For buds: ch3, work 3 sc into ring, fasten off; sew into place with a single long stitch to anchor
Info :
Position butterflies near flower clusters as in the image: one near the basket rim edges and a couple floating on the mesh. Use pins to check placement before permanently sewing.
— Joining Motifs & Panels :
Round 1 :
Lay basket motifs and mesh panels flat in final order: basket, mesh panel, basket, mesh panel, basket. Align inner ring edges so the cream sc border meets the mesh sc border.
Round 2 :
Sew together using mattress stitch with matching cream yarn: insert needle under both edges at even intervals (approx. every 4-6 sts) to create a clean seam. Stitch along entire interface and knot securely (fasten tails inside seams)
Round 3 :
After joining, work a single round of sc around the entire outer perimeter of the runner in Cream to unify the piece—sc evenly around corners, working 3 sc into corners for smooth curves (perimeter sc count variable)
Info :
Pin motifs and panels before sewing. If you want more stability, work a narrow slip-stitch join instead of mattress stitch. Ensure right sides are facing up for a neat seam.
— Final Outer Border & Reinforcement :
Round 1 :
With Cream: ch1, sc evenly in each perimeter st to tidy edge. Work 2 sc in any long flat corner to avoid puckering
Round 2 :
Work one decorative round: *skip 1 st, (sc, ch3, sc) in next st* repeat to create tiny scalloped edging along entire runner. The chains form delicate loops echoing the scalloped sides
Round 3 :
Fasten off and weave in all ends. Use a yarn needle to bury ends inside seams and behind appliques.
Info :
If you prefer a firmer runner, block and lightly starch the piece. Press with steam on a cotton setting while pinned to shape scallops and flatten mesh rows.
— Assembly & Applique Placement (Detailed) :
Round 1 :
Position largest flowers across the front edge of each basket rim with two medium and two small flowers per basket cluster as in the image. Pin into place—leave central aperture of basket mostly clear so flowers sit forward.
Round 2 :
Sew flowers on using long tail from each flower. Use whip stitch around the base of the flower and a few stitches through the basket interior to anchor. Add leaves under and between flowers using whip stitch at the base and one or two stitches in the center to lock in curvature.
Round 3 :
Embroider stems with surface chain stitch or stem stitch from the base of the center ring toward leaves and tiny buds. Use 2 strands of green embroidery cotton for visibility.
Info :
Sew flowers on last so they sit on top of the rim and slightly overhand the mesh panel. For a professional look glue a small dab of craft glue under each bead center before sewing to lock it in place.
— Optional Variation: Extra Texture Rows for Basket (Add-on) :
Round 1 :
To add extra textured bands to the basket base, work alternating rows of front-post dc (FPdc) and back-post dc (BPdc) across the existing dc rounds: *FPdc around next 2 sts, BPdc around next 2 sts* repeat (count remains same)
Round 2 :
Repeat Round 1 for 4 rounds to create a pronounced ribbing effect. These rows do not change stitch count but add raised bands like woven wicker.
Info :
Adding these post stitches increases yarn use slightly and creates a heavier, more textured basket — a great option for rustic looks.
— Finishing Touches & Blocking :
Round 1 :
Weave in all ends with a yarn needle. Trim yarn tails close after weaving through several stitches to secure.
Round 2 :
Block the runner flat to even scallops and set the mesh. Pin each scallop to a blocking mat at equal intervals, mist with water and allow to dry. For stiffer finish, use a light starch spray before drying.
Info :
Check placement of butterflies and touch up any loose embroidery. Use beads for flower centers if desired — stitch each bead twice through the base of the flower and knot thread on the underside to secure.
This floral basket table runner combines textured basket stitching with joyful 3D flowers for a delightful tabletop accent. Each step brings the piece to life: from basket shaping to delicate petals and embroidered butterflies. The finished runner makes a wonderful gift or keepsake and brings cottage charm to any room. Enjoy the meditative work of creating blooms with yarn — share your finished runner and celebrate your handmade accomplishment! 🧶🌸